At WPBeginner, growing our email list has always been a top priority. Over the years, we’ve tried numerous techniques to boost our email subscribers, but not all delivered the results we hoped for. Some methods worked, while others didn’t quite meet expectations.
After testing multiple WordPress lead-generation plugins, our founder, Syed Balkhi, teamed up with Thomas Griffin to create a more effective solution. They focused on what truly delivered results: a combination of lightbox popups and exit-intent technology.
With OptinMonster, we simplified the process and saw impressive growth. It solved many of our challenges, like engaging visitors without being too intrusive.
In this article, we’ll share the strategies that worked best and show you how we used OptinMonster to grow our email subscribers by 600%.

Some of you would think that 600% growth probably meant we weren’t getting many subscribers. That’s not true.
On a daily basis, we would get around 70 – 80 new subscribers from the sidebar form, contact forms, and other landing pages on the site. By making one single change on the site, we increased our daily email signup rate to around 445 – 470 new subscribers per day.
That’s a 600% growth with the same amount of traffic that we were getting before.
So what changed? Well, we started using OptinMonster.
What Is OptinMonster?
OptinMonster is the best lead-generation plugin for WordPress.
Over 1.2 million websites use the software to grow their email lists, increase sales, and get more leads.
And it’s not just limited to the small businesses either. Big companies like Patreon, McAfee, Pinterest, American Express, and many more use OptinMonster on their websites. If you want more information, feel free to read our OptinMonster review.
OptinMonster allows you to easily create and integrate highly effective optin forms on your website. It integrates with all major email service providers and comes with powerful features such as a drag-and-drop campaign builder, page-level targeting, A/B split testing, exit-intent technology, and more.
Using OptinMonster, we created a smart lightbox popup with an exit intent.
Wait, don’t all popups suck? Yes, most popups suck because they’re not done right.
What Is a Smart Lightbox Popup?
An average popup is usually opened in a separate window, normally when you visit a website or click on the screen. Those are freaking annoying as heck.
Then, there are the other lightbox popups that you probably see a lot of bloggers using. These boxes open within the same window, usually right when you visit the website. They are not as bad, but they can definitely annoy some users.
Then, there is a smart lightbox popup. An exit-intent smart lightbox popup is a targeted message that opens on a specific page right when the user is about to leave.
How Is That Not Annoying?
We ran a split test on WPBeginner to see how the lightbox popup affects our bounce rate and whether we get any user complaints.
The first thing we found was that the bounce rate on a page with an exit-intent lightbox was the exact same as the page without a lightbox. Second, we had absolutely zero user complaints. Last but not least, the number of new email subscribers we got with an exit-intent lightbox was significantly higher.
Exit-Intent Magic
The key reason behind these phenomenal results is exit-intent.
Why? Because the users who are going to leave your website will leave anyway. Using the exit-intent technology, we converted abandoning visitors into subscribers.
OptinMonster’s exit-intent technology tracks user’s mouse gestures and velocity as they browse through your website. This allows the plugin to detect the precise moment the user is about to leave and prompts them with a targeted campaign.

Unlike other annoying exit popups, it does not prevent the user from leaving. They can close the window like they normally would.
However, this gives you new real estate, technically an extra pageview, to retain that visitor and potentially get them to subscribe to your email list.
Most visitors leave your WordPress website without subscribing, even when they like the content. That’s because they have a short attention span, and there is no clear call-to-action on most pages.
Now, if you make it easy for them to subscribe and give them a gentle reminder, they’re much more likely to do so. If you offer them a free bonus, that’s even better.
How to Use OptinMonster to Get Maximum Benefits
You’re probably thinking that it will be a complex setup. Well, it really isn’t. It took us less than 10 minutes to get this all set up.
The exit-intent technology is available in the OptinMonster Pro plan and other features like countdown timers, mobile campaigns, and integrations.
Don’t worry. As WPBeginner readers, you can use our OptinMonster coupon to get 10% off.
Now, the first thing you need to do is install and activate the OptinMonster plugin on your website, as it acts as a connector between your site and OptinMonster. For more details, please see our guide on how to install a WordPress plugin.
Upon activation, the OptinMonster setup wizard will automatically launch. Go ahead and click the ‘New? Claim Your Free Account’ button.
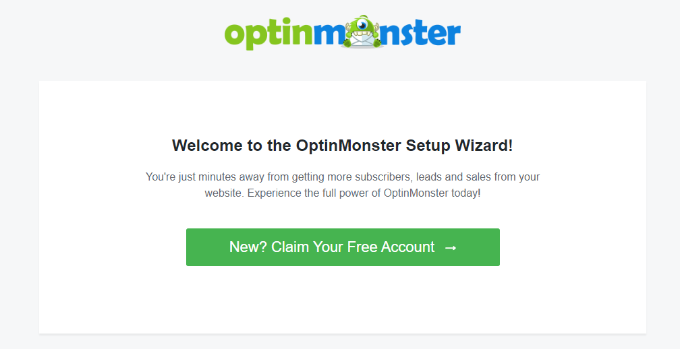
After that, simply follow the onscreen instructions to set up OptinMonster on your website and create a free account.
Next, you can head over to OptinMonster » Campaigns from the WordPress dashboard and click the ‘Create Your First Campaign’ button.

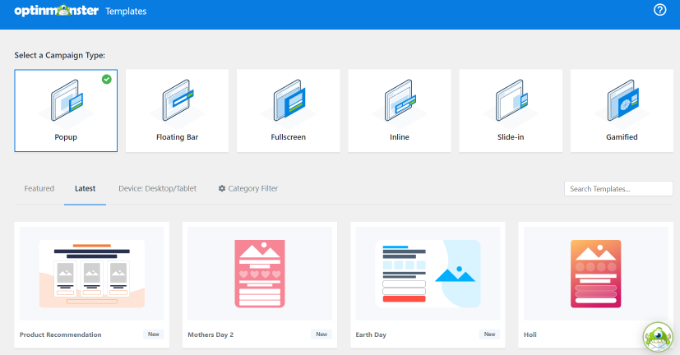
Then, you’ll see different campaign types to choose from. To add an exit-intent popup, go ahead and select the ‘Popup’ campaign type.
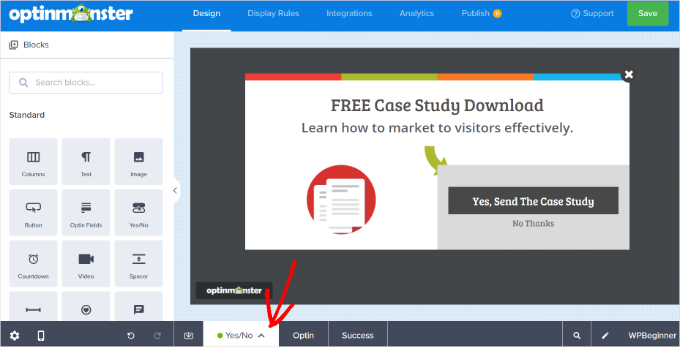
You also get multiple templates for each campaign type. Simply select one for your website and customize it. We used the ‘Case Study Download’ template for the popup on WPBeginner.
On the next screen, you’ll see the drag-and-drop campaign builder.
You can select any element from the menu on your left and add it to the template.
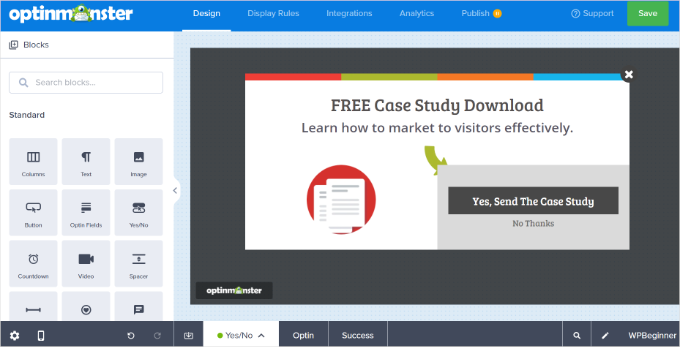
There is also an option to enable the ‘Yes/No’ view, which has proven to increase conversions by 18%.
To enable two steps, simply click the ‘Yes/No’ option next to Optin at the bottom. After that, go ahead and click the ‘Enable Yes/No for This Campaign’ button.
Next, you can head to the ‘Display Rules’ tab and set the campaign conditions.
Let’s select ‘Exit Intent’ from the dropdown menu and choose which devices to display your lightbox popup on. You can add multiple rules and display your popups on selected pages and posts as well.
Plus, OptinMonster lets you choose the sensitivity of the exit intent technology. By default it will be set to ‘Medium’, but you can change it to ‘Low’ or ‘High’.
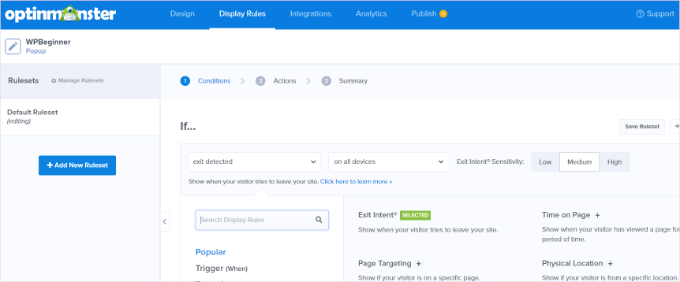
OptinMonster also offers actions for your campaigns. For instance, you can add effects, play sound, and show the campaign view based on optin or success.
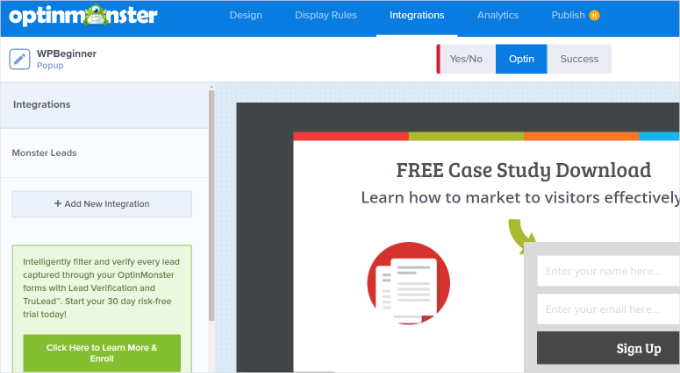
After that, you can head over to the ‘Integrations’ tab. Then click the ‘+ Add New Integration’ button from the menu on your left and select your email marketing service from the dropdown menu.
Once you’re done, go to the ‘Publish’ tab at the top.
Now change the ‘Publish Status’ from Draft to Publish.
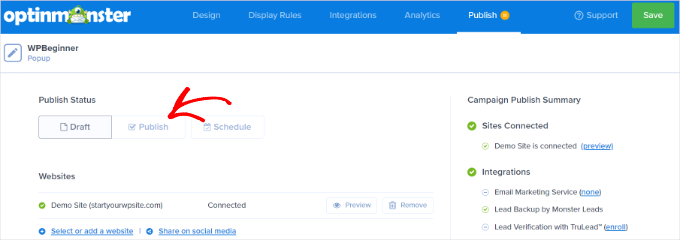
Don’t forget to click the ‘Save’ button to store your settings.
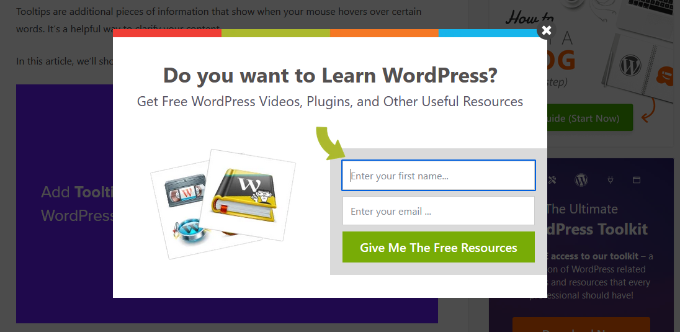
Here’s what the final exit-intent popup looked like on WPBeginner.
Results
This 10-minute setup resulted in close to 3200 new subscribers in one week. Just see the stats below:

Note: Optins were not running site-wide. They were only on single posts.
You may notice that we are now using a different optin on WPBeginner that offers our free resources, and we’ve also had great results there.
We’re now also working on creating targeted campaigns for specific pages, categories, and custom post types to build a hyper-targeted email list.
Final Thoughts
Yes, we hate popups just like everybody else, but this is different. When you create a targeted campaign and give users what they want, then they will happily subscribe. The data above is proof of that.
We didn’t get any extra traffic, nor did we do any special campaigns. We simply used OptinMonster to turn abandoning visitors into subscribers.
OptinMonster also has other optin types (footer bar and slide-ins) for those who don’t want to use the lightbox popup. More optin types are also in the works and will be released in the coming months.
If you want to get more email subscribers and improve your lead generation efforts in WordPress, then we highly recommend that you start using OptinMonster.
We hope this article helped you learn how we increased our email subscribers by 600%. You may also want to see our guides on adding a gamified spin to win optin and using the psychology of popups to boost signups by 250%.
If you liked this article, then please subscribe to our YouTube Channel for WordPress video tutorials. You can also find us on Twitter and Facebook.


Jiří Vaněk
The same thing happened to me. I struggled a lot with collecting email addresses until I used Optin Monster. My problem was that I had the newsletter subscription call-to-action at the end of the article, and many people overlooked it. However, Optin Monster has great triggers, and when I launched my first campaign (with connection to MailChimp), I set the trigger to activate when the user was about to leave the website. When they try to go to another page, a yes/no campaign pops up asking if they want to receive news via email before they leave. This boosted my email list by about 350% in just two months. It’s incredible what this plugin can do. I recommend it to everyone. Marketing with this tool is amazingly fun.
Mai
Hi. I have OptinMonster and I have successfully set up an optin page. However, I could not integrate it with my MailChimp account. I retried and retried but it kept spinning for hours and hours. I’m using OptinMonster 2.1.7, is there an error with this version?
Thanks
WPBeginner Support
Hey Mai,
Please contact OptinMonster support team. They will be able to help you better.
Admin
nigel
Can it be used with Get Response?
Thank you for an interesting post.
WPBeginner Support
Yes, it can be used with GetResponse.
Admin
Gin
okay someone help me out here…i’m starting to get confused with all these opt in/subscription options.
So Mail Chimp is for if you want someone to opt in to your newsletter?
Jet Pack is to add an option so someone can subscribe to your blog that’s on your website?
and…
OptinMonster is for if you want someone to opt in to receiving emails from you?
Are all 3 really necessary to cover all 3 of those opt in options, or is there some easier way to accomplish all 3 things?
Also how does one get the newsletter or any other item to the subscriber once they opt in? Do you have to upload the form to Mail Chimp and then tell Mail Chimp which email addresses to send the information to?
Sooo confused…help me out please!
WPBeginner Support
MailChimp is an email service provider. If you are building an email list, then you will need an email service provider that specializes in sending mass email.
JetPack lets you add a signup form and it can also send your posts to readers. But it is not an email newsletter service, which makes it very limited.
OptinMonster connects your WordPress site to MailChimp or any other email service provider. It helps you create beautiful signup forms that appear in sidebar, popups, slideins, footer bar, etc. This helps you get more subscribers and signups for your mailing list.
hope this helps.
Admin
Sarah
The idea of saving subscribers data on/with a third party is not something we like to do.
Much prefer to be able to save the data on our own server thus in ‘control.
Tom Brady
How much?
Steve Ceaton
I wonder if this still works, or whether it’s been so saturated it actually puts people off now? I know it puts me off.
WPBeginner Support
We still use it and works really well for us. OptinMonster comes with options that allow you to make it less off putting. For example, you can load it on exit-intent, increase cookie duration so that it is not bothering users on subsequent visits, you can launch it on second-page view, and many more.
Admin
Gudtalent
This is really a helpful article
But I will love to know how to stop the pop up box is you are already a subscriber to avoid annoying your reader?
Alex Khan
Can you much such plugin for Google Blogger ? Or can you suggest a good alternative?
Jess Gaithers
Hmm, this makes sense in the short run. But in the long run won’t visitors get really annoyed by repeatedly getting the exit message even though they already signed up? Is there any way to set cookies or something so if someone subscribes this lightbox window won’t ever show up again? Thanks.
Editorial Staff
Yes you can set a cookie length of 365 days or as long or short as you want.
Admin
Jason
You can just have what ever php action that is being used to record the emails set a cookie that never expires. Or use javascript to set a cookie that won’t expire on whatever thank you page the form redirects too after submit.
Navuth
OptinMonster is really interesting me. But how it look like? It pop up like this page, right?
WPBeginner Support
Yes, you may also visit optinmonster.com for more information.
Admin
Bryan Cork
Definitely worth a try.
rich
Can it create optin like this website ? Pop up asks question then leads people to different paths? One of them is the optin.
Nabtron
why did you stop using it now?
WPBeginner Staff
Not right now, but may be in the future.
Fred
Would you ever consider offering this on the Shopify platform as a Shopify app? I would love to have this on my store’s site.
WPBeginner Staff
Here is how to get support for OptinMonster.
Institutomujeres
I was finally decided to buy the plugin and after I installed it and made my first lightbox, when Im integration it does not allow me to connect to mailchimp. After i insert the API number it gets stuck and keeps trying load. You have any idea what could be causing this?
Syed Balkhi
Yes, OptinMonster does have click to open functionality. We’re calling it MonsterLink, and it will be highlighted a bit better in the new redesign.
Here’s the tutorial on how to do it:
http://optinmonster.com/docs/how-to-manually-load-optinmonster-popup-with-click-of-a-button/