After writing thousands of blog posts and helping countless beginners start their blogs, we’ve noticed one common challenge: most people overcomplicate the writing process. They focus so much on perfecting every word that they miss what really matters – the structure.
Through years of testing and refinement at WPBeginner, we’ve developed a straightforward approach to blog post structure that works across any topic or industry. It’s the same framework that helped us grow from zero to millions of monthly readers.
Today, we’ll walk you through this proven blog post structure, complete with templates and real-world examples. Whether you’re just starting out or looking to improve your blogging skills, you’ll find practical templates and real examples you can use right away.
Why Is Structure So Important in Blog Posts?
According to our blogging statistics research, there are over 600 million blogs. With so much competition, you’ll need to do everything in your power to make your blogs stand out.
You might be a world-class writer, but without a clear structure, your blog posts may still be difficult to read.
A well-structured blog leads the reader from one point to the next in a logical way that’s easy to follow and understand. Many people simply skim blogs, so the right structure also helps people find the parts they’re interested in reading.
A clear structure doesn’t just help visitors understand your content. Search engine bots will also find it easier to crawl your blogs and then show them to the right people. This will improve your search engine rankings and get more visitors to your WordPress blog.
With that in mind, let’s look at how you can write a well-structured blog post, even if you’re a complete beginner. Simply use the quick links below to jump straight to the topic you want to read about:
- Start With the Right Blog Post Topic
- Create a Descriptive and Compelling Headline
- Write a Clear and Concise Introduction
- Break Up Content with Headings
- Add a Table of Contents
- Keep Paragraphs and Sentences Short
- Add Images, Video, and Other Media
- Wrap Up Blog Posts With a Conclusion
- End With a Compelling Call To Action (CTA)
- Preview Your Blog Post and Do Some Final Touchups
1. Start With the Right Blog Post Topic
Before you do anything else, the first thing you need to do is pick the right topic to talk about in your blog post.
If you run a personal blog and you just want to share stories or anecdotes on your website, then the blog post topic ideas can be anything you want.
But if your goal is to build an audience and ultimately make money from your blog, then the first step is to do some keyword research.
Keyword research means finding what kind of search terms people use on search engines to find topics related to your blog’s niche. For example, WPBeginner is all about WordPress, so we’re constantly on the lookout for WordPress-related queries.
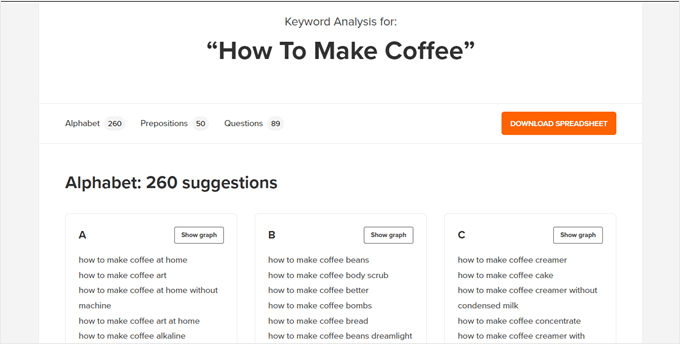
If you’re not sure where to find these keywords, you can use a tool like WPBeginner’s free keyword generator and enter one keyword related to your niche.
So, if you run a blog about coffee, you can use terms like ‘how to make coffee.’ The keyword research tool will then generate some keyword suggestions based on your entry:
For more information, you can read our guide on how to do keyword research for your blog and how to see keywords people use to find your website.
Another thing you can do is an SEO content gap analysis, which can be handy if your niche has some pretty established blogs, and it can be difficult to compete against them.
Content gap analysis means finding what topics are missing from your website. You can compare the content you have versus what your competitors have, as well as what the target audience is looking for.
From there, you can generate some blog post ideas to fill those gaps.
You can read our step-by-step guide on doing SEO content gap analysis for more information.
2. Create a Descriptive and Compelling Headline
Once you have a blog post topic, then you can think about the blog post’s headline.
Your post’s headline is usually the first thing people see. No matter how good your blog’s content is, you’ll struggle to get readers with a boring title.
A compelling headline will catch a person’s attention no matter whether they spot it on social media, an RSS feed, in their search engine results, or some other location.
That said, the headline should describe what the post is about, while also making people want to read it.
With countless blogs on the internet, it’s hard to cut through the noise. While there’s no magic formula for creating the perfect headline, BuzzSumo analyzed over 100 million articles and concluded that the ideal headline length is between 11 words and 65 characters.
If you include numbers in your headlines, then research suggests people prefer to share headlines that have single-digit numbers.
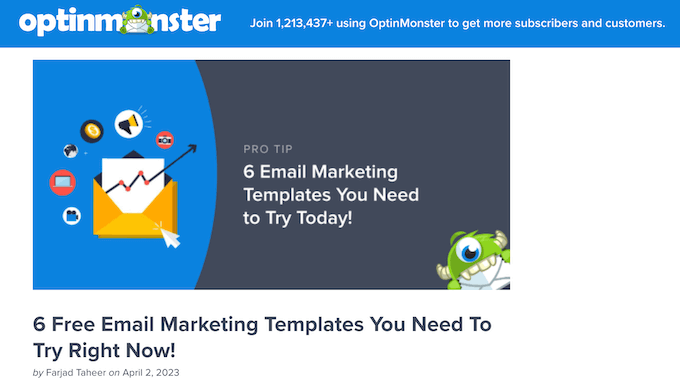
BuzzSumo also found that more people engage with headlines that include the current year. Even simply adding a year to the end of a title may be enough to increase your blog traffic.
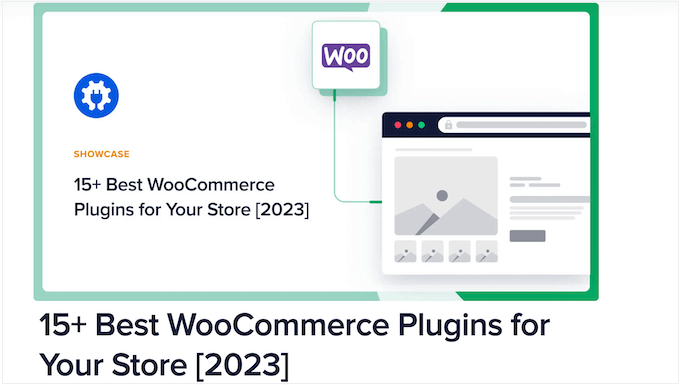
People are also more likely to share headlines that suggest newness, so you may want to try including phrases like ‘for the first time.’
Another trick is teasing must-have information by saying things like ‘need to know,’ ‘you need to,’ or ‘the best.’

If you’re writing a ‘how to’ post, then think about the problem your blog solves. What might someone type into a search engine when they’re facing this problem? This is often a great starting point for a compelling ‘how to’ headline.
After drafting a title, you can enter it into a headline analyzer such as AIOSEO. This plugin will use real data to score your headline and suggest ways to improve it. In this way, even beginners can write a compelling blog headline.
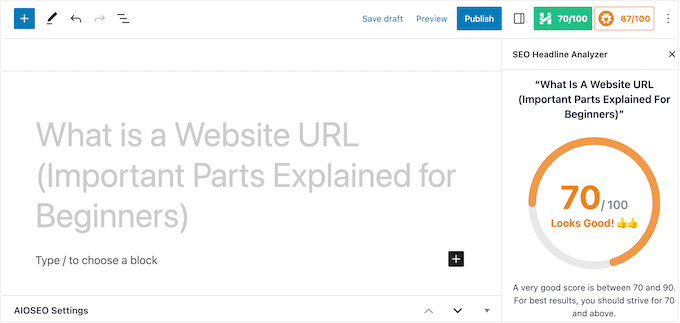
If you don’t want to install a plugin, then you can use WPBeginner’s free Headline Analyzer.
For more information, please see our guides on how to use a headline analyzer in WordPress to improve SEO titles and SEO title vs H1 post title.
3. Write a Clear and Concise Introduction
Every great blog post needs a clear introduction that tells visitors what the post is about. This helps people decide whether they’re interested in the topic.
Just like the headline, it’s not enough to simply state what the blog is about. You also need to make the visitor want to carry on reading.
People don’t want to waste time on blogs they’re not interested in. Having said that, your introduction should be short and to the point. Ideally, you should aim for 1-3 paragraphs.
When it comes to creating a tight, focused introduction, a good trick is to try and include your blog’s keyword as early as possible. By sticking to this goal, you’ll be less likely to go off-topic.
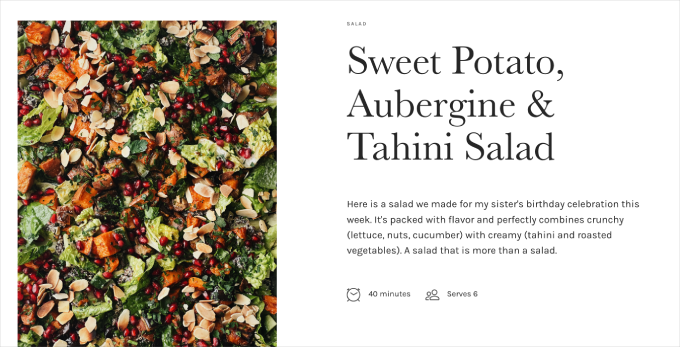
It’s also wise to add elements of Google’s E-E-A-T (Experience, Expertise, Authoritativeness, Trustworthiness) to your intro. Doing this helps establish credibility and keeps your readers engaged.
For example, if you run a food blog, you can show E-E-A-T in the intro by sharing your experience as a chef or creating recipes that you’ve tried yourself.
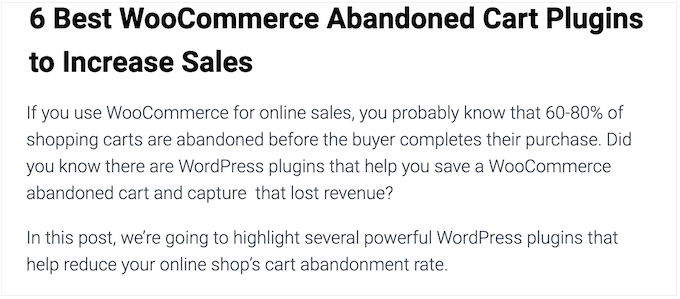
Depending on the kind of blog you’re writing, you may get good results by sharing interesting or surprising statistics in the introduction.
This example from MonsterInsights is guaranteed to catch the attention of any online store owner who wants to get more sales.
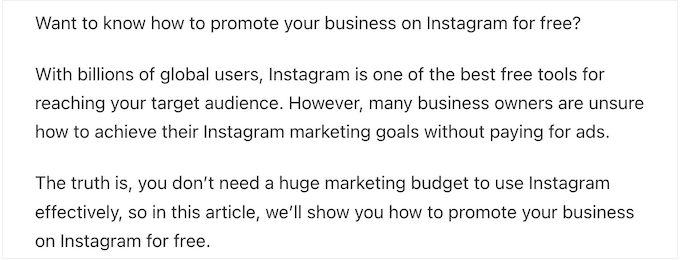
Another option is to talk about a problem and promise a solution.
This RafflePress post discusses a problem the user may have: promoting your business on Instagram can be expensive, and not everyone has a big budget.
It then promises a solution: get noticed on Instagram for free.
Many introductions also use FOMO or fear of missing out. By adding time pressure, you can make people want to read the post now, rather than risk missing out on a giveaway, event, trip, or anything else the post is talking about.
This travel blog takes a pretty standard ‘Top Places to Visit’ listicle and turns it into a race against time.

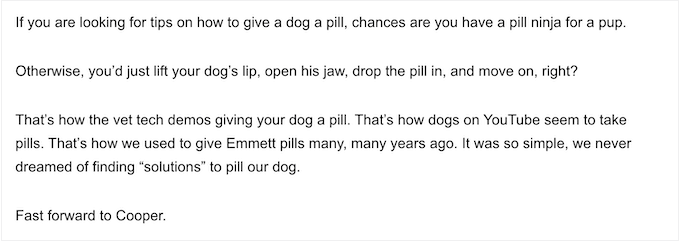
We’ve also seen blogs draw the reader in by sharing a humorous personal story. If this anecdote resonates with the target audience, then it can be a powerful hook.
For example, this introduction makes it very clear that the author knows exactly what the reader is going through.
No matter what approach you take, if you’re going to hook your audience, then you need to know all about them. The best way to learn about your audience is by using Google Analytics.
For step-by-step instructions, please see our guide on how to install Google Analytics. If you’re already a GA user, you may also want to see our ultimate guide to Google Analytics 4.
4. Break Up Content with Headings
No matter how good your writing is, all your hard work will go to waste if readers can’t concentrate on more than a few paragraphs.
That’s why we recommend using headings to break your post into bite-sized chunks.
Headings help readers skim the post and find the content they’re interested in reading. It also makes it easier for them to revisit sections they want to read again.
Before you start writing, it’s a good idea to map out all the headings you’ll use and the content you’ll add to each section. This will keep you focused as you write the post.
Ideally, your headings should summarize each major point you want to make. In fact, readers should be able to understand the flow of your blog simply by scanning the headings.
Let’s look at an example. Here, we have some tips on how to store coffee beans correctly. Although each paragraph provides useful extra information, you can get all the tips just by reading the headings.
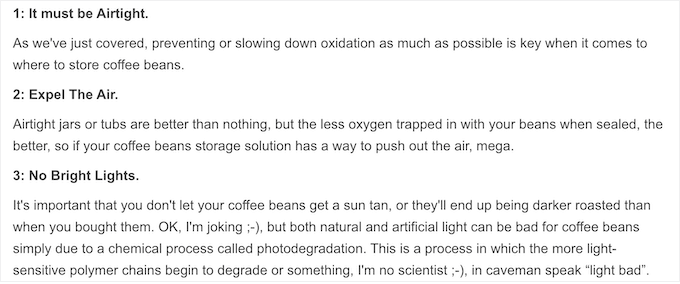
After creating your headings, organize them so your content flows logically. For example, if you’re writing a fitness blog, then you shouldn’t tell readers how many times to repeat an exercise before showing them how to do it.
When it’s time to add these headings to your WordPress website, there are six built-in heading tags that you can use.
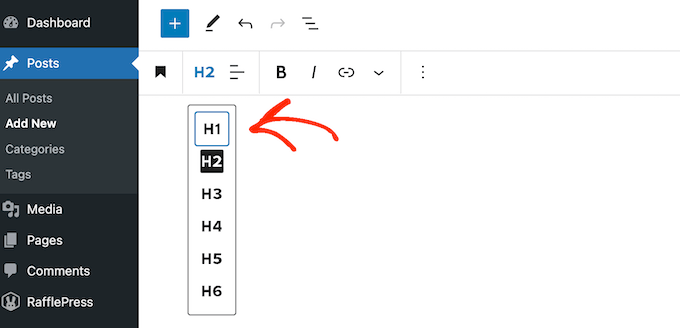
Similar to bullet points and numbered lists, you can use these headings to create a nested structure of headings and subheadings.
However, we recommend keeping the heading hierarchy as simple as possible, to avoid confusing your readers. This means using H2 headings for main sections, and then H3 for subsections, and so on.
Pro Tip: Need help with your blog post outline? Check out our expert guide on how to write a blog post outline for more information.
5. Add a Table of Contents
A table of contents lists the post’s main points and provides links to specific sections. This gives visitors an overview of what the blog covers while allowing them to jump straight to the content they’re interested in.
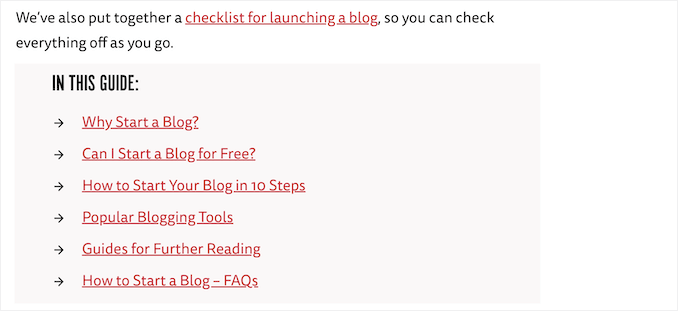
This can keep visitors on your website for longer, even if they’re only interested in part of a blog post.
A table of contents can even improve your WordPress SEO, as Google often uses the table to automatically add ‘jump to section’ links in search results.

The easiest way to add a table of contents to your WordPress blog is by using AIOSEO.
AIOSEO is the best WordPress SEO plugin and comes with a built-in table of contents block.
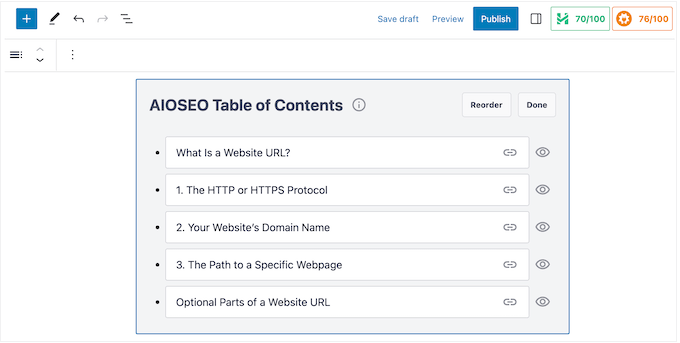
This block saves you a ton of time by automatically generating a table of contents based on the post’s headings, while also allowing you to customize the table.
Aside from this table of contents block, we also love AIOSEO because it enhances our on-page SEO for WPBeginner blog posts. You can read our full AIOSEO review to learn more about the plugin.
For complete step-by-step instructions, please see our guide on how to create a table of contents in WordPress posts and pages.
6. Keep Paragraphs and Sentences Short
Imagine opening a blog post just to find a wall of text. Chances are, you’d leave the page immediately.
That said, it’s important to break your blog into short paragraphs and sentences. These are easier to skim and look much less daunting, especially on mobile devices.
A good trick is to avoid long and complicated words, intricate metaphors, and flowery language. All of that to say: keep it simple. You’ll lose people if you try to be too clever.
Ideally, you should aim to make a single point per sentence, using as few words as possible.
Often, you can break grammatical rules if it gets your point across in fewer words. This may mean starting sentences with things like ‘Or,’ ‘And,’ or ‘But,’ or using more casual language and fragments rather than full sentences.

You should also organize your sentences and paragraphs to give the reader the most important information first, and then go into finer detail from there. This makes it easier for the reader to skip sections they’re not interested in.
In this TrustPulse blog, the writer starts by explaining what eCommerce email marketing is. Then, they give Mailchimp and ActiveCampaign as examples of popular email providers.
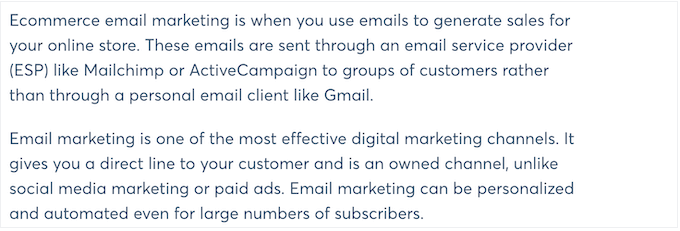
The next paragraph talks about why email marketing is important, before exploring specific features. As you can see, the section starts with the most important point and then gets more and more detailed.
7. Add Images, Video, and Other Media
Visitors don’t want your blog to feel like a long book. Adding visuals like photos, infographics, and graphs can help.
These images break up your text and show what each part is about at a glance. They also grab readers’ attention as they scroll through your post.
We also found that blogs with visual content are more popular. According to our blogging statistics research, posts with more than seven images get 116% more organic traffic compared to posts that have no images.
Similarly, blogs with videos get 83% more traffic than those without video.
If you’re writing ‘how to’ blogs, then images help visitors understand what they need to do. For example, this PushEngage blog uses screenshots to show readers what to click next to create a landing page in WordPress.
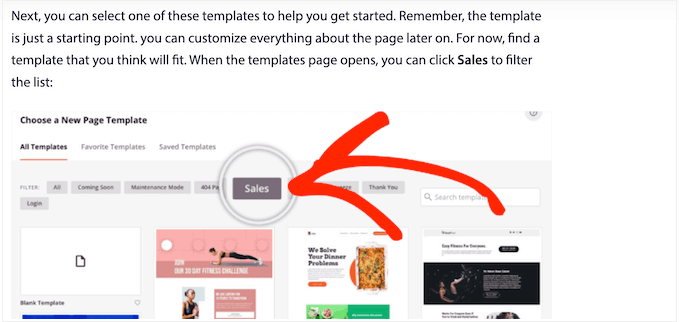
If you’re promoting an affiliate product, then visuals like images and videos are a great way to show that product in action. This can often get you more affiliate revenue.
Let’s look at an example. This post about soil-less indoor garden kits shows lots of photos of the different kits available to buy on Amazon, complete with Amazon affiliate links.
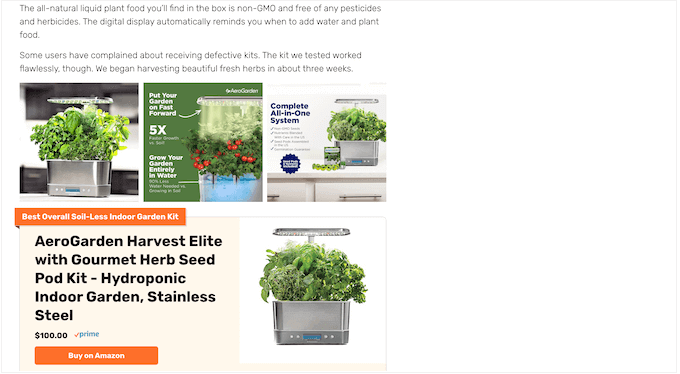
Just be aware that lots of high-resolution media can add to your site’s loading time, so it’s important to optimize your images and other media.
Readers will also need to scroll past any media they’re not interested in, which can be particularly frustrating for smartphone and tablet users.
With that being said, all visuals should add value for the reader.
8. Wrap Up Blog Posts With a Conclusion
A good conclusion summarizes all the points you’ve made throughout the blog, without introducing any new information.
Depending on the topic, you may sometimes want to suggest an actionable solution or share your top pick of all the products, WordPress plugins, travel destinations, and anything else you’ve compared or reviewed throughout the blog.
However, as a general rule, conclusions tend to be pretty short, so don’t worry if your conclusion is one or two sentences.
9. End With a Compelling Call To Action (CTA)
When the reader reaches the end of the post, you need to tell them what to do next. This should be an action that keeps them engaged with your blog or gets them to convert, which is known as a call to action.
In the following Easy Digital Downloads post, you can see several calls to action on the page.

A good call to action is clear, asks for the user to take precise action, and has a sense of urgency. For example, you might ask them to download a PDF or subscribe to your email newsletter.
Even if you use the same call to action, it’s a good idea to customize it for the individual post. In the following image, the interior design blog Decorilla uses its standard call to action, which encourages readers to schedule a free consultation using a booking form.
However, they’ve tweaked the messaging to suit the blog’s topic, which is how to decorate a child’s bedroom.

If you’re not sure what call to action to use, then ask yourself why you’re writing this blog. If you want to get more comments, then you might ask readers to share their opinion or answer a question by posting it in the comment section.
You might even offer a reward for commenting, such as entering the reader into a giveaway or contest. For example, the example below gives readers a list of books and asks them to comment on which one they want to win.

Another option is to suggest some posts the visitor might want to read next.
Here at WPBeginner, we like to end our posts by listing related resources. We’ve found that this helps readers find more useful information.
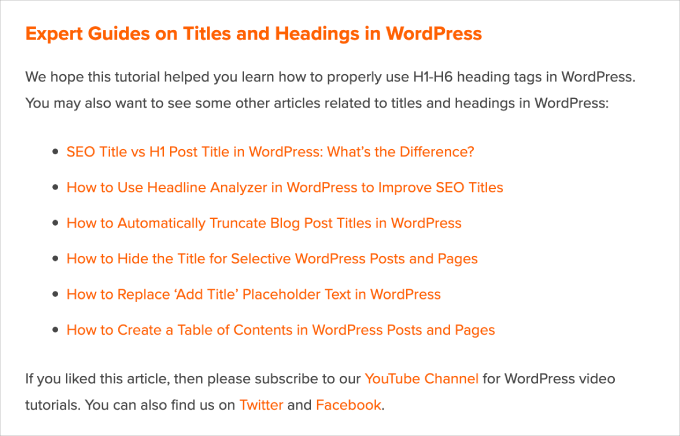
That said, we also make sure to also invite people to subscribe to our social media channels.
10. Preview Your Blog Post and Do Some Final Touchups
Once you have a blog post draft with all the images ready, you need to make sure that everything looks right. This means there are no grammar or spelling errors, the images look clear, your content is easy to understand, and so on.
What you can do is preview the blog post before publishing it. Simply click the ‘Preview’ button on your block editor, like so:
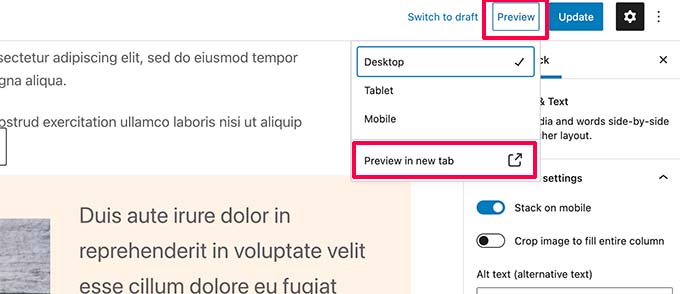
Then, you can use a grammar checker tool to check for language-related errors in your content. We have some recommended tools you can check out in our list of the best online grammar checkers for WordPress.
Besides that, you may want to use a plagiarism checker and an AI detector as well. Google is not a fan of duplicate content, especially ones taken from other sites. Make sure your content sounds as original and unique as possible to maintain your blog authority.
Bonus Tips to Take Your Blogging to the Next Level
Now that you know how to structure a great blog post, here are some more tips to improve your blog:
- Check out our list of best blog examples for fresh ideas and inspiration from successful bloggers.
- Learn how to effectively attract and manage guest bloggers in WordPress to diversify your content and grow your audience.
- Discover how to display estimated post reading time in your WordPress posts, helping readers decide if they have time to dive in.
- Master the art of scheduling your posts in WordPress to maintain a consistent publishing schedule.
- Learn how to add and improve readability scores in WordPress posts to make your content more accessible to a wider audience.
- Find out how to easily find and remove stolen content in WordPress with these effective methods.
We hope this tutorial helped you learn how to write a great blog post. You may also want to explore the best blogging niches to make money online and our expert opinion on whether blogging is dead.
If you liked this article, then please subscribe to our YouTube Channel for WordPress video tutorials. You can also find us on Twitter and Facebook.


Dennis Muthomi
The heading tips are spot-on, and I’ve got the numbers to back it up. We tried this with three client blogs, and guess what? Time on page went up by 37%, and engagement got way better.
I’m a big fan of using H2s for main sections and H3s for subsections. It’s not just easier to read – it makes updating content so much simpler later on.
Mrteesurez
Thanks for this post.
You have put together tips and effective way to write a great blog post. Knowing how to post does not the same as knowing how to write a good posts.
WPBeginner Support
You’re welcome!
Admin
Jiří Vaněk
Thank you for all the advice, not just in this article. I started writing my blog 14 months ago, and I’ve been really enjoying it so far. I’ve spent hundreds of hours on it and applied so many things from your tutorials. I’ve learned a lot here about how to have a better blog. You’re amazing.
WPBeginner Support
Glad to hear our content has been helpful and we hope we keep being helpful to you
Admin
Elizabeth Steyn
Thank you so much for this info. I am a first time blogger and I just don’t know what I’m doing at the moment. My blog is not up and running yet, but I’ve drafted my first 2 blog posts. This info gives me the opportunity to look at my drafts and edit them into something people would want to read. I think I will be fine in future following these guidelines. Thank you!
WPBeginner Support
You’re welcome, we hope you find our other articles helpful as well!
Admin
Lanre
Same just started my blog also