One thing we noticed after creating different WordPress sites for years is that a single search form doesn’t always work best. Different parts of your site may need different types of searches.
By default, a WordPress search form looks through all your content. But we’ve found that visitors often prefer more specific searches. For example, in online stores, shoppers want to search just for products, not blog posts.
In this article, we’ll show you how to add and use multiple search forms on your WordPress site. We’ll share what’s worked best for us across many different websites.

Why Use Multiple Search Forms in WordPress?
A search form can help visitors find what they are looking for, fast. However, if you have lots of content, then it might make sense to create multiple forms that search specific types of content.
For example, if you run an online store, then you might create a smart WooCommerce product search that searches specifically for products.
You can also create an advanced search form for custom post types. For example, at WPBeginner, we have created custom post type search forms for our Deals and Glossary pages.

By using different search forms in different locations across your site, you can help visitors get accurate and helpful search results, no matter how much content you have published. This will improve the visitor experience and reduce the bounce rate.
That being said, let’s show you how to create multiple search forms in WordPress. You can use the quick links below to navigate through this tutorial:
Step 1: Install and Set Up SearchWP
The easiest way to add multiple search forms to your WordPress website is by using the SearchWP plugin. It’s one of the best search plugins for WordPress, used by over 50,000 sites.

With SearchWP, you can search content that WordPress ignores by default, including custom post types, PDF files, WooCommerce products, and categories. You can also create multiple different search forms and then add those forms to any page, post, or widget-ready area.
The first thing you need to do is install and activate the SearchWP plugin. For more details, see our step-by-step guide on how to install a WordPress plugin.
Upon activation, go to SearchWP » Settings and then click on the ‘General’ tab.
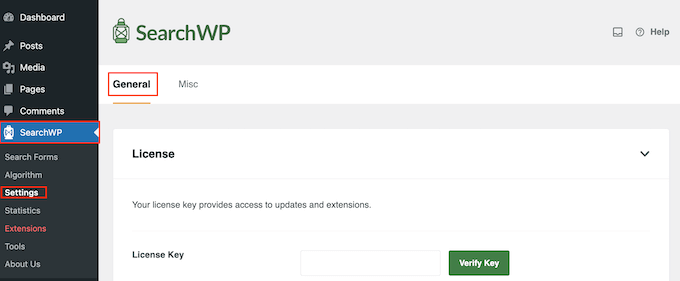
Here, you need to enter your license in the ‘License Key’ box. You can find this information in your account on the SearchWP site.
With that done, just click the ‘Verify Key’ button.
Step 2: Create a Custom WordPress Search Algorithm
After entering the license key, it’s a good idea to fine-tune how SearchWP indexes, searches, and displays your content. You can think of this as creating a custom Google search algorithm that’s just for your WordPress blog or website.
These are the general settings that all search forms will use by default. You can override these settings for the individual search forms.
To get started, head over to SearchWP » Algorithm.
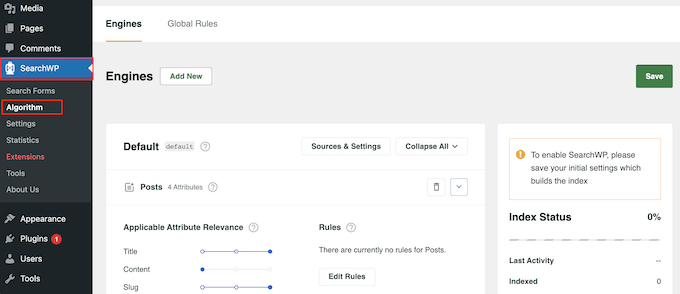
Here, you will see a section for the different content types that SearchWP searches by default, such as pages and posts.
You will notice that each item has an ‘Applicable Attribute Relevance’ scale. This is the weight (importance) that SearchWP will give to each attribute.
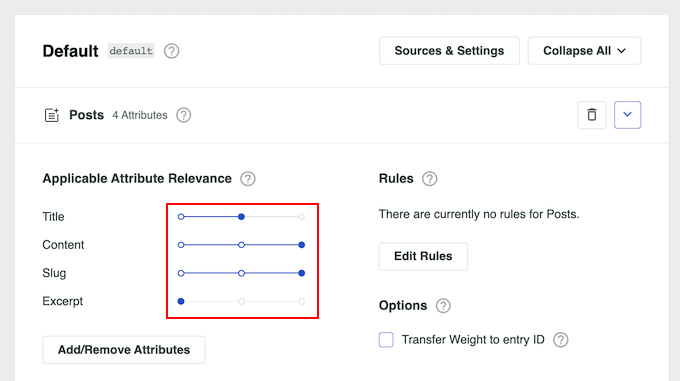
Content that matches an attribute with high relevancy will appear higher in the search results. By contrast, content that matches an attribute that has less relevancy will appear lower on the search results page.
To change the relevancy, simply drag the different sliders. For example, if you move the ‘Title’ slider to the left and the ‘Content’ slider to the right, then the content will carry more weight than the title.
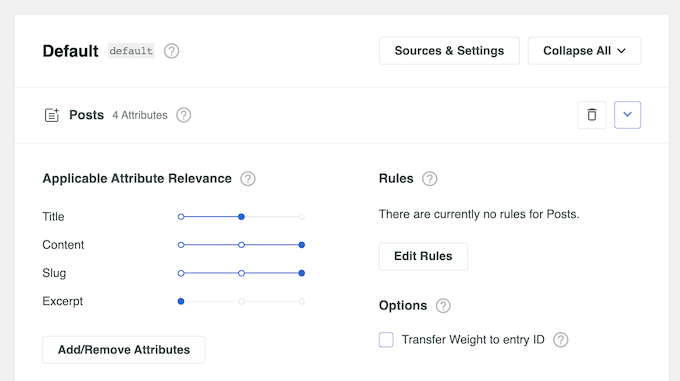
You can even tell SearchWP to search content that WordPress ignores by default.
To do this, click on the ‘Sources & Settings’ button.
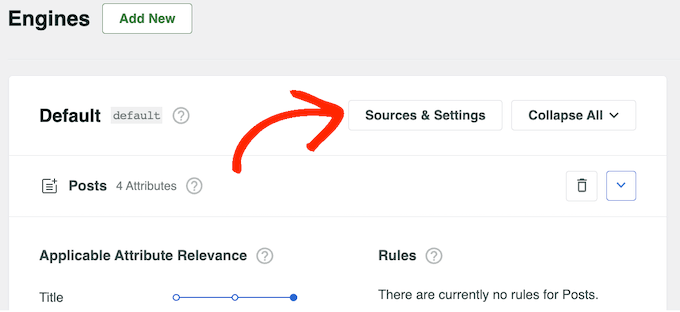
You can now check the box next to the different content types. For example, you may want to make blog comments searchable or add PDF indexing and searching in WordPress.
When you are happy with your changes, simply click on the ‘Done’ button.
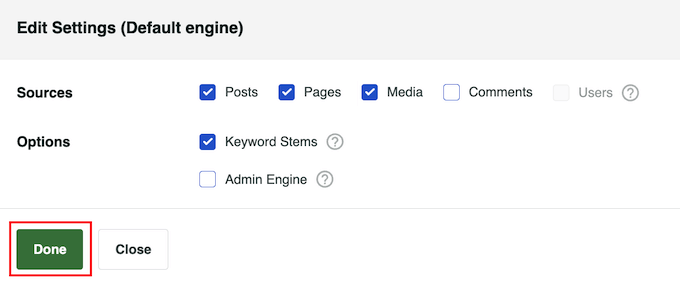
This adds a new section for each content type. Once again, you can change the attribute relevance using the different sliders.
When you are happy with how the search algorithm is set up, just scroll to the top of the screen and click the ‘Save’ button.
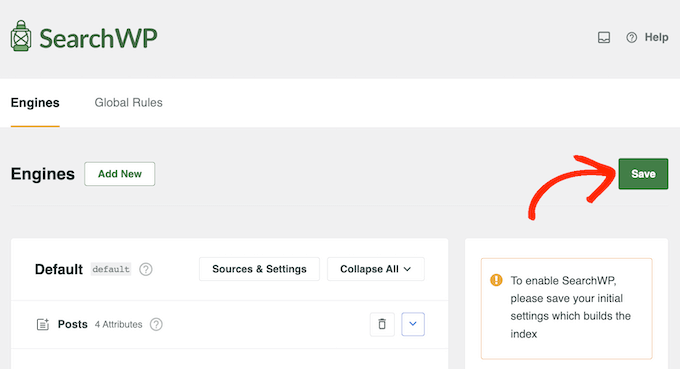
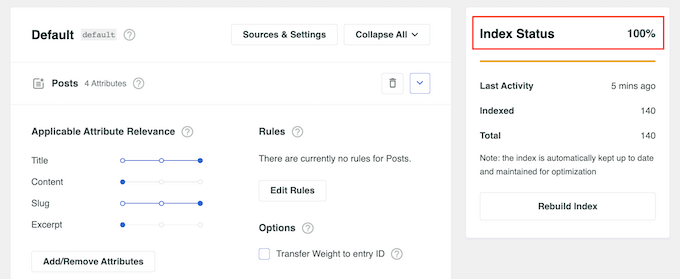
SearchWP will now rebuild the index automatically. Depending on the speed of your Internet connection and your WordPress hosting provider, this may take a few minutes.
As soon as you see ‘Index Status 100%’, you will know that SearchWP has indexed all your content and settings.
Step 3: Create Multiple Different Search Forms in WordPress
Now, you can create as many different search forms as you want.
To get started, head over to SearchWP » Search Forms and click the ‘Add New’ button.
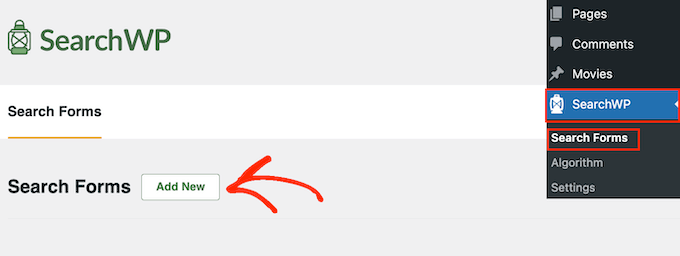
This creates a new search form, ready for you to customize. For example, if you run a review website, then you might create a form that searches for product review posts and ignores other content like your blog posts and media.
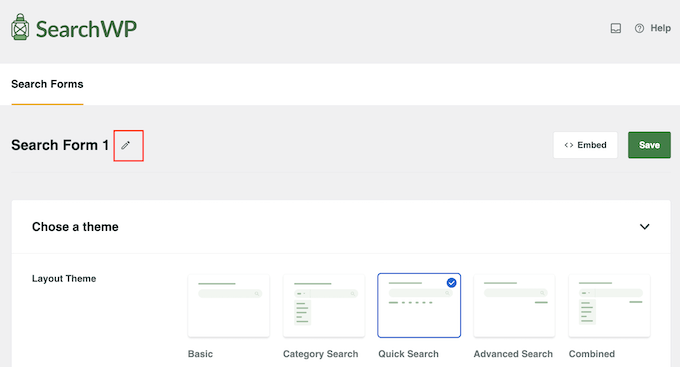
To start, you will need to give the form a unique name by clicking on the small pencil icon next to ‘Search Form 1’.
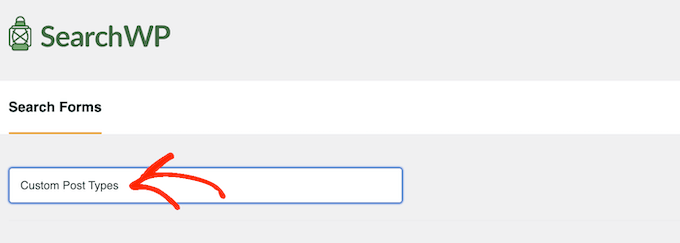
You now type in a name for the custom search form.
Since you are going to make multiple search forms in WordPress, it’s important to use a name that helps you identify this form in the WordPress dashboard.
After that, you can choose a layout using the ‘Layout Theme’ thumbnails.
Some of these layouts are designed for specific search forms. For example, if you are creating a form that searches by category in WordPress, then we recommend selecting ‘Category Search’, as it already has many of the settings you need.
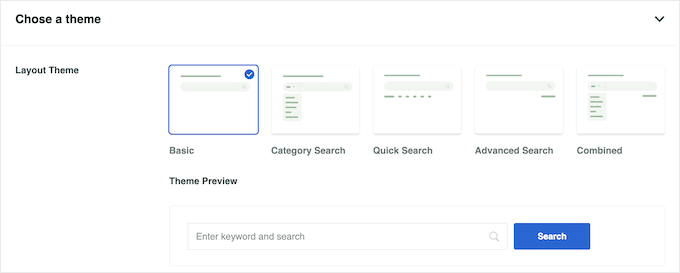
Simply click on the different themes to see a preview of how this form will look on your website. After making your decision, scroll to the ‘Custom Styling’ section.
The settings you see may vary depending on your theme layout. For example, if you selected ‘Quick Search’, then the ‘Quick Search’ setting will be enabled by default.
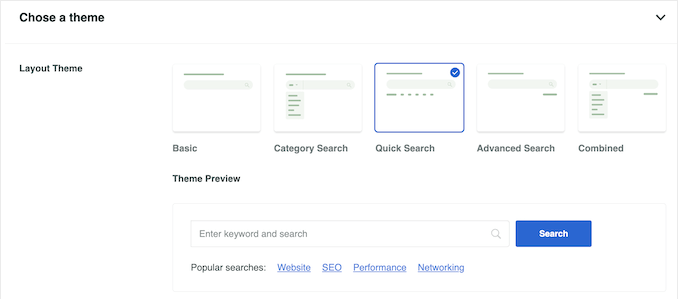
You can disable and enable the different options using their toggles. The live preview will update automatically as you make changes, so you can try different settings to see what works the best.
Depending on your layout and the kind of form you want to create, you may need to enable and disable some of the ‘Custom Styling’ settings.
Do you want to create a form that searches by category? Then, you will need to enable the ‘Category Search’ toggle.
After that, find the ‘Select Category’ field and type in each category that you want to include in the search results. For example, if you run an online store, then you may want to create forms that search specific WooCommerce product categories.

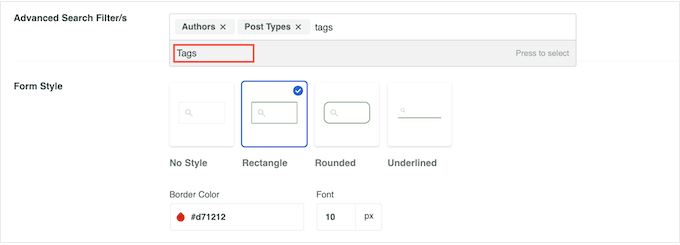
If you want to allow visitors to filter their search results using factors like the author, post type, and tag, then you will need to click to enable the ‘Advanced Search’ toggle.
After that, scroll to the ‘Advanced Search Filter/s’ field. By default, SearchWP allows visitors to filter their results using Authors, Post Types, and Tags.

To remove any of these filters, just click on its ‘X’ button. If you want to add more filters, then simply type their names into the field.
Then, when the right option appears in the dropdown, give it a click.
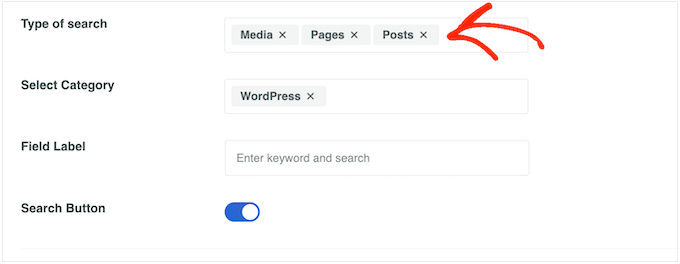
By default, the form will search media, pages, and posts. If you have created custom post types, then you may want to include these in the search results.
To do this, find the ‘Type of search’ field and give it a click.
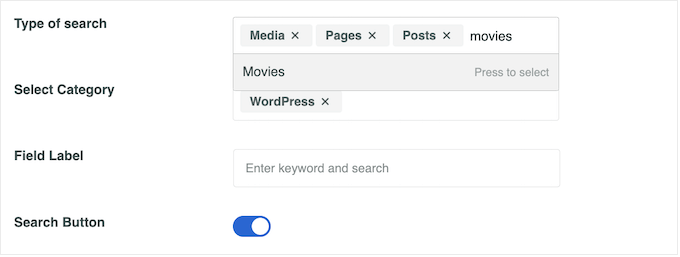
You can now type in the name of each custom post type.
When the right custom post type appears, click to add it to the search.
Do you want to exclude media, pages, or posts from the search results?
Then just click the small ‘X’ next to ‘Media’, ‘Pages’, or ‘Posts’.

When you are happy with the type of content that SearchWP will search, you may want to add some placeholder text to the search bar.
Here, we recommend letting visitors know how the search form works and the results they should expect to get. For example, if you have an online marketplace, then you may want to use text such as ‘Search for products’ or ‘Start shopping’.
By default, SearchWP will show a generic ‘Enter keyword and search’ message. You can replace this with your own messaging by typing into ‘Field Label’.

By default, the search form shows a magnifying glass and a blue ‘Search’ button.
To remove the ‘Search’ button, simply click to deactivate the ‘Search Button’ toggle.

When you are happy with these settings, scroll to the ‘Form Style’ section.
Here, you can choose between different form styles, add a border, and change the font size.
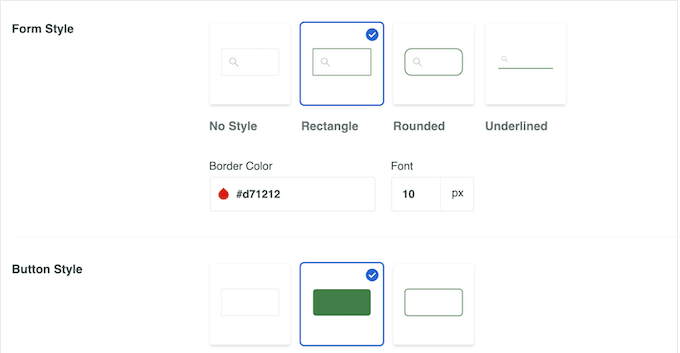
Under ‘Button Style,’ you can customize the ‘Search’ button that appears in the form.
Finally, when you are happy with how the form is set up, you can scroll to the top of the screen and click on ‘Save’ to store your settings.
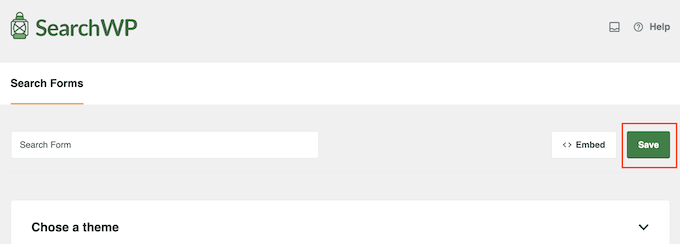
To create more custom search forms with unique settings, simply repeat the exact same process described above.
Step 4: Add Multiple Search Forms to Your WordPress Site
You can add multiple search forms to any page, post, or widget-ready area using either a shortcode or the Search Form block.
Since it’s the easiest, let’s start by looking at the block method.
Option 1: Add a Search Form to a Page or Post
You may want to add a search form to a specific page or post or even show it inside the post content.
For example, you might add a search form to your FAQ page, documentation, help desk, knowledge base, or similar. This can improve the customer experience by helping users find answers and useful resources.

To get started, simply head over to the page or post where you want to add the form.
You can then click on the ‘+’ icon and type in ‘Search Form’.
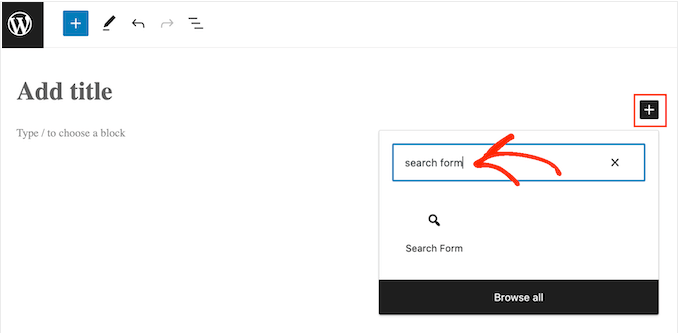
When the right block appears, give it a click.
You can now open the ‘Select a Form’ dropdown and choose the form you want to show on this page or post.
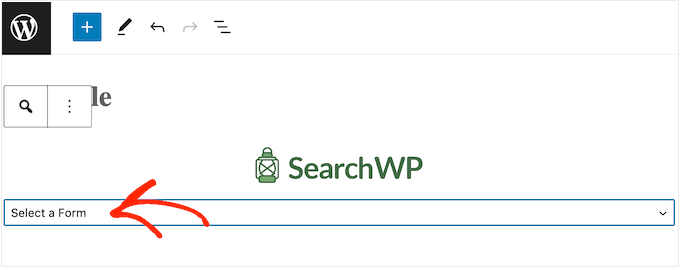
When you are ready to make the search form live, just click on either ‘Update’ or ‘Publish’. Now, simply visit this page or post to see the search form in action.
Option 2: Add a Search Form to a Widget-Ready Area
Another option is to add a search form to a widget-ready area, such as the sidebar or similar section. This is an easy way to show the same search bar across multiple pages on your WordPress website.
Go to Appearance » Widgets to see all the different areas where you can add widgets.
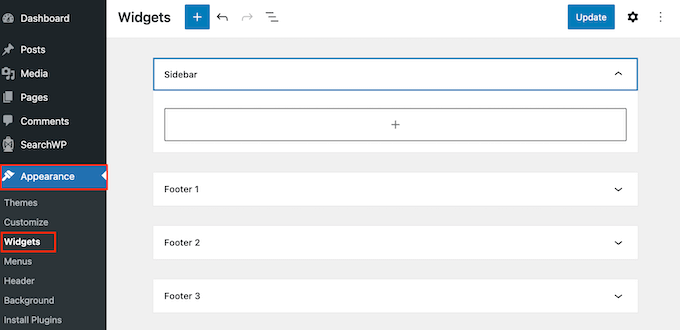
The options you see may vary depending on your WordPress theme. For example, if you are using the Astra theme, then the sidebar widget area is called ‘Main Sidebar’.
Simply click the ‘+’ block icon in the area where you want to add a widget.

Then, type in ‘Search Form’.
When the right block appears, click to add it to your website.
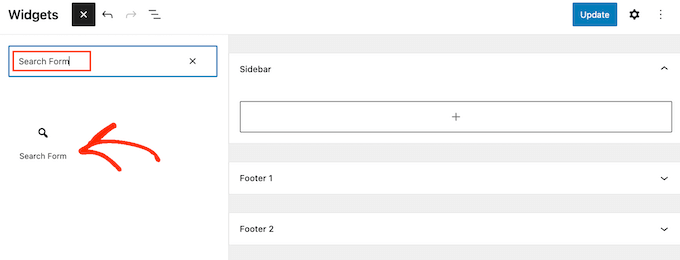
You can now open the dropdown menu and choose the search form that you want to use.
When you are finished, just click the ‘Update’ button to make the search form live.
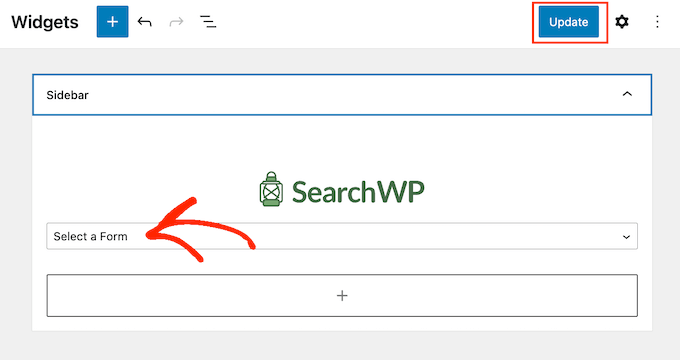
Now, you can visit your site to see the improved search form.
For more on this topic, please see our guide on how to add and use widgets in WordPress.
Option 3: Add a Search Form Using the Full Site Editor
If you are using a block WordPress theme, then you can add search forms using the full site editor. It includes areas that you can’t edit using the standard WordPress content editor. For example, you can add a search form to your 404 template in WordPress.
To get started, head over to Appearance » Editor in the WordPress dashboard.

Now, you will see some options to edit your block theme.
For the sake of example, we will show you how to add a search form to a page template. To do that, click the ‘Templates’ menu.

You will now see a list of all the templates that make up your WordPress theme.
Simply find the template or template part that you want to edit and give it a click.
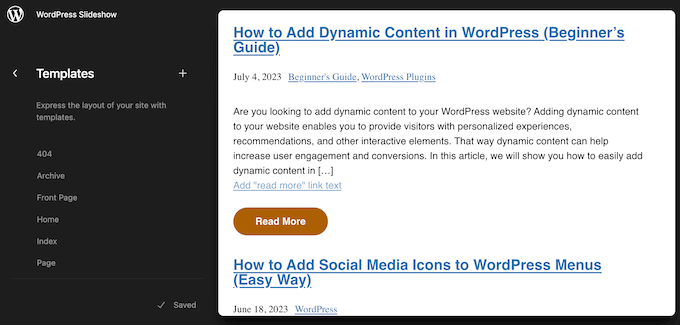
WordPress will now show a preview of this template.
To go ahead and edit the template, click on the small pencil icon.
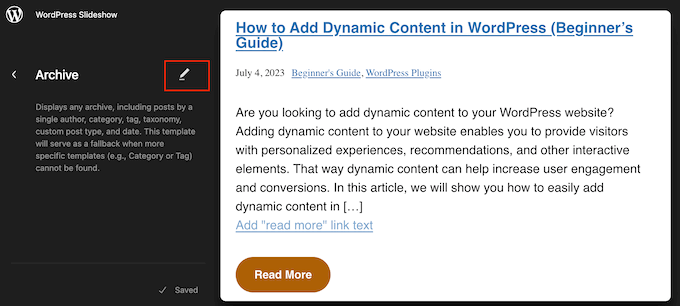
Now, click on the ‘+’ icon.
In the panel that appears, type in ‘Search Form’.
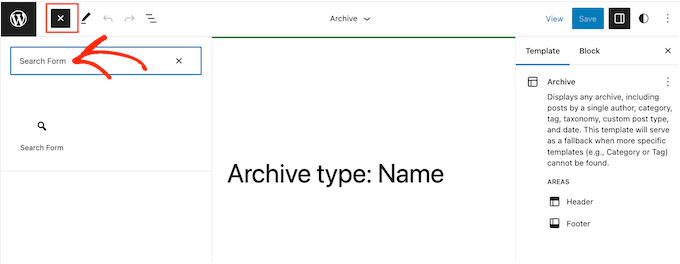
When the right block shows up, drag and drop it into your layout.
You can now open the dropdown menu and choose the search form that you want to use.
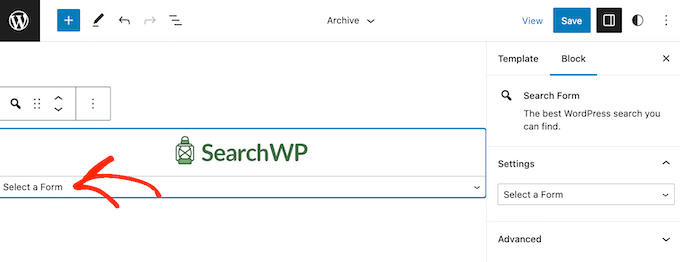
With that done, just click on the ‘Save’ button to make your changes live.
Option 4: Add a Search Form to WordPress Using a Shortcode
Another option is to add a search form using its shortcode. This may be an easier option if you want to add the same search form to multiple pages, posts, or widget-ready areas, as you can simply paste the same shortcode into multiple locations.
To get a search form’s shortcode, head over to SearchWP » Search Forms. Here, find the search form that you want to show and copy the value in the ‘Shortcode’ column.
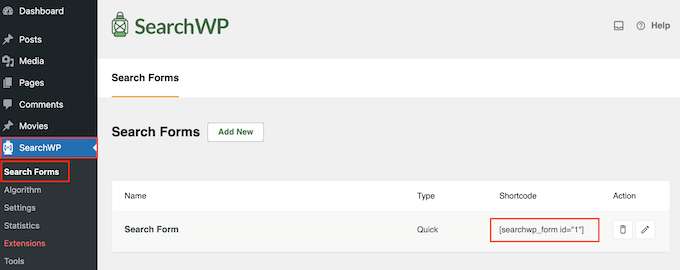
You can now add the shortcode to any page, post, or widget-ready area. For step-by-step instructions, please see our guide on how to add a shortcode in WordPress.
Option 5: Add a Search Form to Your Navigation Menu
Oftentimes, websites would have a page with a search form and a menu that contains a search bar. This way, wherever the user is located, they can just scroll up to the header section and use the search feature when needed.
If you’re interested in doing this, you can check out our guide on how to add a search bar to the WordPress menu with SearchWP.
We hope this article helped you learn how to use multiple search forms in WordPress. You may also want to see our expert tips on creating more interactive forms in WordPress and our expert picks for the best WordPress form plugins.
If you liked this article, then please subscribe to our YouTube Channel for WordPress video tutorials. You can also find us on Twitter and Facebook.


Ralph
Wow, I didn’t even know it is possible to have multiple search forms. Good to know I can make search results better in certain areas with seperate forms. And once again you prove that SearchWP plugin is such a good tool to have!
WPBeginner Support
Glad we could bring this to your attention
Admin
Pablo
And how would you change the placehoder text for each form?
For instance, placehoder text for form 1: Search the normal blog. Placeholder text fro form 2: Search books for form 2.
WPBeginner Support
For one option you could add placeholder = “text” in the input tag for which you want to display each text
Admin
Jude Martenstyn
Perfectly works. Thank you.
Danny
I cannot get this to work, search results come up with a blank page
Anyone else get this working or know of another solution for creating multiple forms?
Sofi smith
Hi Danny,
Did you get this to work? The / is depreciated – use in the actual form rendering instead and it works
Hope this helps.
Jim Bouschor
i followed this exactly and i’m able to load the proper search results templates when i perform a search, but NO results appear. Also when I do a search in one of my forms, the other form has the searched term in the input field when i return to it.
If anyone can shed some light it would be greatly appreciated. I cannot find anything useful on the internet somehow…
Zaheer Abbas
Great Work.
Daniel Gadd
Did this get resolved.Does it work.I hope so as im investing time here now with this post
sunnyrainyareallgood
Is it ok to name template as search-normal.php and search-book.php instead of normal-search.php and book-search.php?
tourismpics
This doesn’t appear to work. Any ideas?
Arifur Rahman
dear admin, I don’t know why I could not get any effective result by following this tutorial?
Anthony
What does the line
“$args = array_merge( $args, $wp_query->query );”
Do?
Jenny
…think you’ve over-coded your search box,did anyone tell you it doesn’t work at all?
EvertVd
There is small problem with this: If you place two search forms on a page you have two input-boxes with the same id (id=’s’). Which at the very least will not validate.
Mirza Ali HuXain Qazilbash
useful stuff for beginner..