Tired of digging through your WordPress website just to find uploaded files? 📂
By default, WordPress form plugins store files on your site. But that’s not always convenient, especially if you need to share, organize, or access them from anywhere.
So what if you could send file uploads straight to Google Drive – automatically?
We’ve explored various methods to find an easy way to do this. And we’ve found that WPForms (a tool we use and love ourselves) is the best solution.
With its pre-made templates and drag-and-drop builder, you can create a file upload form easily. Then, once the form is ready, you can set up an integration with Zapier, so every uploaded file lands exactly where you need it: in a Google Drive folder.
In this guide, we’ll show you step-by-step how to upload files from a WordPress form to Google Drive. 🙌

Why Upload Files From Your WordPress Form to Google Drive?
Normally, you can use your WordPress form builder plugin to add a file upload field and keep the uploaded files on your website.
But what if you wanted to share the uploaded files with someone who does not have access to the WordPress admin area?
This is where Google Drive comes in.
Google Drive allows you to store files on the cloud and easily share them with anyone. It also allows you to easily access files from any device without logging into your WordPress site.
For instance, if you create a job application form and ask for resumes, then you can automatically upload those files directly to Google Drive and share them with others in your team.
Another scenario is when you run a contest where users upload photos or submit articles to participate.
Sending those submissions directly to Google Drive saves disk space on your website. At the same time, it keeps those files safe in a remote cloud location.
Besides, if you want to improve your WordPress security, it’s a good idea to save a copy of your files elsewhere in case of data corruption or hacker attacks. In this case, you’ll have the form data stored in your WordPress and Google Drive.
With that in mind, we’ll show you how to easily send WordPress form uploads to Google Drive. Here’s a quick overview of all the steps we’ll cover in this guide:
Ready? Let’s get started!
Step 1: Creating and Preparing Your WordPress Form in WPForms
For this tutorial, we will be using WPForms, the best and most popular contact form plugin for WordPress with over 6 million active installations, including us!
What’s more, you can use the AI-powered form builder to auto-generate your form. With this feature, you can just describe briefly what kind of form you need, and the AI will make it for you. To learn more about the tool, you can check out our complete WPForms review.
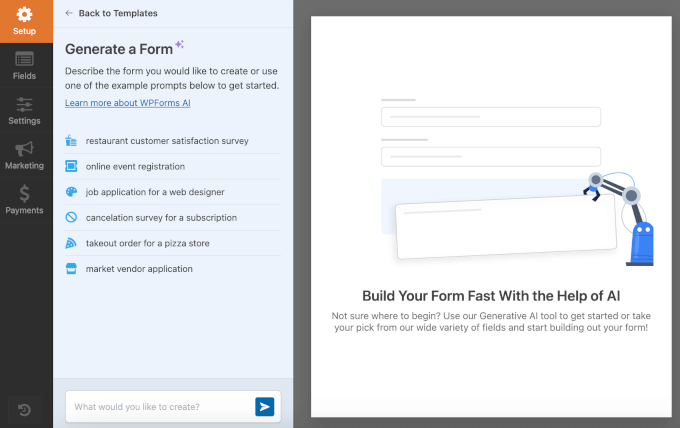
Now, this plugin comes with a simple drag-and-drop editor and more than 2,000 form templates. This makes it very easy to embed any kind of form on your WordPress site.
Then, we are going to use a tool called Zapier to connect WPForms with Google Drive. Zapier will be the bridge to send data between two different apps without you needing to use any code.
It also seamlessly connects with over 2,000 apps, making it even easier if you ever need more integrations in the future.
Before we move on, do note that while there’s a free version of WPForms, you’ll need the Pro version or higher to access the Zapier addon. When you purchase the Pro version, you’ll also unlock advanced features like conditional logic, digital signatures, and surveys & polls.
Creating a File Upload Form in WPForms
First, let’s install and activate the WPForms plugin on your website. For more details, you can see our step-by-step guide on how to install a WordPress plugin.
Next, you need a form for your website visitors to send you files. If you don’t already have one set up, check out our step-by-step guide on creating a file upload form in WordPress.
🚨 Important: This method will only work with a single file. It will not work with multiple files from one form submission.
Once you have set up your form, you need to add it to your website. To do this, simply edit the post or page where you want the form.
On the edit screen, you’ll need to click on the ‘+’ button to add a new block.
After that, simply search for the WPForms block and add it to your content area.
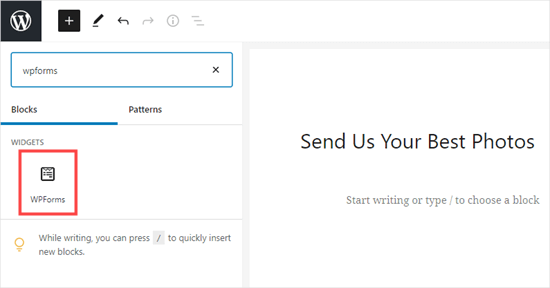
Then, publish your page or post to put your form live.
Once you’ve done so, go ahead and create a test entry. This will be used to set up and test the connection between WPForms and Google Drive.
Here’s our test entry:

Preparing to Connect WPForms with Zapier
We are going to use Zapier as a bridge between WPForms and Google Drive. To do this, you need to install and activate the WPForms Zapier addon.
In your WordPress admin, you’ll want to go to the WPForms » Addons page and find the Zapier addon.
Go ahead and click the ‘Install Addon’ link to install and activate it.

Next, let’s navigate to the WPForms » Settings » Integrations page.
Then, simply click on the Zapier logo to get your Zapier API key. You will need this to connect Zapier with WPForms.
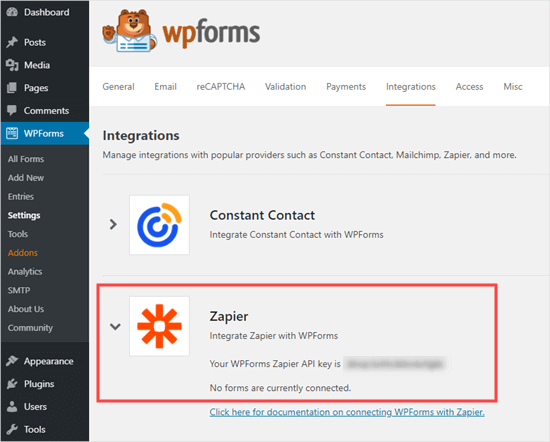
From here, you’ll want to copy the API key somewhere safe or keep this tab open. You will need the API key in a later step.
Step 2: Creating a Zap to Send Files from Your Website Form to Google Drive
Once your form is ready, you can go to the Zapier website. The first thing to do here is create a free account or log in to your existing account.
In your Zapier dashboard, simply click the ‘Make a Zap’ button to get started. This will open the configuration wizard.
✏️ Note: Zapier uses the word ‘zap’ for a process with a trigger and an action. Our trigger will be a visitor filling in the form, and our action will be sending the file(s) attached to the form to Google Drive.
At the top of the screen, you’ll choose a name for your zap. Once you’ve done that, it’s time to set up the trigger.
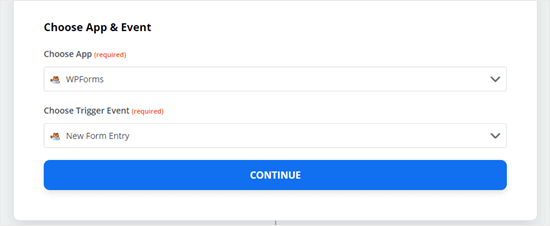
To get started, let’s select WPForms in the ‘Choose App & Event’ box.
Just type ‘WPForms’ into the search bar to find it.
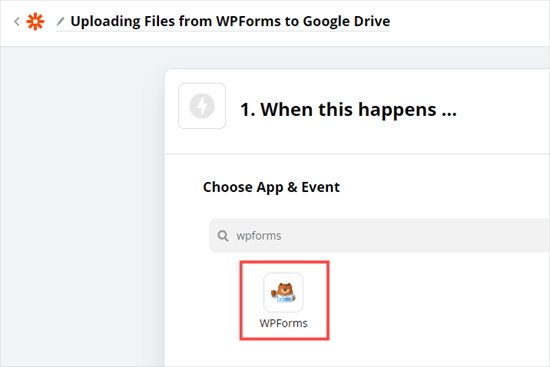
You will now be prompted to select a trigger event.
This will default to ‘New Form Entry’ so all you need to do here is click the ‘Continue’ button.
Now, Zapier will ask you to sign in to WPForms.
Go ahead and click the ‘Sign in to WPForms’ button.

You should then see a popup window.
From here, you need to enter the API key that you found earlier. You also need to add your website’s URL or domain name.
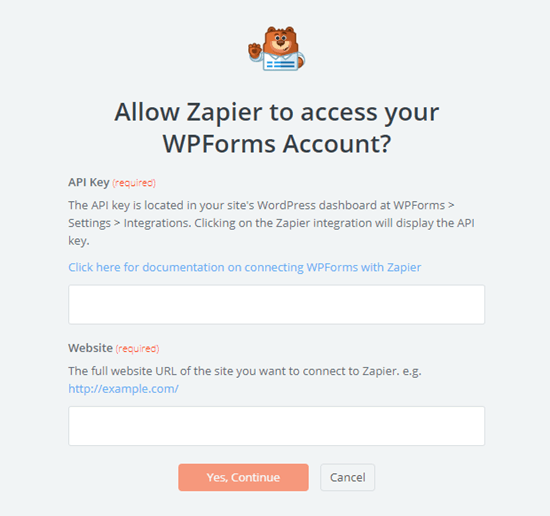
After entering those details, go ahead and click the ‘Yes, Continue’ button to move on.
Next up, Zapier will ask you to select your file upload form from a dropdown list.
Go ahead and click on the name of your form.
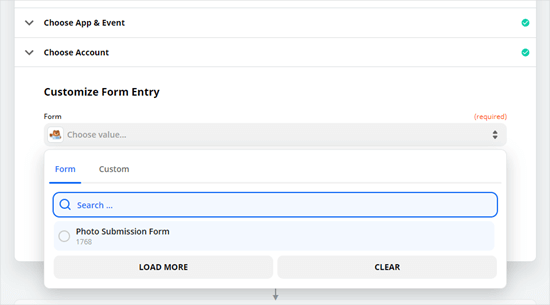
Once you’ve selected the correct form, you can click the ‘Test trigger’ button.
This ensures that Zapier has connected to your form correctly.
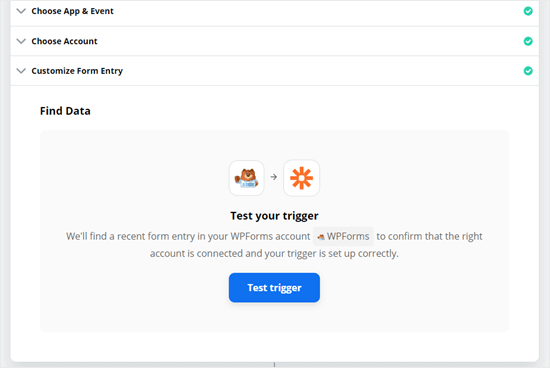
After clicking that button, you should see a message that Zapier has found a test entry.
Here’s what it might look like:
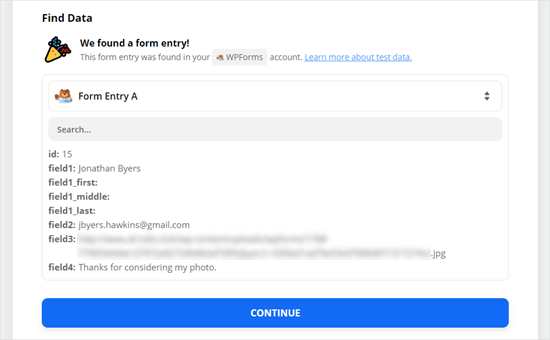
Then, simply click the ‘Continue’ button to move on to the Action part of the Zap.
Here, you need to choose your second app, Google Drive.
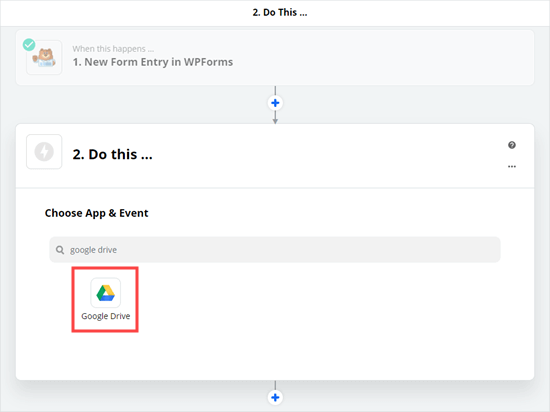
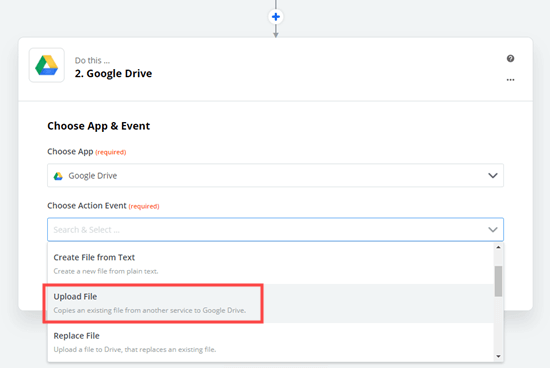
You will then see the dropdown for choosing an action event.
Go ahead and select the ‘Upload File’ option and then click to continue.
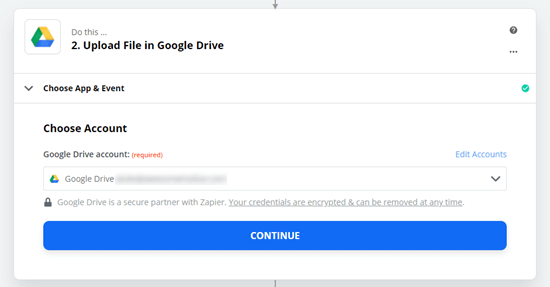
Zapier will now prompt you to sign into your Google Drive account.
Simply enter your login details for your Google account.
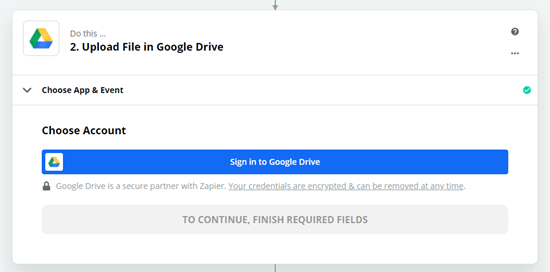
Once you’ve done so, you can click the ‘Continue’ button to move on.
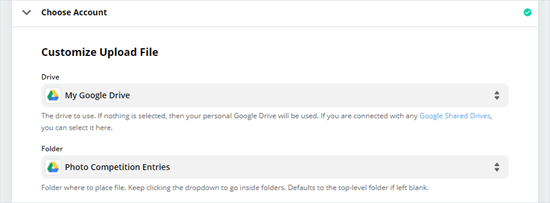
From there, you can set up where you want the files to go in your Google Drive.
Simply click the Drive dropdown to select whether you want to use your personal drive or a shared drive.
Then, you can open the ‘Folder’ dropdown to select the folder you want to use.
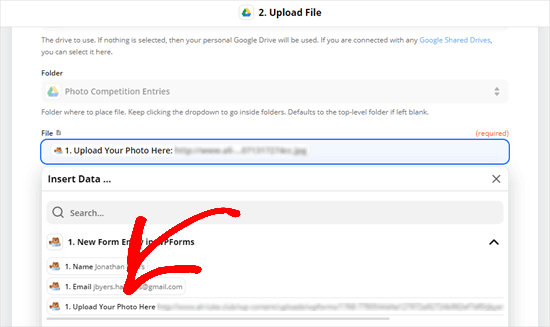
With that done, the next step is to tell Zapier which file(s) to upload.
Under the ‘File’ dropdown, simply select the upload field on your form.
After that, you can leave the other settings blank and click the continue button to move on.
Zapier will now prompt you to test your Zap by sending an upload file to Google Drive.
You’ll need to click the ‘Test and Continue’ button to do so.
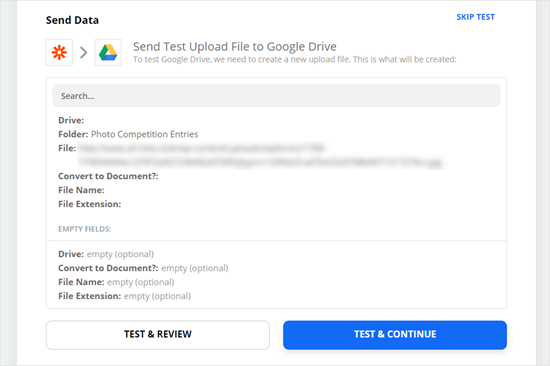
This will send Google Drive the files you uploaded in your test form entry.
Go ahead and check your Google Drive folder for the files.

You might also want to double-check that the zap works.
If it doesn’t, you can click ‘Retest Action.’
Once you’re confident that your zap is working as intended, go ahead and click the ‘Turn on Zap’ button to make it live.

Now, all files sent through your file upload form will automatically be uploaded to your chosen Google Drive folder.
WPForms will always keep a backup of all files on your WordPress hosting account in case the Zapier API experiences any outages.
Please keep in mind that if you get a lot of form submissions with large files, then this will take up increased storage space in your Google Drive. In our business, we use the G Suite Business plan to get unlimited storage space.
Bonus Tip: Syncing Your Form Entries with Google Sheets
If you’re storing files in Google Drive, you might also want to track form data in a spreadsheet for better organization.
This way, you can save contact form entries such as the person’s name, email, and message.
What’s more, this integration makes it simple to share data with your team, reduce manual errors, and even generate reports automatically. Best of all, you can set it up in just a few clicks!
You can do this with WPForms and Uncanny Automator.
Basically, you’ll first create your form using WPForms and set up the necessary fields. Then, you’ll use Uncanny Automator, the best WordPress automation plugin, to connect WPForms with Google Sheets.
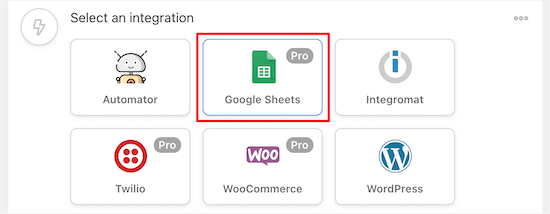
For details, you’ll want to read our tutorial on how to connect any WordPress forms to Google Sheets.
We hope this article helped you learn how to upload files from a WordPress form to Google Drive. Next, you might also want to check out our guides on how to redirect users after form submission and how to track user journeys on WordPress lead forms.
If you liked this article, then please subscribe to our YouTube Channel for WordPress video tutorials. You can also find us on Twitter and Facebook.


Jiří Vaněk
Great tutorial. Is there any advantage in using google drive for uploading instead of storing data on FTP? Do I mean, for example, antivirus protection from Google?
WPBeginner Support
While Google’s scanning can help somewhat, this would be more to help prevent reaching any storage limits on a hosting provider should there be many submissions.
Admin
Jiří Vaněk
I understand. I recently started using this technique based on this guide when I was running out of space on one of my websites, and it’s really great because I have another 15 GB of free space on Google Drive. I also noticed that Google Drive has antivirus protection, and the data should be encrypted, which seems like an additional benefit to me. Anyway, thanks for your time and response.
Lauren
This is great, but why do the images turn into a txt.file when they get to my google drive!?
WPBeginner Support
You would want to ensure you selected the image to be uploaded in Zapier for the most likely reason that a text file is being added.
Admin