Recently, one of our readers asked us how they can uninstall and reinstall WordPress. Uninstalling and reinstalling WordPress can indeed be daunting, especially when things aren’t working as they should. It’s often a last resort when other troubleshooting steps have failed.
This process might feel intimidating due to potential risks. You may worry about losing data or impacting your site’s SEO rankings.
The good news is that it doesn’t have to be a risky operation. Drawing from our 16+ years of experience managing the largest WordPress resource and other brand sites, we’ve found methods that make this process easy and safe.
In this article, we’ll guide you through each step to properly uninstall and reinstall WordPress.
When Do You Need to Reinstall WordPress?
Reinstalling WordPress should never be the first option. Most common WordPress errors are easily fixable, and this will save you from the hassle of reinstalling WordPress.
If you cannot figure out the cause of an issue, then just follow the instructions in our WordPress troubleshooting guide. This article will help you pinpoint the issue and find a solution.
In case of a hacked WordPress site, you can try the tips in our guide on how to clean a hacked WordPress site.
Pro Tip: If you can’t restore your hacked website and need professional help, you can hire WordPress experts. WPBeginner Pro Services include hacked site repair, where our experts can get your site back up and running in no time. Schedule a consultation now!
If all else fails, then uninstalling and reinstalling a fresh copy of WordPress can be used as the last resort. Here are all the steps we’ll share in this guide:
- Step 0. Create an Emergency Backup
- Step 1. Export Your WordPress Content
- Step 2. Download wp-content Folder
- Step 3. Properly Uninstall WordPress
- Step 4. Fresh Install WordPress
- Step 5. Restore Uploads, Images, and Theme
- Step 6. Import Content
- Step 7. Install WordPress Plugins (One by One)
- Bonus Tip: Troubleshooting WordPress Errors
Let’s get started.
Step 0. Create an Emergency Backup
Before you do anything, you should first create a complete backup of your existing WordPress site.
You can use a WordPress backup plugin to do this. Make sure that you store your backup files on your computer or a cloud storage service like Google Drive or Dropbox.
We will not be using this backup to reinstall WordPress in this tutorial, but it’s good to have in case something goes wrong.
For more details, please see our beginner’s guide to backing up a WordPress site.
Step 1. Export Your WordPress Content
The first thing you need to do is export your WordPress content by creating a WordPress export file. This file will contain all your posts, pages, categories, tags, and comments.
Restoring a WordPress site using this export file allows you to leave out data created by WordPress plugins.
Here is how you will create a WordPress export file:
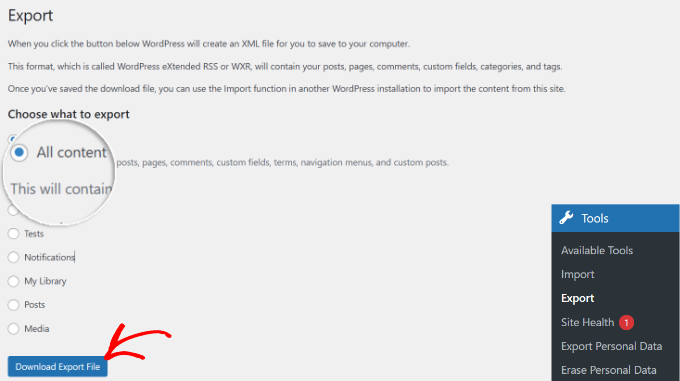
First, you’ll need to sign in to your WordPress admin area and then go to the Tools » Export page.
From here, you can select the ‘All content’ option and click on the ‘Download Export File’ button.
If you have a lot of registered users on your website, then you may want to export them too. See our guide on how to easily import/export users in WordPress.
Step 2. Download wp-content Folder
All your WordPress themes, plugins, images, and uploads are stored in the /wp-content/ folder on your website.
Let’s download this content to your computer so that you can use it later to reinstall WordPress.
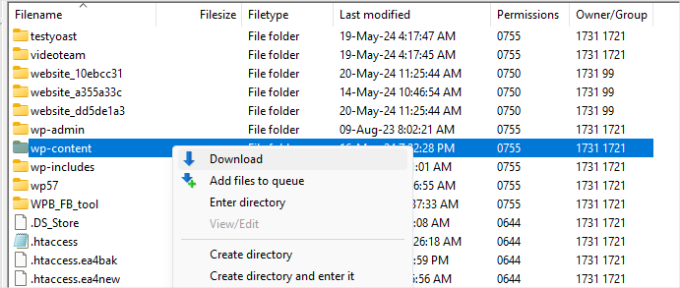
First, you’ll need to connect to your WordPress site using an FTP client or File Manager in cPanel. Once connected, simply select the wp-content folder, right-click it, and click the ‘Download’ option to save it on your computer.
After downloading the wp-content folder, you are ready to uninstall WordPress.
Step 3. Properly Uninstall WordPress
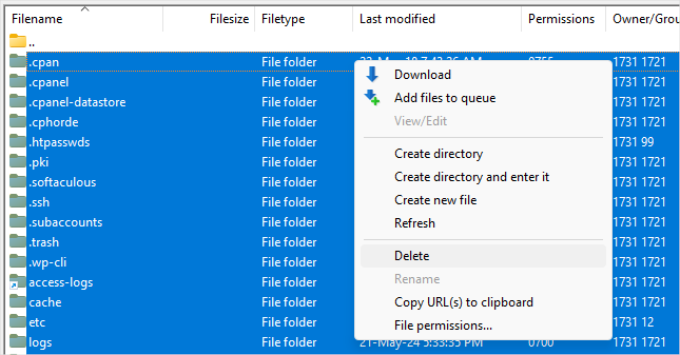
To uninstall WordPress, you need to connect to your site using an FTP client or File Manager in cPanel and delete all WordPress files.
Simply select all the files and folders of your website. After that, you can right-click and select the ‘Delete’ option.
You don’t really need to delete your WordPress database. Most WordPress hosting companies allow you to create as many databases and usernames as you need.
Instead of deleting the existing database, you can create a new one with a new username and password.
To create a new database, let’s log in to your cPanel account and click on ‘MySQL Databases.’
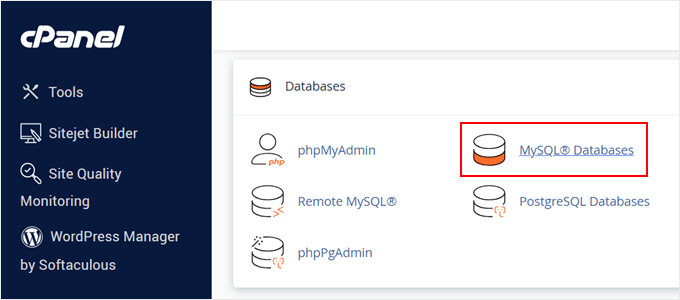
This will bring you to the ‘MySQL Databases’ page.
First, you need to enter a name for your new database and click the ‘Create Database’ button.
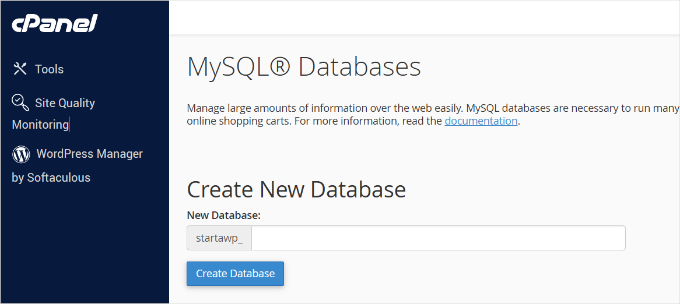
After that, you can scroll down to the ‘MySQL Users’ section and add a new user.
You will need to enter a username and password and then click the ‘Create User’ button. Some hosting providers also offer a password generator in cPanel.
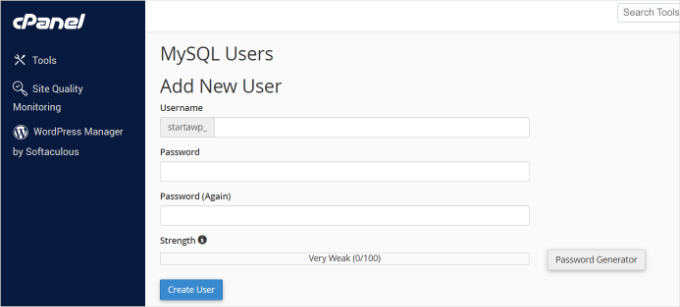
The next step is to add the user to the database you created earlier.
Simply scroll down to the ‘Add User to Database’ section and then select the username and database you created earlier.
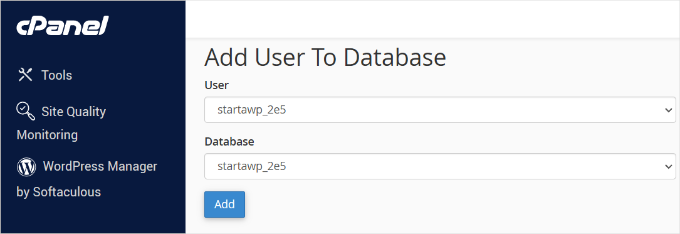
Once that’s done, go ahead and click the ‘Add’ button to continue.
Your new database is ready to be used when you reinstall WordPress.
Now that you have successfully uninstalled WordPress, let’s see how to reinstall it and restore your website.
Step 4. Fresh Install WordPress
In this step, you’ll need to download a fresh copy of WordPress from the WordPress.org website.
Simply visit the website and click the ‘Get WordPress’ button in the top right corner.
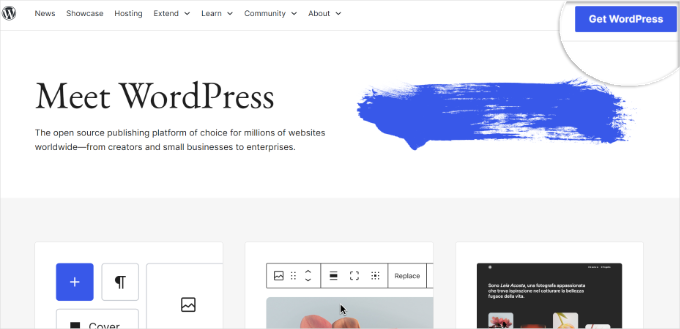
Next, you’ll see 2 options: downloading the zip file or looking for a hosting provider.
We will select the ‘Download and install it yourself’ option. Simply click the ‘Download WordPress’ button and save the zip folder on your computer.
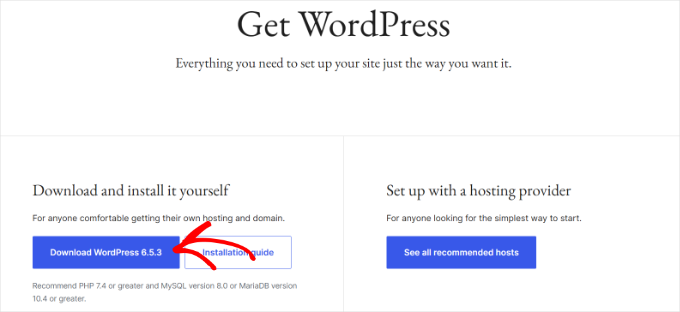
After downloading WordPress, you need to unzip the download file.
Inside it, you will open the wordpress folder to access all the WordPress files. You need to upload these files to your website using an FTP client.
To start, you can navigate to the folder where you extracted the WordPress core files. From here, you’ll select all the files, right-click, and hit the ‘Upload’ option.
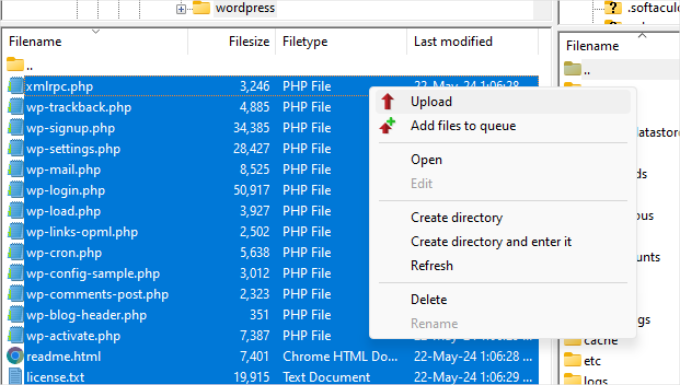
After uploading the WordPress files, go ahead and visit your website.
WordPress will now ask you to enter your database information.
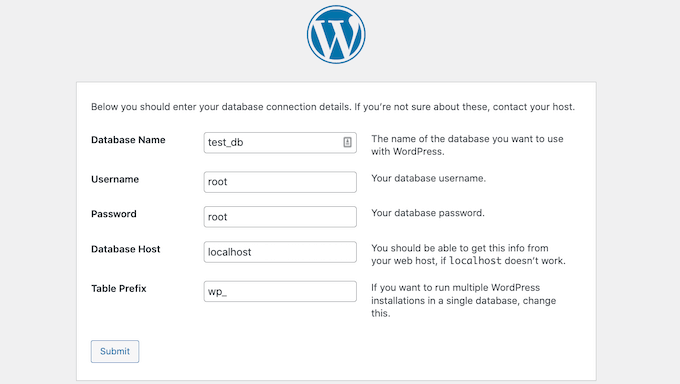
You need to enter the name of the database, username, and password you created earlier. Your host information will most likely be localhost.
Once you are done filling out the information, just click on the ‘Submit’ button to continue.
WordPress will now attempt to connect to your database.
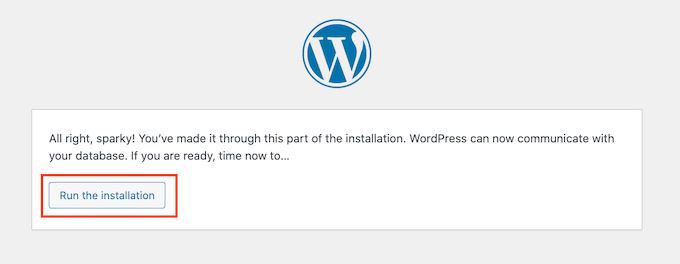
Upon successful connection, you will receive a success message. You can now the ‘Run the installation’ button to continue.
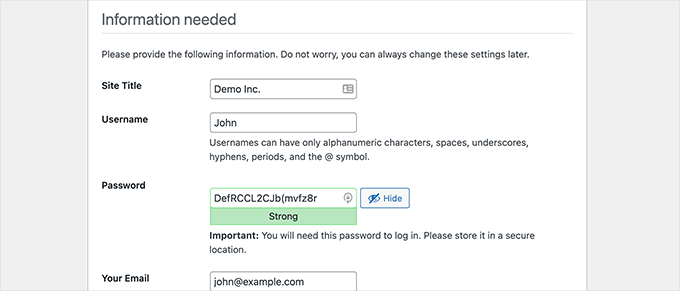
In the next step, WordPress will ask you to provide your site information, such as the site title, description, admin email address, and password.
After filling out the information, you can click the ‘Install WordPress’ button to continue.
WordPress will now finish the installation.
if you need more details, you can see our guide on how to install WordPress.
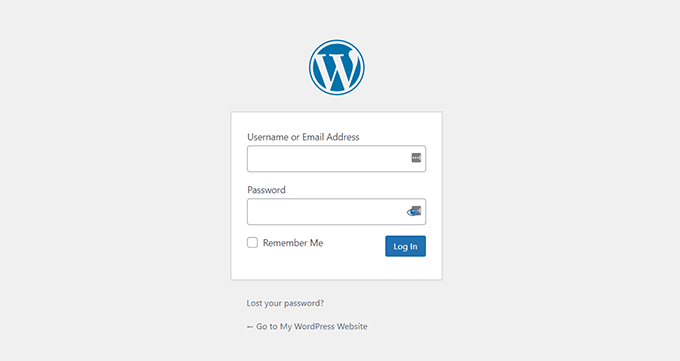
Next, go ahead and log in to the WordPress admin area using the username and password you entered earlier.
Once you are logged into WordPress, you need to delete the default content. From your WordPress dashboard:
- Simply head over to ‘Posts’ and delete the ‘Hello World’ post.
- You can then visit the ‘Comments’ section and delete the default comment.
- Lastly, you’ll want to go to ‘Pages’ and delete the sample page.
You have successfully reinstalled a fresh copy of WordPress. Now, let’s move on to restoring your content.
Step 5. Restore Uploads, Images, and Theme
First, you will need to restore your uploads, images, and theme, which are located inside the wp-content folder you downloaded earlier.
To do that, you need to connect to your website using an FTP client and go to the /wp-content/ folder.
Next, you’ll select the /wp-content/uploads/ folder from your computer and upload it to your website.

If you have made changes to your WordPress theme or child theme files, then you can upload them now. Your theme folders are located in the /wp-content/themes/ folder.
Step 6. Import Content
Now, it’s time to import your posts, pages, categories, tags, and other content.
First, you need to navigate to the Tools » Import page and then click the ‘Install Now’ link under WordPress.
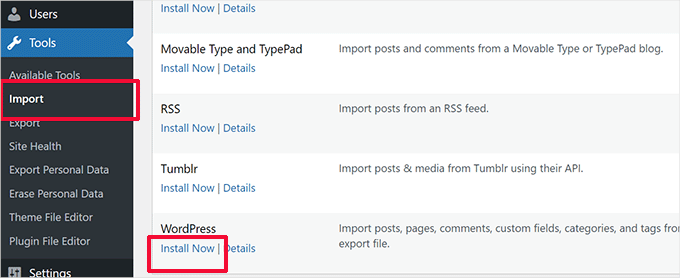
WordPress will now download and install the WordPress importer.
After that, you need to click the ‘Run Importer’ link.
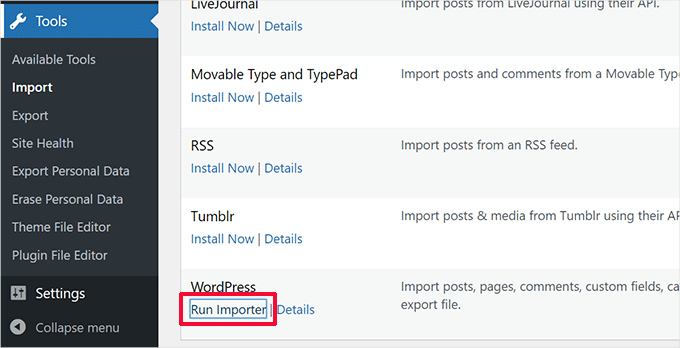
This will bring you to the WordPress importer page, where you need to click on the ‘Choose File’ button.
Then, you can select the XML file you downloaded during step 1.
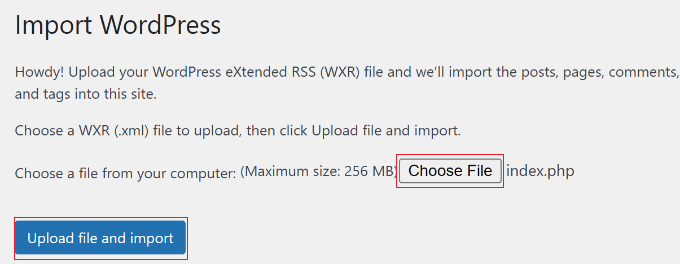
Once that’s done, just click the ‘Upload file and import’ button to continue.
WordPress will ask you if you want to create new authors and assign the posts to them or if you would like to assign all posts to your current user account.
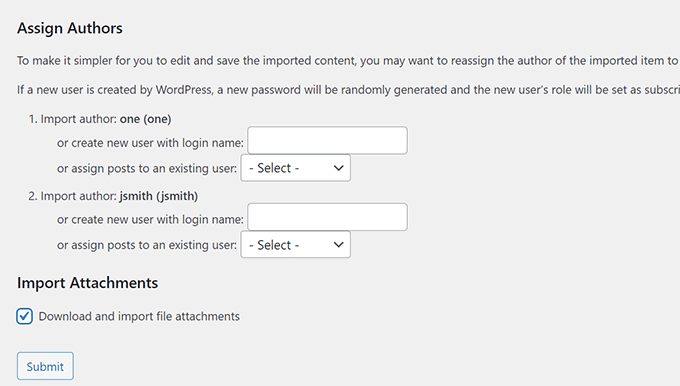
If it is a single-author WordPress site, you can assign all posts to yourself. Otherwise, do nothing, and WordPress will import the authors.
You also need to check the box under ‘Import Attachments.’ This will allow WordPress to import the images from your /wp-content/uploads/ folder to the WordPress media library properly.
Go ahead and click on the ‘Submit’ button to continue.
WordPress will now start importing content from the XML file to your fresh WordPress install. Once finished, you will be able to see your content by visiting your website.
Step 7. Install WordPress Plugins (One by One)
After successfully importing content to your reinstalled WordPress site, you can move on to installing plugins.
You will need to install all plugins one by one and then activate them. You may also need to manually set up plugins to adjust their settings.
That’s all. You have successfully uninstalled and reinstalled WordPress. You can now review your website and set up things as they were before, like your navigation menus, sidebar widgets, contact form, and more.
Bonus Tip: Troubleshooting WordPress Errors
WordPress errors are issues that can disrupt your site, appearing as error messages, broken pages, or malfunctioning features.
Common errors include:
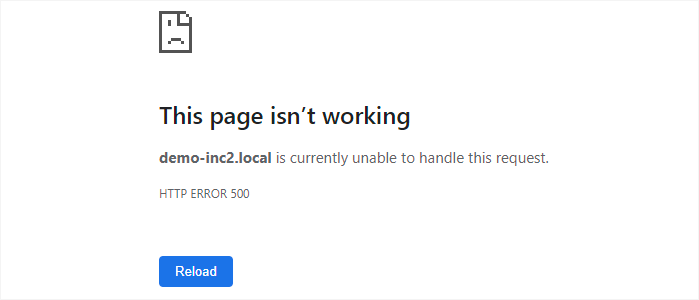
These errors are important because they can damage your site’s appearance and functionality, leading to a higher bounce rate and potential security vulnerabilities.
Fixing them promptly ensures smooth operation and a positive visitor experience. Troubleshooting may seem difficult, but with the right steps, you might not need to uninstall and reinstall your WordPress sites completely.
For more on this, you can go ahead and check our beginners’ guide to troubleshooting WordPress errors.
We hope this article helped you learn how to uninstall and reinstall WordPress. You may also want to see our guide on how to use WordPress recovery mode or our expert picks of the best WordPress maintenance services.
If you liked this article, then please subscribe to our YouTube Channel for WordPress video tutorials. You can also find us on Twitter and Facebook.


James Medina
Can you repost this, but for mac users please, these are all PC menus which are different for mac users.
WPBeginner Support
None of the menus in article would be specific to an operating system, the main difference would be if your host does not use cPanel and instead uses a different interface.
Admin
Tim Allen
I cannot access my wp-admin dashboard to export content. But I can get into cPanel. Is there a method to uninstall/reinstall from cPanel?
WPBeginner Support
We would first recommend going through our steps in our guide below to help you back into your admin area:
https://www.wpbeginner.com/wp-tutorials/locked-out-of-wordpress-admin/
Admin
Maarten
“Then you need to delete all WordPress files.”,… would be handy to explain with one are Wordpress files… is that everything, including htaccess?
WPBeginner Support
It would be all of your files in the folder for your site.
Admin
Guillaume
I just wanted to thank you for your awesome tutorial. I am interested in the Uninstall/Re-installation of Wordpress. I get stuck on a 503 error as I wanted to go on my website.
WPBeginner Support
For the 503 error, you would want to take a look at the recommendations in our article below:
https://www.wpbeginner.com/wp-tutorials/how-to-fix-503-service-unavailable-error-in-wordpress/
Admin
Vandna Namdeo
Sir my wordpress back end Very Slow its taking too much time to do anything in admin area.
How can I fix it.
I tried all plugin uninstall and agian install but still facing same problem.
Please help me
Talha Anwar
After doing all these steps, i have lost my featured images, none of image is being shown in media folder, but post images can be seen.
WPBeginner Support
Hey Talha,
If you changed your WordPress theme after reinstalling WordPress theme, then you probably need to regenerate thumbnails. All your images should be stored in wp-content folder which you downloaded in Step 2.
Admin
Rabson
hello , how can I set premium account and the customer buy it .
I want automatic process it means if customer buy premium account ,
WordPress change normal account to premium account .
tnx
WPBeginner Support
Hey Rabson,
The best way to achieve this is by using a WordPress membership plugin.
Admin