Losing critical data or having your site crash without a backup is every website owner’s worst nightmare. Manual backups can help, but let’s face it – they’re easy to forget.
That’s where automatic backups come in. They quietly run in the background, protecting your site so you can focus on what matters.
We personally use and love WordPress backup plugins like Duplicator for our own websites. But we get it if you need a solution that doesn’t rely on plugins.
That’s why you may want to use CodeGuard. It handles your backups through SFTP/FTP connections, so even if your WordPress site runs into trouble, your backup system keeps working.
In this guide, we’ll show you exactly how to set up automatic WordPress backups with CodeGuard.
What Is CodeGuard?
CodeGuard is a daily backup service that keeps your WordPress website safe automatically. Most backup plugins save your files directly on your website or need you to connect to storage services like Google Drive. CodeGuard does things differently.
First off, your backups are automatically stored on Amazon Web Services (AWS). AWS keeps your backups extra safe by saving multiple copies in different locations around the world. This means you never have to worry about where your backups are stored or how to manage them.
CodeGuard is also smart about how it saves your backups. It takes one complete backup of your website first, then only saves the changes you make after that every single day. This makes the backup process faster and uses less storage space.
The service also helps protect your website from harmful software. It comes with a malware protection feature that finds and removes threats from your website. So you’re not just backing up your site – you’re also keeping it safe from attacks.
While CodeGuard works great with WordPress, you can use it with other website platforms like Joomla and Drupal, too. This makes it perfect if you run different types of websites.
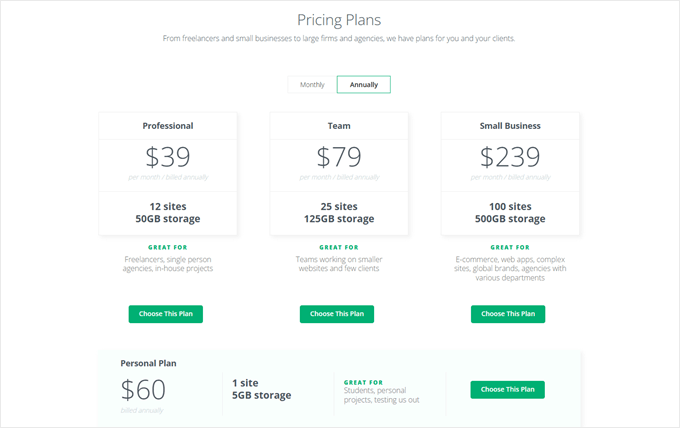
CodeGuard isn’t a free backup service, but you can try all its features with a 14-day free trial before making any commitment. The Personal plan costs $60 per year, includes automatic backups for one WordPress website, and provides 5GB of storage space.
Now, let’s look at how to set up CodeGuard on your WordPress blog or website. You can use the quick links below to navigate through the tutorial:
🚨 Finding WordPress backups too complicated? Let our WordPress Maintenance Services handle it all. We’ll take care of your automated backups, security monitoring, and regular updates – backed by our 16+ years of WordPress expertise. Focus on growing your business while our 24/7 expert team keeps your site running smoothly.
Step 1: Get Your FTP Account Credentials
First things first, you need to get your FTP (file transfer protocol) access credentials. These credentials are essential for connecting your WordPress website to CodeGuard’s backup service.
The steps to get your FTP details will vary depending on your hosting provider. We’ll show you how to do this using Bluehost and its built-in cPanel settings, which is a common setup for many WordPress websites.
While Bluehost offers FTP access through its dashboard, the cPanel method provides more advanced options, especially when creating a new FTP account to access your root directory.
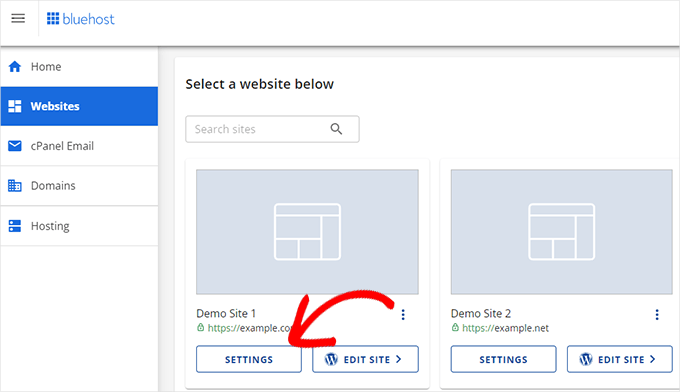
First, log in to your Bluehost account, then navigate to the ‘Websites’ tab. After that, click on the ‘Settings’ button on your website.
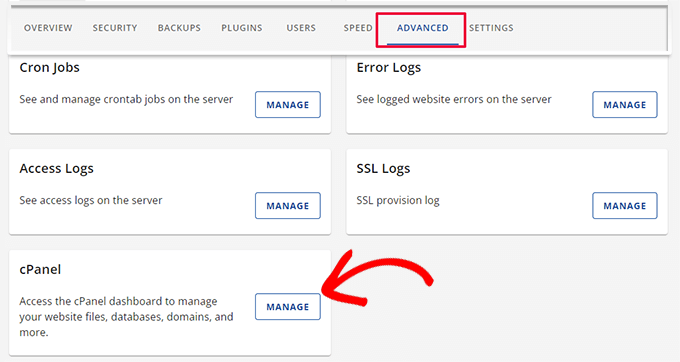
Now, switch to the ‘Advanced’ tab.
Then, scroll down and select the ‘cPanel’ option.
Here, you will see various settings for managing your website.
Simply look for the ‘Files’ section and select ‘FTP Accounts.’
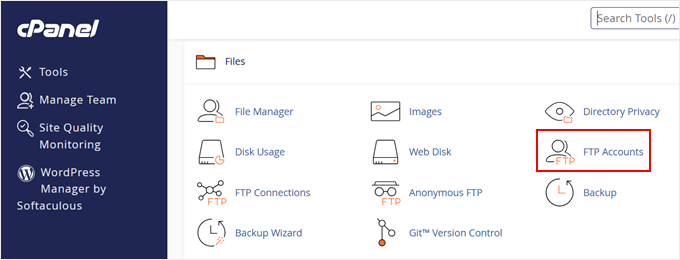
Now, you have two options: scroll down to view your existing FTP credentials or create a new FTP account if you haven’t already.
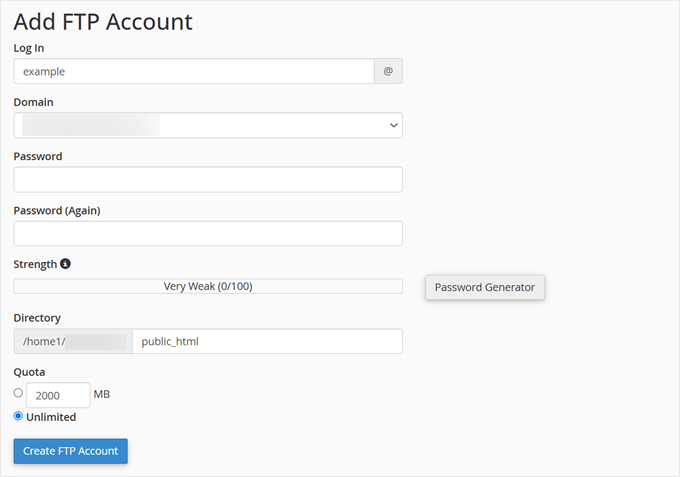
If you’re creating a new account, enter a username for your FTP account, select your website’s domain name, create a strong password, and choose your root directory.
The root directory is typically the ‘public_html’ folder where your WordPress website files are stored.
Then, click ‘Create FTP Account.’
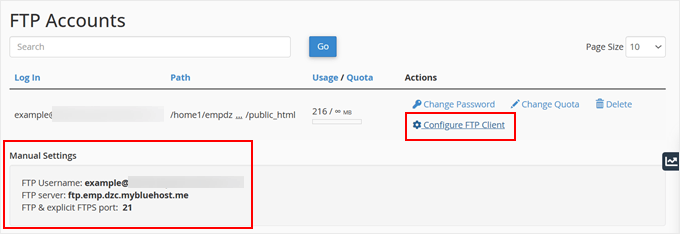
Once done, scroll down and click the ‘Configure FTP Client’ button to see your FTP credentials.
We recommend keeping this tab open, as you’ll need these details when setting up CodeGuard in the next step.
Step 2: Connect Your Website with CodeGuard
Now that you have your FTP credentials ready, let’s set up your automatic WordPress backup with CodeGuard.
First, visit the CodeGuard website and click ‘Get Started Now.’
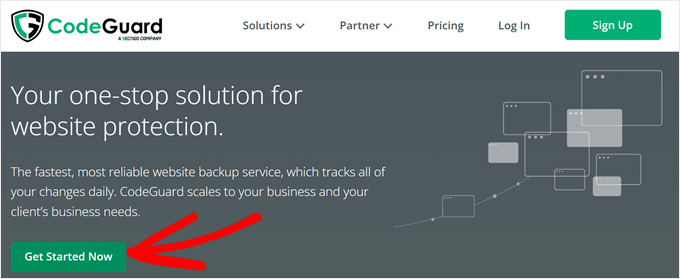
You’ll need to choose a plan and enter your payment details. Don’t worry; CodeGuard offers a 14-day free trial, so your card won’t be charged right away.
Once you’ve created your CodeGuard account, you’ll be taken to the CodeGuard dashboard. Scroll down and click on ‘Add FTP/SFTP Website’ to begin setting up your WordPress website backup.

In the first field, enter your WordPress website’s URL.
Then, choose between SFTP or FTP credentials. This depends on what your WordPress hosting service provides, so make sure to check their documentation.
Next, enter the FTP server address you got from the previous step.
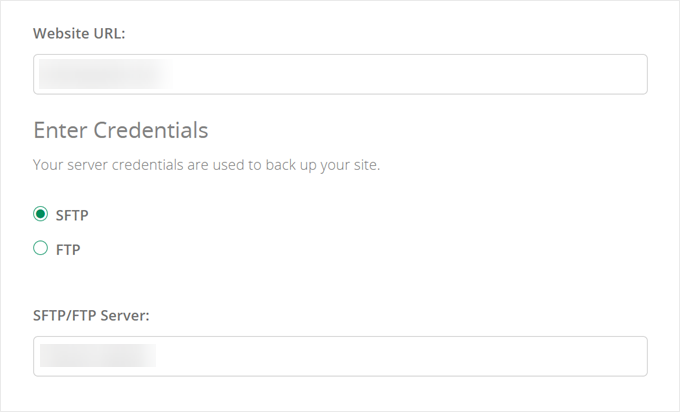
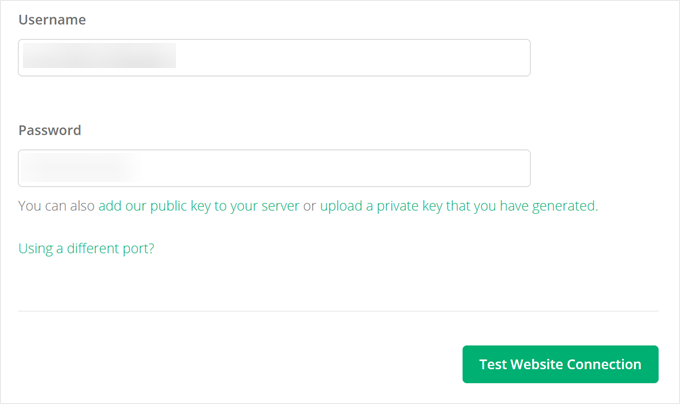
Now, you need to enter your FTP username and password in the appropriate fields.
Once you do that, simply click ‘Test Website Connection’ to make sure everything works correctly.
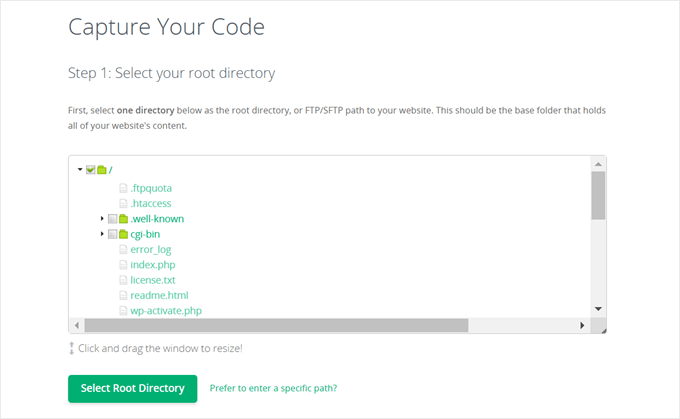
After a successful connection, CodeGuard will ask you to select your root directory.
You can click ‘Select Root Directory’ once you’ve found it.
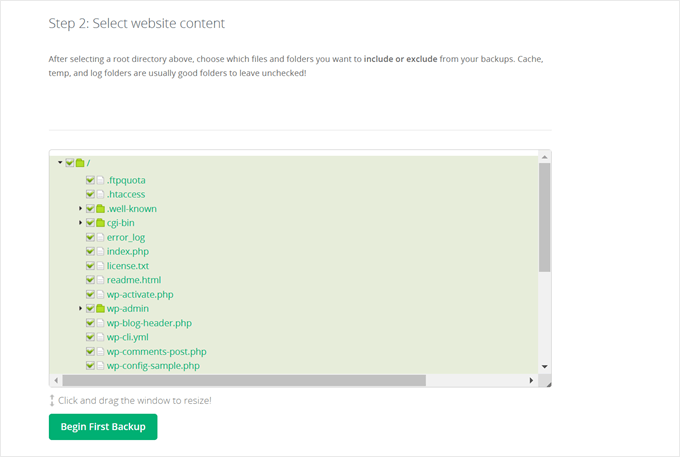
Finally, you can choose which WordPress files to include in your backup.
For full protection, we recommend backing up all files. Click ‘Begin First Backup’ to start the process.
Step 3: Connect Your Database with CodeGuard
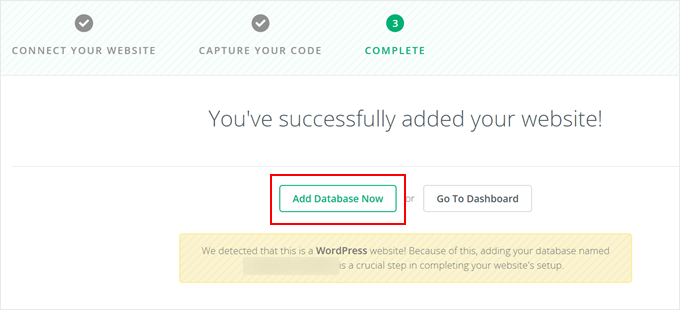
Now that your files are set for backup, CodeGuard will ask you to add your database. This is important because your database backup contains all your WordPress posts, pages, and settings.
To begin, click ‘Add Database Now.’
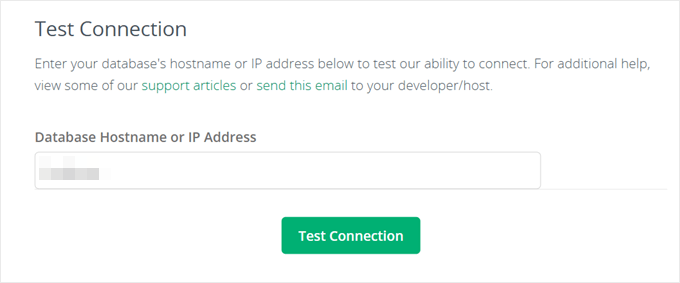
First, you’ll need to enter your database hostname or IP address. You can find these details in your wp-config.php file. For more information, check out our guide on how to edit the wp-config.php file.
If your database hostname shows as ‘localhost,’ simply enter your domain name (for example, example.com).
Click ‘Test Connection’ to proceed.
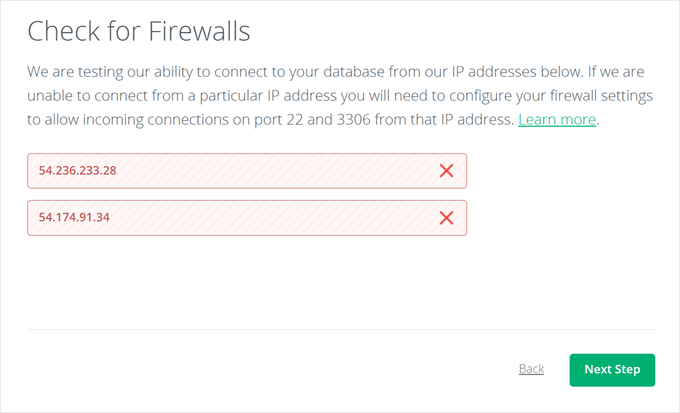
CodeGuard will now check if it can connect to your database.
During this test, CodeGuard will identify any IP addresses that need special access to your database backup. You can click on ‘Next Step’ for the time being.
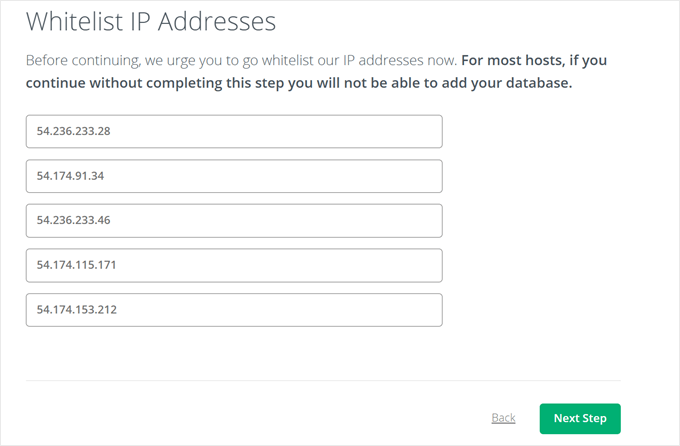
CodeGuard will now show you a list of IP addresses that need to be whitelisted.
We recommend keeping this tab open as you’ll need these IP addresses in a moment.
Then, open a new tab and log into your cPanel.
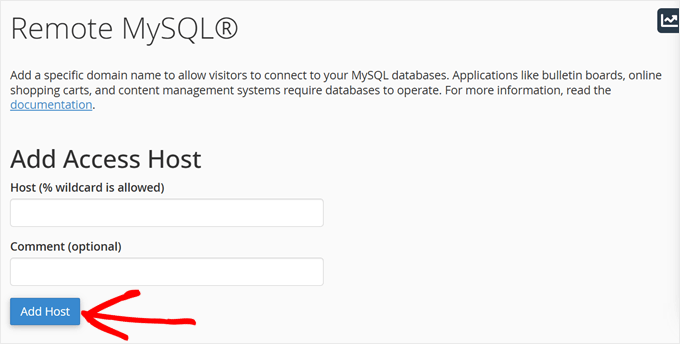
Here, just find the ‘Databases’ section and click on ‘Remote MySQL.’

This is where you’ll whitelist the CodeGuard IP addresses for your database backup.
For each IP address that CodeGuard showed you, enter it in the ‘Host’ field in cPanel, leave the ‘Comment’ field empty, and click ‘Add Host.’ You will need to repeat this process for all IP addresses.
Let’s now return to the CodeGuard database setup tab on your browser and click ‘Next Step.’
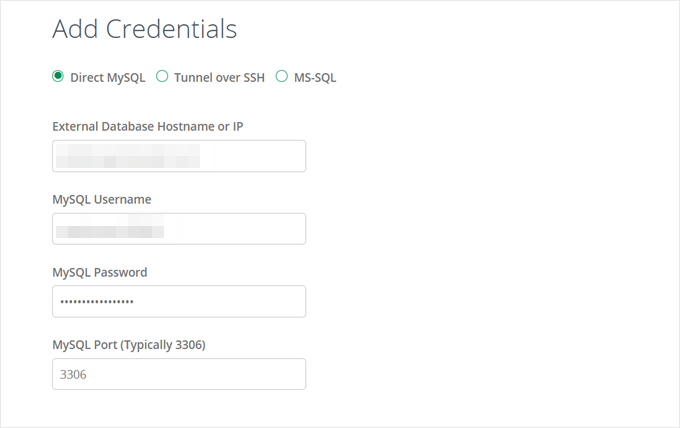
Now select ‘Direct MySQL’ and enter your database details, such as:
- Database hostname (your domain name if localhost)
- MySQL username
- Password
- Port number (usually 3306)
You can find your database username and password in your wp-config.php file. After entering these details, click ‘Next Step.’
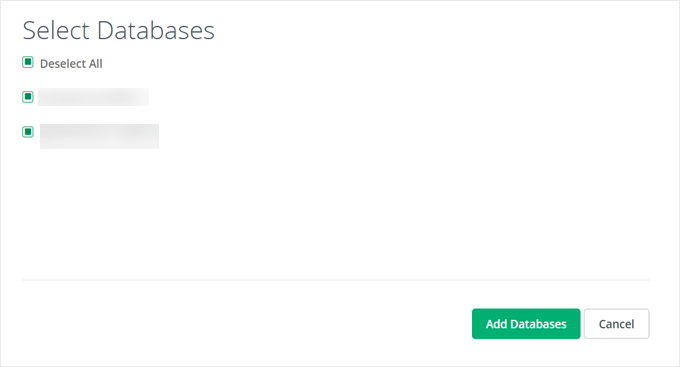
Finally, select the databases you want to back up.
After that, click ‘Add Databases.’
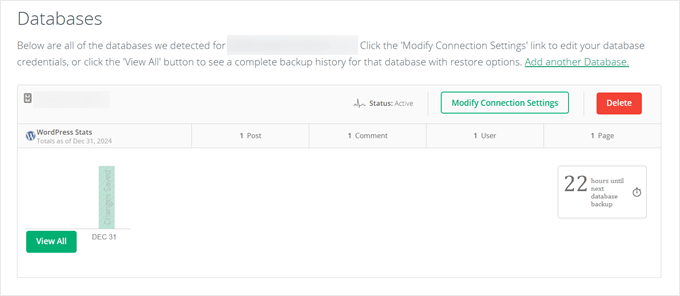
CodeGuard will begin your first database backup.
Once complete, it will display your most recent backup information, and CodeGuard will start backing up your website every day.
How to Restore Your Website with CodeGuard
One of the best features of CodeGuard’s backup service is its one-click backup restoration capability. Whether your WordPress website faces technical issues or gets compromised, you can easily restore it to a previous working version.
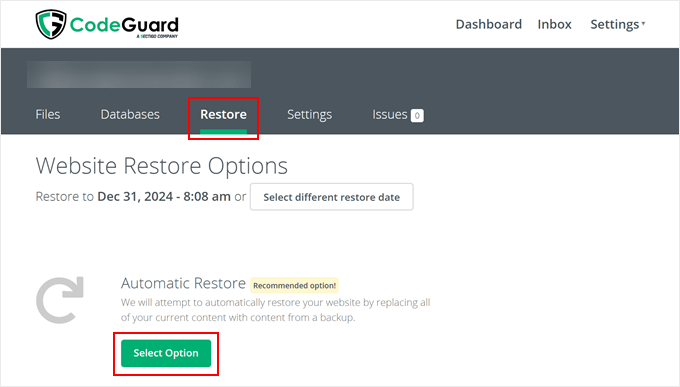
To begin the restoration process, log into your CodeGuard dashboard and switch to the ‘Restore’ tab. Look for the ‘Automatic Restore’ option and click ‘Select Option.’
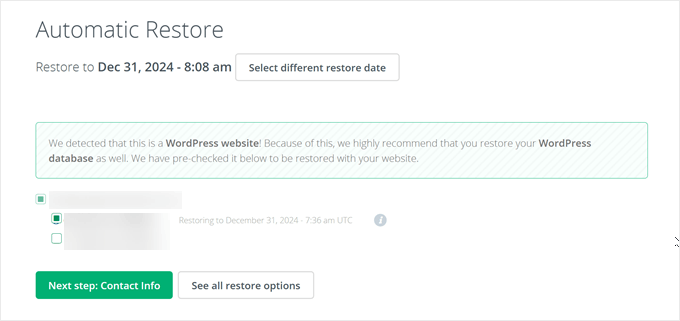
Next, you’ll need to choose what to restore. CodeGuard lets you restore both your database and website files at once.
With that in mind, go ahead and select the ones you want to restore, then click ‘Next Step: Contact Info.’
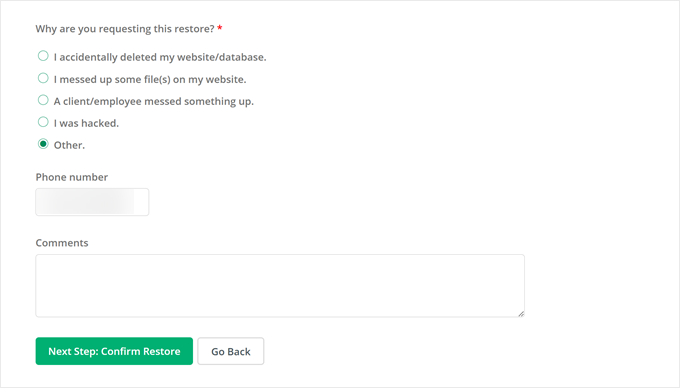
CodeGuard will ask why you’re requesting the restore.
You can choose from their preset options or select ‘Other’ if none match your situation. You can also insert your phone number to get notifications about the restoration progress.
Go ahead and click ‘Next Step: Confirm Restore’ to proceed.
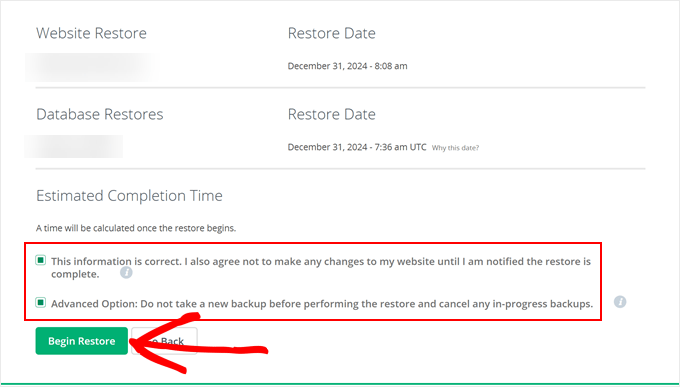
On the confirmation page, you’ll see your restoration date and estimated completion time. You can review these details carefully.
Don’t forget to check the boxes that confirm the information is correct, and tell CodeGuard not to back up anything while the restoration is in progress.
Then click ‘Begin Restore’ to start the process.
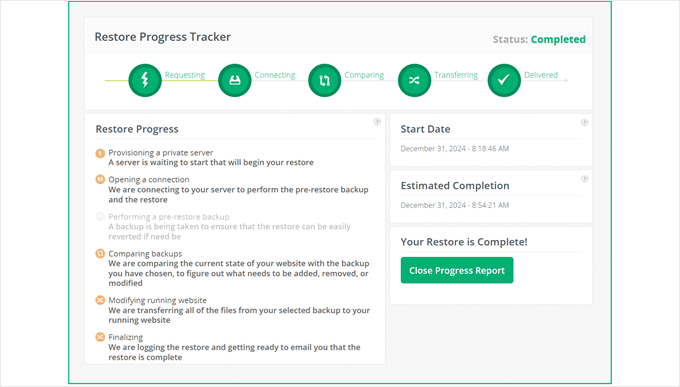
CodeGuard will show you a Restore Progress Tracker that monitors the restoration process.
Keep in mind that the restoration duration varies depending on your website’s size. Larger sites with more files and database content will take longer to restore.
Looking for an Affordable CodeGuard Alternative? Try Duplicator
If you’re looking for a more budget-friendly backup solution, then we recommend checking out Duplicator. It’s a WordPress backup plugin we’ve personally used on many of our partner websites.
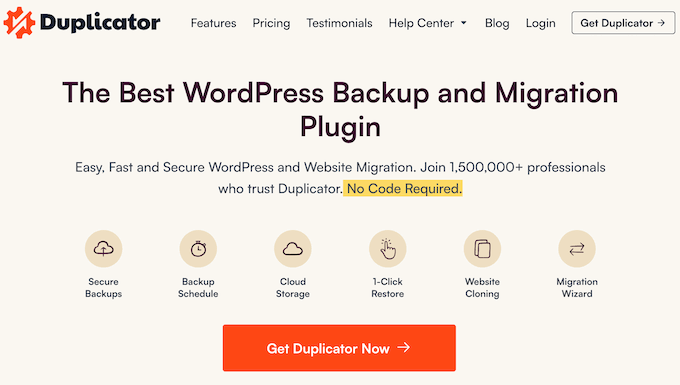
Like CodeGuard, Duplicator can store your backups on Amazon S3, ensuring your data stays safe.
It also supports other popular cloud storage services like Google Drive, Dropbox, and Microsoft OneDrive, plus any S3-compatible service like Wasabi.
The Duplicator Starter plan costs $49.50 per year, making it more affordable than CodeGuard. This plan lets you back up two WordPress websites and includes:
- Unlimited backups and migrations
- Scheduled automatic backups
- Recovery points for easy restoration
- Server-to-server transfers
- Custom backup filters
Want to learn more about Duplicator? Check out our detailed Duplicator review, where we test all its features and show you how to use them effectively.
We hope this article has helped you learn how to set up automatic WordPress backups with CodeGuard. You can also check out our article on how to back up WordPress multisite and our expert picks of the best WordPress migration plugins.
If you liked this article, then please subscribe to our YouTube Channel for WordPress video tutorials. You can also find us on Twitter and Facebook.


Have a question or suggestion? Please leave a comment to start the discussion.