Reaching your audience through multiple channels is essential for effective communication. While email newsletters remain a popular method, SMS messages offer a direct and immediate way to connect with your subscribers, making sure your messages are seen.
Recently, one of our readers asked us about the best way to send SMS messages to their subscribers along with email newsletters. In our testing, we found that Brevo is one of the most powerful and user-friendly platforms for sending SMS messages directly from WordPress.
In this article, we will show you how to send SMS messages to your WordPress users so you can add a sense of urgency and immediacy to your communications.
Why Send SMS Messages to Your Users?
Sending text messages can be highly effective in bringing back customers to your WordPress website. For the best results, you can combine SMS messages with other marketing tools like an email newsletter, push notifications, and search traffic.
Text messages have a fantastic open rate. Some studies suggest that SMS open rates are as high as 98%.
Compare that with a typical open rate of just 20% for emails, and you can see why SMS messages are becoming a preferred marketing medium.
People also check text messages much more quickly than they check emails. It takes an average of 90 seconds for someone to respond to a text and 90 minutes to respond to an email.
Of course, you don’t want to overdo it. Even when they have opted in, most users won’t want daily texts from you. Even weekly might be too much.
Important: Make sure that you obey the law. Different countries have different legal requirements for text messages, particularly marketing messages.
You might also want to use SMS messages to send receipts or order updates from your WooCommerce store. We will cover how to do that later in this tutorial.
For the sake of this tutorial, we will be using the Brevo platform. However, you can also use other email marketing solutions like Omnisend, HubSpot, and more.
With that being said, let’s take a look at how to send SMS messages using Brevo.
Sending SMS Marketing Messages Using Brevo
Brevo (formerly Sendinblue) is an email marketing service that also allows you to send SMS messages to your subscribers.
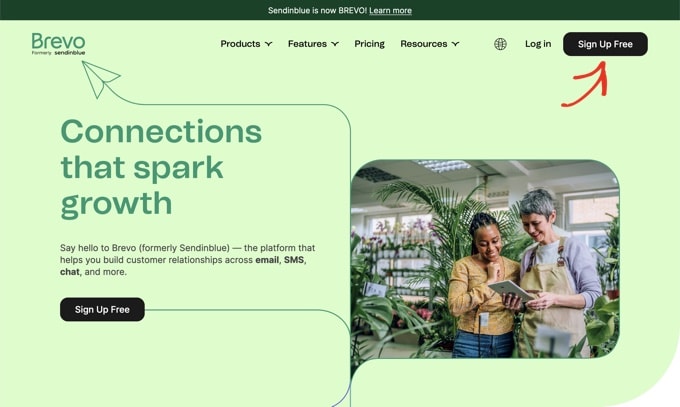
To get started, you will need to set up an account with Brevo if you haven’t already got one. On the Brevo website, just click the ‘Sign Up Free’ button to start creating your account.
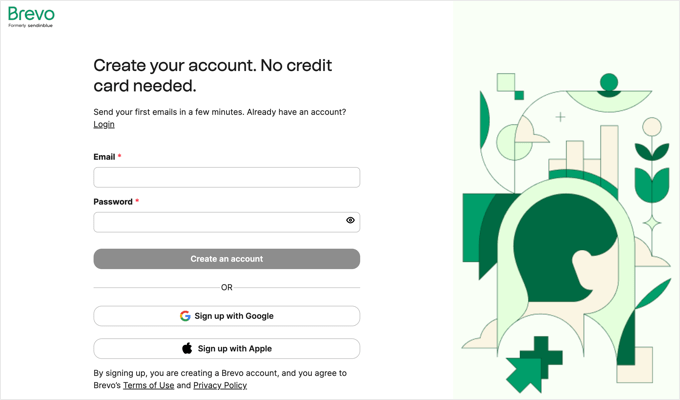
You can get started creating an account by typing in your email address and password. After that, you will need to click the ‘Create an account’ button.
Alternatively, you can use the buttons to sign up using your Google or Apple credentials.
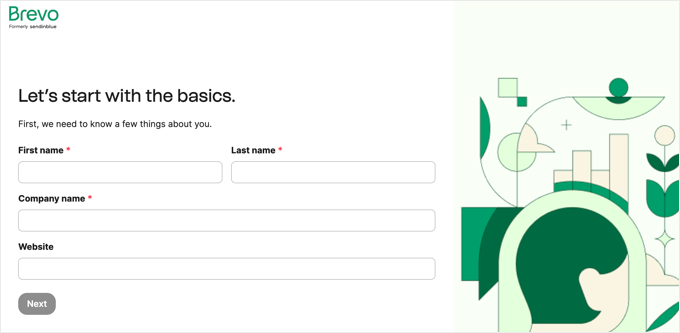
This will bring you to a screen where you can complete your user profile. Simply fill in the form and then click the ‘Next’ button. There will be several pages to fill in.
During this process, an activation code will be sent to your phone in an SMS message to confirm the number is actually yours.
After that, you will be able to choose one of Brevo’s plans, including a free plan. The different plans include sending emails, starting at 300 emails per day. However, you will need to purchase credits to send SMS messages.
Once you have finished the account setup process, you will see your Brevo dashboard.
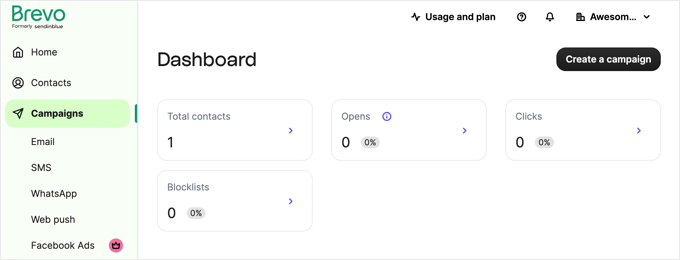
Before you can start sending text messages, you will need to contact the support team. Go to the Brevo contact page and write a message that includes:
- A request to activate your account
- Your WordPress website’s URL
- A note that you will be sending marketing messages
Once your account has been approved, you will get an email from Brevo. Note that this can take up to 24 hours.
Buying SMS Credits for Your Brevo Account
While you are waiting for your account to be approved, you can continue setting up your Brevo account. The first thing you need to do is activate the SMS app in Brevo.
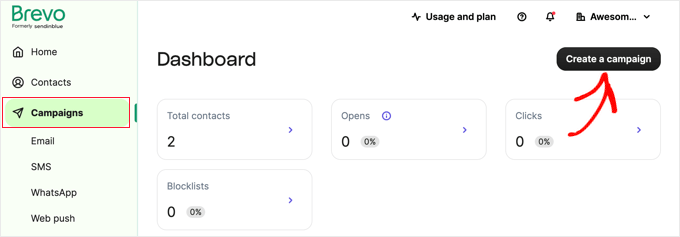
From the Campaigns dashboard, click the ‘Create a campaign’ button.
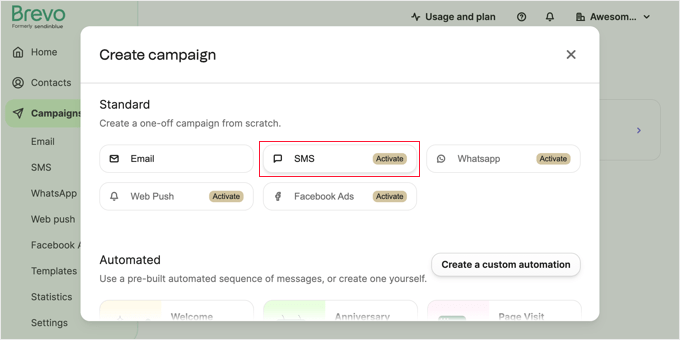
You will see the different types of campaigns you can create. Notice that email campaigns are active while the other types of campaigns are not.
You just need to click ‘Activate’ next to SMS.
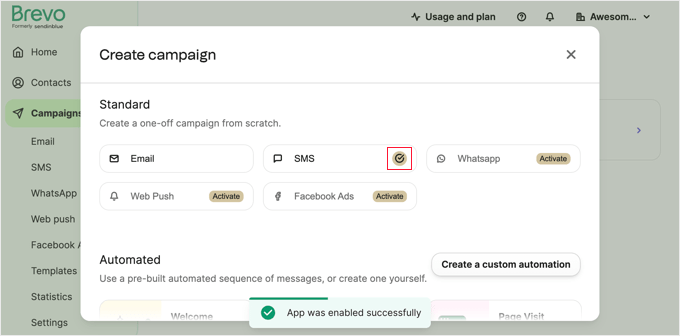
After a few seconds, you will see a message that the app was enabled successfully, and there will be a tick mark next to ‘SMS’.
You can now close the popup by clicking the ‘X’ icon at the top right.
Now that the SMS app is active, you can purchase some SMS credits.
To do that, you need to click ‘Usage and plan’ at the top of the page. This will show you how many emails and SMS credits you have to use in your campaigns.
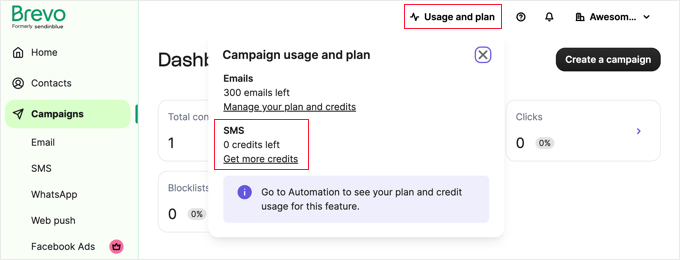
Your current SMS balance is 0, so you will need to click the ‘Get more credits’ link.
Brevo defaults to selling you 100 messages at a time. If you like, you can purchase more credits by typing a larger number under ‘Number of messages’.
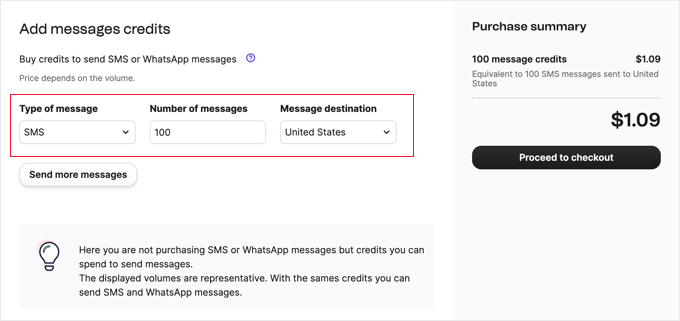
Note: It costs 1 credit to send a text message in the US, but you will need to pay more than 1 credit per message in other countries.
Once you have selected the number of credits, go ahead and complete your purchase.
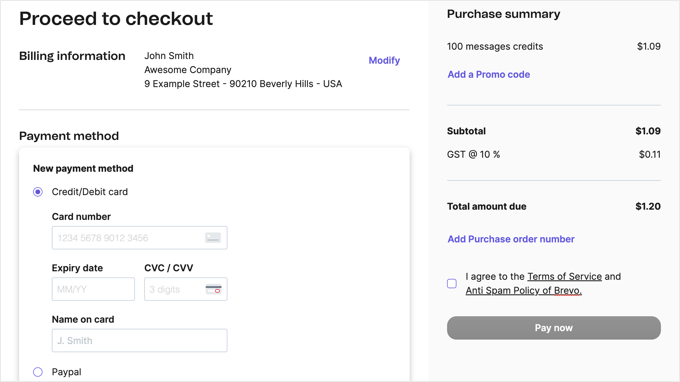
Once you have bought your credits, you may need to wait up to 48 hours for them to appear in your account. You might also get an email from Brevo asking you for more details about what type of SMS marketing you plan to do.
This is to help you stay in compliance with SMS laws.
You will need to reply to them with answers to their questions before your credits can be added to your account.
Creating Your SMS Marketing List
In order to send out SMS messages, you will need to import your contact list.
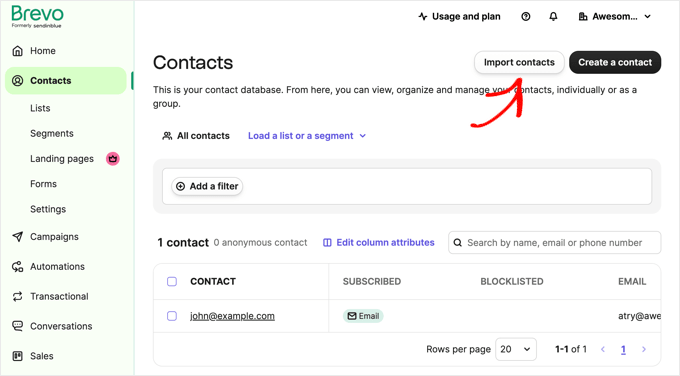
You can get started by clicking the ‘Contacts’ tab on the left. Or if you are still looking at the Campaigns Dashboard, then you can click the ‘>’ arrow next to ‘Total contacts’.
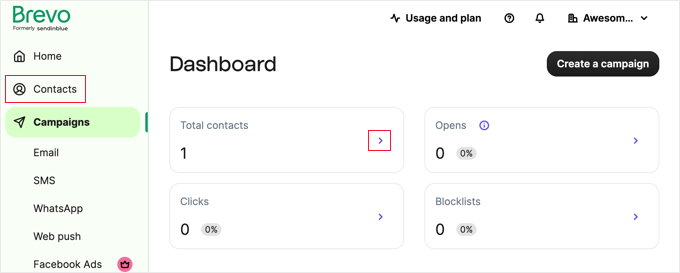
This will display a list of all your contacts. Right now, you will be the only contact on the list.
Now, you can click the ‘Import contacts’ button at the top of the page.
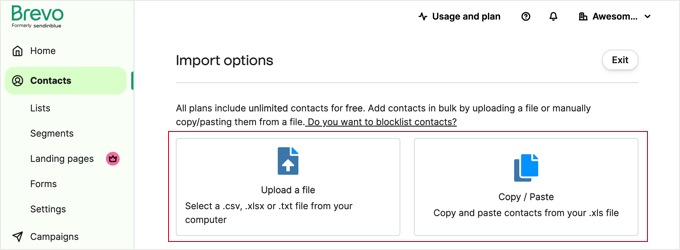
This will take you to the ‘Import options’ page. You will be given two options for importing your contacts.
You can either upload a .csv file from your computer or you can copy and paste contacts line by line. Whichever option you choose, Brevo will offer examples to help you.
Important: Your users need to have opted in for SMS marketing messages. You can collect website visitors’ phone numbers and consent using a WordPress form plugin like WPForms or a marketing popup plugin like OptinMonster.
Sending Your First SMS Campaign
Once your credits show up, you can start sending messages.
It’s a good idea to send a test message first so that you know that everything is working correctly. The phone number you use for the test message needs to belong to a contact in your list.
You can use the number you added when you first signed up. Or, if you want to use a different phone number for your test, then you will need to add a test contact in Brevo.
Simply go to the Contacts section in your dashboard and click the ‘Create a contact’ button.
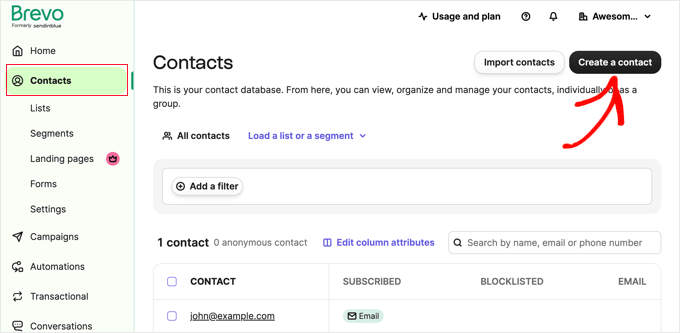
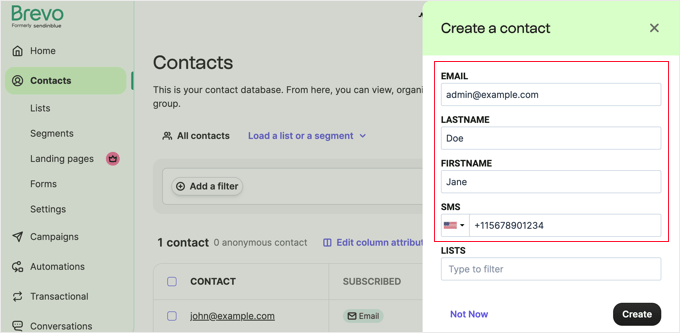
A panel will pop up on the right of the screen where you can create a contact.
You need to fill in your details, including your mobile phone number.
After that, you need to add your test contact to a list.
You can use an existing list or add a new one.
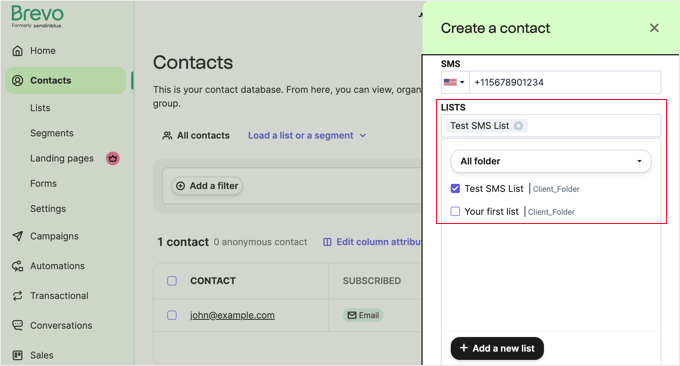
Once you have done that, you need to click the ‘Create’ button at the bottom of the page. You should see a message telling you that the subscriber has been successfully added.
Now, you can try sending a test SMS.
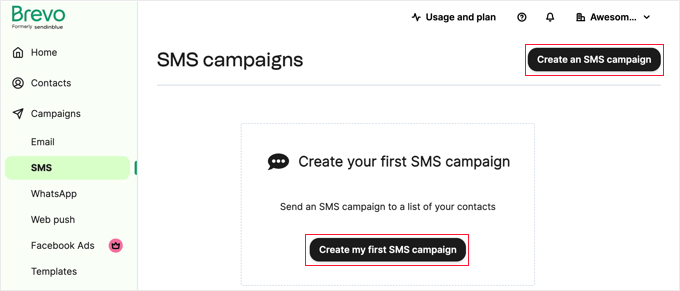
First, go to the Campaigns » SMS tab in your Brevo dashboard. Next, click either the ‘Create an SMS campaign’ or ‘Create my first SMS campaign’ button.
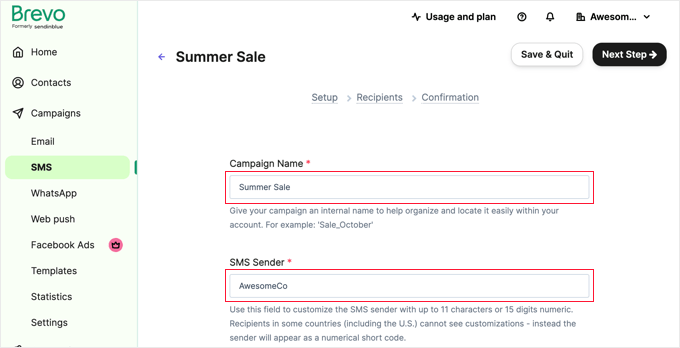
You can enter whatever you want for your Campaign Name. This isn’t seen by the recipients but should make sense to you when you look at your campaigns in the future.
You should also enter an SMS Sender. This will be displayed for users in certain countries.
If you will be sending SMS messages to customers in the United States, then you must enable the ‘Manage compliance for the United States’ toggle.
This is important because it will help you follow United States laws for text messages.
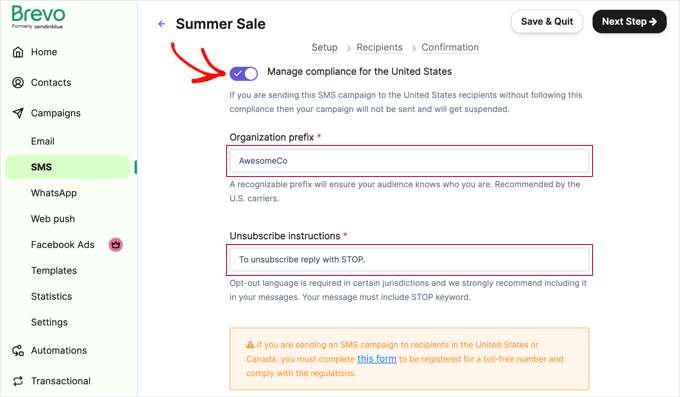
This will give you two more options to fill in: an organization prefix so that your customers will recognize who the message is from and unsubscribe instructions.
If customers in the United States or Canada will be receiving this SMS message, then you will also need to click the ‘this form’ link in the orange box to register for a toll-free number and comply with regulations.
Next, enter your SMS message. Beneath the message box, you can see how many characters you have used and how many SMS messages will be sent.
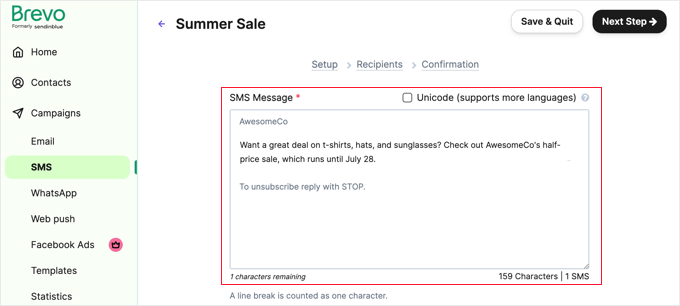
If you use more than 160 characters, then the message will be counted as 2 SMS messages.
At the bottom of the screen, click the ‘Send a test’ button when you are ready.
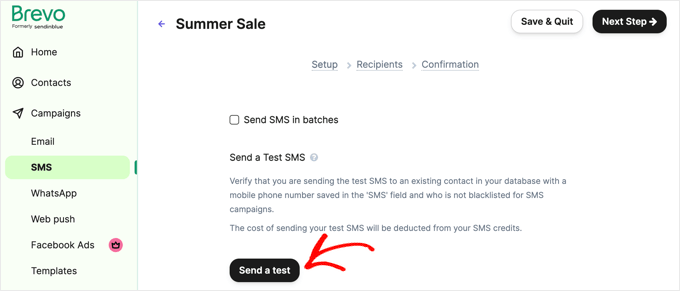
This will pop up the ‘Send a test’ box.
There is just one field where you should enter your mobile number, which you included when you added yourself as a contact earlier. After that, you need to click the paper airplane button to send the SMS.
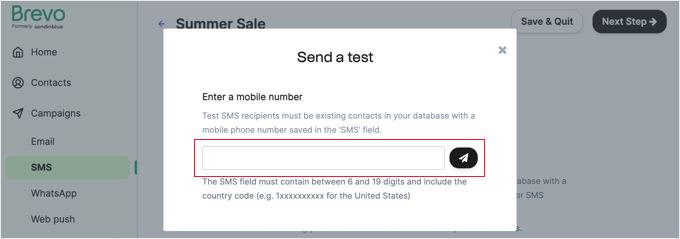
You should see a message telling you that your test message has been sent successfully.
Now, check your phone to see if the text has come through. Here’s ours:
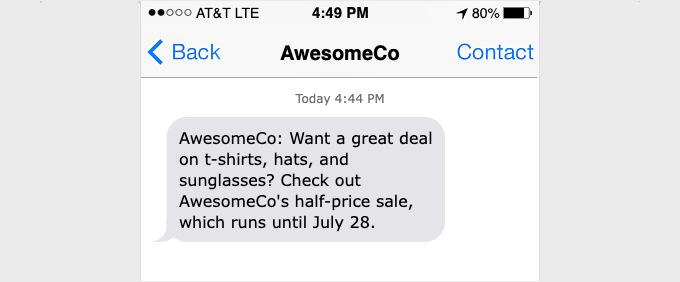
If your text hasn’t arrived, wait a minute or two, and it should appear. If not, double-check that you are using the right mobile number.
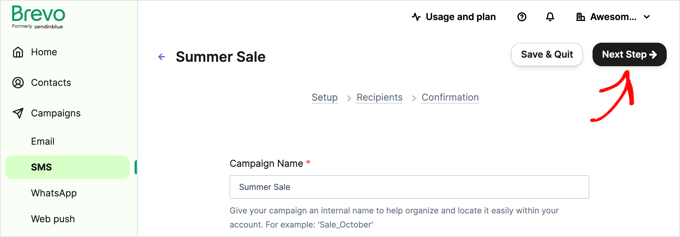
Once you know that everything’s working, you can continue setting up your campaign. Click the ‘X’ button to close the ‘Send a test’ window, and then click the ‘Next Step’ button in the top right corner of the screen.
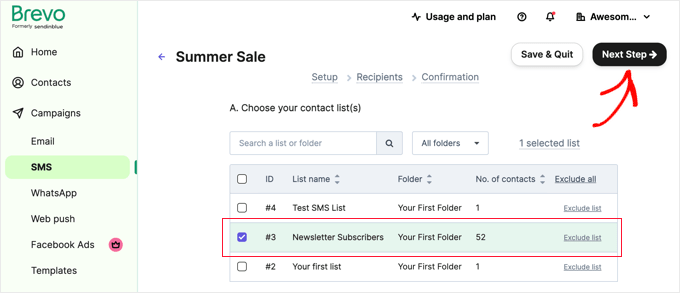
Now, you will need to choose the contact list you want the message to go to. If you like, you can select multiple lists.
Just check all the lists you want to use, then click the ‘Next Step’ button.
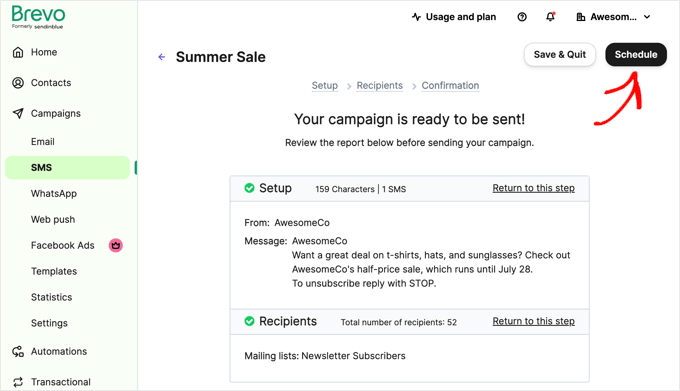
Your SMS campaign is now ready to send.
You can review the details and change them if you want to, using the ‘Return to this step’ links. Once you are happy, simply click ‘Schedule’ in the top right.
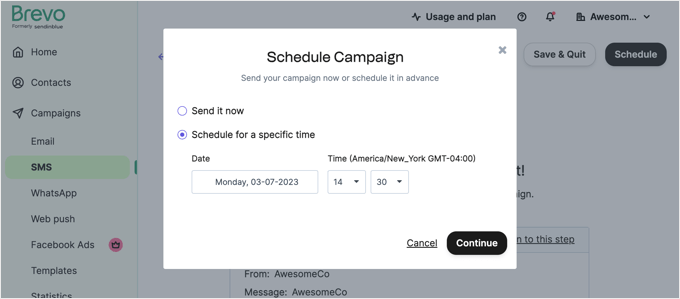
You can either schedule your campaign so that your texts are sent out at a specific time, or you can send the messages immediately.
Just make sure you avoid sending the campaign early in the morning or late at night. Be mindful of time zones, too. Not everyone will remember to turn on Do Not Disturb mode overnight.
Sending SMS Messages to Your WooCommerce Customers
What if you want to send your customers notifications about their orders?
If you have decided to start an online store, then you might want to send text updates as well as emails to your customers.
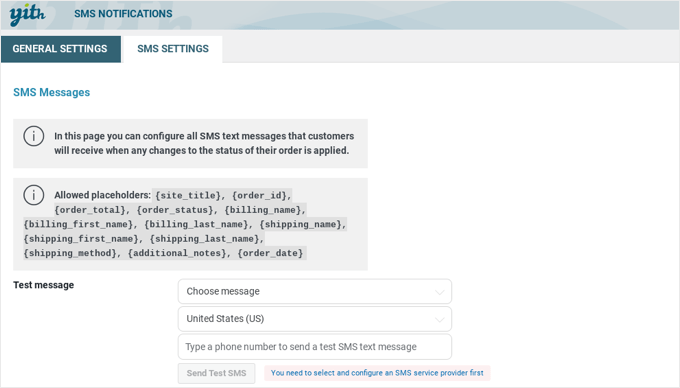
Sending WooCommerce SMS Notifications Using YITH WooCommerce SMS Notifications
The easiest way to do this is with an SMS plugin like YITH WooCommerce SMS Notifications. This plugin lets you use an SMS gateway, such as Twilio, to send text messages to your customers. They receive these texts when their order status changes, such as when it’s dispatched.
You can set up YITH WooCommerce SMS Notifications so that it’s enabled for all customers, or you can let customers opt-in at the checkout.
Also, you can use it to get your own SMS notifications about new orders. This makes it easy to stay on top of things if you are away from your computer.
Sending WooCommerce SMS Notifications Using FunnelKit Automations
If you are looking for an alternative, then you can use FunnelKit Automations to send SMS notifications to your WooCommerce customers.
FunnelKit Automations is one of the best marketing automation tools for WooCommerce sites. It allows you to easily set up automated SMS and email campaigns right from your WordPress dashboard.
It comes with pre-built automations for new customers, first orders, post-purchase sequences, shipment tracking notifications, abandoned cart reminders, anniversary coupons, and more. Or, you can create your own workflows using the visual automation builder.
Sending WooCommerce SMS Notifications Using Uncanny Automator
A third option is to use Uncanny Automator to send SMS messages to your WooCommerce customers, and we have written a step-by-step tutorial to show you how.
You can learn more in our guide on how to send Twilio SMS notifications from WooCommerce.
Expert Guides Related to SMS, Phone, and Chat in WordPress
Now that you know how to send an SMS to your WordPress users, you may like to see some other guides related to SMS, phone, and chat:
- How to Get SMS Text Messages From Your WordPress Forms
- Best SMS Marketing Plugins for WordPress (Expert Pick)
- How to Send Twilio SMS Notifications from WooCommerce (Step by Step)
- Best Virtual Business Phone Number Apps (w/ Free Options)
- Best Voice Message Plugins for WordPress
- Best Business Voicemail Transcription Services (Text and Email)
- How to Add a Chatbot in WordPress (Step by Step)
- How to Add LiveChat to Your WooCommerce Store (and Boost Sales)
- Best WordPress Chat Plugins (Expert Pick)
We hope this tutorial helped you learn how to send SMS messages to your WordPress users. You may also want to see our guide on how to choose the best business VoIP provider and our expert picks for the best live chat software to grow your sales.
If you liked this article, then please subscribe to our YouTube Channel for WordPress video tutorials. You can also find us on Twitter and Facebook.


Ralph
I would love to use this method to have better conversions in my shop but sadly my country has really strict laws in terms of keeping data such as phone numbers and it is not cheap to have required security. But as always great guide and maybe I will use it in the future, when my business will get better. Wish me luck!
WPBeginner Support
Good luck!
Admin
kumarsumon
Really assisted always WP beginner thanks to sharing a helpful article.
WPBeginner Support
You’re welcome, glad our guide was helpful
Admin