The WordPress block editor makes it easy to create structured layouts for your pages and posts. For example, the Gutenberg nested blocks feature lets you add multiple blocks within a parent block, helping you build more organized and visually appealing designs. This allows you to customize different block elements at the same time.
At WPBeginner, we have been using a lot of different block editor features on our blog, including reusable blocks, nested blocks, and tables, to improve our workflows. Our experience has helped us learn the best tips and tricks for getting the most out of the Gutenberg block editor.
In this article, we will show you how to easily select and use WordPress nested blocks.
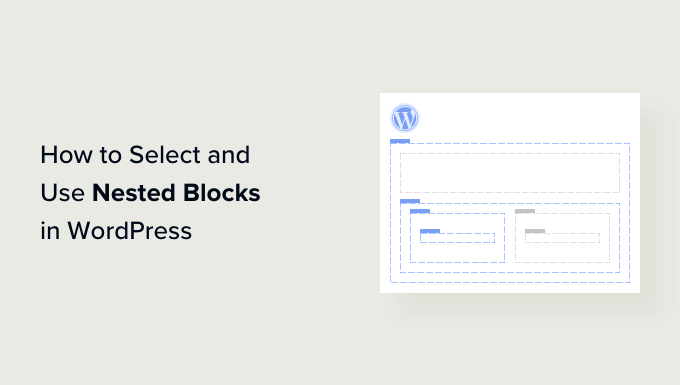
What Are WordPress Nested Blocks?
The WordPress Gutenberg nested block feature allows you to insert (or ‘nest’) one or more blocks within another block.
Nested blocks help you create more complex layouts on your WordPress website by adding multiple blocks inside each other. This allows for more flexibility when designing and formatting content for pages and posts.
For instance, you can nest multiple Image blocks within a Group block to display a set of photos from a particular event or a series of artworks created using a particular technique.

Additionally, the nested block feature allows you to edit individual blocks separately. This allows you to customize each block according to your needs without affecting the other blocks.
This, in turn, results in better content organization, makes content more attractive, and streamlines the creative process.
That being said, let’s see how you can easily select and use WordPress Gutenberg nested blocks.
How to Use the WordPress Nested Blocks
You can easily nest multiple blocks together using the Group or Columns block in the Gutenberg block editor.
First, you need to open up an existing or new post in the block editor from the WordPress admin sidebar.
From here, simply click on the add block ‘+’ button in the top left corner of the screen and find the Group block. Upon clicking it and adding it to the page, you must select a layout for the blocks that you will nest together.
For this tutorial, we will be selecting the ‘Group’ layout.
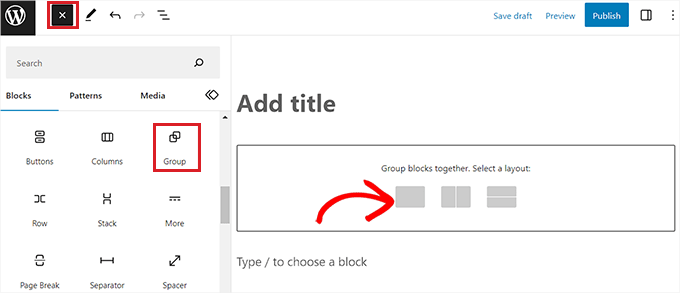
Next, simply click on the ‘+’ button on the screen to start adding content within the parent block.
For the sake of this tutorial, we will be adding an Image block.
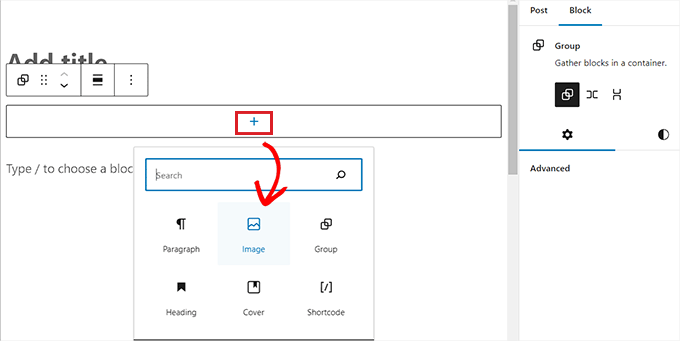
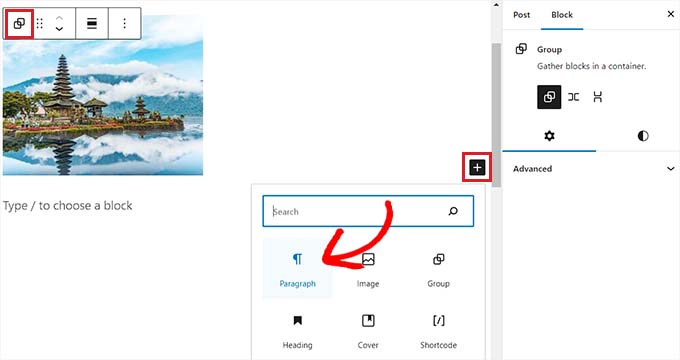
Upon adding the block, just click the ‘Group’ button in the block toolbar at the top to select the parent block.
Next, you need to click the ‘+’ button to open up the block menu again, from where you can choose other blocks to add.
How to Configure WordPress Nested Block Settings
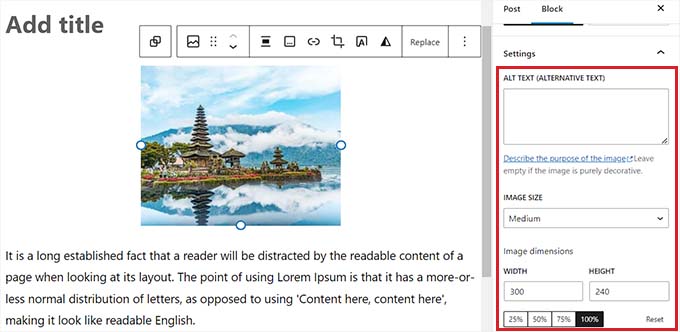
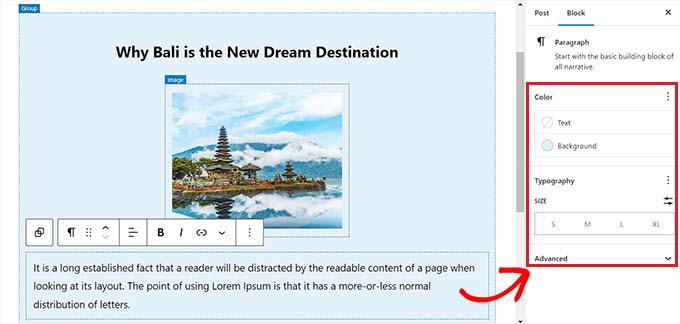
Once you have nested multiple blocks, you can configure their individual settings by clicking on each block. This will open up the block settings in the right column on the screen.
From here, you can adjust the background color, text color, and size of the individual blocks without affecting the other blocks that are nested within it.
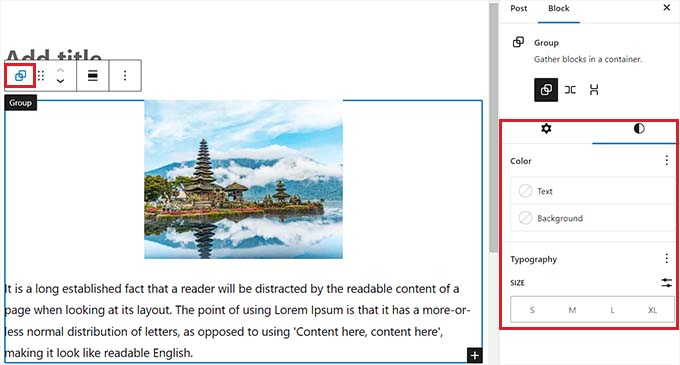
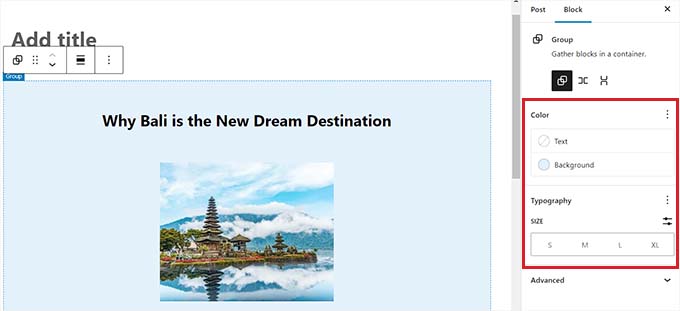
To configure the settings of all the nested blocks together, you will have to click the ‘Group’ button in the block toolbar at the top. This will open up the parent block settings in the right column.
You can now configure the justification, orientation, background color, text color, and typography of all the nested blocks.
Keep in mind that these settings will affect all the blocks nested within the parent block.
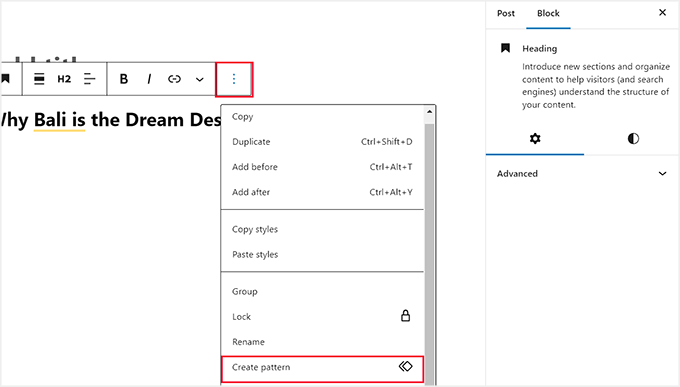
You can also convert an existing individual block into nested blocks by clicking the ‘Options’ button in the top toolbar of any block.
This will open up a menu prompt, where you need to select the ‘Create Pattern’ option.
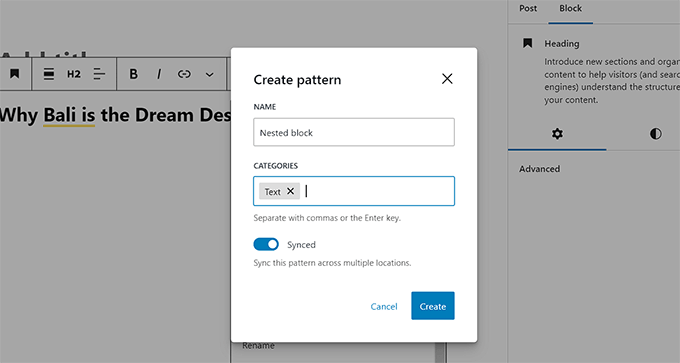
Once you have done that, a prompt will open up asking you to give a name and choose a category for your new reusable block.
Then, click the ‘Create’ button to store your settings.
After you are satisfied, don’t forget to click the ‘Publish’ or ‘Update’ button to save your changes.
In our example, we have nested a Title, Image, and Paragraph block within a Group block.
This is how the nested blocks looked on our demo website.

Bonus: Use the Wayfinder Plugin to Easily Select Nested Blocks
Sometimes, it can be difficult to select an individual block and configure it when there are multiple blocks nested together.
Luckily, the Wayfinder plugin makes it super easy to select nested blocks from a parent block and even tells you the type and class of the blocks.
First, you will need to install and activate the Wayfinder plugin. For more instructions, see our beginner’s guide on how to install a WordPress plugin.
Upon activation, head over to the Settings » Wayfinder page from the WordPress admin sidebar.
Once you are there, all the settings will already be activated. You simply need to uncheck the box next to the settings that you don’t want to use.
For example, if you want Wayfinder to display block types for all the blocks in the editor, then keep the box checked next to the ‘Display block type’ option.
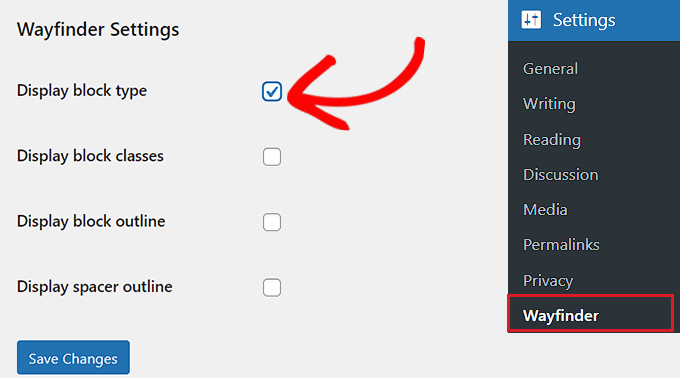
However, if you don’t want the plugin to display block classes, simply uncheck the box next to that option.
After configuring the settings, don’t forget to click the ‘Save Changes’ button.
Next, you need to open up an existing or new post in the WordPress block editor from the dashboard.
Once you are there, hovering your mouse over any inner block will show an outline with its name. You will also be able to see the outline and name of any nested blocks within the parent block.
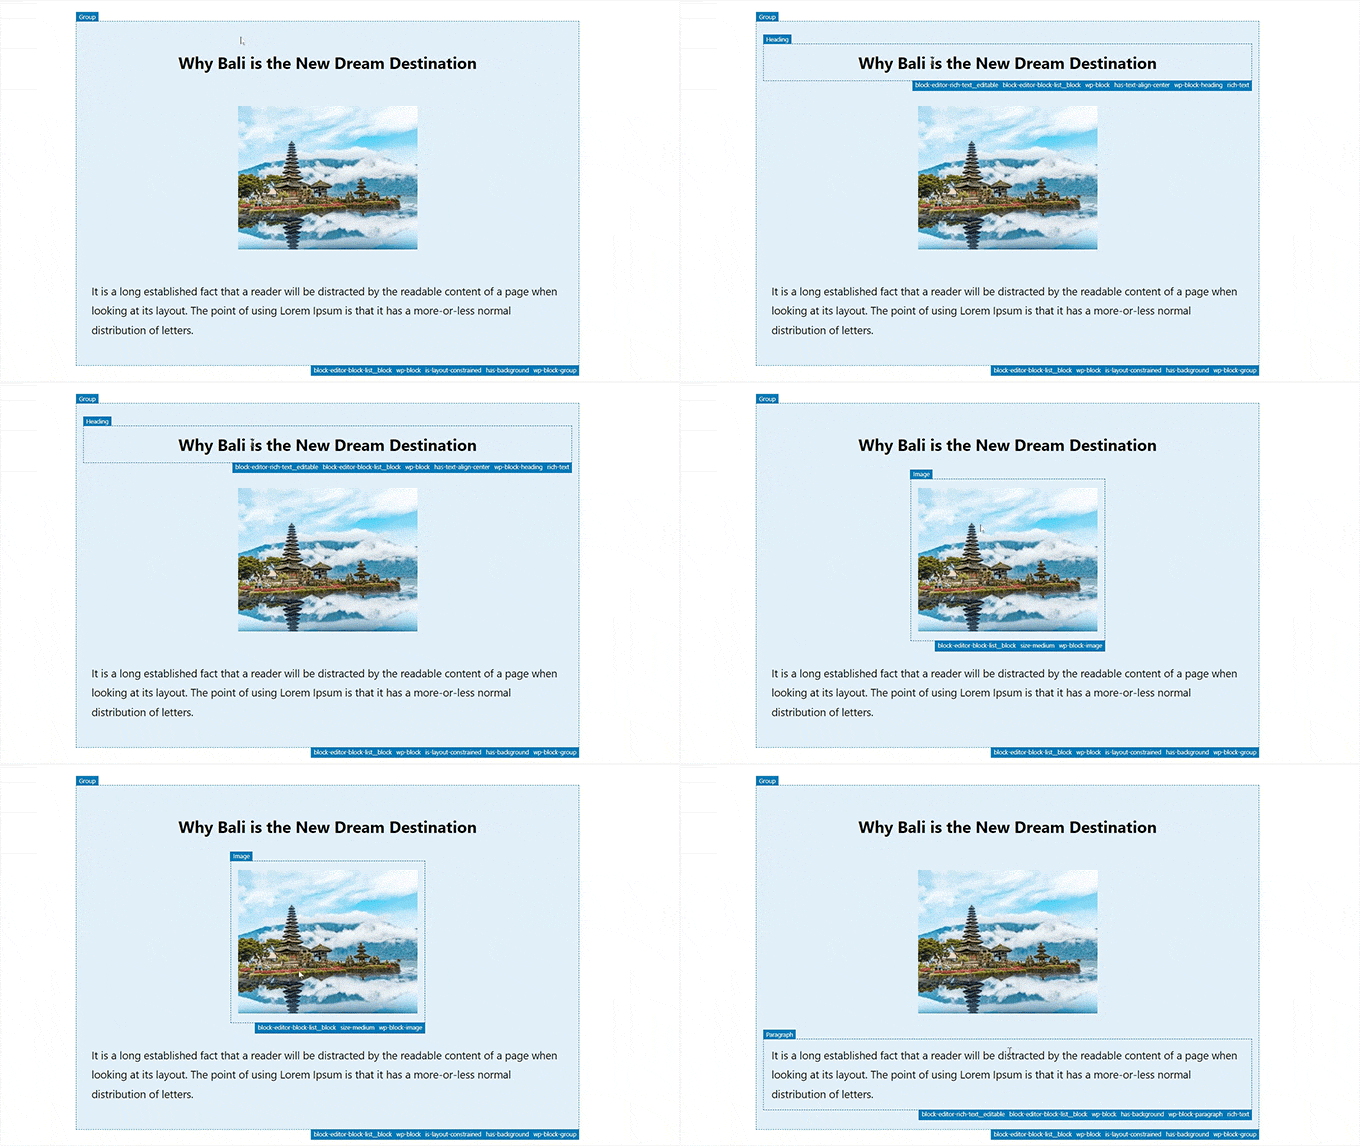
This will help you identify all the different blocks that are nested within a Group or Column block.
From here, you can easily select an individual block from the parent block to configure its settings.
You can also select all the nested blocks at once by clicking on the ‘Columns’ or ‘Group’ heading. This will open the parent block settings in the right column.
Once you have configured the block settings, simply click the ‘Update’ or ‘Publish’ button to save your changes.
We hope this article helped you learn how to select and use WordPress nested blocks. You may also want to see our step-by-step tutorial on how to change block height and width in WordPress and our beginner’s guide on how to use WordPress block patterns.
If you liked this article, then please subscribe to our YouTube Channel for WordPress video tutorials. You can also find us on Twitter and Facebook.


Christopher Molitor
Great article and THANKS for mentioning Wayfinder!
p.s. Released version 1.1.7 to add support to latest version of WP.
WPBeginner Support
Glad you liked the article and glad we could share Wayfinder
Admin
kzain
Nested blocks seem like a game-changer for creating unique layouts on my WordPress site! The drag-and-drop functionality sounds super user-friendly. I love that you can customize each nested block individually. This opens up so many possibilities for creating engaging website content. Thanks for this helpful guide!
Ralph
I’m using nest blocks for image on left and text on the right and I want it to stay that way not only on desktop but also on mobile but it just doesn’t It places text under the image. Is this normal in case of mobile or am I doing something wrong?
WPBeginner Support
It would depend on the theme but it is very common to happen on mobile to ensure the text remains readable on mobile.
Admin
Jiří Vaněk
Thanks to these articles, I’m slowly getting acquainted with Gutenberg. I’m used to very simple solutions from Elementor, and here everything seems a bit complicated or rather unfamiliar to me. However, sometimes I come across people who want help with a website exclusively using Gutenberg and nothing else. So, I appreciate these guides where I can get my hands on, try out, and learn things that might be completely ordinary for someone using Gutenberg.