Bloggers often monetize content on their websites using subscriptions or one-time payment models. They do this by restricting certain content to registered users.
This is easy to set up if you have the right WordPress plugin. Fortunately, we’ve tested and worked with multiple plugins over the years that can help you set up content restrictions. Based on our experience, MemberPress and Restrict Content Pro are some of the best options you can use.
In this article, we will show you how to restrict content to registered users in WordPress.
Why Restrict Content to Registered Users?
If you are running a membership site or want to monetize your WordPress blog, then restricting content access is a great way to make money online.
You can lock specific pages and encourage users to subscribe to a premium plan to access the exclusive content.
For example, let’s say you have multiple guides on your site. You can turn them into an eBook and restrict that content to paying members only. Similarly, if you have a video section or online courses, then you can lock them for your paid subscribers.
Restricting content to registered users also helps build a community. You can set up a forum, a Facebook group, or a Discord server exclusively for members. This way, you can add more value for registered users.
That said, let’s look at how you can easily restrict content in WordPress for registered users. We will share 2 methods using a premium and a free plugin. You can click the links below to jump to your preferred method:
Method 1: Restrict Content to Registered Users Using MemberPress (Recommended)
The easiest way to lock content access is by creating memberships using the MemberPress plugin. It is the best membership plugin for WordPress and helps you make money by charging a one-time or recurring fee for exclusive content.
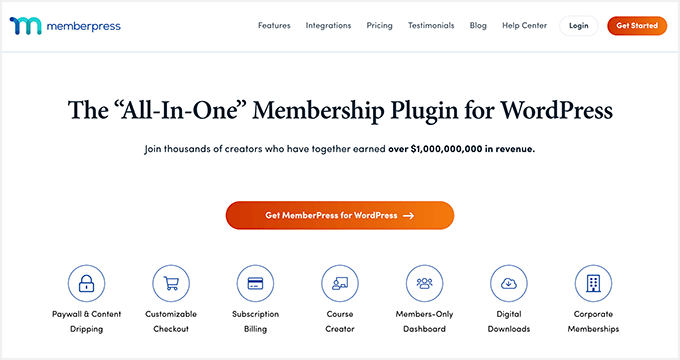
MemberPress is a premium plugin, and you will need at least the Basic plan to get started. WPBeginner users can enjoy up to 60% off by using our MemberPress coupon.
To learn more, see our detailed MemberPress review.
Step 1: Setting Up the MemberPress Plugin
First, you will need to download and install the MemberPress plugin. If you need help, then please see our guide on how to install a WordPress plugin.
Upon activation, you will need to head to MemberPress » Settings from the WordPress dashboard and head to the ‘License’ tab.
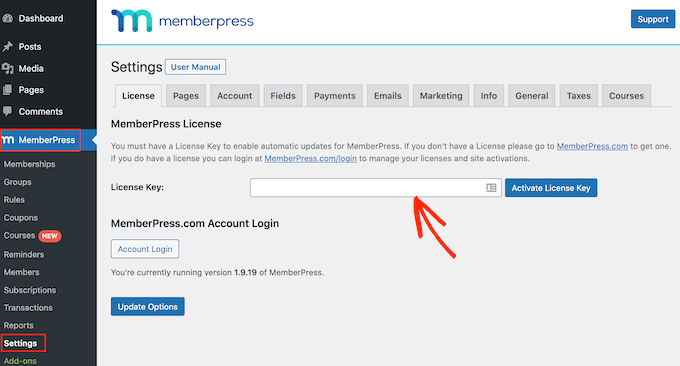
From here, simply enter the license key and click the ‘Activate License Key’ button. You can find the key in your MemberPress account area.
After that, you will need to switch to the ‘Payments’ tab and add a payment gateway. Go ahead and click the ‘+ Add Payment Method’ button.
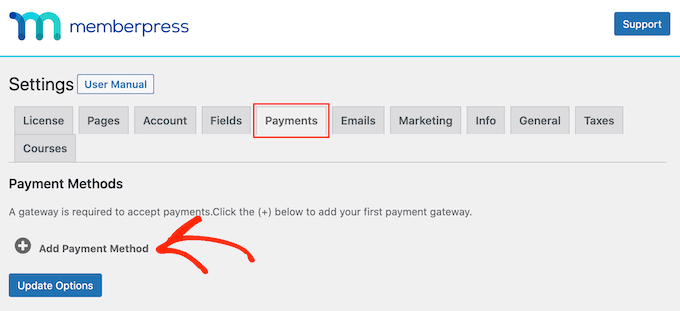
MemberPress works with many top payment providers like PayPal, Stripe, and Authorize.net.
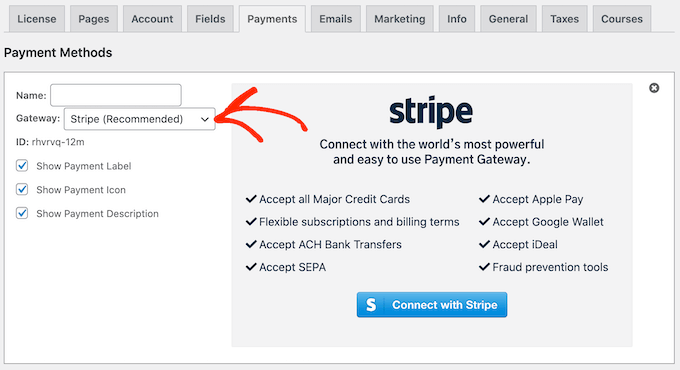
Simply enter a name for your payment option and click the ‘Gateway’ dropdown menu to select a service.
Step 2: Create Membership Levels
Once you’ve connected a payment provider to MemberPress, the next step is to create different membership levels. With each membership, you can specify the level of access a user has for viewing restricted content.
To start, simply go to MemberPress » Memberships from the WordPress admin panel and click the ‘Add New’ button.
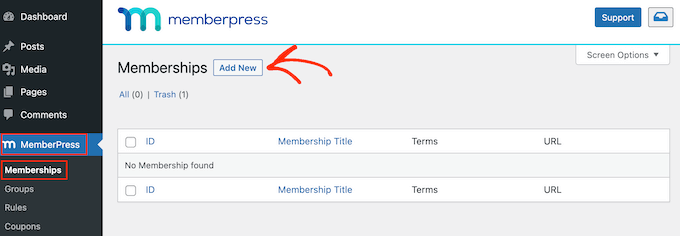
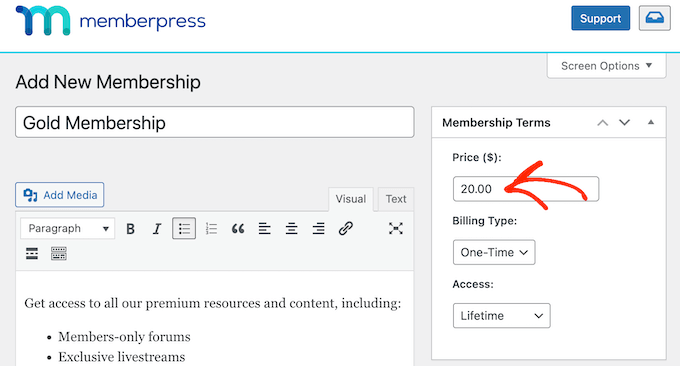
Next, you can enter a title for your new membership and add a description if you want.
In the right panel, you will see options for setting the price and expiration of your membership plan. For instance, you can select the billing type as recurring or one-time and choose the interval to be yearly, monthly, weekly, or custom.
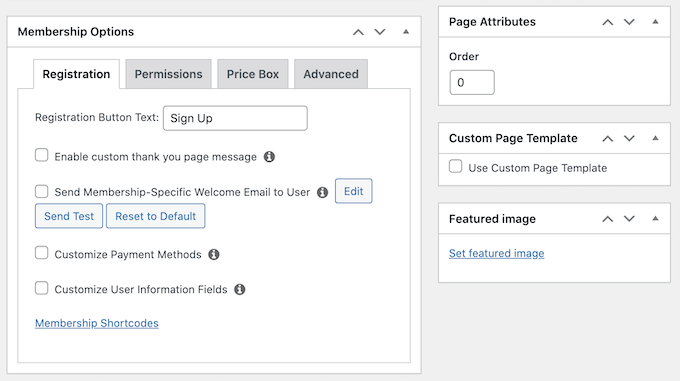
After that, you can scroll down to the ‘Membership Options’ meta box.
Here, you will see different options for editing the registration button text, customizing permissions, and other membership options.
Once you are satisfied with the membership level, simply click the ‘Publish’ button.
Now, go ahead and repeat these steps to create as many membership plans as you want.
Step 3: Restricting Content in WordPress for Registered Users
After setting up membership plans, the next step is to lock content on your site for registered users.
To start, you can head to the MemberPress » Rules page and then click the ‘Add New’ button.
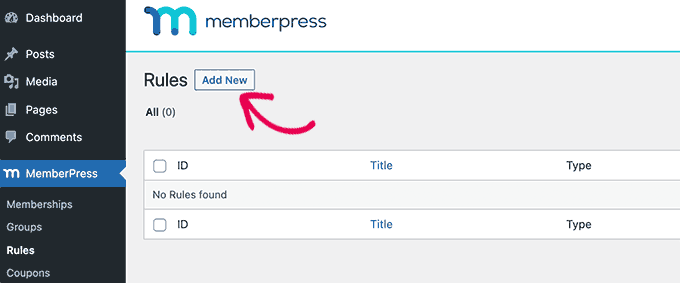
On the next screen, you select the content to protect and set up conditions for accessing it.
First, you can click the dropdown menu under ‘Protected Content’ and pick the piece of content you want to restrict.
MemberPress offers multiple conditions to choose from. There is an option to protect all content, pages under certain categories or tags, a single post or page, and more.
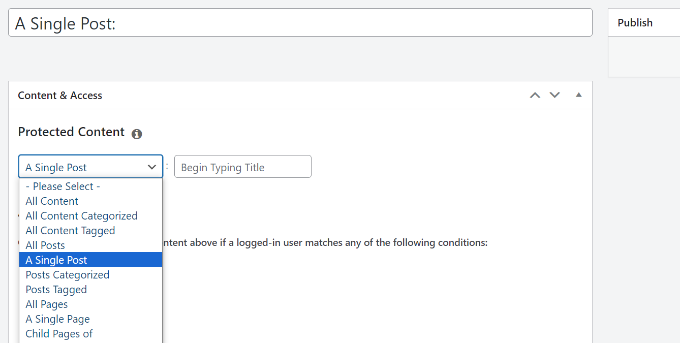
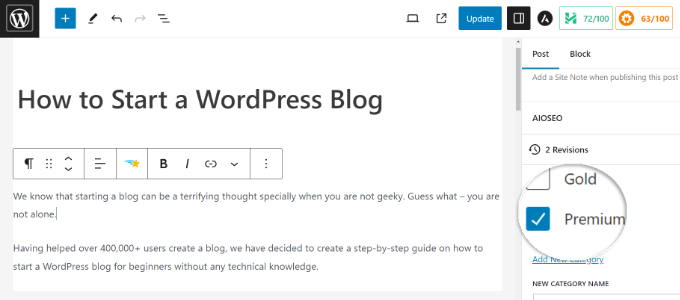
If you want to restrict multiple pages, then you can create a category on your site, pick the ‘All Content with Category’ option, and choose multiple pieces of content to restrict.
Similarly, you can also add tags to specific pages and use the ‘All Content with Tag’ option in MemberPress to restrict access.
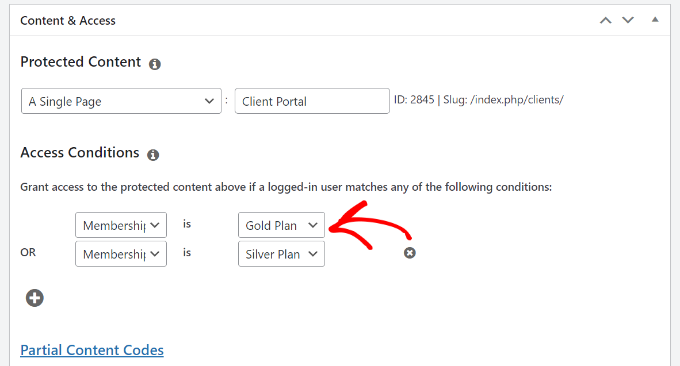
For the sake of this tutorial, we choose to protect a ‘A Single Page’ and then enter the title of the page.
Next, you will need to click the dropdown menu under ‘Access Conditions’ and select the ‘Membership’ option.
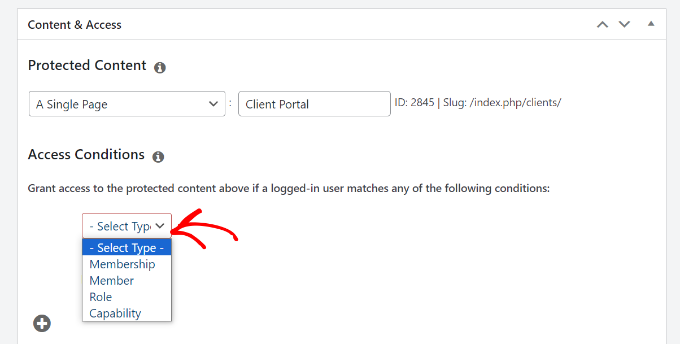
From here, MemberPress will ask you to select a membership level to allow access to the content.
You can also add multiple membership levels by clicking the ‘+’ icon under Access Content and selecting the memberships that can view your content.
Next, you can scroll down to the ‘MemberPress Unauthorized Access’ metabox.
Here, you will find options to show what logged-out or unregistered users will see when trying to view the content.

When you are done, you can simply scroll to the top.
From here, click the ‘Save Rule’ button.
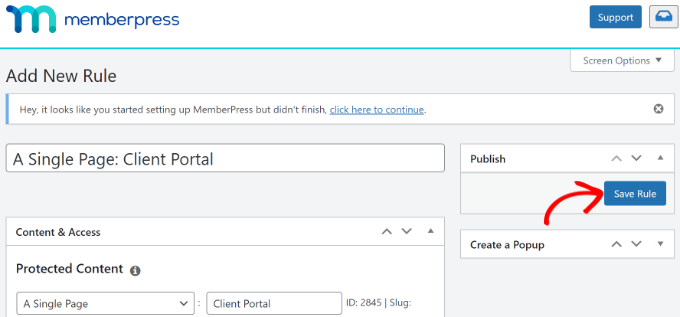
You’ve now successfully restricted content for registered users on your WordPress website.
MemberPress also allows you to create a pricing page, redirect unregistered users to the pricing page, set up a login form, and much more.

To learn more, please see our ultimate guide to creating a WordPress membership site.
Method 2: Lock Content to Registered Users Using Restrict Content (Free)
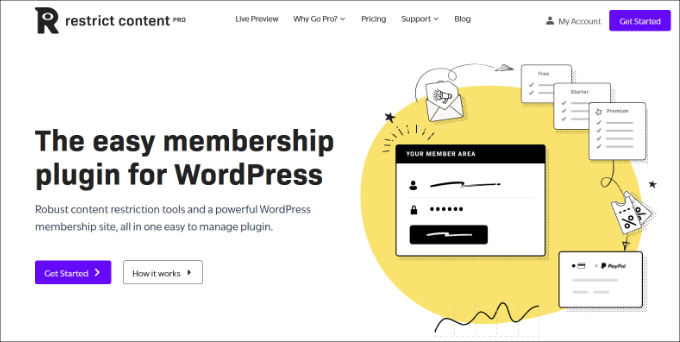
If you are looking for a free way to restrict content to registered users, then you can use the free plan of the Restrict Content Pro plugin.
To start, you will need to visit the Restrict Content Pro website and click the ‘Get Started’ button.
After that, you can sign up for a free account.
Simply click the ‘Get started’ button under the Free plan.
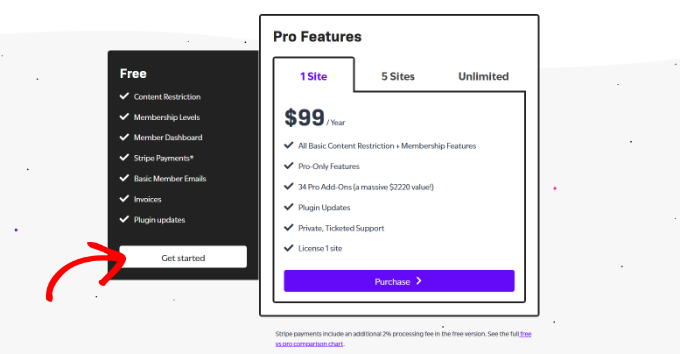
Next, you will see a popup window.
Go ahead and enter your email address and click the ‘Get Your Free Plugin’ button.
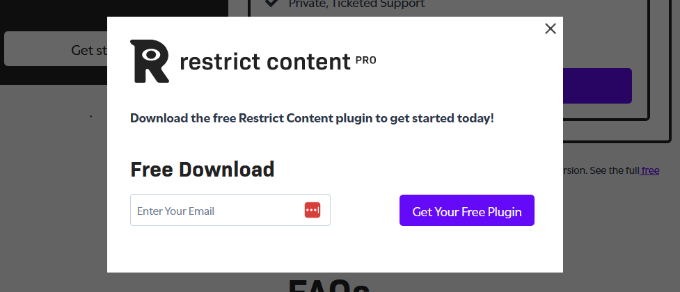
Once you click the button, you will receive an email from Restrict Content Pro with the download link for the free plugin.
From here, you can download the plugin and then install and activate it. If you need help, then please see our guide on how to install a WordPress plugin.
Step 1: Set Up the Restrict Content Plugin
Upon activation, you can head to Restrict » Settings from the WordPress admin panel and go to the ‘General’ tab.
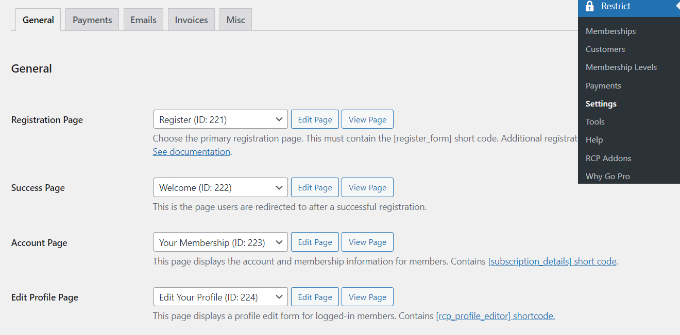
Next, you need to select your registration, success, account management, edit profile page, and billing update pages.
After that, you must click on the ‘Payments’ tab to configure your payment gateway. You will be asked to choose a currency and then select your payment gateways.
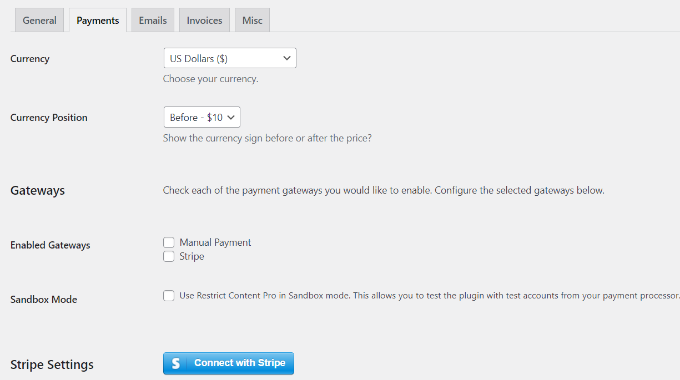
For instance, you can click the ‘Connect with Stripe’ button and follow the onscreen instructions to configure the payment service.
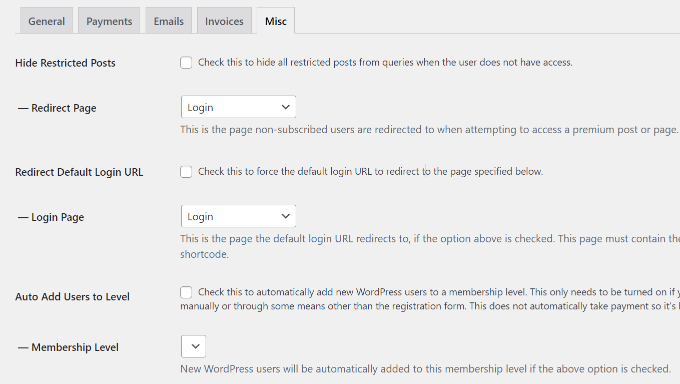
Next, you can switch to the ‘Misc’ tab.
There are some important options available in this tab. You can set up login page redirects, disable account sharing, control form CSS, send IPN emails, and set up reCAPTCHA for registration forms to prevent spam registrations.
Step 2: Create Subscription Levels for Restricted Content
Now, we are ready to create subscription levels for your restricted content.
For example, you can create a subscription level ‘Premium‘ and set a price for it. When you are restricting content on your website, you will be able to choose the subscription level a user must have in order to access that content.
To get started, you can head to Restrict » Memberships Levels from the WordPress dashboard.
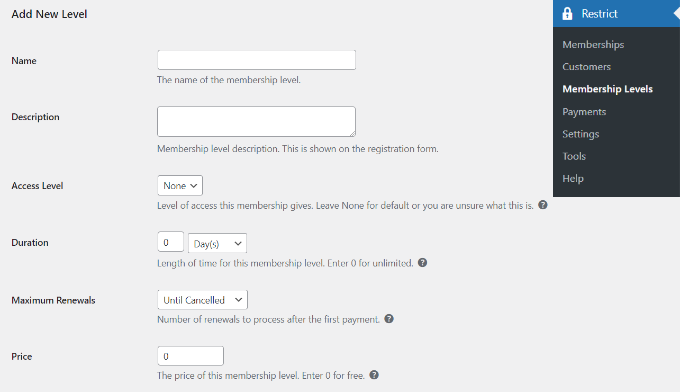
Creating a subscription level in Restrict Content Pro is simple. Simply give your subscription level a title, a description, and a price. You can set the price to zero if you want to create a subscription level for registered non-paying users.
You can choose the duration of a subscription level or set it to 0 to make the duration unlimited.
Lastly, you need to set the status to ‘Active’ and choose the ‘User Role‘ that will be assigned to people after signing up.
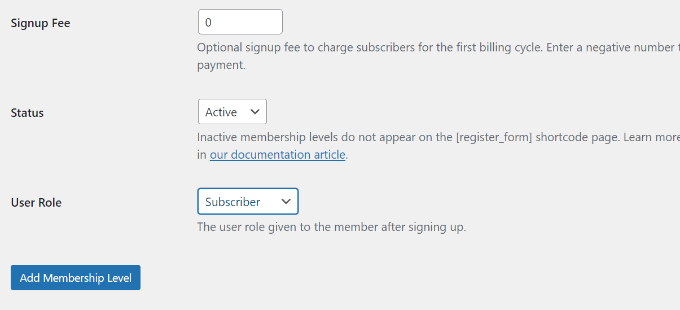
Once you are done, simply click the ‘Add Membership Level’ button.
You can now repeat this step to add as many membership levels as you want on your website.
Step 3: Lock Content for Registered Users
Now, you are ready to lock content for registered users. Go ahead and edit any post or page on your website.
In the content editor, scroll down to the ‘Restrict this content’ meta box. From here, click the dropdown menu under ‘Member access options’ and pick the ‘Members of membership level(s)’ option.
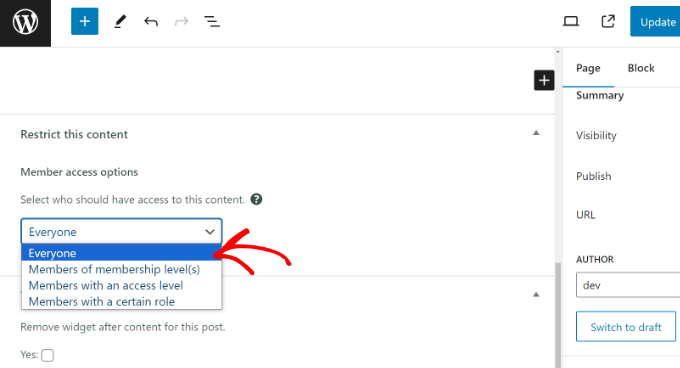
After that, you will see multiple options.
Go ahead and choose the ‘Members of specific membership levels’ option and pick the membership level that can access this content.
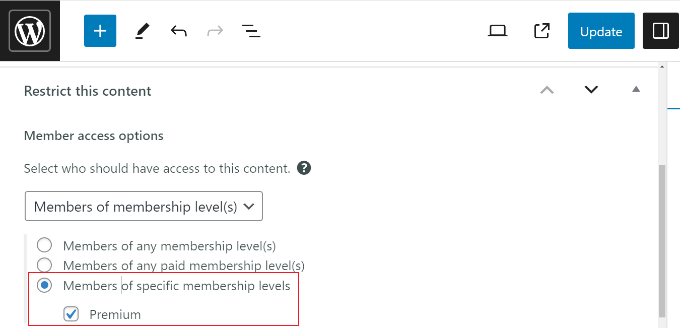
The plugin also lets you restrict content based on user roles. When you are done, go ahead and update your page or post.
That’s it. You’ve successfully locked content for registered users using the Restrict Content Pro plugin.
Bonus: Set Up Content Locking to Grow Your Email List
Content locking is a technique where users must take an action to view content. For instance, you can lock specific pages or guides and encourage people to sign up for your email newsletter or pay a fee to view the content.
The easiest way to set up content locking in WordPress is by using OptinMonster. It is the best lead generation and conversion optimization software that helps you boost sales, grow your email list, and get more conversions.

OptinMonster offers prebuilt campaign templates and a drag-and-drop builder, making it super easy to customize your campaigns. It also has powerful display rules, which let you choose when and where the campaign will be displayed.
You can enable the Lock Content option from the Display Rules settings and choose whether to blur or remove the locked content.
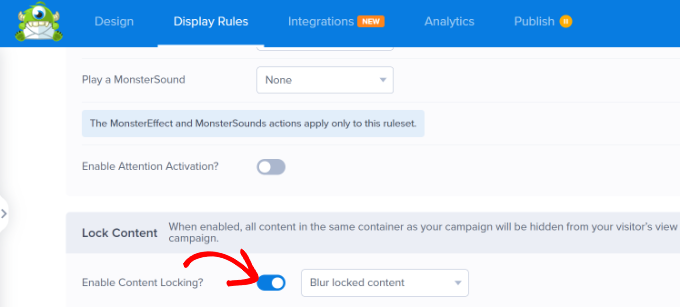
Then, OptinMonster will restrict access to the blog post or landing page until a user performs the desired action, like entering their email address.
For more details, please see our guide on how to add content locking in WordPress.
We hope this article helped you restrict content to registered users in WordPress with MemberPress. You may also want to see our guide on how to run member-only events in WordPress and the best LMS plugins for WordPress.
If you liked this article, then please subscribe to our YouTube Channel for WordPress video tutorials. You can also find us on Twitter and Facebook.


Hajjalah
Thanks for this great article. You have indeed clearly explained the entire process. But I am still wondering one can set promotion offers and if there is a way to show-case sample content of the premium content to the free users to attract them to subscribe.
For-example “a premium post to only show the first paragraph for the free users”. Is that possible? Can promotional offers also be set for some duration using the provided methods?
WPBeginner Support
For what you are wanting, you would want to look into content locking which we cover in our guide below!
https://www.wpbeginner.com/wp-tutorials/how-to-add-content-locking-in-wordpress/
Admin
Jiří Vaněk
MemeberPress is a great plugin. At first I wanted to put paid content on Patreon, but unfortunately there are fees as a percentage of payments. This option to hide articles for paying users on the site is much more convenient because of this. Great.
Prajwal Shewatkar
I use simple restrict by WP chill. It is also worth mentioning.
Gazali
I want to create a wordpress website for my school where each student can see their quarterly report card through login system uploaded by admin. Username and password are provided by the admin and there should be no registration or sign up option, just login and forgot password. Each student can see their respective reports only. Can you guide me? Please
WPBeginner Support
Depending on how you’re wanting to structure the content would determine what would be best. You would want to reach out to an LMS plugin for if they have a recommended method to set that up. For some recommended LMS plugins you can take a look at our article here:
https://www.wpbeginner.com/plugins/best-wordpress-lms-plugins-compared/
Admin
Mark
Hi,
Is it possible to set paid members to be able to comment but not free members?
Thanks
Mark
irakli
What if I want to just restrict content to registered user? I don’t want them to pay anything. In other words my website content will be free to access but users will need to register to read the articles, watch videos, etc… Is this something that Restrict Content Pro can do? If not which plugin do you recommend for this? Thanks
WPBeginner Support
Hi irakli,
Yes you can do that as well by creating free subscription plans.
Admin
Scott
Can free subscription plans be automatically approved without manual intervention once a user clicks on a link in an email?