This is a guest post by Syed Faizan Ali
Windows live writer is a versatile tool that allows you to publish posts onto your WordPress blog directly from your desktop. This means that you don’t need to sign into your WordPress admin panel to update your blog at all. In this tutorial, I am going to show you how to enable desktop publishing for your WordPress blog using Windows Live Writer.
How to setup Windows Live Writer on WordPress
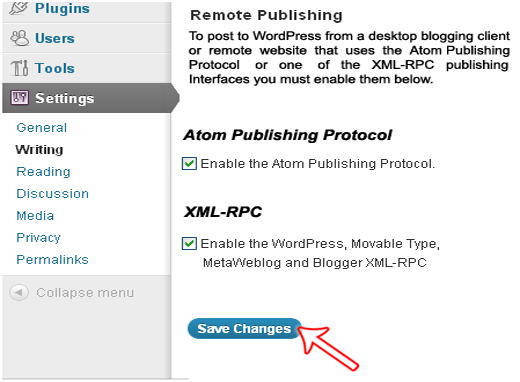
Step 1: To publish your posts on a WordPress Blog through Windows Live Writer you have to enable the Atom Publishing Protocol and XML-RPC publishing interfaces
- Go to WordPress Admin Panel » Setting » Writing
- Enable Atom Publishing Protocol and XML-RPC
- Save your changes
Step 2: Now download Windows Live Writer from Microsoft Corporation and install it. This may take few minutes depending on your internet connection.
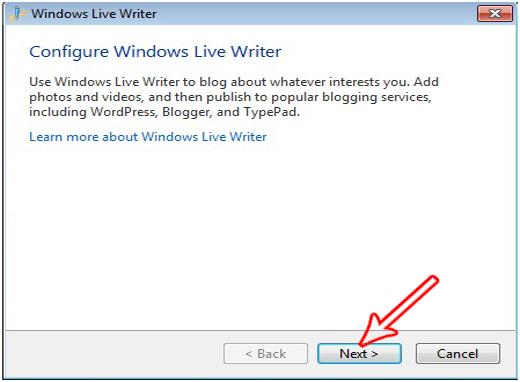
Step 3: To get started open Windows Live writer, and you will be able to see a notification. You can avoid the notice and move to the next step by pressing the “next” button.
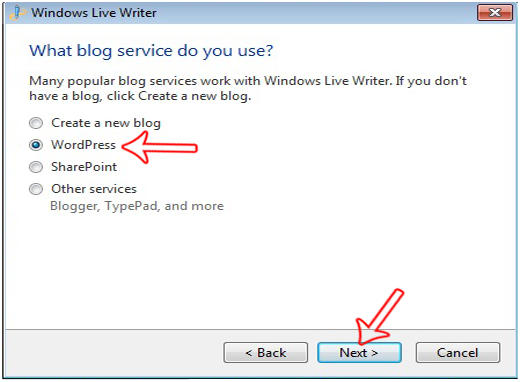
Step 4: Now you have to select your blogging platform which should be WordPress. You can even host multiple blogs on Windows Live Writer once you have completed the configuration.
Step 5: Now insert the URL of your WordPress blog along with the admin username and password. This will verify whether you are the owner or not. After pressing the next button WLW will try to connect with your blog.

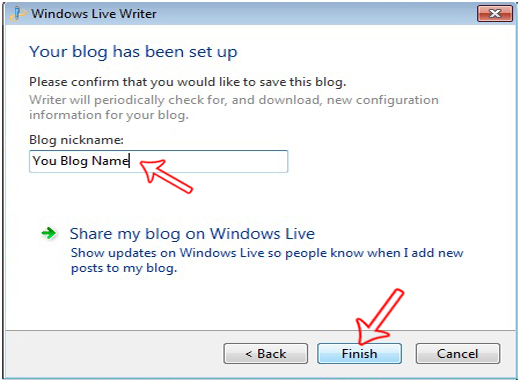
Step 6: Write the name of your blog. It will not change or rename your blog’s actual title. This will only act as your blog’s nick name for Windows Live Writer.
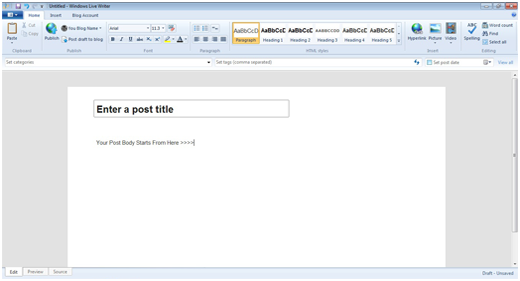
Step 7: Now you can directly publish your posts from your desktop without even opening your browser.
Common problems while using Windows Live Writer
These are some of the most common problems encountered by WordPress bloggers when they use Windows Live Writer while trying to upload images, draft new posts, publish posts, or simply edit an existing post.
- Problem While Uploading Images: While you are trying to upload images with Windows Live Writer you may encounter an annoying error message that, “The following images cannot be published because the weblog does not support image publishing”. This usually happens when you have not configured your FTP server for external image hosting.
Solution: To resolve this issue you need to reduce the file size of your images. You may consider using image extensions that provide sufficient photo quality but take less disk space. You can also upload images directly with your WordPress media uploader and then simply link those images in Live Writer.
- Speed Issues: Windows Live Writer freezes suddenly without any reason, or it is soaking up lots of your computer memory.
Solution: Most of the time WLW (Windows Live Writer) checks for software updates which might be why it freezes and eats a lot of your CPU memory. To resolve this issue:
- Go to Start Menu >> Run >> Then type services.msc
- Now Select “Windows Live Setup Service” and then press “Stop”.
- Problems While Configuring New Blog: When you try to add a new WordPress blog to Windows Live Writer you could face an error message that “Windows Live Writer is unable to detect your blog: server not responding”.
Solution: Add the following codes in the .htaccess file of your WordPress Blog directory:
<Files xmlrpc.php>
SecFilterInheritance Off
</Files>
- Error with Template Detection: Windows Live writer cannot download your custom WordPress theme for a live preview.
Solution: You need to make sure that the following snippet is present in your WordPress theme (You can look for this code in between the <head> tags)
<link rel="EditURI" type="application/rsd+xml
"title="RSD" href="http://www.YourBlog.com/xmlrpc.php?rsd" />
Frequently Asked Questions Regarding Windows Live Writer
How can I add a new blog to Windows Live Writer?
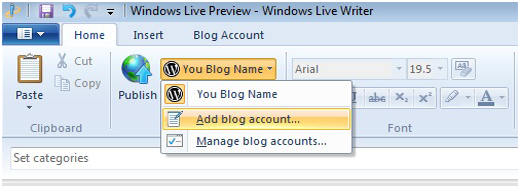
Answer: On the top of your WLW tool bar you will be able to see your previously setup blog’s nick name. By pressing it a new dropdown will be opened. Just select “Add a Blog Account” and follow the same instructions as above.
How do I schedule a post in Windows Live Writer?
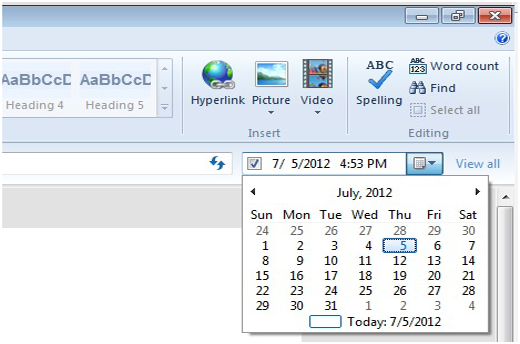
Answer: On the right side of your screen in WLW you will be able to see a bar indicating the date. Just click it and select the exact timing before saving your post.
How to Publish Posts With Windows Live Writer:
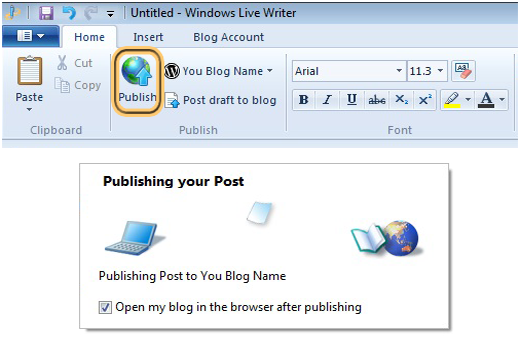
Answer: Publishing new posts with WLW is extremely straightforward. At the top of the toolbar you will notice a “publish” button. After pressing it and you will be asked to provide admin login details. Within seconds your posts will be published.


mohadese esmaeeli
As mentioned in this article, xmlrpc is a feature that, alongside its advantages, has some drawbacks and may pose significant security issues. Choose any method mentioned in this article that suits you and deactivate it. Keep in mind that if you use a remote system to publish content to your site, you need to enable this feature. Otherwise, you won’t be able to establish remote connections through the system. If you disable this feature and notice that some of your plugins or other tools are no longer functioning,
preeti
i unable to edit .htacess file in wordpress blog directory, its showing 500 server error. where to place error code?
sinlenbec
Hello…
How to Use Microsoft Word to Publish Directly to Your WordPress Site
Tom
I just used your guidance to download and install Windows Live Writer. Thank you! As a new blogger, who dutifully read a lot of the information provided at WordPress CODEX; I kept trying to find a download for Windows Live Writer – as the CODEX often recommended. Yet, when I tried to download Windows Live Writer, I was told that I already had a more recent version; yet no version showed up in my program list. (I did have some of the associated programs, by not Live Writer.) Then, when I used your download, I was taken to Windows Live Essentials – the newest version of Live Writer etal. Now I have windows Live Writer; and, at a glance, I can see how much easier this is going to make blogging for me. I was lost without you. Thanks.
Mubashir
Hi
I did not find Atom Publishing Protocol settings in my WP dashboard Writing Option.
What should I have to do?
Editorial Staff
Its enabled by default now.
Admin
Justin Germino
Nice tutorial dude, I am having 1 issue I can’t find a resolution for where Windows Live Writer gives the following error when trying to open local posts or post to blog.
The server committed a protocol violation. Section=ResponseHeaderDetail=CR msut be followed by LF.
Ayzee
I have a blog in Wordpress that I rarely use. This tutorial can probably change my mind about letting it go. Thank you!
Trish C. Lopez
A very helpful tutorial! When I’m ready to move to Wordpress, I’ll check out all of your WP tutorials.
Seth
Nice tutorial, thanks for sharing!