Normally, when you add a form to your website, it is visible to all users who can see that page. This is great for contact us forms or email subscription forms where you’d want everyone to access them.
However, in certain situations, you might want only premium members to view and use the form. If you want to limit a WordPress form’s access to only certain people, then you may need to password-protect it.
In this article, we’ll explain step by step how to easily password-protect your WordPress forms.
Why Password Protect WordPress Forms?
There are lots of reasons why you might password-protect forms on your WordPress website.
For instance, you create and maintain websites for a number of clients. When they need support, they fill out a support request form. Non-clients shouldn’t be able to request support using that form.
You have weekly appointments with clients over Zoom or Skype, which they can book through your website. Non-clients shouldn’t be able to book an appointment.
You run an online photography club. Members can send in their best photos each month, and you feature a selection on your website. Non-members shouldn’t be able to send in photos.
In all these situations, you want to prevent non-clients or non-members from filling out your form. Otherwise, you need to carefully review all the form entries to check whether they are valid submissions.
We are going to cover 2 ways to password-protect your forms in WordPress. You can click the links below to jump to any section:
Video Tutorial
If you’d prefer written instructions, just keep reading.
Method 1: Password Protect a WordPress Form Using WPForms
WPForms is our #1 rated contact form plugin for WordPress. It allows you to create any kind of WordPress form by using a simple drag-and-drop form builder.
It also comes with a form locker addon, which allows you to add password protection to your WordPress forms when needed.
First, you need to install and activate the WPForms plugin. For more details, see our step-by-step guide on how to install a WordPress plugin.
For this tutorial, we will use the WPForms Pro version because it includes the Form Locker addon, more form templates, and more. There is also a WPForms Lite version available for free, but it doesn’t include the Form Locker addon.
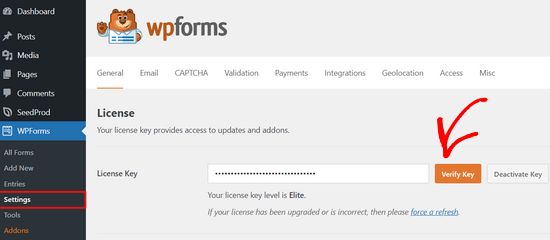
Upon activation, you can head to WPForms » Settings from the WordPress dashboard. From here, simply enter your license key and click the ‘Verify Key’ button. You can easily find the key in your account area.
Once you have your form ready, the next step is to install the Form Locker addon for WPForms.
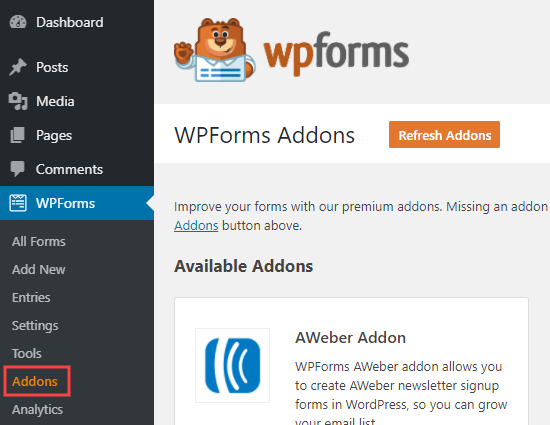
First, go to WPForms » Addons in your WordPress admin.
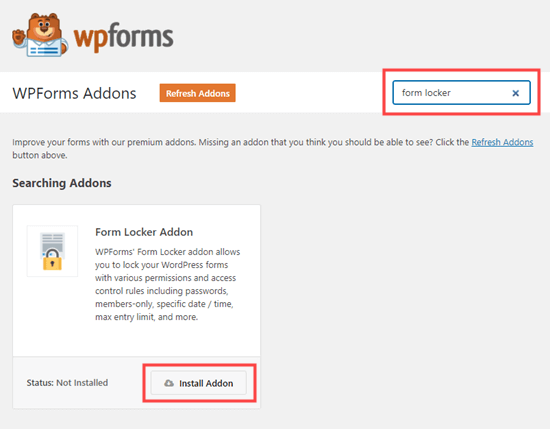
Here, you need to search for the ‘Form Locker’ addon.
Just click on the ‘Install Addon’ button to install and activate it:
Next, you need to set up your form. Just follow our instructions on how to create a contact form in WordPress for help with this.
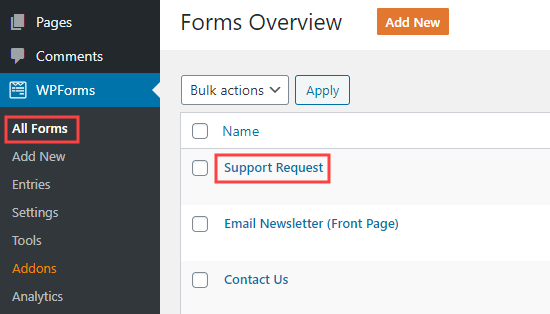
Now, go to WPForms » All Forms and find the form that you want to protect.
Simply click on the form name to start editing it.
Next, go to Settings » Form Locker from the left panel.
Go ahead and enable the ‘Form Verification’ option. Once you do that, you’ll see more options appear.
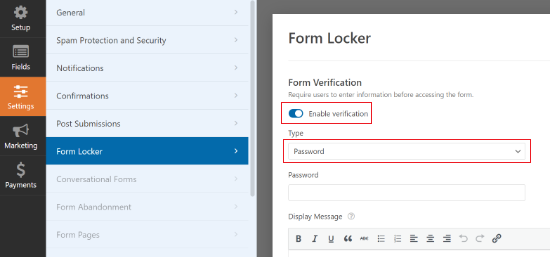
By default, the verification type will be set to Password. However, you can also use age and email as the verification type.
Next, you will need to enter a password. You may also enter a display message if you want to.
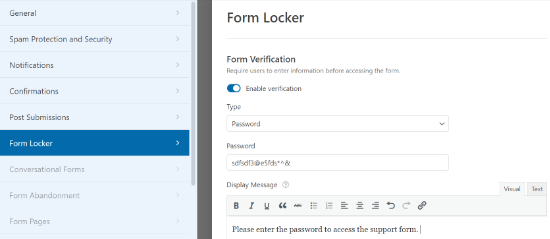
Don’t forget to click the ‘Save’ button at the top of the screen after setting your password.
You can also click the ‘Embed’ button to add your form to a new or existing page.

You can now visit your website to see the password-protected form in action.
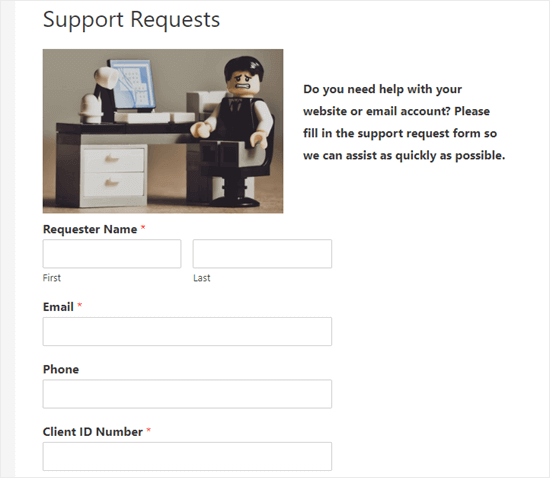
Now, when someone visits a post or page with that form on, they will see the rest of the content but not the form itself.
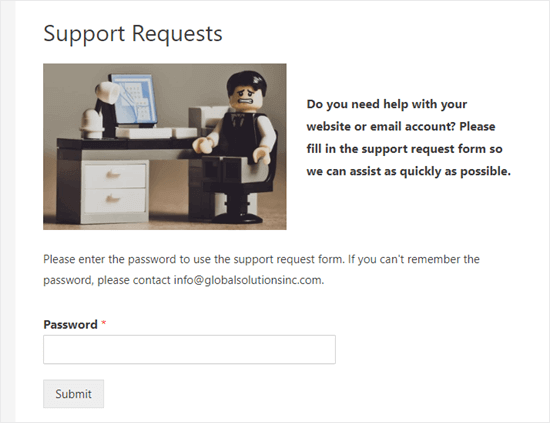
When the user enters the password, the password box and message will disappear.
They will see the page content and the form itself:
You could also use this method to password-protect forms in widget areas such as your sidebar.
Outside of password protection, Form Locker offers other advanced features, such as limiting the total number of entries, restricting access to logged-in users only, and even enabling form submissions for only certain dates.
However, if you’re looking for a free option to password-protect your form, then see option #2.
Method 2: Password Protect the Form’s WordPress Page
What if you want to hide the whole page, not just the form itself? This is very easy to do in WordPress.
First, create a new page or edit an existing one. When you’re in the content editor, simply click on the ‘Public’ link from the settings panel on the right.
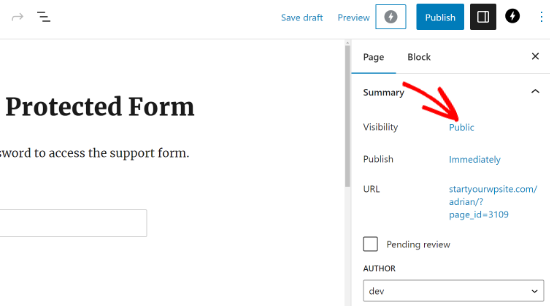
You will now see the ‘Post Visibility’ popup.
Next, click the ‘Password Protected’ option and type in the password you want to use.
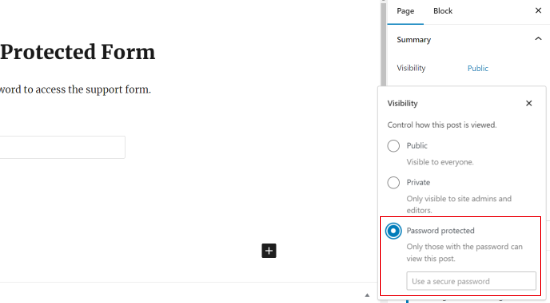
That’s it! You can publish or update your page or post.
Now, when someone visits that page, they will need to enter a password to see any of the content:

We hope this article helped you learn how to password-protect your WordPress forms. You may also want to see our ultimate guide to using WordPress forms and how to secure your contact forms.
If you liked this article, then please subscribe to our YouTube Channel for WordPress video tutorials. You can also find us on Twitter and Facebook.


Jiří Vaněk
Is it possible to protect one form in WP Forms with multiple passwords? E.g. so that every user who wants to request support has his own password and it is not the same for all users?
WPBeginner Support
Not at the moment but to achieve something like that you could look to use a membership plugin to have a members only page where the form is located.
Admin
Jiří Vaněk
Thank you for your response. I’m a bit disappointed that it’s not as simple as I had hoped, but I’ll try to set it up using the MemberPress plugin. Thanks for pointing me in the right direction; hopefully, I’ll be able to handle it now.
David DLima
Hi,
I used the password protect successfully. Just have one problem. Using the second option, the size of the password field is very long. Is there a way to reduce the size of the field?
Regards
David
WPBeginner Support
The second method would be determined by your specific theme, we would first recommend reaching out to your theme’s support and they should be able to assist
Admin