Starting a print-on-demand shop in WordPress is an excellent way to launch a customizable business without the need for upfront inventory or large investments.
With POD, you can create unique designs for products like t-shirts, mugs, and posters. Then, you can have them printed and shipped directly to your customers on demand.
The best part is that products are only printed once a customer places an order, which reduces financial risk and allows you to turn your creative ideas into a successful online store.
At WPBeginner, we have a lot of experience building online stores and helping businesses launch their eCommerce websites with ease. We’re always looking for new ways to help our readers out.
That’s why we thoroughly researched and tested various tools to help you create a print-on-demand shop. We found that Printful is the best option. It’s super user-friendly, scalable, and easily integrates with WordPress, making it the perfect choice for your business.
In this article, we will show you how to make a print on demand shop in WordPress, step by step.
What Is Print on Demand and Why Use It?
Print on demand is a manufacturing method where a design is only printed on a product once a customer has ordered it. This is very similar to dropshipping, except the products are custom-made for you.
It can be used for clothing, bags, homeware, and more.
Print on demand isn’t as cost-effective as mass-production manufacturing methods, but it has some big advantages for small businesses and can still be very profitable.
With POD, you don’t pay anything until a customer pays you, making it much easier for small businesses to get started. Additionally, the POD services handle printing, fulfillment, and shipping themselves, so you won’t have to worry about that.
There’s no need to buy inventory upfront, and you don’t need any storage space either. Plus, you can easily experiment with different designs to see which is most popular.
There are a few different print on demand companies out there. In this tutorial, we will be using Printful. It’s well-established and integrates easily with your WordPress site through WooCommerce.
Printful offers printed designs and embroidery for some products, such as baseball caps and backpacks.
You can easily sell custom-branded merchandise, such as t-shirts, hoodies, shorts, hats, backpacks, bracelets, phone cases, keychains, coffee mugs, blankets, and over 249 products.
Having said that, let’s see how to easily create a print on demand shop in WordPress.
Creating a Print on Demand Shop With Printful
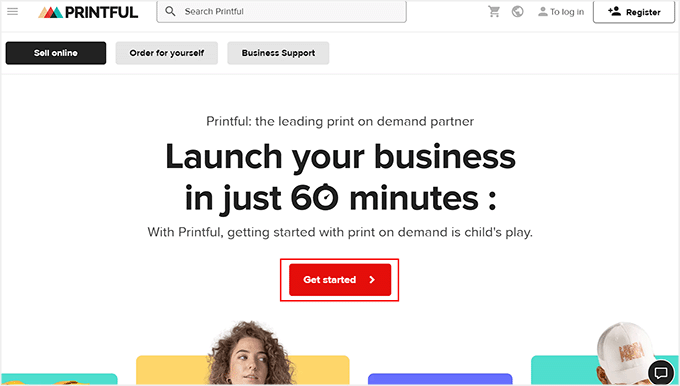
To make a print on demand shop, you need to first visit the Printful website.
Here, click the ‘Get Started’ button.
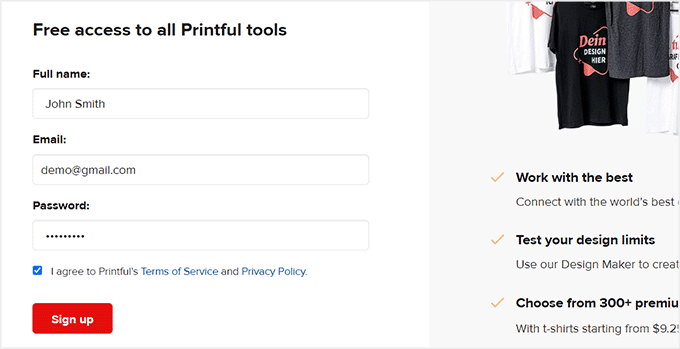
This will take you to a new screen, where you must add your email address, name, and password to create an account.
Once that is done, click the ‘Sign Up’ button to start the process. Printful will then ask you for some details about your business that you can fill in.
You will also get an email with a link that you need to click to confirm your email address.
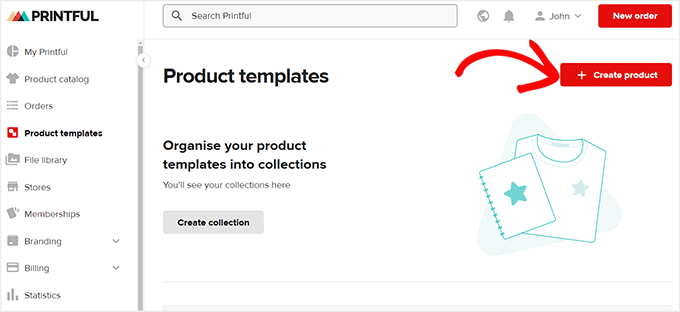
Next, you will be taken to your dashboard, where you can switch to the ‘Product Templates’ tab from the left column.
Here, click the ‘+ Create Product’ button.
Doing this will open a new prompt, where you can select the type of product you want to create from the left side. For instance, if you want to create a t-shirt for women, you can expand the ‘Women’s clothing’ tab and choose a type of shirt.
This will open some shirt templates on the right. Go ahead and click on the t-shirt that you like.
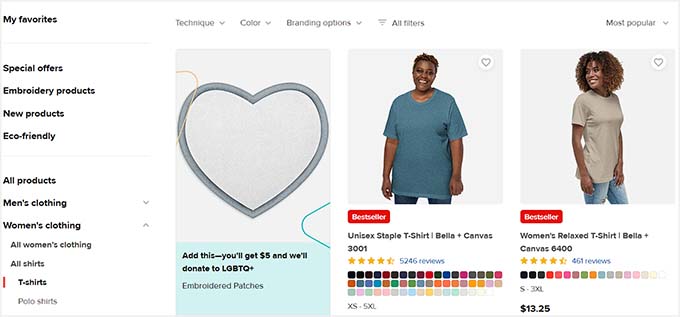
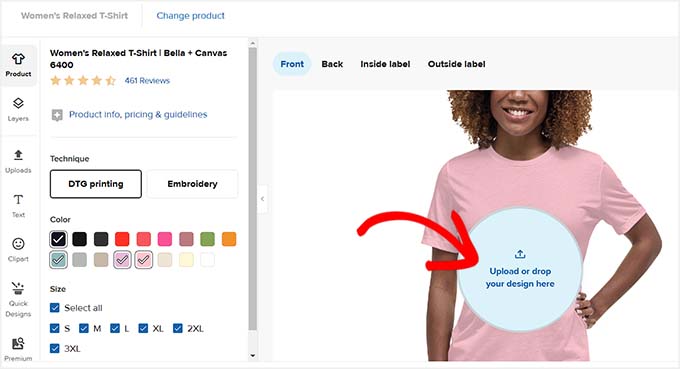
Printful’s visual builder will now be launched on your screen with a shirt preview on the right and settings in the left column.
You can start by choosing a size and color for your shirt. After that, click the ‘Upload or drop your design here’ button to add your brand logo or a simple clipart to your shirt.
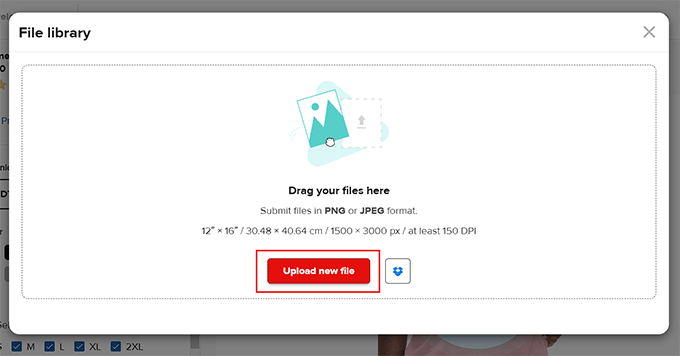
This will open a popup, where you have to click the ‘Upload new file’ button.
You can now upload an image of your choice from your computer.
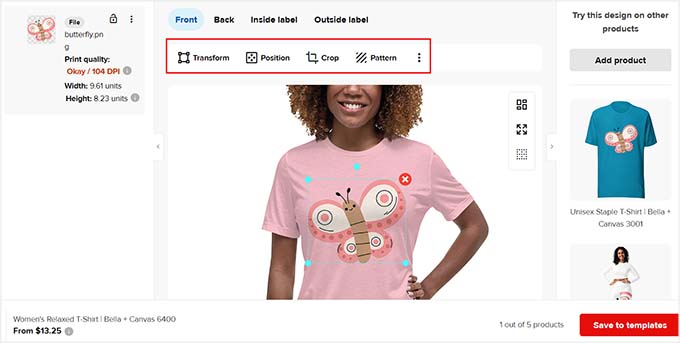
After adding an element, you can also change its size and position, crop the image, add patterns, and remove the background.
Then, you can click the ‘Back’, ‘Inside Label’, or ‘Outside Label’ options and repeat the process to add other clipart to your t-shirt.
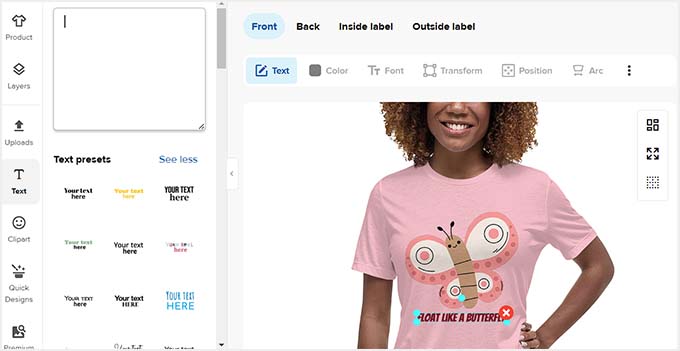
After that, switch to the ‘Text’ tab from the left side of the screen.
You can now type your company name or a quote you want added to the clothing item.
You can change the text color, graphics, font, position, outline, and even add shadows using the toolbar at the top.
Once that is done, switch to the ‘Clipart’ tab. From here, you can drag and drop any images that you want to add to your shirt.
Next, click the ‘Save to Templates’ button.
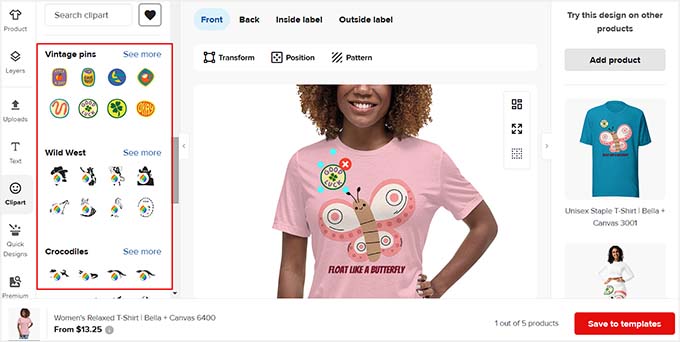
Doing this will direct you to the Printful dashboard, where you can start the process again to create as many shirts, hoodies, and other merchandise as you want.
Once you have done that, you also need to set up a billing method for Printful. Your customers will pay you through your online store for the product, and Printful will charge you the cost of shipping it.
To do this, visit the Billing » Billing methods page from the dashboard on the left and click the ‘Add new billing method’ button.
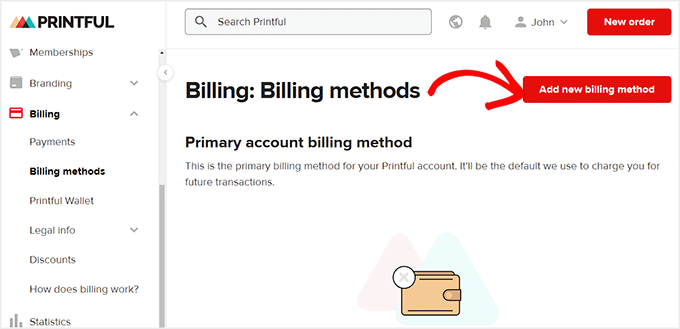
This will take you to a new page where you must add your billing information, such as name, country, zip code, and phone number, to access billing methods.
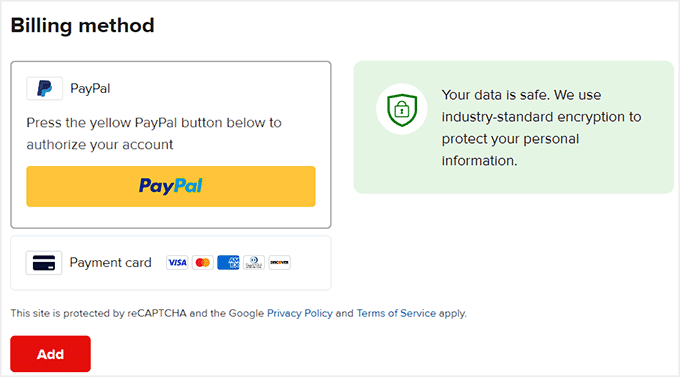
After that, scroll down to select a payment method and connect your payment gateway account with Printful. Then, click the ‘Add’ button to store your settings.
You have now successfully created print-on-demand merchandise to sell on your website.
Connecting Printful to Your WordPress Site
The next step is to connect your Printful account to your WordPress website. After that, you also need to install and activate the WooCommerce plugin.
If you haven’t set up your store yet, then you can see our step-by-step guide on how to start your online store.
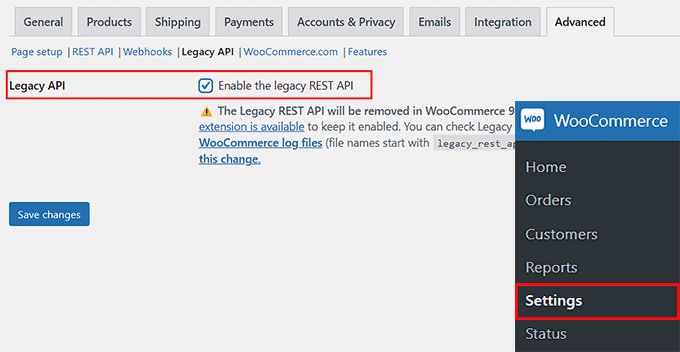
Once your website is fully set up, visit the WooCommerce » Settings » Advanced page from your WordPress dashboard. Here, click the ‘Legacy API’ link at the top.
This will open some new settings, where you have to check the box next to the ‘Legacy API’ option. Then, click the ‘Save Changes’ button to store your settings.
Next, you need to install and activate the Printful Integration for WooCommerce plugin. For more details, see our step-by-step guide on how to install a WordPress plugin.
Upon activation, visit the Printful page from the WordPress dashboard and click the ‘Connect’ button.
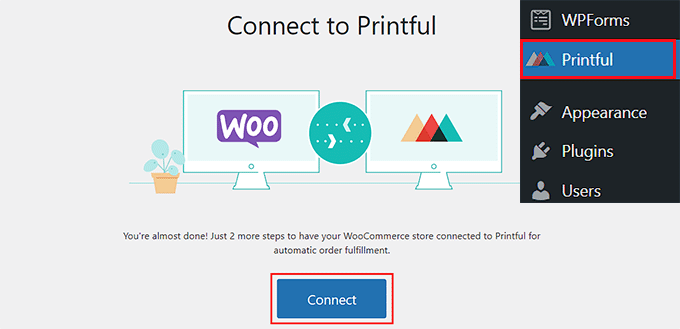
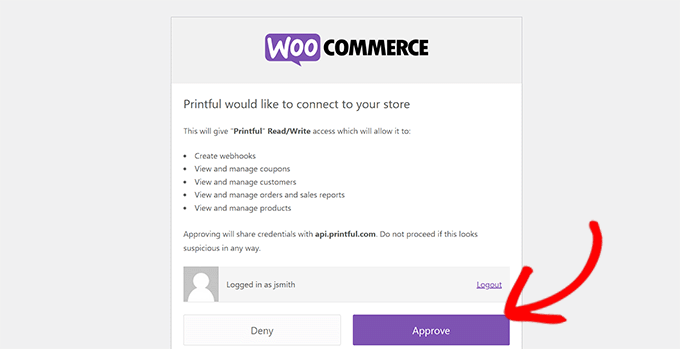
This will open a new tab, where you have to click the ‘Follow Link’ button. Doing this will open another prompt asking your permission to connect WooCommerce with Printful.
Go ahead and click the ‘Approve’ button.
You will then be asked to confirm your Printful account details.
Once you’ve done that, you will see a message letting you know that your product data is being synchronized. After a minute or so, your WooCommerce store will be linked.
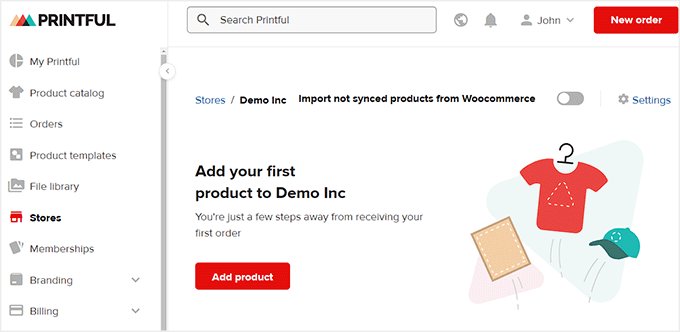
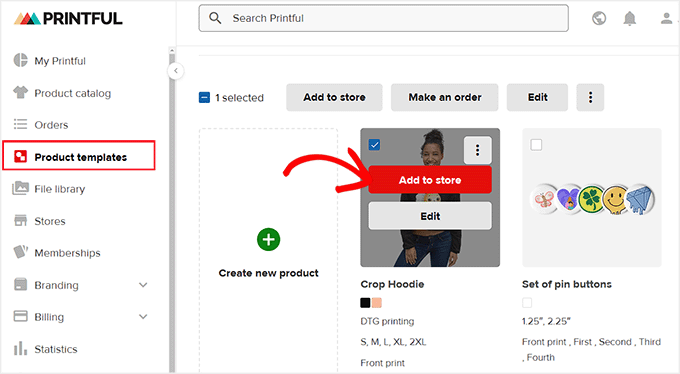
To add products to your store in WordPress, switch to the ‘Product Templates’ tab from the left column in Printful.
Then, click the checkbox for the product that you want to add and click the ‘Add to Store’ button at the top.
Note: You cannot add two or more products to your store at the same time. Each product must be approved first.
Now, a popup will open up, where you must follow Printful’s instructions. You will get to select colors and sizes, view the mockup images, and give your product a name and description.
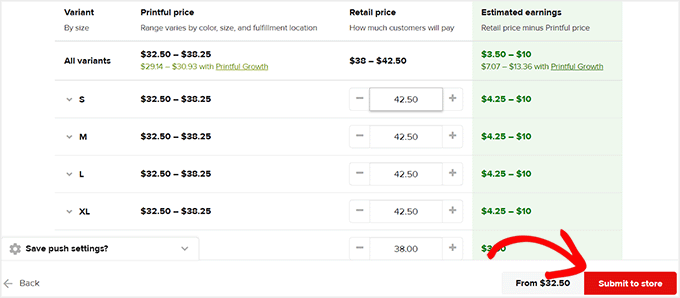
Finally, you will be taken to the last step, where Printful will automatically suggest prices for you. These are marked up from the price that Printful charges so that you can make a profit on each item.
However, you can still change the prices according to your liking. Once you are done, just click the ‘Submit to Store’ button.
After that, you can repeat the process to add other products to your WooCommerce store.
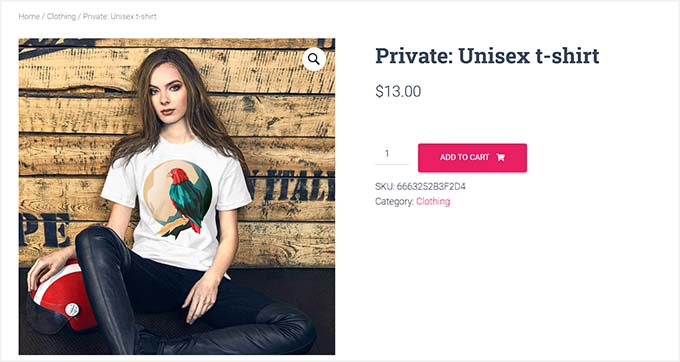
Next, visit your site to see the added products in action.
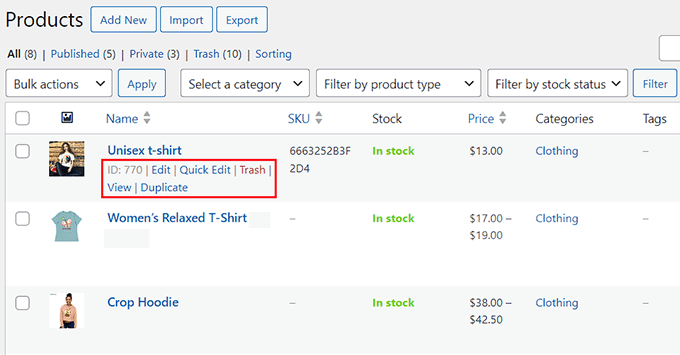
You can also edit your Printful products in your WordPress dashboard by going to the Products » All Products page.
Here, click the ‘Edit’ link to make changes to a product using the WooCommerce settings.
With Printful, you can create as many products as you like without paying anything until you get orders.
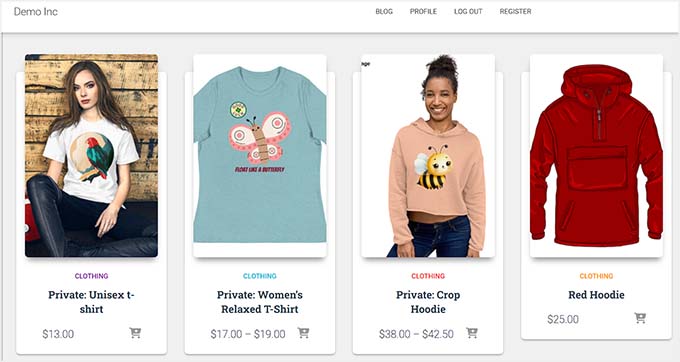
Here’s our finished online store, with a range of print-on-demand products.
Bonus: Create a Simple T-Shirt Shop in WordPress
If you only want to sell t-shirts in your print on demand shop, then the above method may not be the best option. This is because Printful is designed to sell all kinds of products like bags, badges, mugs, and more.
Alternatively, you can create print on demand t-shirts to boost your brand awareness using SpreadShirt. All you have to do is create an account on the platform and design your shirts.
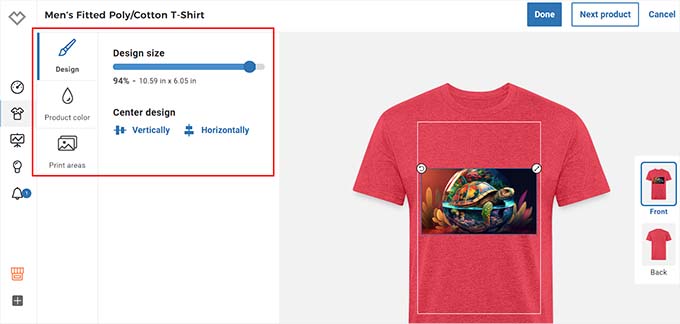
You can then connect your WordPress website to SpreadShirt and start selling your designs from your site.
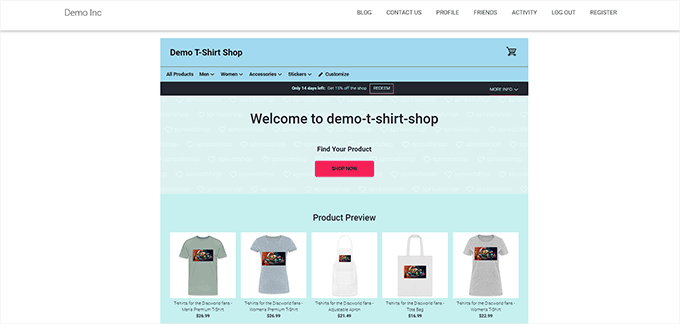
For more details, see our tutorial on how to easily create a t-shirt shop in WordPress.
We hope this article helped you learn how to make a print on demand shop in WordPress. You may also be interested in our beginner’s guide on how to add your Etsy store in WordPress and our top picks for the best WooCommerce plugins.
If you liked this article, then please subscribe to our YouTube Channel for WordPress video tutorials. You can also find us on Twitter and Facebook.


Matt
Is there a way to do this without using a print on demand supplier, I want to supply and print my own products, are there plugins for customers to upload their design and view it on the product?
WPBeginner Support
We do not have a recommended plugin for that at the moment but if we find one we would recommend we will be sure to share
Admin
WPBeginner Support
If we find a method we would recommend we will be sure to share and update our article!
Admin
Bobby
Is there a way like this that is similar to set up a product generator for the customer that is connected to your wordpress site? They would upload their logos, art etc to preview on a product like a t shirt then if they like, they order then order goes through like the above method but instead of of pre-determined products, they can upload their art onto any product they want and then order.
liz
but can you do both blogging and selling stuff together because i want to blog but i also want to sell stuff all in the same place
WPBeginner Support
Yes, you can have a site that sells products and has a blog. We would recommend taking a look at our article below for more on blogs vs websites.
https://www.wpbeginner.com/beginners-guide/what-is-a-blog-and-how-is-it-different-from-a-website-explained/
Admin
Sanwan
Is it possible to add your own t-shirt mockup images or do you have to use the standard Printful mockups? If so, how can you add your own mock up photos?
WPBeginner Support
They have a mockup generator that you can use to customize the mockups for what you want them to be.
Admin
Dan
If you connect the printful shop to your Woo commerce store
can you then only add products from your printful store to your site or can you add products that you have in your own stock that you will ship yourself?
WPBeginner Support
You can also sell products that are not on Printful.
Admin
Aurora M
This is great way to monetize and secondly easy to start
WPBeginner Support
Glad you found our guide helpful
Admin