After years of building WordPress websites, we’ve learned how important it is to have a local WordPress setup on your computer.
Having WordPress on your personal machine lets you experiment with new features without risking your live site, dive deep into WordPress development, and even build entire websites before they go live. It’s like having a private sandbox for all your WordPress projects.
If you’re a Windows user, there are numerous ways to set up WordPress locally. But we’ve narrowed it down to the two easiest methods. In this guide, we will show you how to easily install WordPress on a Windows computer, no matter which version you’re using.
Why You Should Install WordPress on Windows?
If you’re a Windows user, then installing WordPress locally on your computer offers several benefits.
A local WordPress installation creates a testing environment that doesn’t affect your live website. This setup, often called a local server or localhost, is your personal playground for WordPress.
WordPress developers regularly use local installations for their work. For instance, they may use it to experiment with new plugins or themes or test the site before updating to the Gutenberg block editor.
But it’s not just for the pros. If you’re new to WordPress, a local setup is perfect for learning. You can explore features, test themes and plugins, and experiment freely without worrying about breaking a live site.
It’s important to note that when you install WordPress locally on Windows, only you can see the site. If you want to create a public website, then you’ll need a domain name and web hosting.
Now, technically, you can install WordPress on Windows using XAMPP, and we’ve written a tutorial on it before.
That being said, we’ve found 2 even simpler ways than XAMPP for setting up a local WordPress environment, making them great for beginners or users who need to create a local site quickly. You can click the link below to jump ahead to any method you’re interested in:
- Method 1: Install WordPress on Windows Using Studio (Quick and Simple)
- Method 2: Install WordPress on Windows Using Local WP (More Customizable)
- Alternative: Use WordPress Playground to Test Themes, Plugins, and More
Method 1: Install WordPress on Windows Using Studio (Quick and Simple)
For the first method, we will use Studio. It’s a local WordPress software made by Automattic, the company that manages and runs WordPress.com, which is a website builder based on the WordPress software.
We will talk about this method first because it’s much quicker and simpler to follow, making it perfect for complete beginners.
First, you need to open the Studio by WordPress.com website. Then, click on the ‘Download for Windows’ button.
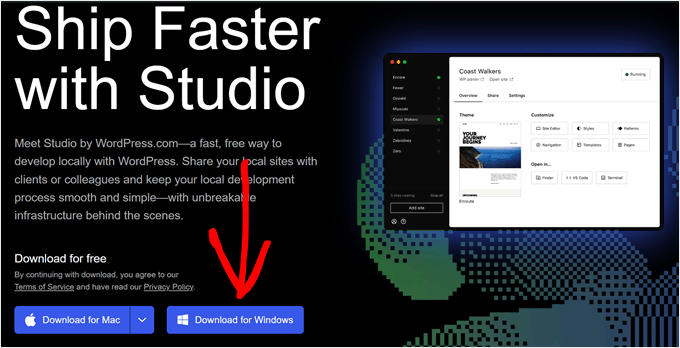
Once you’ve done that, just open the downloaded file to start the installation.
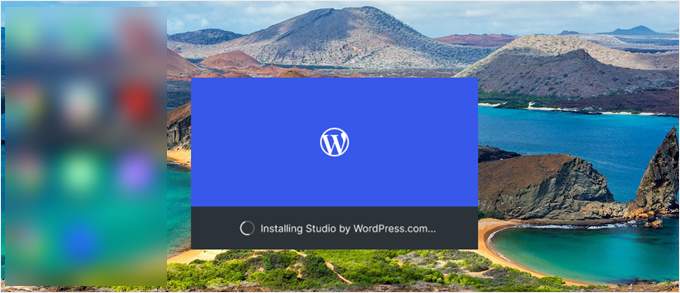
A popup window will now appear, showing you that the application is being installed.
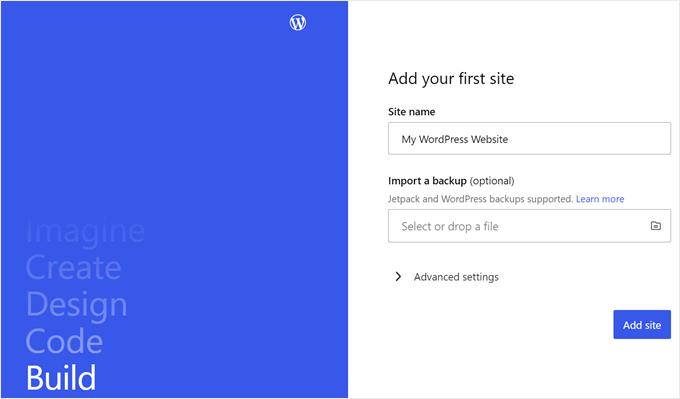
With that done, you can add your first site.
To do this, just enter your new local WordPress site name and click ‘Add site.’ You can name the site however you like so long as it helps you easily identify it.
You should now see your local WordPress site dashboard.
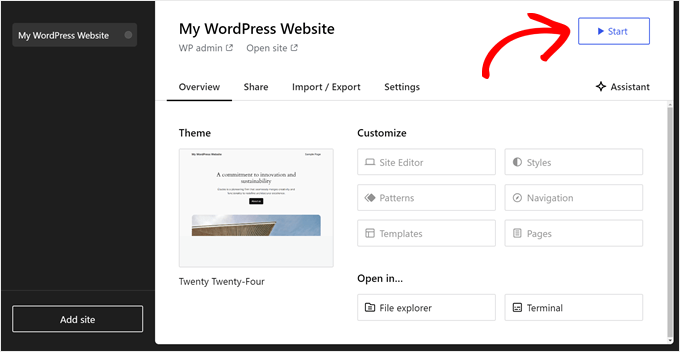
To access your WordPress dashboard and edit your website, just click the ‘Start’ button at the top right corner. This will make your local website accessible to you on your computer.
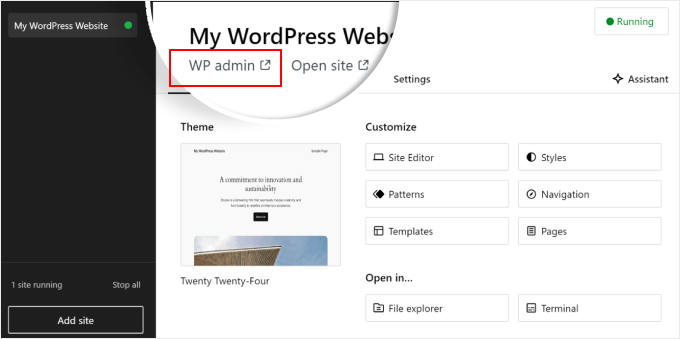
Once the ‘Start’ button changes to ‘Running,’ you can click on the ‘WP Admin’ link at the top left side of the page.
This will bring you to your local WordPress admin page.
And that’s pretty much it for the setup. Let’s explore the other settings that may be necessary as you build your local website.
As you can see in the ‘Overview’ tab, you can immediately access the WordPress full-site editor menu right from the Studio dashboard. You can also click ‘File explorer’ to open your WordPress website’s folders and files and click on ‘Terminal’ to manage your website using WP-CLI.
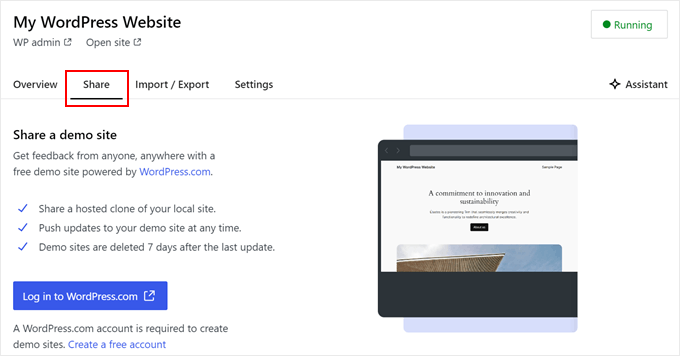
If you switch to the ‘Share’ tab, you can log in to your WordPress.com account, clone your local website, and upload it to WordPress.com’s servers. This will temporarily make the cloned site online, which is useful for sharing demo sites with your clients or team members.
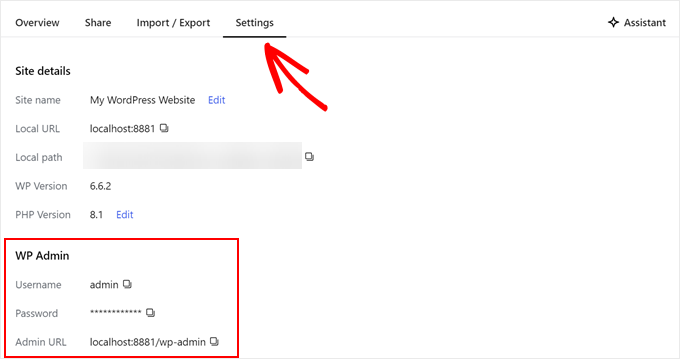
At times, you may want to log in to your local website directly through your browser instead of using Studio. In that case, you need to know your wp-admin credentials.
To find them, you can switch to the ‘Settings’ tab and find your WordPress admin username, password, and login URL there.
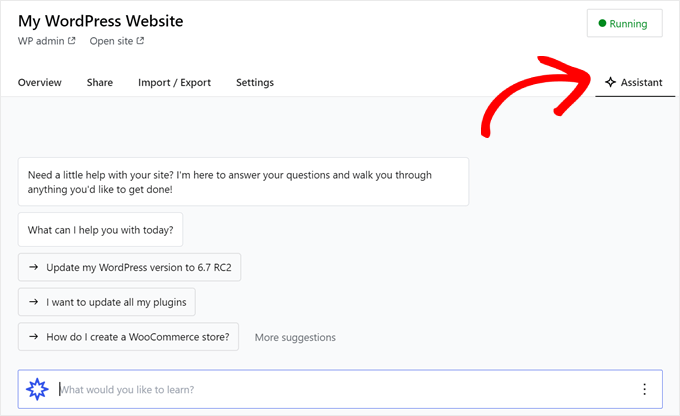
Another neat feature of Studio is its built-in AI chatbot, which you can communicate with by clicking on the ‘Assistant’ button.
Here, you can ask Studio for help with tasks like updating all your plugins at once, updating your core WordPress version, or creating code for a custom block.
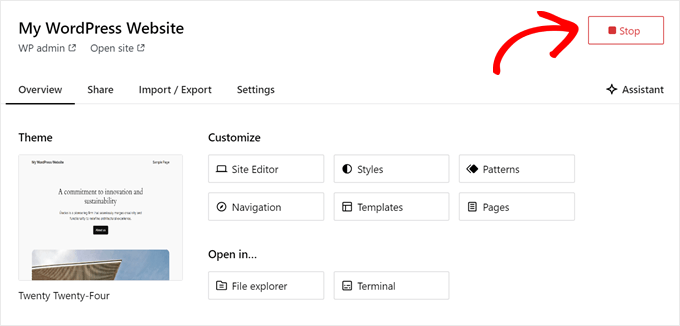
When you’re done working on your local site, just hover over the ‘Running’ button at the top right corner until it says ‘Stop.’
Then, click on the button to stop the website.
One downside of Studio is you cannot configure the WordPress environment to your liking. This means you need to use the PHP version, web server, and database that have been pre-selected for you.
This can be a drawback if you need to test your website or plugin with specific server configurations.
If you require more control over your local WordPress environment or need to match your local setup with a specific live server configuration, then you can check out the next method using Local WP.
Method 2: Install WordPress on Windows Using Local WP (More Customizable)
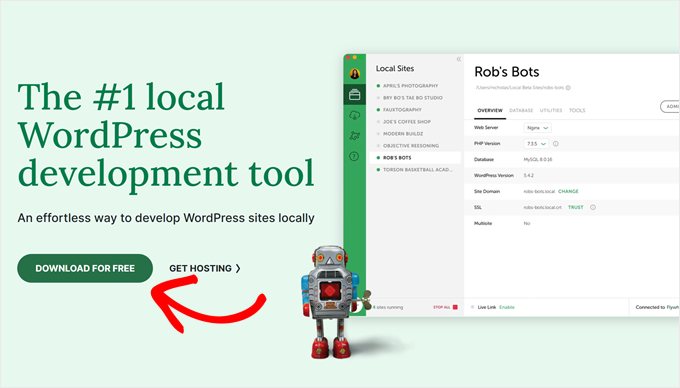
First, you need to download and install the Local WP software on your Windows computer. Simply go to the Local WP website and click the ‘Download for Free’ button.
After that, a popup window will appear where you’ll need to select your platform. Go ahead and choose ‘Windows’ from the dropdown menu.
Next, you can enter your details like first and last name, work email address, and phone number to download the software.
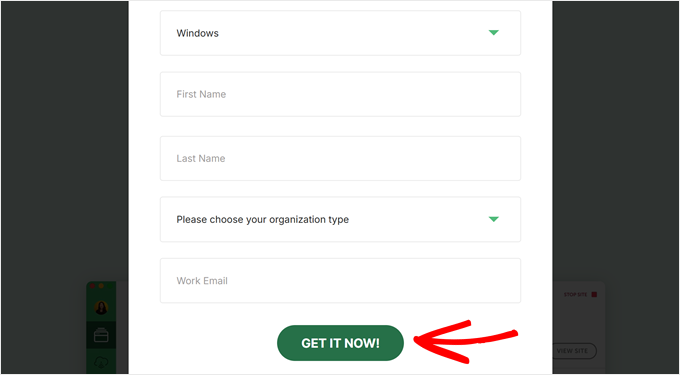
Upon entering the details, simply click the ‘Get it Now’ button.
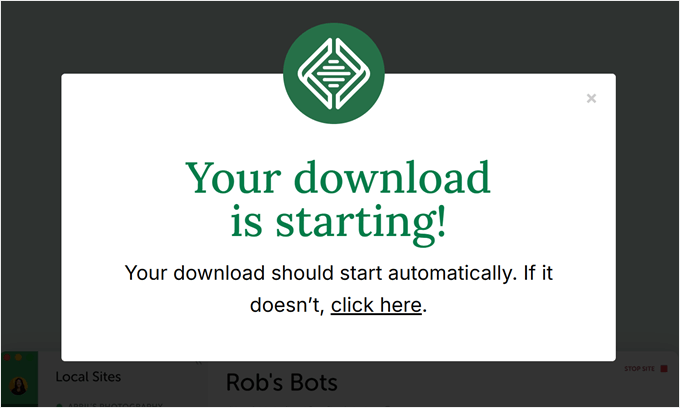
After that, the software will be automatically downloaded into your computer. Otherwise, you can click on the ‘click here’ link to start the download.
Once the file is downloaded, go ahead and launch the setup wizard.
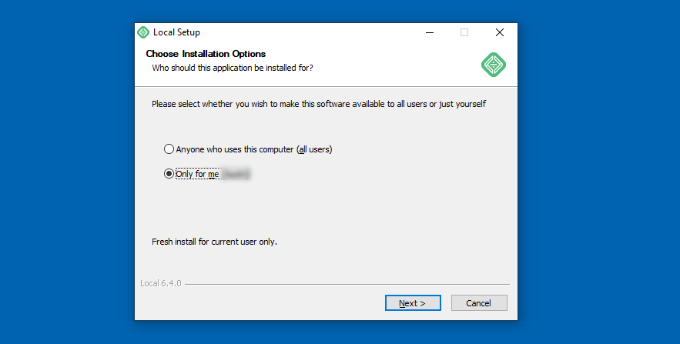
Now, you’ll need to select whether you’d like to install the software for all users or only for you.
Once you’ve selected an option, click the ‘Next’ button.
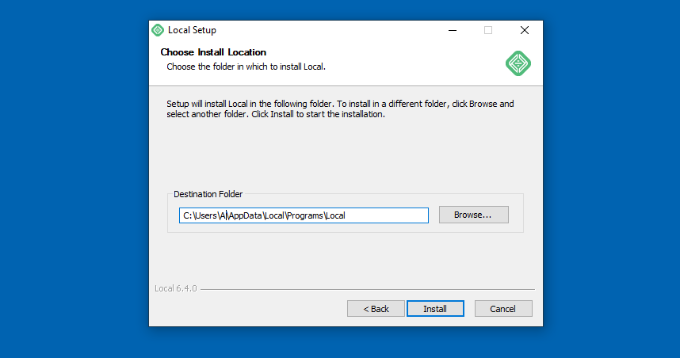
In the next step, you can select the ‘Destination Folder’ where the software will be installed.
Simply click the ‘Browse’ button to set the path and then click the ‘Install’ button.
The Local WP software will now install on your Windows computer.
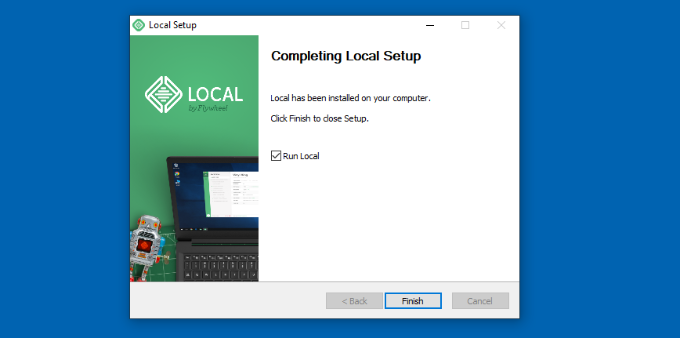
Once it’s done, you can check the ‘Run Local’ checkbox and click the ‘Finish’ button in the setup wizard.
The software will now launch on your Windows device.
The next step is to add a new local website. To do that, simply click the plus ‘+’ button at the bottom.
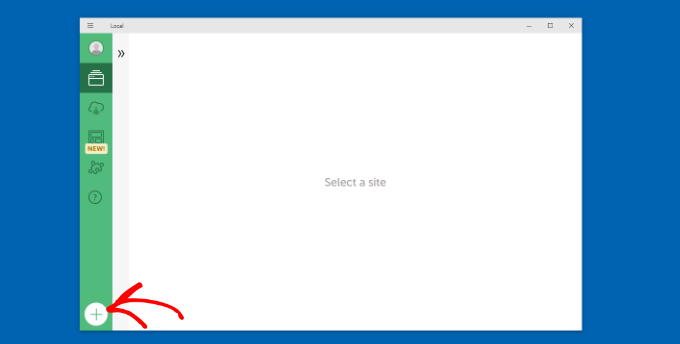
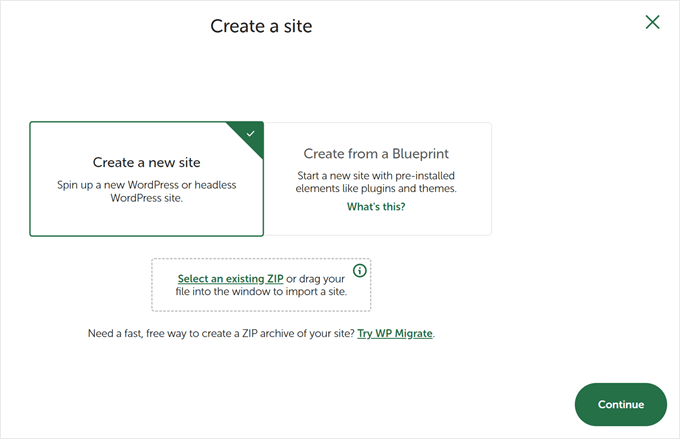
After that, you can create a site in the Local software.
Select the ‘Create a new site’ option and click the ‘Continue’ button. There are also options to create the site from a blueprint or an existing website file, but we’ll go with the first option for the sake of demonstration.
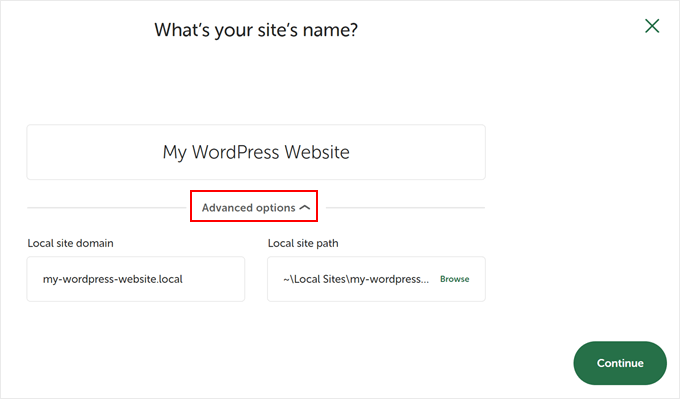
Next, you can enter a name for your local website, like ‘My WordPress Website.’
There are also advanced options where you can enter the local site domain and local site path. By default, the domain will use your website title but separated with dashes.
Once you’re done, simply click the ‘Continue’ button.
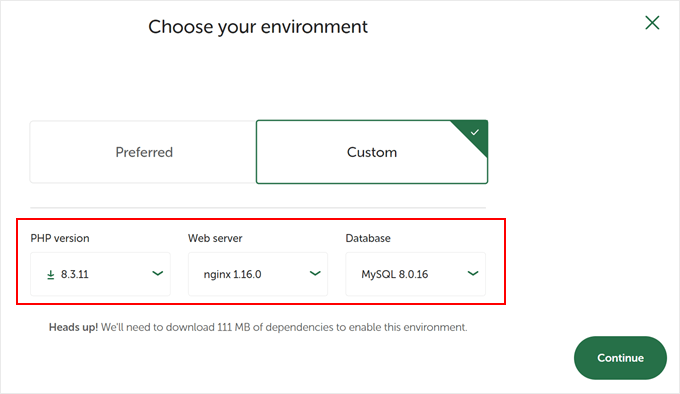
After that, you will need to choose an environment for your local website.
You can use the ‘Preferred’ environment where the software will automatically select the PHP version, web server, and MySQL version. On the other hand, you can also select ‘Custom’ and enter the environment details.
Local WP offers the latest PHP versions. As for the web server, you can choose between Nginx or Apache. You can also select between MySQL or MariaDB for the databases.
Do note that some PHP, web server, and database versions require downloading some dependencies for them to work properly.
Next, you can enter a WordPress username and password for your local website. Plus, there’s also an option to choose a WordPress email address where you’ll receive all the email notifications.
Other than that, there is an advanced option where the software will ask whether you have a WordPress multisite network. If not, just click ‘No.’
After entering these details, simply click the ‘Add Site’ button.
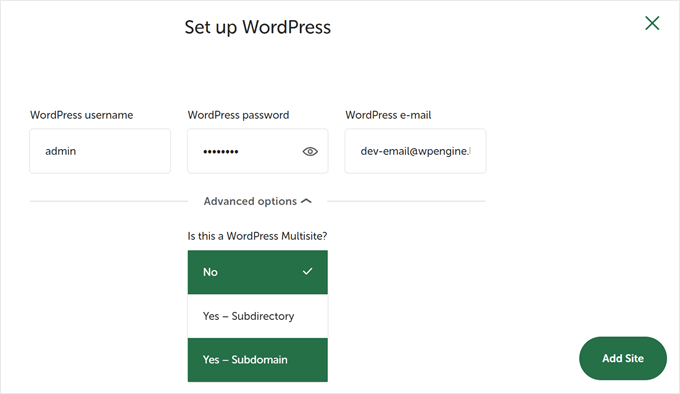
The software will now install WordPress and set up your website.
To launch the local website, go ahead and click on the ‘Start site’ button at the top right corner.
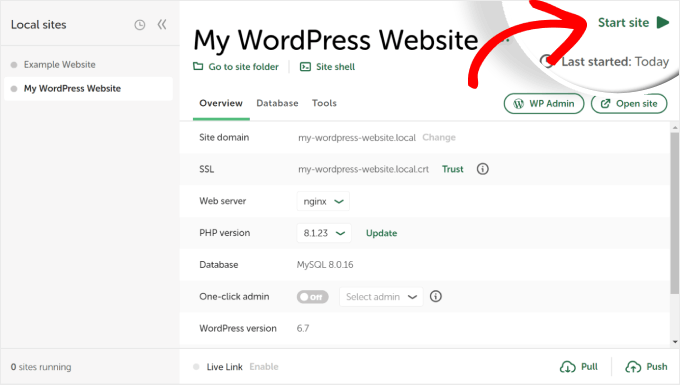
Next, click on the ‘WP Admin’ button, and you’ll see the WordPress admin login page.
Simply enter the username and password you entered earlier when setting up the local website, and then click the ‘Log In’ button.
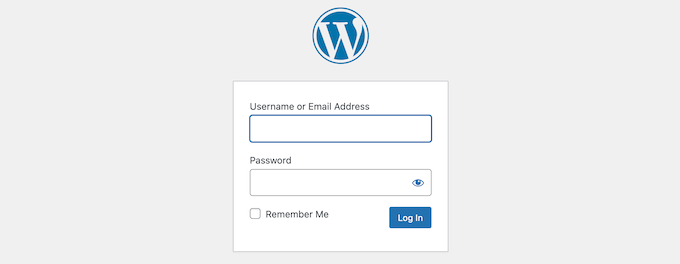
You can now edit your local website on your Windows computer.
When you’re done, don’t forget to stop the website from the Local WP software by clicking the ‘Stop site’ button.
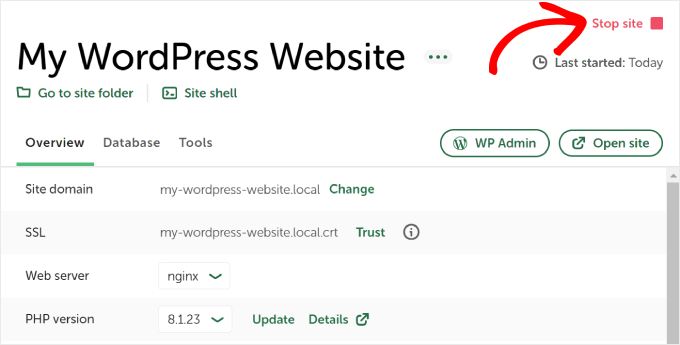
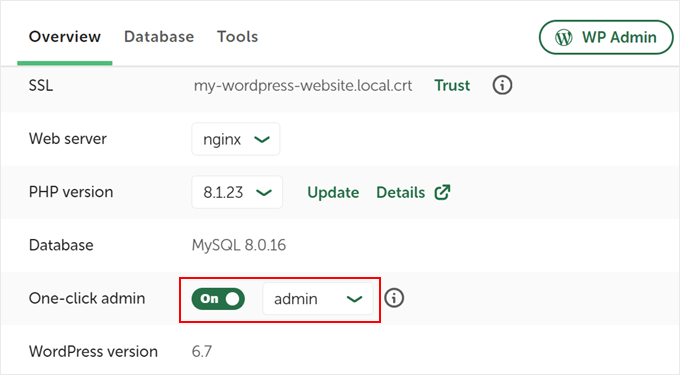
Pro Tip: If you want to skip the login process, you can enable a one-click admin login in Local WP.
To do this, just go back to the Local WP dashboard and toggle the ‘One-click admin’ button until it says ‘On.’ Then, in the dropdown menu, select the admin user that can use this one-click login feature.
Alternative: Use WordPress Playground to Test Themes, Plugins, and More
WordPress Playground is an innovative tool that lets you experiment with WordPress directly in your web browser. It’s a virtual sandbox where you can try new WordPress themes, plugins, and features without affecting any real website.
WordPress Playground differs from a local WordPress environment in several key ways.
First, it doesn’t require installation on your computer and resets after each use, unlike permanent local setups. You can access it from any device with a browser, while local installations are tied to one computer.
While WordPress Playground is ideal for quick tests and learning, a local WordPress environment on your Windows computer offers more flexibility for long-term development projects.
For a detailed walkthrough, check out our guide on how to use WordPress Playground in your browser.
I’ve Installed WordPress on My Windows Computer, What Now?
Now that you have WordPress on your computer, here are some things you can do:
- Learn basic WordPress tips and tricks to use your site better.
- Try different WordPress themes to see how your site can look.
- Install and test must-have WordPress plugins to add new features to your site.
- Learn how to fix common WordPress errors on your own.
- Try different drag-and-drop page builders to make your site look nice.
- Learn how to reset the WordPress admin password on localhost to recover access to your site.
- Set up automated workflows to make managing your site easier.
- Learn about WordPress security to keep your site safe from hackers.
- Move your local WordPress site to a live server when you’re ready to share it with everyone.
We hope this article helped you learn how to install WordPress locally on a Windows computer. You may also want to see our article on how to install WordPress locally on a Mac computer and our ultimate guide to creating a WordPress staging site.
If you liked this article, then please subscribe to our YouTube Channel for WordPress video tutorials. You can also find us on Twitter and Facebook.


Leone Agoya
Thank you for this article. Very helpful and it works.
Vivek Sharma
Best tuts awesome explanation , best website
WPBeginner Support
Hey Vivek, glad you like our website. Don’t forget to join us on Twitter for more WordPress tips and tutorials.
Admin
Stephen Rea
Thank you… It feels great to be learning new powers.. WP and WAMP now on desktop… Now to learn WP !
Dave
Great walk through!!! Thanks for the assist!!!
Elaine
Wow, thanks sooo much. It helped me a lot.
Manuel
Absolutely outstanding! Had an issue with C++ 13 & 14 but it was so well explained and pointed me in the right direction that I was able to solve it and now I have a development Wordpress environment on my Window 10 laptop. THANK YOU VERY MUCH
Jonathan
Do I need have basic in knowledge coreldraw and or photoshop to become a professional web designer.
Thanks for your sincere answer.
WPBeginner Support
It will help greatly. Specially Photoshop.
Admin
Karthik
Really useful and thanks very much..:)
Michael Gyori
Greaet tutorial, thanks!
One suggestion. Mention the Skype Port 80 issue right at the point when it would be encountered in your tutorial. Having it mentioned at the end was not helpful because I already spent considerable time trying to figure out what was going wrong. A simple note saying: “If your browser screen is blank when selecting phpMyAdmin, then you may have a conflict with Skype (see below).”
mark k
Thx for the tutorial – ran in to problems starting WAMP (blank page on localhost/phpmyadmin), on wins 10 www service was running stopping apache, so ran services.msc and stopped that.
Only other problem happened when wp tried to create config – by default it self completes txtBox with “password” so just remember to delete it. simple fix but had me stumped for 2 mins.
once again thx
Frank George
please i need urgent help as i would love to move my site live….i am running wordpress through my local host using Microsoft web matrix through IIS7…how do i do it please…i need help urgently!
ahmed
Hi
I have plant to installed WordPress on wamp windows based server.who is right person to contact if I find any problem. Please let me know.
Thanks in advance.
Ahmed
vijay
i installed wordpress using bitnami software.
i also tried using wamp both are awesome.
Johari
Thank you for simplifying the manual. The steps you provided are easy to follow. Keep posting great articles!
cornel
great job , thank you
Vikash Gupta
Thank you for providing nice guidance.
It worked for me excellently.
Ahmed
When i tried to start wamp, its giving me an error that vcruntime.dll is missing… Please any solution?
Mayur
After clicking on phpmyadmin showing error.
The webpage cannot be found
Plz help me..
Ruben Tahir
Trying to run phpMyAdmin for the first time, I am prompt to enter user name and password. I suppose there must be a default user name a password. What are they or how to setup my own?
Ruben Tahir
Just found out by simply googling. the username is root and no password.
You should mention that in your tutorial.
J Robinson
My WAMP-64 was installed some time ago on my D: drive. I just added WP. When I point the browser to http://localhost/wp-admin/ (changed the WP folder name back), I get:
Warning: require_once(D:\wamp64\www/wp-load.php): failed to open stream: No such file or directory in D:\wamp64\www\wp-admin\admin.php on line 31
and
Fatal error: require_once(): Failed opening required ‘D:\wamp64\www/wp-load.php’ (include_path=’.;C:\php\pear’) in D:\wamp64\www\wp-admin\admin.php on line 31
Should I just delete everything and start over, or is there a configuration to fix this?
manjeet kaur
hi sir I want to learn word press .can I learnt it online ? my future depend on it
Dipankar Ray
Thanks for the step by step info. However, I am not sure how to create a Database as very time I click on the Wamp icon and then phpMyAdmin, I am getting a blank new browser window with ‘http://localhost/phpmyadmin as the URL..
Therefore,I can’t proceed to the next step which is to click on Databases and thereafter create a database for Wordpress.
Please help and point out if I am not on the right path.
Thanks.
WPBeginner Support
Try adding a slash at the end of URL like this:
http://localhost/phpMyAdmin/
Admin
Dipankar Ray
Thanks for your suggestion of using the URL above. I had overcome my previous issue and was able to proceed. However, after that I came across other issues like MySQL errors and decided to uninstall WAMP server from my computer.
By the way, my OS is Windows XP.
Now on trying to re-install after downloading this software I am receiving the following error message. ‘ Aestan Tray Menu has encountered a problem and needs to close.We are sorry for the inconvenience.’. This has happened over three times. Thanks.
Please help as I am not sure where I am erring.
WP Complete Beginner
Pretty sure that you have Microsoft IIS running which is causing this mess. Happened to me. Go to the WAMP > Apache > Test Port 80 option.
It will blurt out something like Port 80 wrong service is running. The real service that’s running is MS IIS X.0
Launch cmd as admin and type iisrest / stop in the command line.
Then go to WAMP > Apache > Service Administration > Install Service
Finally, Then go to WAMP > Apache > Service Administration > Start Service.
It should work! Let me know if my comment helped you.
Jun Allan
Thank you!
Fawaz
Thanks a lot. Had to fix some errors and finally it worked. Very nice guide through. Already bookmarked.
Vassilis
How do I establish 2 or more sites on the same server (if possible)?
Thanks in advance
Krishna
Really useful and worked perfectly. Thank you so much..
ART
I’m an advanced beginner using Vista SP2. I think I am running both 32 and 64 bit. I had a big problem with VCRunTime140.dll missing error. First I tried Wamp 64bit, then Wamp newest 32bit, then confirmed VCRunTime140.dll was installed in my Windows\System32 folder and confirmed my updated Firefox was in the Programs(86) folder. Still had the *.dll missing error. Then tried the older Wamp 32bit. Problem solved.
2 more errors I made were to copy the WordPress folder without extracting it. Then deleted where I copied it and properly extracted it before copying. But I copied it to Wamp instead of Wamp\www
After I deleted it from the second wrong location, I copied it to Wamp\www and things worked great after that.
Hopefully a little helpful to call out some beginner errors to prevent others’ headaches.
Visata requires Wamp Version 2.5
Recently Wamp and Google Maps versions or settings have changed. Vista SP2 cannot run the latest Wamp, Stay with Version 2.5, specifically MYSQL 5.6.XX (I found xx=17 but some places say xx=26 is available.)
Thank you so much for these instructions!! Other lists of instructions are very difficult and not very useful.
Vianney kirumira
Thank u so much guyz. really you have made my day!. At least
Iris India
Excellent ! Thanks for your step by step instructions
Sid
Probably being dumb, but how do i see my web site project again and work on my site? To open it again I selected the ‘wamp’ icon, it opened a dashboard where I could see my project folder, I double clicked to open it, but instead of my site I got a page that said error my page cannot be found. I could not see the wordpress dashboard when I selected the wamp icon or any option to open wordpress. Can you please advise? Thanks.
Michael
Type localhost/site-name in your browser. To view your admin type localhost/sitename/wp-admin
Nicko Johnson
After clicking on phpMyAdmin its saying the site can’t be reached. What could be wrong?
Sid
Just want to say thank you! I have never done anything like this before and your steps were very useful and easy to follow
NOURI
when I try to install WAMP, it gives me error msg
JP
I followed instructions, yet when I attempt to open the browser with:
http://localhost/mysite/
I get a 404 file not found. Any hints as to what is going on? Thanks.
WPBeginner Support
The mysite directory is not found in the WAMP web folder.
Admin
kittyket
and what do you have to do then?
WPBeginner Support
It depends. May be a user has installed WordPress in their htdocs or www directory. Or may be they created the mysite folder elsewhere and WAMP can’t find it in the www directory.
Maya
Struggled a bit with Wampserver installation but finally everything went smooth. Thanks for the step-by-step explanation.
WPBeginner Support
Glad you found it helpful.
Admin
puri shanker dhobi
how to open a php template in wordpess using wamp server
Gold
Thank you so much!!!! You’re all shades of amazing.. This tutorial was super super helpful. Everything worked perfectly. Thanks again!
veena
after wp_config file it is sudenly showing following error.
Error establishing a database connection
I have created a database , mysql , apache , php are all working, how find out solution for this?
Suzi
I was getting the same error because I was not using a password, and I forgot to remove the word “password” where it asks for MySQL password on the previous page!
Erling Bergan
I have followed the instructions, and everything has looked fine. I have clicked on the Wampserver icon, and then clicked on phpmyadmin. A browser window opens, but there is no phpMyAdmin in it. The web page is blank. Could you give me a hint of what may be wrong?
Suzi
I was having the same issues .. there are so many reasons that this could be happening. did you follow ALL of the instructions, including the VISUAL downloads and skype and port 80 issues? I got to the point where my icon was green and still would not work, so I uninstalled it and used the 32 bit version even though I have 64 bit on my pc. Then it worked!
Jimmy Karago
Thanks so much was lost but, this helped me a lot
soheib
thank youuuuu really helped!!!!!!!!
Mxolisi Maphosa
Thank you very much, this helped me so much.
ana
Great tutorial! It really helped me. I’ll be following you.
Jeremy
Hi, what if I have an instance of Acquia Dev Desktop (Drupal) on my local machine? Installing this wont be an issue?
Thanks
Paul Gomez
Hello, right now I am trying to set the WAMPserver, but in i see 4 versions 2 for 32 Bits and 2 for 64 Bits. Which of the two versions should I pick? I am a bit confused what the difference is from the 2 versions. I see the Apache, PHP and MySQL versions are different but I am not sure.
WPBeginner Support
They are basically the same. Most modern computers have 64bit architecture. If you are using an older machine then try 32bit version, other wise try 64bit version.
Admin
Paul Gomez
I understand, but that was not my question. Please read my original message.
Jason
This has to do with the size of the data types the processor can handle and the size of the memory addresses it can hold in it’s register. 64 bit applications can utilize more RAM because they can utilize exponentially more of those addresses, but unless you are writing your own ‘big data’ type of applications or using plugins that need the extra memory then it’s almost completely irrelevant to you. You won’t notice the difference either way, so just pick one.
Phil
Any answer on this? I have the same question. I know I want 64 bit, but what PHP version should I choose?
HV
The two 64bit installs have different software versions.
Apache : 2.4.17 MySQL : 5.7.9 PHP : 5.6.16 on one
and Apache : 2.4.9 MySQL : 5.6.17 PHP : 5.5.12 on the other.
The two 32 bit versions are similar
They are giving you options in case your development environment
needs a particular version of Apache, PHP or MySQL
Prasad Sagare
After clicking on phpmyadmin show error.
IIS 8.5 detailed error-404 not found.
Plz help me..
David
I get the same error 404 page when clicking phpmyadmin. Any resolution here? I do not have skype on this computer.
Luc
After numerous failures, this instruction worked just fine! Thanks.
dicegeorge
Thanks,
that worked without a hitch,
i’ve been wanting to do this for ages!
Michael
It is not clear to me whether I must set up a database first, or can I simply import my current live back up of the blog, and then work on it locally.
I sort of expected to import the existing word press blog to my local hard disk, and the import process will then create all the tables and the databases.
Thanks
Ron
Thank you. This great page of info REALLY helped !!!
Prashant Menase
Thank you for easy steps!!! Helped me lot! keep adding………….