We’ve showed you how to install WordPress on Windows and Mac. However, recently one of our users asked if it was possible to use the same local WordPress install both at work and at home. In this article, we will show you how to install WordPress on a USB stick using XAMPP, so you can use your local WordPress install on any computer that you like.
XAMPP is a software package containing Apache web server, PHP, MySQL, and phpMyAdmin. You can install it on your Windows, Linux, or Mac operating systems. We’ll be showing you how to install it on a USB drive connected to a Windows PC, but the installation method are pretty much the same no matter where you install it.
The first thing you need to do is download XAMPP lite. Go to the XAMPP download page, and then click on More downloads.
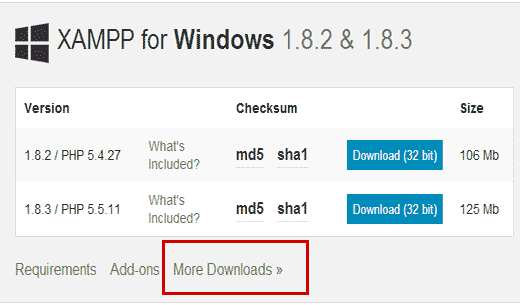
You will be redirected to sourceforge website where you need to first click on XAMPP for Windows, and then click on the latest version.
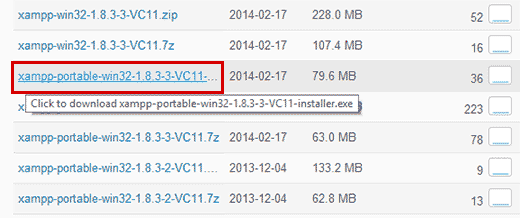
On the next screen, there will be a list of files available for that version. Scroll down and find the portable version in .exe format. Click on the file name to begin the download.
Once you have downloaded the XAMPP portable file, you need to double click on the file to run the installation. During the installation you will be asked to select the location where you want to install XAMPP. You need to click on the folder icon, and then select your USB drive.
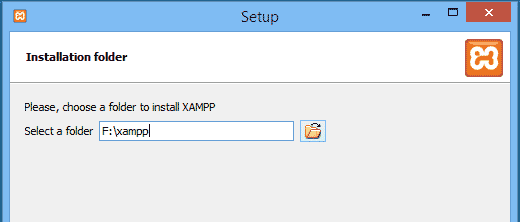
Click on next to continue the installation. The installer will now install XAMPP on your USB drive. After the installation, you need to go to your USB drive and then open the XAMPP folder.
To launch XAMPP, you need to run xampp-control.exe from your USB drive. This will bring up the XAMPP Control Center which looks like this:
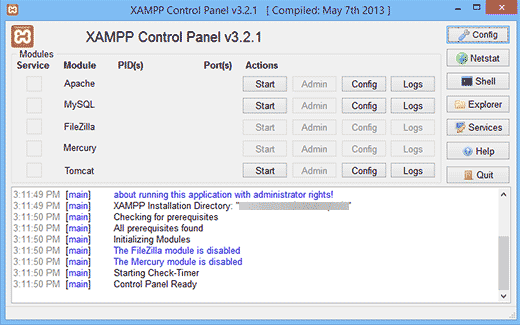
You need to start Apache web server and MySQL by clicking on the start button next to them. You will be prompted by Windows Firewall, and you need to allow access to both applications.
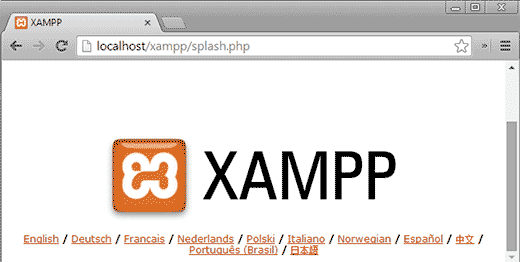
Now open a web browser and type http://localhost/ in the address bar. You will be greeted by the XAMPP splash screen. This means you have successfully installed XAMPP on your USB drive.
Installing WordPress on USB Stick
So far, you have successfully installed Apache web server with MySQL and PHP on your USB stick. The next step is to install WordPress itself. The installation of WordPress in USB stick is not much different than installing it on your Windows or Mac computer.
First you need to open your USB drive and go to the htdocs folder in your XAMPP installation directory. Create a new folder in the htdocs. This folder will be your local WordPress site. You can name it anything that you like. For the sake of this tutorial lets name it site1.
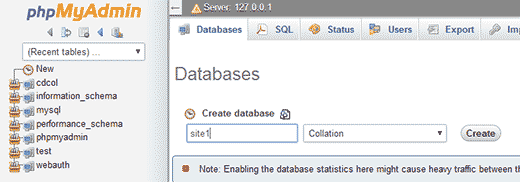
WordPress needs a MySQL database to run, so you need to create a database before installation. To create one, you need to open web browser and enter http://localhost/phpmyadmin in the address bar. This will open phpMyAdmin which is a web based database management software. Click on the Databases on the top menu bar, and then provide a name for your database before hitting the Create button.
Now we need WordPress. Simply visit WordPress.org and download a fresh copy of WordPress to your computer. Extract the downloaded .zip file to your Desktop and open it.
Now you need to copy the contents of wordpress folder and paste it in the /htdocs/site1 folder on your USB drive.
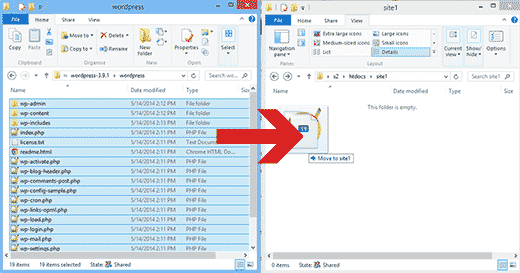
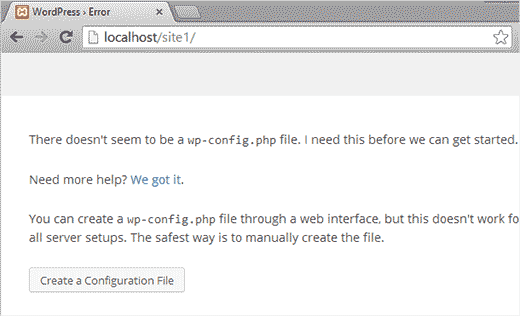
Once you have copied WordPress files, you can run the WordPress installation by accessing your site at http://localhost/site1 in a web browser.
WordPress will inform you that it didn’t find the WordPress configuration file, so you need to create one by clicking on the Create a Configuration File button.
On the next screen, provide the database name you created earlier. In the username field you need to enter root, and leave the password field blank. Hit the submit button to proceed.
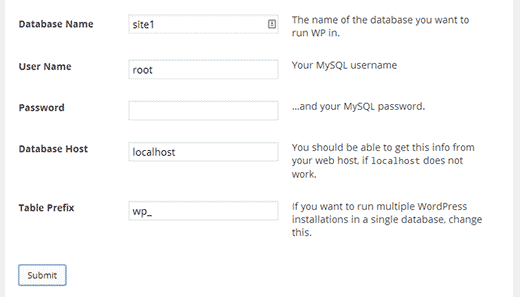
WordPress will now try to connect to your database. Upon success, it will show you a success message. Click on the Run Install button to proceed.
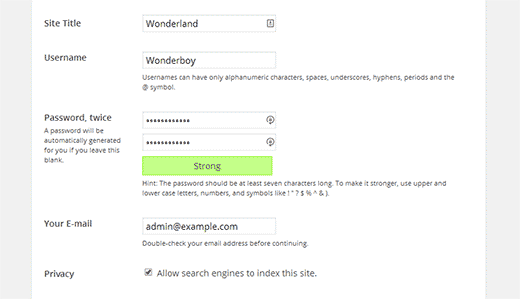
You will be asked to provide your site information and create an admin username and password. This admin username and password will be used to login to the WordPress admin area. You will also need to provide an email address. In the privacy section you can uncheck the box that says Allow search engines to index this site. Once you are done, hit the Install button at the bottom.
That’s all, you have successfully installed WordPress. You can now proceed to login to your site and do whatever you want. To create another WordPress site on the same USB, simply create another folder in the htdocs directory and repeat the process.
We hope this article helped you install WordPress on a USB stick. You can now take this USB stick with you. Note that your USB stick will only work with Windows computers. You may also want to see our guide on how to use WordPress in your browser with WordPress Playground or our expert picks of the best drag and drop WordPress page builders.
If you liked this article, then please subscribe to our YouTube Channel for WordPress video tutorials. You can also find us on Twitter and Facebook.


martine
Hi,
Installed all in good order. When trying to login into wordpress I get the following error : One or more database tables are unavailable. The database may need to be repaired.
Clicking on the link for repair I get the below and I have to delete the last line referring to the repair. If I do this I get another pop up saying I need to add it again and try again. It is a continious circle with no end.
How to solve this?
The wp_users table is okay.
The wp_usermeta table is okay.
The wp_posts table is okay.
The wp_comments table is okay.
The wp_links table is okay.
The wp_options table is okay.
The wp_postmeta table is okay.
The wp_terms table is okay.
The wp_term_taxonomy table is okay.
The wp_term_relationships table is okay.
The wp_termmeta table is okay.
The wp_commentmeta table is okay.
Repairs complete. Please remove the following line from wp-config.php to prevent this page from being used by unauthorized users.
define(‘WP_ALLOW_REPAIR’, true);
WPBeginner Support
Hi Martine,
If this is a fresh WordPress install and you don’t have any content, then you may want to resinatll WordPress. If it does have content, then you may need to repair tables from PhpMyAdmin.
Admin
rajendra upadhyaya
sir
is there any way to install wordpress on usb with WAMP and how much memory it uses
Miran Potocnik
Hello,
We use WP on server. If I install Apache web server with MySQL and PHP on my USB stick and copy the contents of wordpress folder from server and paste it in the /htdocs/site1 folder on my USB drive. Does it mean that the web pages will be the same? How I can synchronize them?for example: If I change something WP on server side that will be changed on local side, when network be up.
Armando
I used (Microsoft) DISKPART in order to change my USB stick into a bootable disk (FAT32) to be used with XAMPP. Before, it would not install.
You may want to add this tip to the tutorials.
Thanks for your tutorial and best regards!
Jay
I’m not sure these steps still work – I have done the process before (year or so ago) and it worked. Now doing it again on a new drive, and with all updated components, step two of the wordpress installation is always (almost) blank. So something is going wrong. I have tried twice and same thing.
Any tips, based on updated components?
Joshua Harman
Is there any way you’d e willing to do this tutorial for Mac? I’ve been wracking my brain for hours trying to get it to work but don’t have a ton of experience
brainfreeze
hi joshua. i am wondering if you have found a way for Mac? if yes, please share. thanks.
Mahendra
can we run php file in another computer which does not have xampp using usb sticks
Amonza
I am not quite exactly sure what you are asking, but if you have xampp installed on a usb stick as described you should be able to take that stick to any computer and run the apache server and be able to serve php pages from the htdocs folder on the pen drive.
If you are running an IDE that needs the path to php.exe you could point it to the php folder on the pen drive.
Lisa
For those who have done this, what size USB drive do you suggest?
Ahmad Fahrurroji
Good idea, I’ve never used this option installing xampp on usb stick but It’s good to try. Thanks.
WPBeginner Staff
you can transfer your site using BackupBuddy (here is a tutorial) or using Duplicator.
Ian Delemare
I like the idea of having a portable version of WordPress and being able to develop a site in many locations. But what is the procedure to transfer a developed site (including images, posts plugins etc) from a USB stick to the web?
Bill Gibson
I had put a multisite version of WP on a USB stick a couple of years ago. I added a portable version of Firefox, and included the Mobile Barcoder plugin. The multiple sites could be used for classes, projects or presentations, and it was a nice organizational tool. Add text, links & images, and embed for videos or larger files. As long as you put your USB stick in an Internet connected device, you had a great presentation tool. The “Mobile Barcoder” app created QR codes, on the fly, so I could pull up a site from the Flash drive, and then generate a QR code to share links with the audience.
WPBeginner Staff
Yes there is, but we are not sure whether it works as a portable app or not
Zeeshan Asif
What about Mac ???
WPBeginner Staff
Unfortunately MAMP the mac alternative to XAMPP can not be run from an external drive. There is an alternative called AMPPS but we have not tried it.
DigitizedSociety
XAMPP has a mac version.
James B.
Great post. I’ve been using “Instant WP” for my local and USB stick installs of Wordpress…but I may try XAMPP out! Thanks for the great work.