Many website owners don’t realize they can run multiple WordPress installations on their domain. Whether you want to test new designs, create a staging site, or start a new project without buying another domain, a subdirectory installation can be incredibly helpful.
This approach has saved us countless hours of troubleshooting and prevented many potential website disasters. Because of this, we’ve found this to be one of the most useful tricks in our toolkit.
The best part? Installing WordPress in a subdirectory isn’t as complex as it might sound. In this step-by-step guide, we’ll show you how to install WordPress in a subdirectory, just like we’ve done countless times for our own projects.
By the end of this tutorial, you’ll have a clear understanding of how to create a separate WordPress installation without interfering with your main site.
Here’s a quick overview of what we’ll go over in this post:
Subdomain vs. Subdirectory: Which One Is Better for SEO?
Normally, when you’re starting a WordPress website, you’ll set it up on its own dedicated domain name (like wpbeginner.com). But sometimes, you might want to create additional websites using the same domain name.
Luckily, WordPress gives you a couple of ways to do this. You can either install WordPress in a subdomain ((http://newebsite.example.com) or as a subdirectory (http://example.com/newwebsite/).
One question we get asked all the time is: which one is better for SEO? Let’s break it down.
Search engines like Google treat subdomains as completely separate websites from your main domain. Think of it this way: they see WPBeginner and our WPBeginner Videos site as two distinct entities. This means a subdomain has to build its own authority and ranking power independently.
On the other hand, sub-directories directly benefit from the established authority of your main domain. In most cases, this gives subdirectories a head start in ranking higher in search results.
If you’re looking to create separate WordPress sites using either subdomains or subdirectories, one popular method is to install a WordPress multisite network. This allows you to manage multiple sites from a single WordPress installation.
However, if you need to keep these websites completely separate and managed independently, you can also install different instances of WordPress. To make it easier to manage multiple separate WordPress installations, you can use WordPress site management tools that provide a single dashboard for all your sites.
Requirements for Installing WordPress in Subdirectory
Good news! Installing WordPress in a subdirectory is usually pretty straightforward. If you already have a WordPress website set up on your main domain (like yourdomain.com), you’re all set. You don’t need to do anything special on the hosting side.
However, if your main domain is currently hosting a static website (one that’s not built with WordPress), you’ll want to quickly check with your web hosting provider to make sure they support WordPress. Most reputable hosts do, but it’s always good to confirm.
If your current host doesn’t support WordPress, don’t worry. You’ll just need to move your website to a different hosting company.
We highly recommend Bluehost. They’re offering a fantastic discount on hosting specifically for WPBeginner users, and they even include a free domain name.
If you are using a different hosting provider, then all top WordPress hosting companies make it very easy to install multiple WordPress websites using the same hosting account.
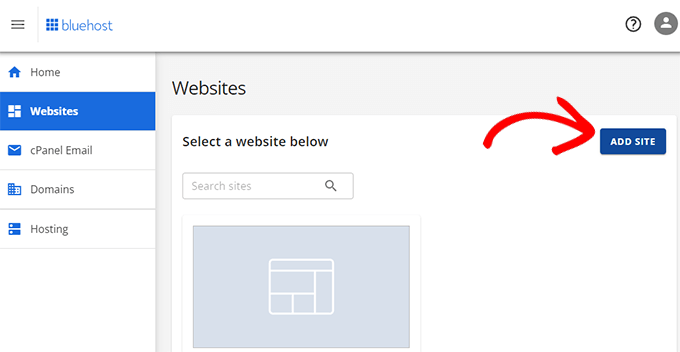
For instance, if you are using Bluehost, then you can easily add a new WordPress installation right from your hosting dashboard.
However, please remember that most shared hosting accounts have limited server resources. If one of your websites suddenly gets a lot of traffic, it could potentially slow down or affect the performance of your other websites on the same account.
If you’re just starting out, then using shared hosting is often perfectly fine. However, as your business and website traffic grow, you’ll likely want to consider upgrading to managed WordPress hosting for better performance and scalability.
That being said, let’s look at how to install WordPress in a subdirectory easily.
Step 1: Create a Subdirectory Under the Root Domain Name
First things first, you need to create a new subdirectory (think of it as a folder) under your main website. This is where you’ll install all the WordPress files for your new site
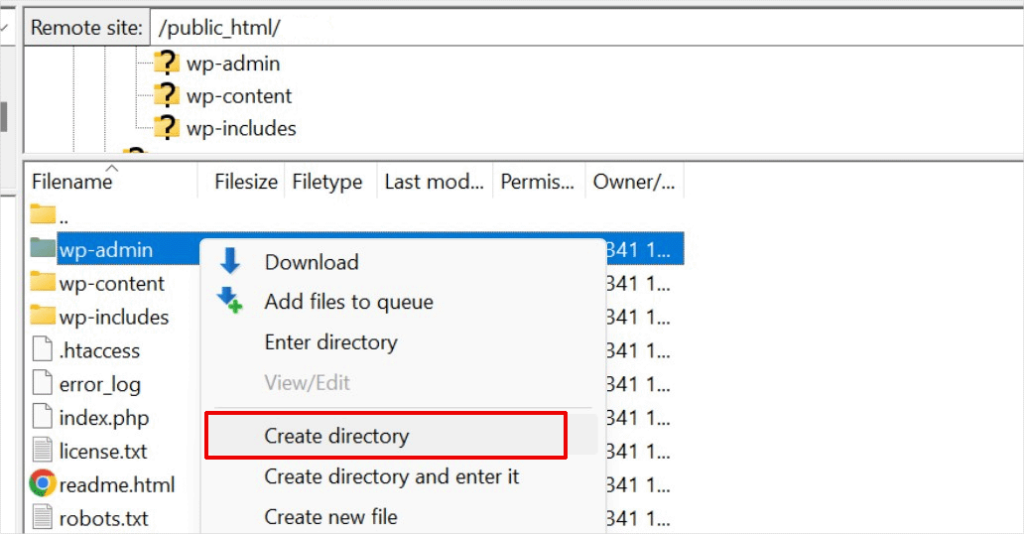
To do this, you’ll need to connect to your WordPress hosting account using either an FTP client such as FileZilla, or the File Manager tool that’s usually available in your hosting control panel (like cPanel).
Once connected, go to your website’s root folder, which is usually the /public_html/ folder.
If you already have a WordPress website installed on your main domain, you’ll see your existing WordPress files and folders in here.
Next, you need to create the new subdirectory. Right-click within the root folder and look for options like ‘Create new directory’ or ‘New folder.’
Now, be careful when choosing the name for your subdirectory. This name will become part of your new WordPress site’s URL, and it’s what people will type into their browsers to visit this specific website.
For example, if you name this directory travel-guides, then your WordPress website’s address will be: http://example.com/travel-guides/

Step 2: Upload WordPress Files
Your newly created subdirectory is empty at the moment. Let’s change that by uploading WordPress files.
First, you need to visit the WordPress.org website and click on the ‘Download’ button.
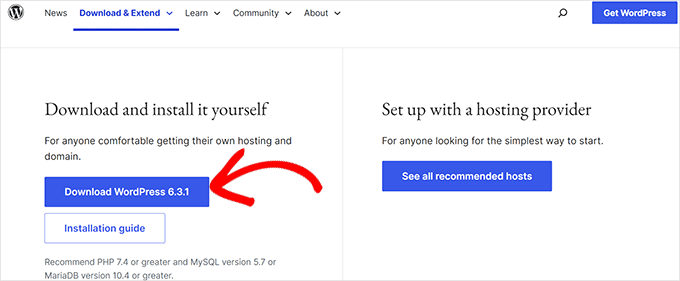
Your browser will now download the zip file containing the latest WordPress software to your computer.
After downloading the file, you need to select and extract it:
- Mac users: Simply double-click the downloaded zip file.
- Windows users: Right-click on the zip file and choose the ‘Extract All’ option.
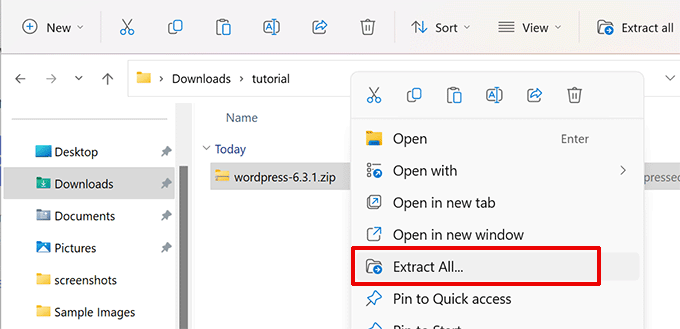
After extracting the zip file, you will see a ‘wordpress’ folder.
Inside the wordpress folder, you’ll see all the core WordPress files and folders.
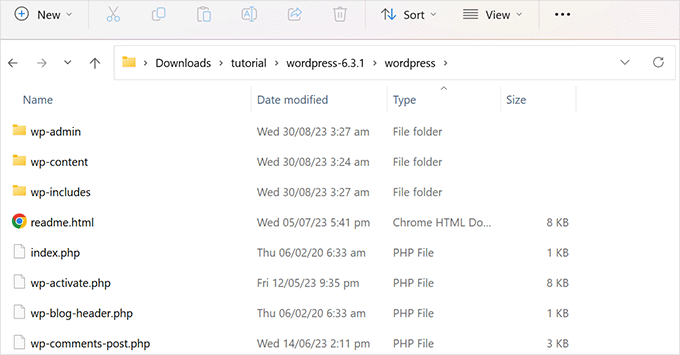
Now, let’s upload these files to your new subdirectory.
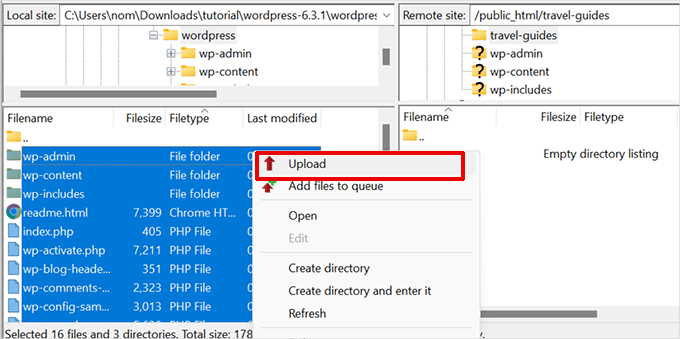
Connect to your website using an FTP client and go to the subdirectory you created in the first step. In the local files panel of your FTP client, go to the ‘wordpress’ folder you just extracted.
Now, select all files inside the folder and upload them to your new subdirectory.
Step 3: Create a New Database
WordPress stores all your content in a database. Since you’re installing a new WordPress site in a subdirectory, you’ll need to create a brand new database for it.
First, log in to the dashboard of your WordPress hosting account and click on the ‘Settings’ button below your website.
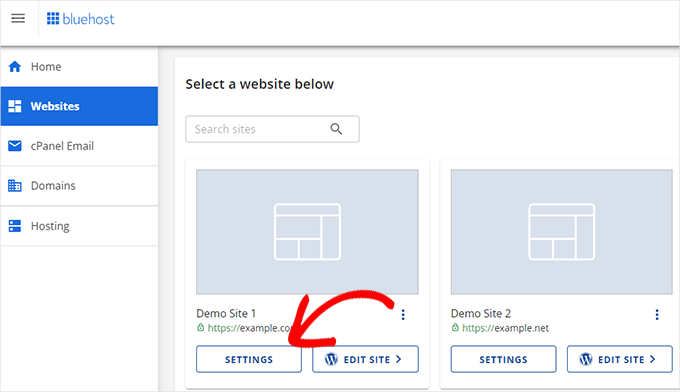
After that, switch to the ‘Advanced’ tab in the top menu.
Scroll down a little to the cPanel section and then click ‘Manage’.
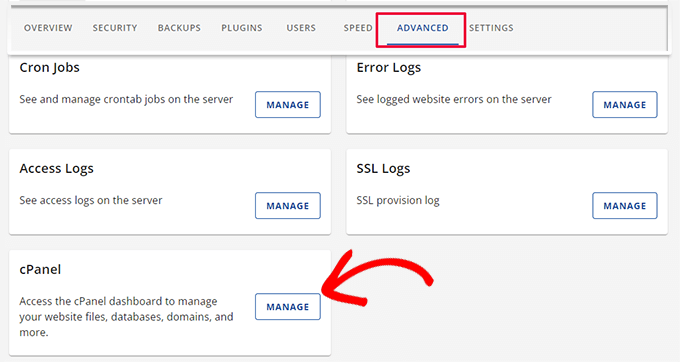
This will launch the cPanel or the advanced hosting control panel.
From there, you need to click on ‘MySQL Databases’ under the Databases section.
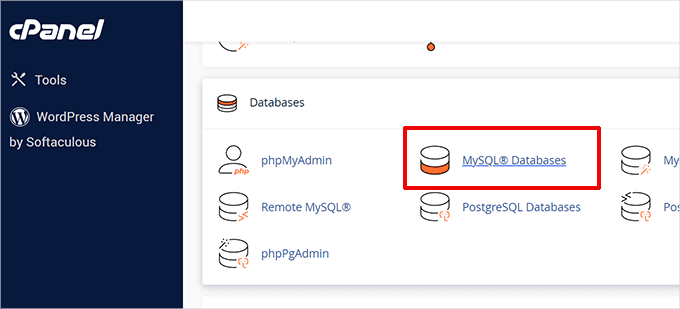
👆 Your hosting dashboard might look a little different from the screenshots above, but the core concepts are the same. You just need to find the area where you can manage databases.
On the next screen, enter the name you want for your new database and click the ‘Create Database’ button.
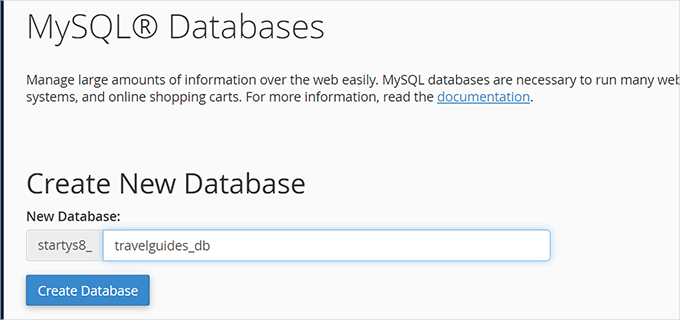
Your cPanel dashboard will now create the new MySQL database. With that done, click on the ‘Go Back’ button to return to the Databases page.
Next up, you need to create a MySQL user who has permission to access and manage this new database.
Simply scroll down to the ‘MySQL Users’ section. Here, you’ll be able to create a new username and a strong password for this user.
That done, click on the ‘Create User’ button to continue.
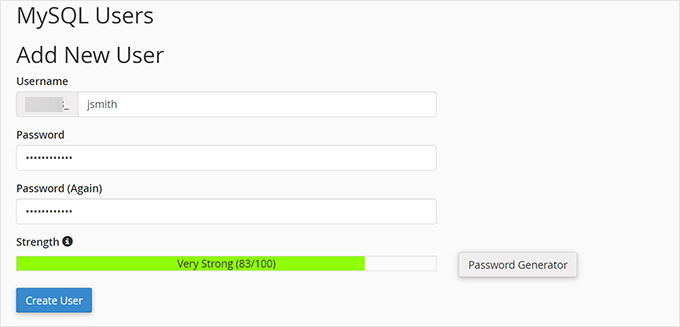
Finally, you need to connect this user to the database you made earlier and give them the necessary permissions.
Scroll down to the ‘Add user to database’ section. Select the MySQL username you just created from the dropdown menu, and then select the name of the database you created.
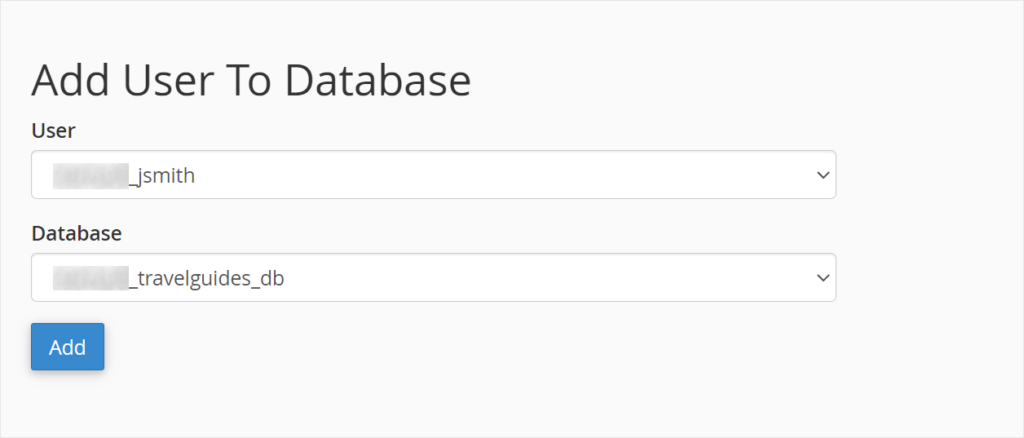
Click on the ‘Add’ button to continue.
cPanel will now grant the MySQL user full privileges on your newly created database.
Step 4: Install WordPress
Now that everything is in place, you can go ahead and install WordPress.
Visit the directory you created earlier in a web browser by typing the URL like this:
http://example.com/your-subdirectory-name/
This will bring up the WordPress installation wizard. First, select the language for your WordPress website and click on the ‘Continue’ button.
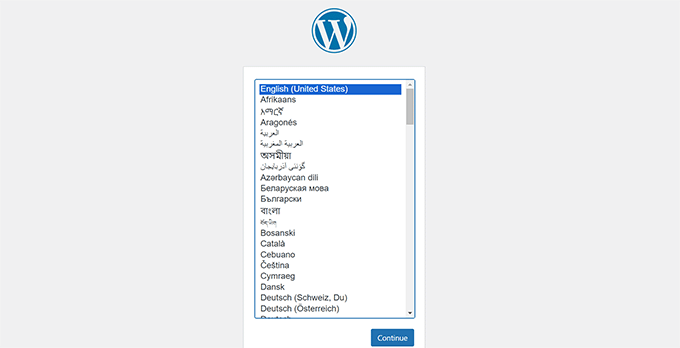
Next, you will be asked to provide your WordPress database name, database username, password, and host.
Enter the database details and click on the ‘Submit’ button.
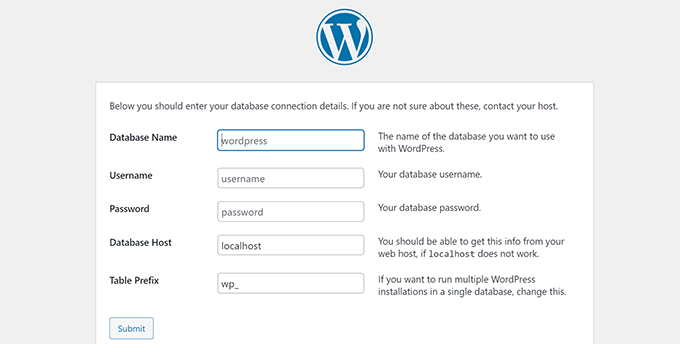
WordPress will now connect to your database.
After a connection is made, you will see a success message like this:
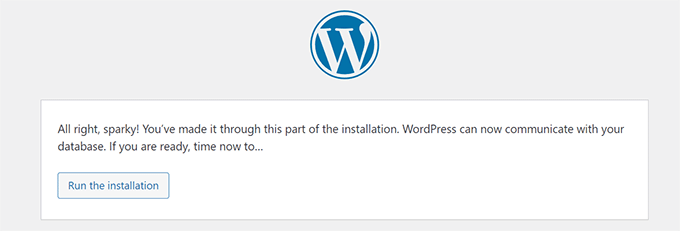
Click on the ‘Run the install’ button to continue.
On the next screen, you will be asked to provide a title for your website and choose an admin username, password, and email address.
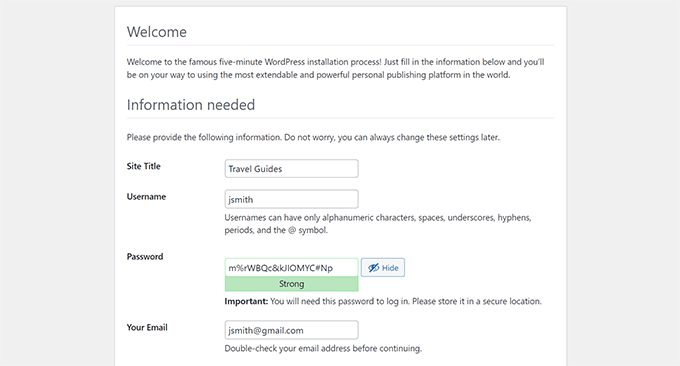
After entering your website details, click the ‘Run install’ button to continue.
WordPress will now set up your website and show you a success message once it’s done:
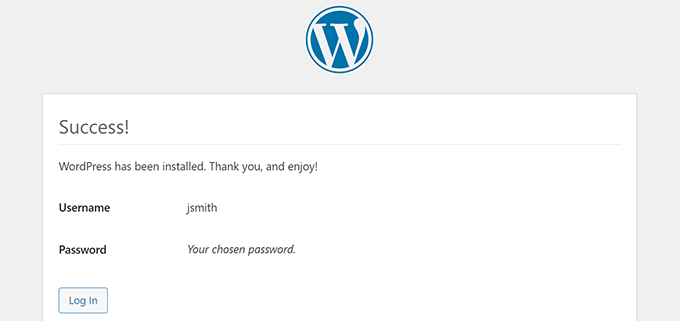
You can now log in to your new WordPress website, which is installed in the subdirectory.
Step 5: Fix Permalinks
If you already have a separate WordPress installation in the root directory, you might run into an issue where the .htaccess file in your subdirectory causes a conflict. This can lead to frustrating 404 errors on your new subdirectory website.
Don’t worry, there’s a simple fix. You just need to edit the .htaccess file in your subdirectory WordPress install. Replace the code inside your .htaccess file with the following code:
# BEGIN WordPress
<IfModule mod_rewrite.c>
RewriteEngine On
RewriteBase /your-subdirectory/
RewriteRule ^index\.php$ - [L]
RewriteCond %{REQUEST_FILENAME} !-f
RewriteCond %{REQUEST_FILENAME} !-d
RewriteRule . /your-subdirectory/index.php [L]
</IfModule>

# END WordPress
Make sure to replace /your-subdirectory/ with the actual name of your subdirectory.
💡 As you’ve just seen, running a WordPress site can sometimes involve a few technical hurdles. If the thought of dealing with potential errors or updates sounds stressful, then we’re here to help.
Our WordPress maintenance services take the hassle out of website management, so you can focus on what really matters: adding content to your new site and growing your audience!
We hope this article helped you install WordPress in a subdirectory. Next, you may want to see our guide on how to make a one-page website, or see our expert pick of the best drag and drop page builders.
If you liked this article, then please subscribe to our YouTube Channel for WordPress video tutorials. You can also find us on Twitter and Facebook.


Olaf
A subdomain or subfolder can be a great choice if you need a new WordPress instance, for example, for a separate online store or discussion forum. You don’t even need a new database. Everything can be handled with a single database if you choose a different prefix during installation. From my own experience, though, .htaccess can sometimes cause issues. In your article, I see for the first time that someone took the time to adjust the code and added the RewriteBase line to make sure everything works as it should. I admire how thoroughly you’ve crafted your tutorials.