Custom post types are essential for organizing and displaying diverse content like portfolios, testimonials, and products.
However, by default, WordPress search results may not include custom post types, potentially leaving valuable content undiscovered.
At WPBeginner, we know how important it is to make your entire content library easy to search. On our blog, we use custom post types and have made them searchable, so our readers can quickly find and explore the content they are looking for.
In this article, we will show you how to easily include custom post types in WordPress search results.
Why Include Custom Post Types in WordPress Search?
By default, the custom post types that you have created on your WordPress website will not be included in the search results.
This is because the built-in WordPress search feature is quite limited and does not index the content that you have added in custom post types.
For example, you may have written some movie reviews under your Movies custom post type. However, your visitors will not be able to find these reviews in your WordPress blog search results.

When you decide to include custom post types in your search results, you will make it easier for users to find your content, improving user experience.
Plus, including custom post types in search results can improve your website visibility.
Having said that, let’s see how to easily include custom post types in WordPress search results.
How to Include Custom Post Types in WordPress Search
The easiest way to include custom post types in WordPress search is by using SearchWP.
It is the best custom search plugin for WordPress, used by over 30,000 websites.
During testing, we discovered that it is easy to use and lets you search content that is not included in the default WordPress search. To learn more, see our SearchWP review.
To include custom post types in WordPress search, you will need to install and activate the SearchWP plugin. If you need help, then please see our guide on how to install a WordPress plugin.
Upon activation, head over to the SearchWP » Settings page from the WordPress admin sidebar and enter your license key.
You can find this information under your account page on the SearchWP website.
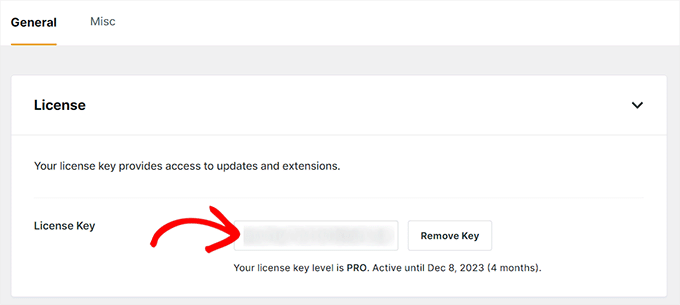
You can now set up SearchWP to include custom post types in WordPress search results.
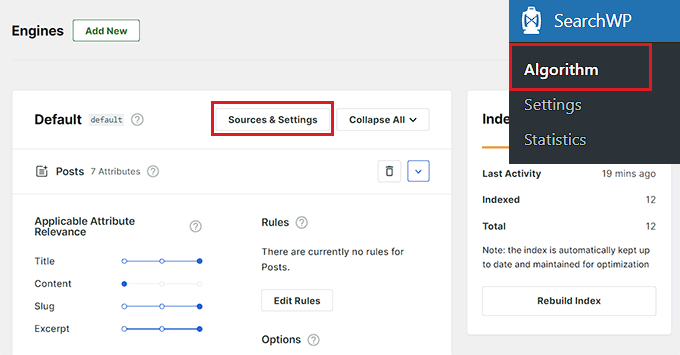
To do this, head over to the SearchWP » Algorithm page from the WordPress dashboard and find the ‘Default’ panel.
On this screen, you will see sections for the different types of content on your WordPress site that SearchWP includes in its search results. This includes your website’s media, posts, and pages.
To include custom post types, click the ‘Sources & Settings’ button.
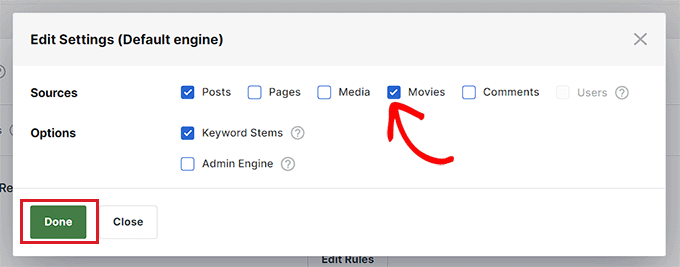
This will open the ‘Edit Settings (Default engine)’ prompt on your website screen.
Here, under the ‘Sources’ section, you will see all your post types listed along with comments, media, and more.
Now, simply find all of the custom post types that you want to include in your search results. Then, check their boxes.
For example, if you want to add the ‘Movies’ custom post type, then check the box next to that option.
Once you have done that, click on the ‘Done’ button.
You will now see a new section for each of your custom post types on your WordPress site added in the ‘Default’ tab.
In each section, SearchWP shows all the attributes that it will look at when searching your custom post types.
For each attribute, SearchWP has an ‘Applicable Attribute Relevance’ scale. This is the weight that SearchWP gives to this attribute when searching your custom post types.
By default, the sliders for ‘Title,’ ‘Slug,’ and ‘Excerpt’ are all the way to the right, so they have the most weight. The slider for ‘Content’ is in the center, so it has less weight.
However, if you want to change the weight of an attribute, then you can simply drag the slider next to it according to your liking.

You may want to try different relevancy settings to see what gives you the most accurate and helpful search results.
You can also remove attributes. For example, your custom post type may have attributes that you want SearchWP to ignore, like attributes that you added for your internal reference only.
To add or remove attributes, click on the ‘Add/Remove Attributes’ button.
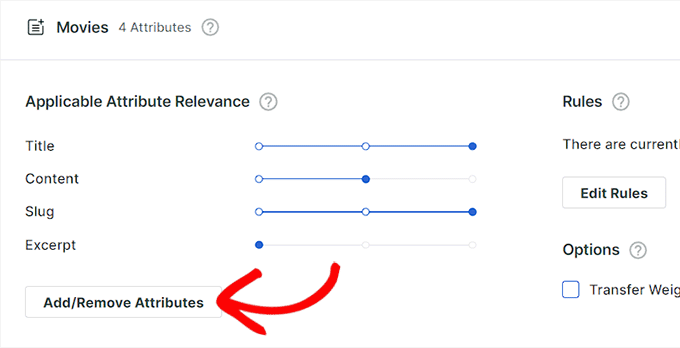
This will open a new prompt on the screen where you can check the box next to an attribute to make it searchable.
Similarly, if you want SearchWP to ignore an attribute, then go ahead and uncheck its box.
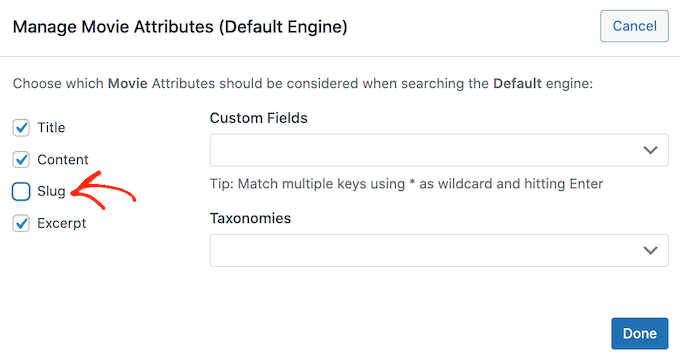
If you’ve created any custom taxonomies or custom fields, then you might want SearchWP to look at this content when searching your custom post types.
To do this, simply click on either ‘Custom Fields’ or ‘Taxonomies.’ You can then type in the name of the attribute that you want to add, and click on it when it appears.
For detailed instructions, you may want to see our tutorial on how to make custom fields searchable in WordPress.
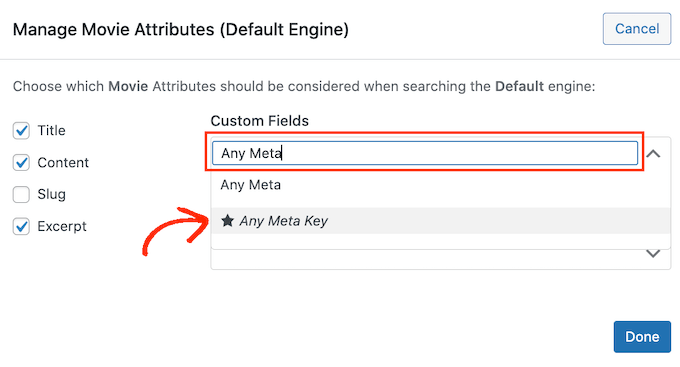
When you are happy with your settings, click on the ‘Done’ button.
Now, if you have added any attributes, custom fields, or taxonomies, then you can change the weight of that attribute by moving the slider to the right to give it more weight.
This means that this attribute will have a bigger impact on the search results.
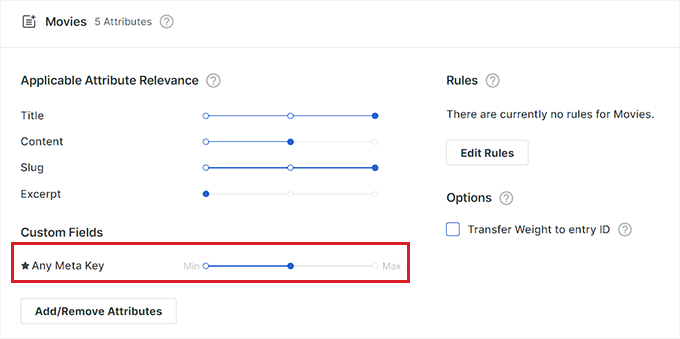
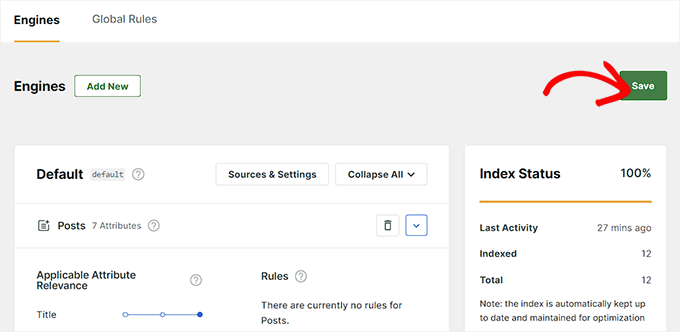
Once you have finished customizing SearchWP’s settings, scroll to the top of the screen.
You can then click on the ‘Save’ button to store your changes.
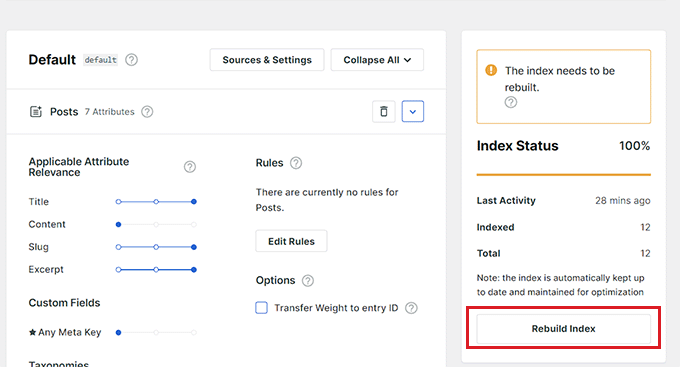
At this point, SearchWP may show you the message ‘The index needs to be rebuilt.’
If you see this message, then go ahead and click on the ‘Rebuild Index’ button in the right column of the screen.
This will add your custom post types to your site’s search index, so they will show up in the search results.
That’s it. WordPress will now include your custom post types in its search results.
For more tips on SearchWP’s advanced settings, please see our step-by-step guide on how to improve WordPress search with SearchWP.
Add a Search Form to Your WordPress Website as a Widget
If you already have a search form on your WordPress site, then SearchWP will automatically replace it.
However, if you have not added a search form to your website yet, then you need to visit the Appearance » Widgets page from the WordPress admin area.
Once you’re there, click the ‘Add Block’ (+) button at the top left corner of the screen to open the block menu.
From here, find the ‘Search’ block and add it to the website sidebar.
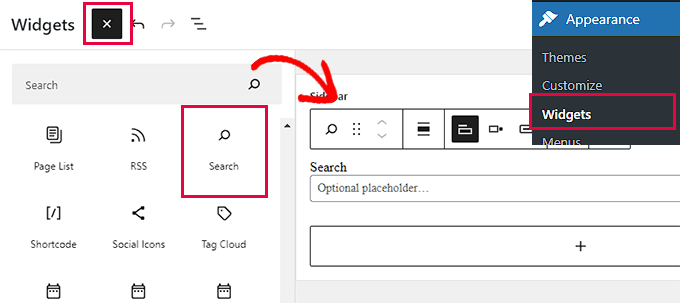
SearchWP will now automatically replace the default WordPress search with its own better search form.
Finally, click the ‘Update’ button to store your settings.
Now visit your website to check out the results of your WordPress search made with SearchWP.

Add a Search Form to Your WordPress Website Using Full Site Editor
If you are using a block-based theme, then you will have a full site editor.
To add a search form, you have to visit the Appearance » Editor page from the WordPress admin sidebar.
Once there, click the ‘Add Block’ (+) to open the block menu and choose the ‘Search’ block.
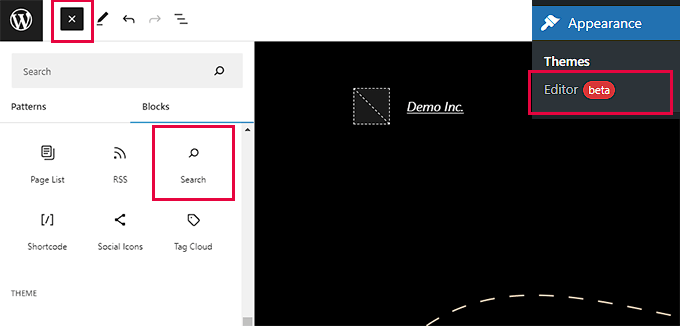
The default WordPress search block will now be automatically replaced by the better search form of SearchWP.
Finally, click the ‘Save’ button to store your settings.
Now visit your website and search for custom post types using the search form.
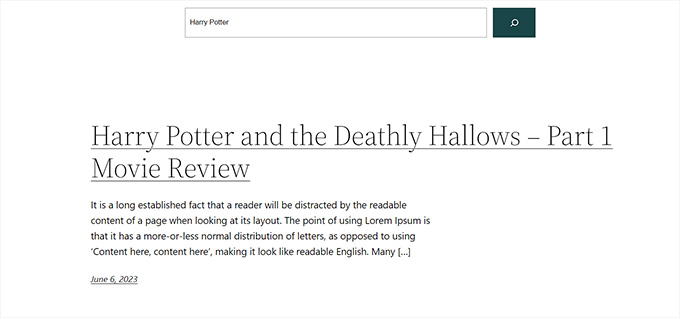
With SearchWP, you can also create a search form that only shows the search results from your custom post type category, which can make it easier for visitors to find what they are looking for.
For more details, see our step-by-step guide on how to create an advanced search form in WordPress for custom post types.
Bonus: Add Fuzzy Search in WordPress
Apart from adding custom post types in WordPress search, you may also want to enable fuzzy search. This feature allows users to easily find the information they are looking for even if they misspell their query.
A fuzzy search looks for partial matches for a search term and shows the closest results if no exact matches are available.

To enable fuzzy search in SearchWP, head over to the SearchWP » Settings page from the WordPress dashboard and scroll down to the ‘General Settings’ section.
From here, simply toggle the switch next to the ‘Partial Matches’ option.
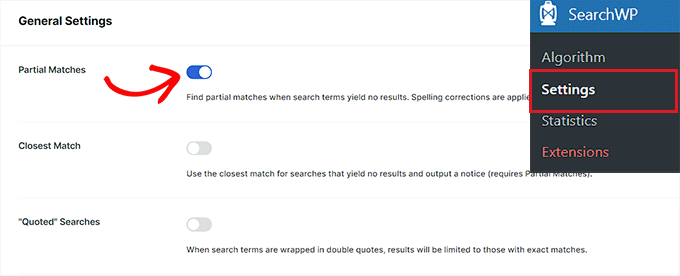
Once you do that, the feature will be automatically added to your search form. For detailed instructions, you can see our tutorial on how to add fuzzy search in WordPress to improve results.
We hope this article helped you learn how to include custom post types in WordPress search results. You can also go through our guide on how to switch custom post types in WordPress and see our tutorial on adding icons for custom post types in WordPress.
If you liked this article, then please subscribe to our YouTube Channel for WordPress video tutorials. You can also find us on Twitter and Facebook.


Dennis Muthomi
The SearchWP section about tweaking attribute weights really caught my eye. I actually used this recently on a portfolio site and it worked great.
We needed the search results to show project titles and categories first, and it was super easy to set up. One thing that really helped us – we tested the search using words our clients typically use before going live.
One quick tip I would like to add is: try playing around with the weights on your custom taxonomies. It makes a huge difference in getting better search results, especially if you’re working with portfolio pieces or case studies that use specific industry terms.
Jiří Vaněk
I wanted to create custom post types on my blog for review articles, which should be separate from other posts. After reading this article, I realized that I might face search-related issues. Thank you for the great tip on WP Search. I’ve been eyeing this plugin for a while and it looks like it will likely become a necessity for my website. Thanks for the new information!