A big part of managing a WooCommerce store involves keeping your product data organized and updated.
If you plan to migrate your store to a new platform, add hundreds of new products, or maintain a multi-store operation, then you must be able to efficiently import and export product information.
Over the years, we have written hundreds of articles to help beginners manage their stores themselves. Plus, we regularly test popular WooCommerce plugins, including those with import/export functionality.
And in this article, we will show you how to import and export products with images in WooCommerce, step by step.
Why Import & Export WooCommerce Products?
Many users need to import and export WooCommerce products for a number of reasons.
- You may want to move products from one WooCommerce store to another.
- You may want to start an online store with a new WordPress website but with the same WooCommerce products.
- If you want to move your website to a new server but need a better way to move products.
- You might want a faster way to add your products to multiple stores that you manage.
- If you need to update product information such as pricing, images, descriptions.
- You may need to update your inventory systems.
- If you want to export products to serve as a backup mechanism in case of data loss.
- And more
Normally, if you are moving your website to a new server, you can duplicate your entire website and set it up on your new host.
We have a complete step-by-step guide for that. See our guide on how to easily move WordPress to a new host or server.
On the other hand, if you only want to move products, then this tutorial will help you learn how to properly export and import WooCommerce products with images and other product data.
We’ll show you two methods; you can choose one that works best for you.
Method 1. Import & Export WooCommerce Products Without a Plugin
WooCommerce comes with built-in functionality to easily import and export products with images without using any additional plugins.
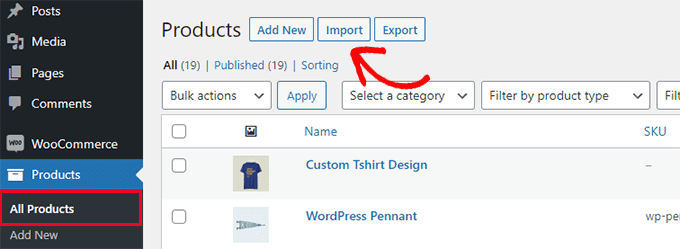
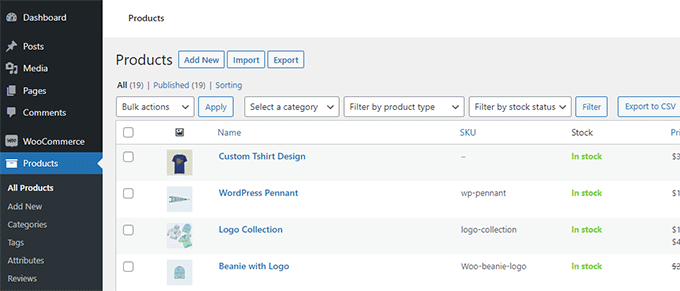
First, you need to visit the Products » All Products page in your WordPress dashboard. There, you will see two buttons at the top to ‘Import’ or ‘Export’ products.
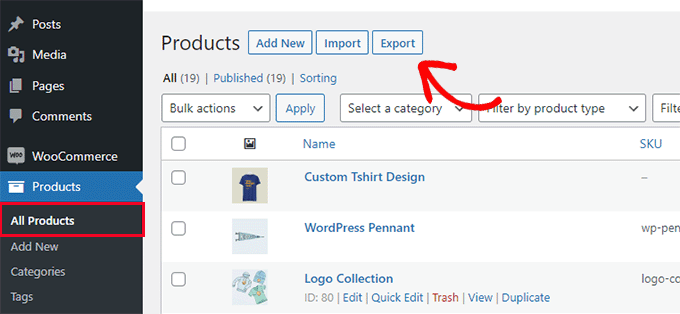
Let’s first check out how the export feature works.
Exporting WooCommerce Products without Using a Plugin
Simply click on the ‘Export’ button at the top to continue.
On the next screen, you’ll see several options for choosing what data you want to export.
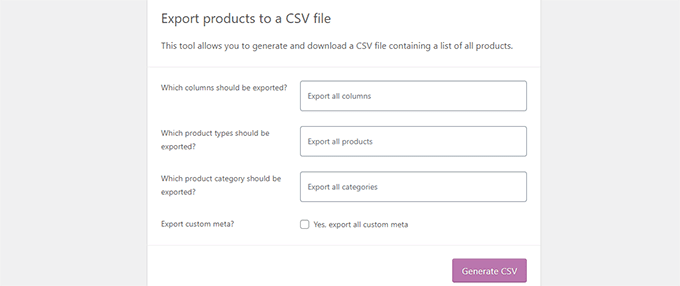
For instance, you can choose to only export certain columns from product data. You can also choose to export specific product types or products in specific categories.
To export all variable products with images and all other data, you can leave these options unchecked.
Optionally, you can check the ‘Export custom meta.’ If you are unsure, then it’s better to check it so that you have the data.
Go ahead and click on the ‘Generate CSV’ button to continue.
WooCommerce will now prepare a CSV file and download it to your computer.
What is a CSV File?
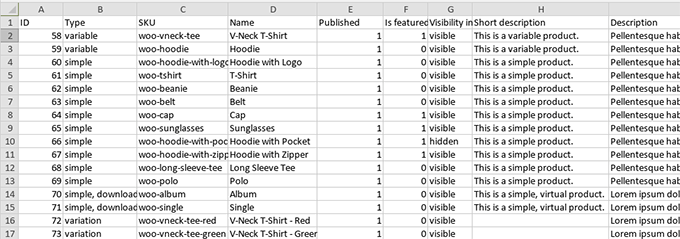
CSV is short for Comma Separated Values, and it is a file type of plain text that separates different columns or fields of data with a comma.
You can open it with any spreadsheet software like Google Sheets or Microsoft Excel. Here is how it would look:
Importing WooCommerce Products without Using a Plugin
Simply go to the Products » All Products page.
Then, click on the Import button at the top.
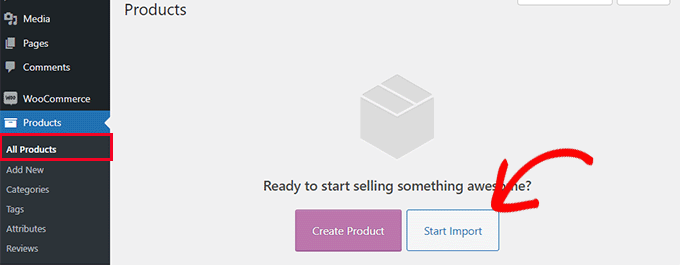
If your WooCommerce store is empty, you will see buttons at the center of the page instead of the ones at the top.
Click on the ‘Start Import’ button to begin the import.
This will bring up the import wizard.
First, you need to click on the ‘Choose File’ button to select the WooCommerce export CSV file you downloaded earlier.
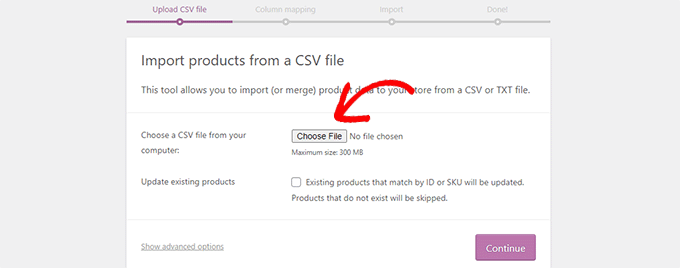
Click on the continue button to upload the CSV file.
WooCommerce will now check to see if your CSV file is in a compatible format. After that, it will ask you to map that data to existing WooCommerce product data.
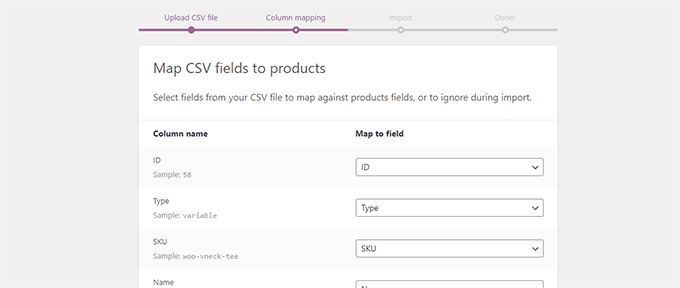
The default settings here will work for most WooCommerce stores.
However, you still need to review whether a column is missing, click on the drop-down menu next to it, and select a matching field if one is available.
Particularly, if you are using variations attribute for products, then make sure to scroll down to the attributes columns and match fields.
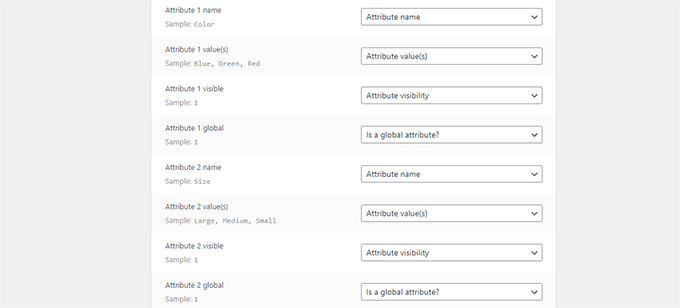
This will allow you to ensure that the fields in your CSV file match the corresponding WooCommerce fields.
Click on the ‘Run’ Importer button to begin.
WooCommerce will now start importing data from CSV files and downloading any product images attached to your items.
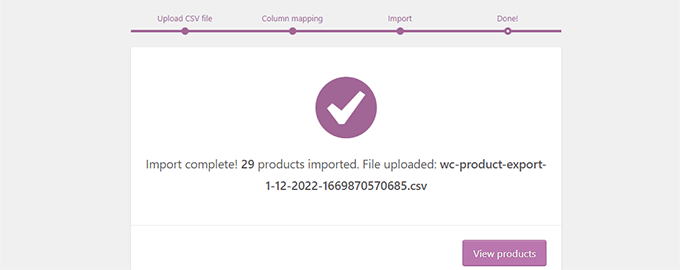
Once finished, you can visit the Products » All Products page to see the imported products.
Make sure to visit your shop and product pages to check that everything is working as expected.
Method 2. Import & Export WooCommerce Products with a Plugin
For this method, we’ll be using a plugin to import and export WooCommerce products.
The advantage of this method is that it offers more flexible options and also allows you to export / import product reviews.
Plus, it allows you to import/export WooCommerce products in batches, which comes in handy if you have a large store with many products and images.
Exporting WooCommerce Products with a Plugin
First, you need to install and activate the Product Import Export for WooCommerce plugin. For more details, see our step-by-step guide on how to install a WordPress plugin.
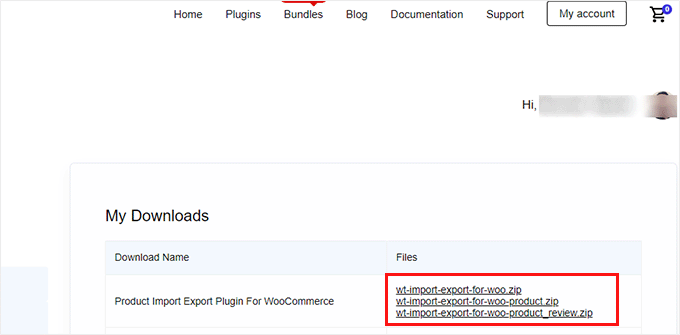
The plugin comes as three separate add-ons. You’ll need to download and install all of them.
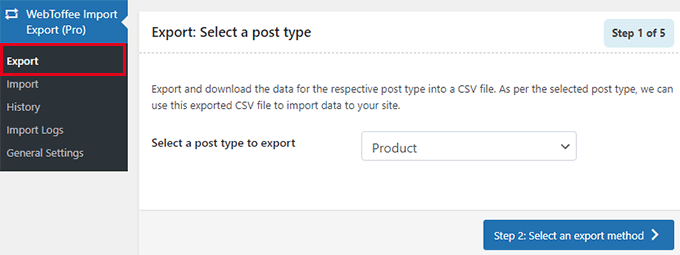
Upon activation, you need to visit the Webtoffee Import Export (Pro) » Export page.
Then, select ‘Product’ as the post type you want to export.
On the next screen, you need to select an export method.
The default Quick Export method automatically selects all your products for export.
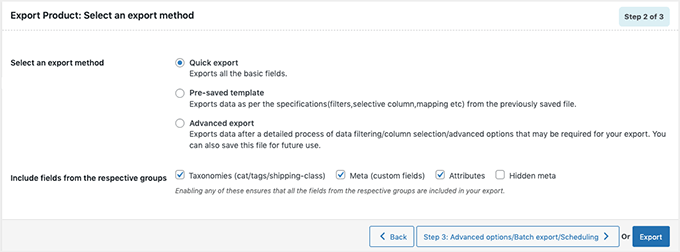
Optionally, you can also choose ‘Advanced Export,’ which allows you to filter products by category, tag, and status.
You can also exclude individual products manually.
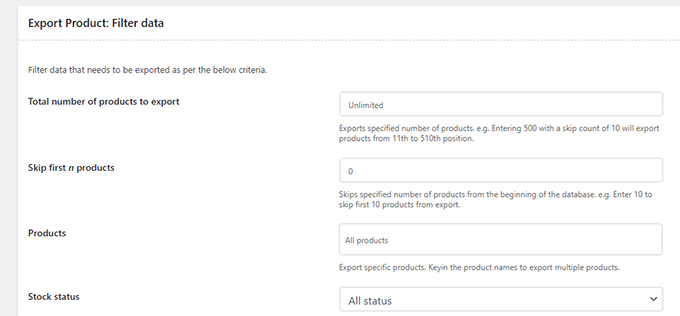
If you wish, you can filter the data and select which products you want to export. For example, the ‘Total number of products to export’ tells you the actual number of products you want to export.
The ‘Skip first n products’ is where you can specify the number of products to be skipped.
For example, enter 10 to skip the first 10 products from export. The Products category lets you filter by the specific names of the products you want to export, and the ‘Stock Status’ lets you choose based on the inventory status.
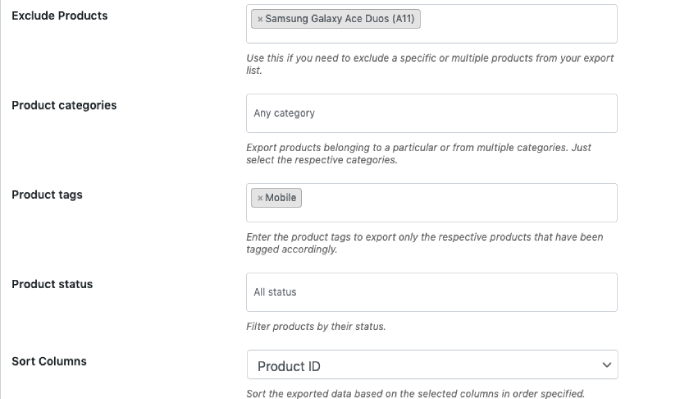
If you scroll down the page, you’ll have other options, such as:
- The products you wish to exclude
- Products in certain categories
- Products with specific tags
- And more
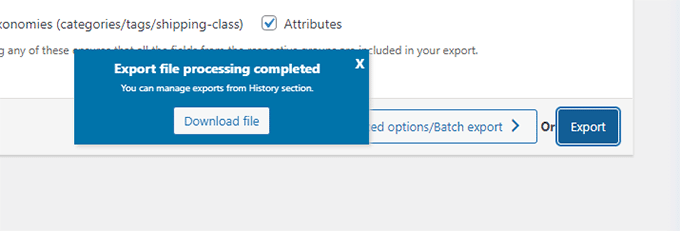
Click on the ‘Export’ button to continue, and the plugin will start preparing your product data.
Once finished, you’ll be prompted to download the export file to your computer.
Importing WooCommerce Products with a Plugin
Now that you have your export file ready, you can import products from another WooCommerce store.
Install and activate the Product Import Export for WooCommerce plugin on the store where you need to import the products.
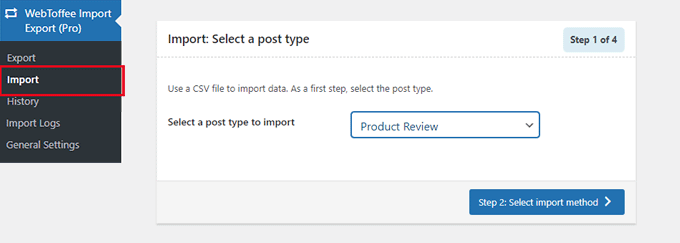
After that, go to the Webtoffee Import Export (Pro) » Import page and select ‘Product’ as the post type you want to import.
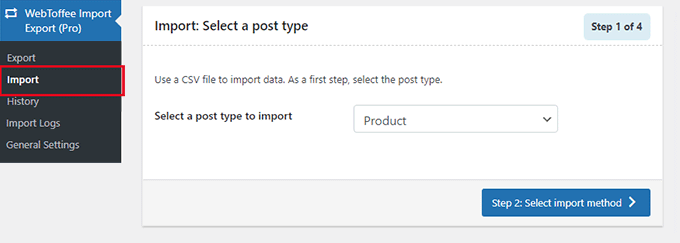
Click on the ‘Step 2: Select import method’ button to continue.
Next, you need to select an import method and upload the exported file you downloaded earlier to your computer.
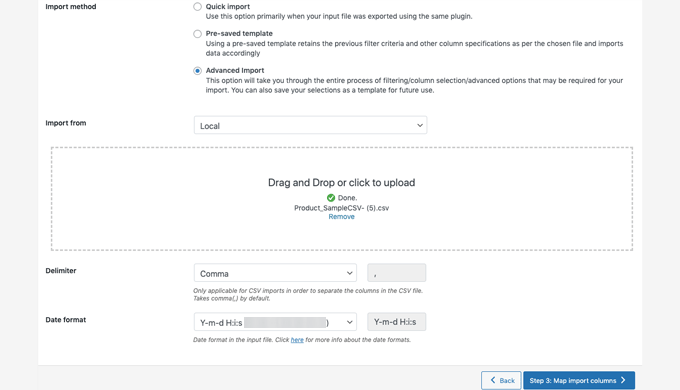
Click on the ‘Step 3: Map and Import Columns’ button to continue.
On the next screen, you’ll see a list of fields and the matching fields from your import file. If you see an empty field, you can choose a matching field for it in the next column.
If you are using product variations like sizes and colors, then make sure to click on the Attributes tab to match attribute fields.
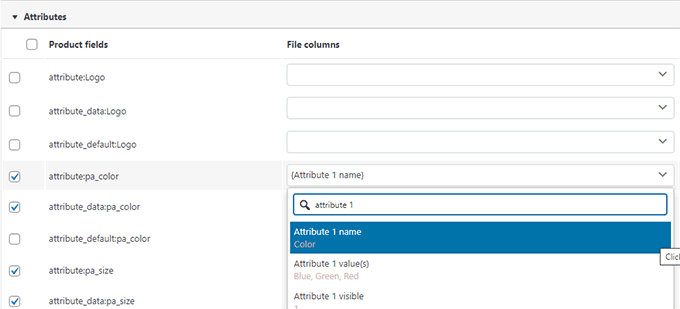
However, if you are not using any products with variations or custom attributes, then you can use the default settings.
Click on the ‘Step 4: Advanced Options / Batch Import’ button to continue.
On the final screen, you’ll see advanced options. For instance, you can choose to match products by ID or SKU, choose what to do if a product already exists, and more.
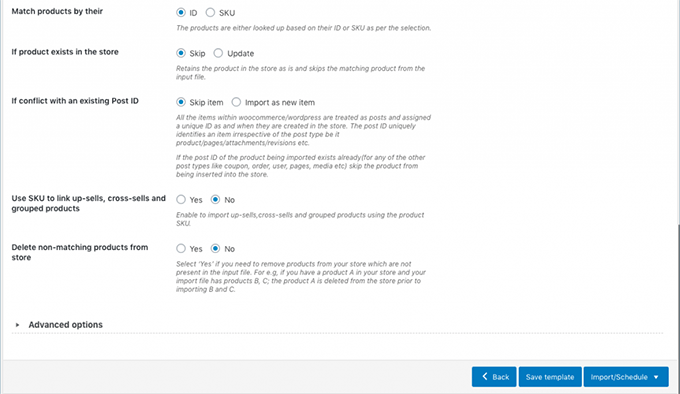
If you are importing products into an empty WooCommere store, then you can use the default settings.
Finally, click on the ‘Import’ button to run the product import process.
You’ll see the progress of the import on screen. Once finished, you can click on ‘View Products’ to check if everything has been imported correctly.
The plugin also allows you to import and export Product Reviews.
If you want to import or export the product reviews, too, then choose the ‘Product Reviews’ post type on the import or export page.
Related: To learn more about this plugin, see our detailed Product Import Export for WooCommerce review.
Improve Your WooCommerce Store with Automations
If you find yourself doing a lot of manual work around your eCommerce store and want to save time, then we recommend using Uncanny Automator for workflow automation.

Uncanny Automator helps you connect over 185+ plugins and apps with a simple no-code visual builder. You can use it to create automated workflows for things that you normally do without writing any code.
We have thoroughly tested this tool in real time and found it to be beginner-friendly and reliable. To learn more about our experience, see our Uncanny Automator review.
There’s a free version that you can try out, and it’s already used by over 40,000 websites.
Aside from workflow automation, if you’re looking for a marketing automation tool for WooCommerce, then we recommend using FunnelKit Automations. It will help you grow your sales and improve conversions without the high costs.

For detailed instructions, see the best WooCommerce automations to increase sales.
We hope this article helped you learn how to easily import and export WooCommerce products with images in WordPress. You may also want to see our pick of the essential WooCommerce plugins or see these practical tips on recovering abandoned cart sales in WooCommerce.
If you liked this article, then please subscribe to our YouTube Channel for WordPress video tutorials. You can also find us on Twitter and Facebook.


kzain
This is a super helpful guide for managing products in my WooCommerce store!
Understanding how to import and export products with images is incredibly valuable. The breakdown of the process using the built-in WooCommerce tools is clear and easy to follow
you guys are ROCK!