By default, WordPress displays an admin email verification notice to site administrators every few months to verify whether the email they use is still correct.
This pseudo-security measure is often unnecessary and annoying for site owners, especially if they are confident in their current email setup and want to streamline their admin workflow.
Several of our partner brands have chosen to disable the WordPress admin email verification notice and have not encountered any noticeable differences in their sites’ performance or security.
By turning it off, they have avoided interruptions without affecting the core security measures already in place, such as two-factor authentication or secure passwords.
In this article, we will show you how to easily disable the admin email verification notice in WordPress.
What is an Admin Email Verification Notice in WordPress?
The admin email verification notice feature was introduced in WordPress 5.3. Its purpose is to show website administrators a screen asking them to verify their site email address every few months.
The admin email verification notice ensures that the email address provided by the administrator is accurate and still in use. This is because having a working email is important to site security and management.
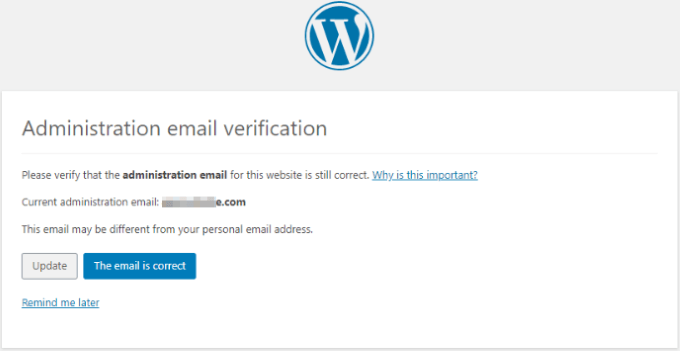
However, originally planned to appear every six months, sometimes the admin email verification notice can be displayed more frequently than necessary.
This can be annoying for users who are just trying to log in to their WordPress websites. Wouldn’t it be great if you could just turn off the admin email verification notice?
Let’s take a look at how to easily disable the admin email verification notice. You can click the links below to jump directly to the method you want to use:
Method 1: Disable Admin Email Verification Notice Using Code (Recommended)
You can easily disable the admin email verification notice by adding a code snippet to your WordPress files. If you haven’t done this before, then take a look at our beginner’s guide on pasting snippets from the web into WordPress.
Generally, you would need to add the code to your theme’s functions.php file manually. However, this can be tricky, and the smallest mistake can bring down your whole website.
This is why we recommend using WPCode. It is the best WordPress code snippets plugin on the market that makes it easy and safe to add custom code to your website.
First, you need to install and activate the free WPCode plugin. For more instructions, please take a look at our guide on how to install a WordPress plugin.
Upon activation, visit the Code Snippets » + Add Snippet page from your WordPress admin dashboard.
Here, click on the ‘Use Snippet’ button under the ‘Add Your Custom Code (New Snippet)’ option.

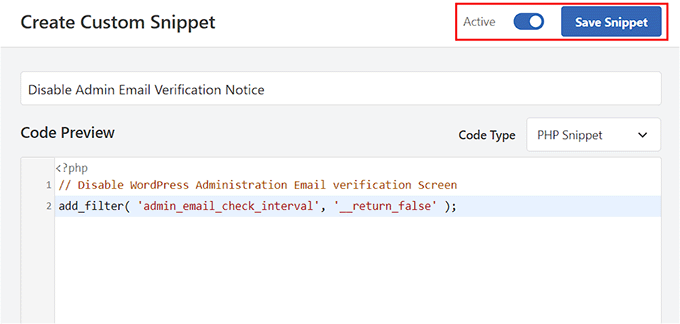
This will take you to the ‘Create Custom Snippet’ page, where you can start by entering a title for your code snippet. It can be anything that helps you identify the code.
Next, select ‘PHP Snippet’ as the ‘Code Type’ from the dropdown menu on the right.
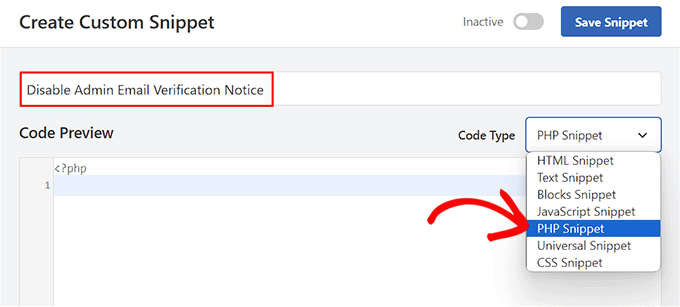
After that, all you have to do is copy and paste the following PHP code snippet in the ‘Code Preview’ box:
// Disable WordPress Administration Email verification Screen
add_filter( 'admin_email_check_interval', '__return_false' );
Next, scroll down to the ‘Insertion’ section and choose the ‘Auto Insert’ option.
The custom code will now be automatically executed on your website upon activation.

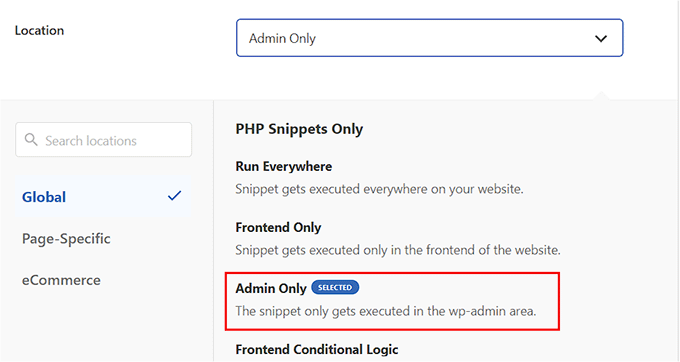
After that, open the ‘Location’ dropdown menu and select the ‘Admin Only’ option.
Once you do that, the code snippet will only be executed in the WordPress admin area upon activation.
Now, go to the top of the page and toggle the switch from ‘Inactive’ to ‘Active’ in the top right corner, and then click the ‘Save Snippet’ button.
Once you have saved and activated the code snippet, it will be automatically executed on your site.
Now, you will no longer see the admin email verification notice.
Method 2: Disable Admin Email Verification Notice Using a Plugin
If you don’t want to add code to your WordPress site, then you can always use a plugin.
First, you need to install and activate the Make Disable Admin Email Verification Prompt plugin. For more instructions, you can check out our beginner’s guide on how to install a WordPress plugin.
Upon activation, visit the Settings » General page from your WordPress admin dashboard and scroll down to the bottom.
Here, you will find the ‘Disable Admin Email Verification Prompt’ option, and you have to check the box next to it.
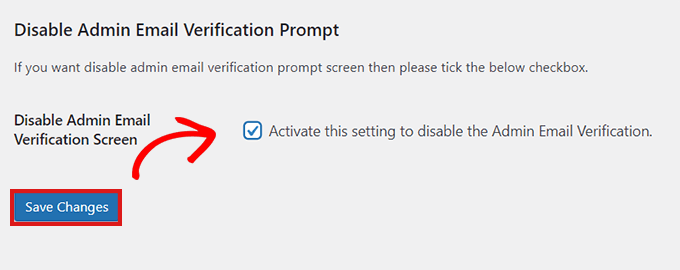
Once you have done that, don’t forget to click on the ‘Save Changes’ button to store your settings.
That’s it! You and your team should not see the admin email verification notice anymore.
Bonus: Disable Automatic Update Email Notification in WordPress
Apart from the admin verification notice, you may also want to disable the automatic update email on your WordPress blog.
By default, WordPress sends you an email for every WordPress core, theme, or plugin update, which can be annoying.
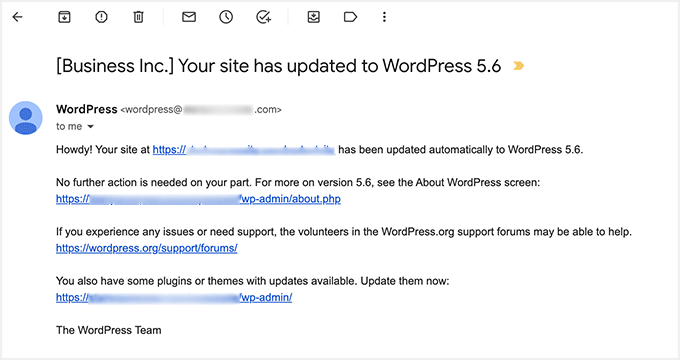
However, you can easily disable this notification by installing and activating the Manage Notification E-mails plugin. For details, see our step-by-step guide on how to install a WordPress plugin.
Upon activation, head over to the Settings » Notification e-mails page from the WordPress dashboard and uncheck the WordPress update email options.
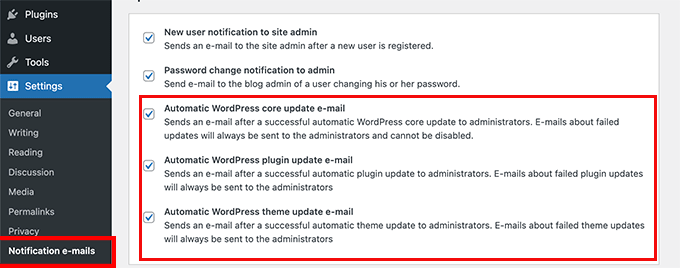
Then, click the ‘Save Changes’ button to store your settings. You have now successfully disabled the update emails. For more information, see our tutorial on how to disable automatic update email notifications in WordPress.
We hope this article helped you learn how to disable the admin email verification notice in WordPress. You may also want to see our tutorial on how to remove the Powered by WordPress footer links and our comparison of the best WordPress database plugins.
If you liked this article, then please subscribe to our YouTube Channel for WordPress video tutorials. You can also find us on Twitter and Facebook.


Jiří Vaněk
Thanks for the snippet. It really comes in handy when you make a website for people and then hand it over to them. Some people are taken aback by this message and then call to see if everything is okay. This disable will really come in handy in these cases. And using a snippet is really very simple, elegant and fast.