If you run a business/agency or work as a freelancer, then you will need an easy way to send invoices to your clients.
Generating these invoices right inside WordPress can help you save time and money and get paid faster.
We offer our own WordPress services, so we have done a lot of research into the best ways to offer client invoices.
Although we don’t personally generate invoices inside WordPress, we’ve discovered that FreshBooks and Sliced Invoices are both great options for small businesses.
In this article, we will show you how to create invoices for clients in WordPress, step by step.
Why Create Invoices for Clients in WordPress?
When you are a freelancer or small business owner, using the right WordPress invoicing system can make your life much simpler while making it easier to get paid.
When you use the right invoicing tools, you don’t have to rely on spreadsheets and outdated methods or pay high subscription fees for complicated accounting software.
The right tools can help simplify client invoicing, tracking, and payment. You can send great-looking invoices to clients with built-in payment options and get paid immediately.
Note: This tutorial covers creating unique invoices for individual clients. If you’re looking for a way to create online order forms for a simple way to collect orders and get paid, then see our guide on how to create an online order form in WordPress.
That being said, let’s show you how to create invoices for your clients in WordPress. You can use the quick links below to jump straight to the method you want to use:
- Method 1: Creating Invoices for Clients Using FreshBooks
- Method 2: Creating Invoices for Clients in WordPress Using Sliced Invoices
- Frequently Asked Questions: Creating Invoices in WordPress
Method 1: Creating Invoices for Clients Using FreshBooks
The easiest and most professional accounting tool for freelancers and small business owners is FreshBooks.
It’s an accounting tool designed for non-accountants and is one of our top invoice plugins for WordPress.
Although it’s not directly built into your WordPress website, using a third-party tool makes it easy to invoice clients, manage finances and accounts, and receive payments all in one place.
There’s a 30-day free trial, so you can test the tool and see if it’s right for your needs. Pro plans currently start for as low as $6 per month.
Signing up for an account is very easy. First, go to the FreshBooks website and click the ‘Try It Free’ button.

This brings you to the account sign-up page.
You need to enter your name and email and click the ‘Try It Free’ button.

After that, you’ll need to verify your email address, which will take you to a page to set up your account.
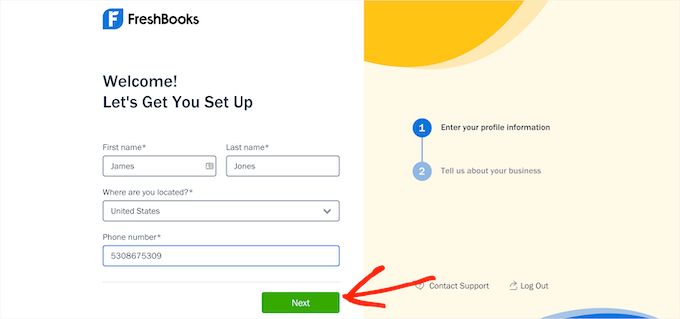
You must enter your name, location, and phone number and then click the ‘Next’ button.
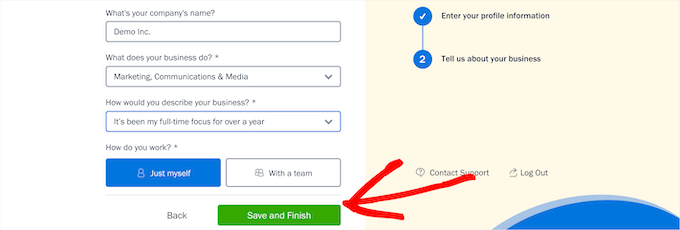
Then, you’ll be asked to enter more information about your business. This includes your blogging niche, yearly revenue, and more.
Once you are done, just click the ‘Save and Finish’ button.
This will bring you to your account dashboard screen, where you can create your first invoice.
Simply click the ‘Create New’ button and select ‘Invoice’ from the dropdown list.

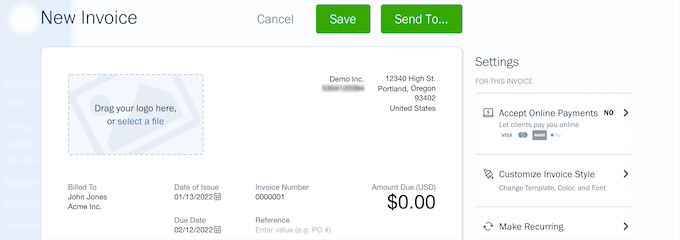
This brings up the customizable invoice generator.
You can upload your logo, change the due date, and add more information about your business. Simply click on any of the invoice areas to make edits.
Next, you can add your itemized line items. For each item, you can add a name and description, set the rate, and choose the quantity.
Click the ‘Add a Line’ button to add multiple line items to your invoice. The pricing totals will automatically update.

Once you are done customizing your invoice, click the ‘Accept Online Payments’ option.
This lets you easily add Stripe payments to your invoice. Stripe is one of the top payment processors in the world and makes it easy to create a merchant account.

Then, you need to click the ‘Connect’ button.
This will open up a new window to create a Stripe account.

Here, you need to enter your email and click the ‘Continue’ button.
If you already have a Stripe account, then you can use the same email, and it will link your account to FreshBooks.

Next, you need to enter a password for your account.
Then, click the ‘Continue’ button.

You’ll be asked to enter and confirm your phone number and then click ‘Next’ one more time.
On the following screens, you’ll need to enter information about your business, bank account, and personal information to confirm your identity.
Once you are finished, you’ll get a notification that you’ve successfully connected to Stripe. Simply click the ‘Close This Window’ button to return to your invoice.

Now, click the ‘Send To’ button at the top of your invoice.
This brings up a dropdown where you can automatically email your invoice to your client.
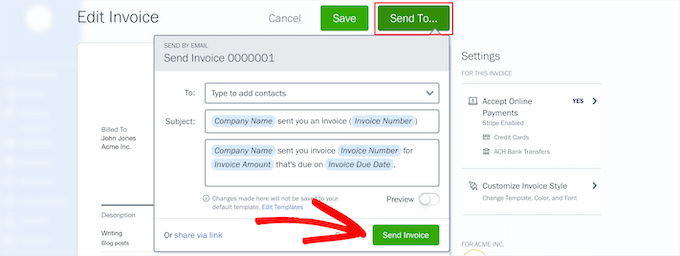
You can change the contact email, subject, and message that will be sent with your invoice. Then, click the ‘Send Invoice’ button.
Your clients will automatically receive your invoice, which they can pay online with a credit card.
Alternatively, you can share your invoice with the client via a link or download it as a PDF invoice and send it to them directly.
Managing Client Invoices in FreshBooks
If you want to view all of your client invoices, then simply click on the ‘Invoices’ menu option from your account dashboard.
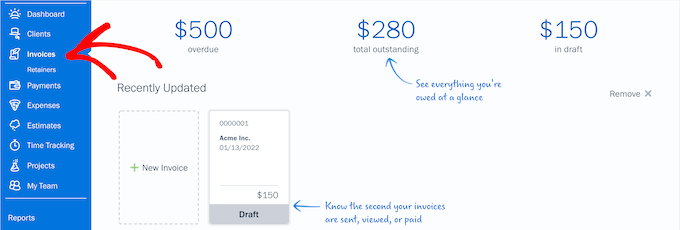
This screen will give you a breakdown of the total amount of overdue, outstanding, and draft invoices.
You can also view all of the invoices you’ve sent from this screen as well.
Time Tracking and Expenses with FreshBooks
Another great feature of FreshBooks is the ability to track time. If you are a freelancer, then you may need to track billable hours for your clients.
Simply click on the’ Time Tracking’ menu option and then click the ‘New Entry’ button.

This brings up a dropdown where you can enter your project details and hours.
Then, click the green ‘Checkmark’ button.

Once you save the hours, you can easily add them as a line item to your invoices. When filling out your invoices, simply start typing, and the billable hours will show up in the line item box.
You can also track your expenses to better understand your business finances. To do this, simply click the ‘Expenses’ tab in your account dashboard.
This brings you a screen where you can view all your business expenses, see vendor payments, and more.

To add a new business expense, simply click the ‘New Expense’ option.
This will bring you to a screen to add your merchant information. You can also assign expenses to a project, make it recurring, and more. Once you are finished, click the ‘Save’ button.
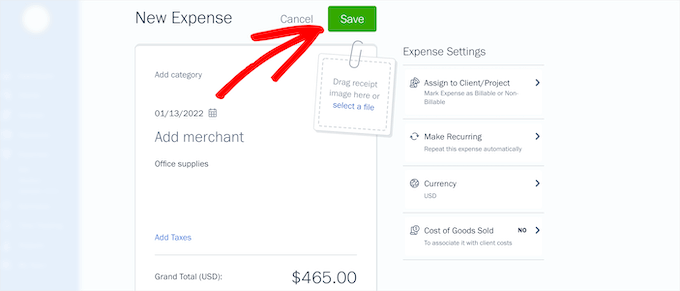
The FreshBooks expense features also let you import your business expenses from your bank account and credit cards. You can even save business receipts by taking a snapshot directly from your phone.
Organizing client invoicing, payments, and business expenses in one place makes it easier to make sound financial decisions about your business.
Method 2: Creating Invoices for Clients in WordPress Using Sliced Invoices
Another way to handle invoices is by using the Sliced Invoices plugin. This plugin lets you easily send and manage client invoices right from your WordPress dashboard.
It also includes invoice templates that can be customized with your business name, custom logo, and more.
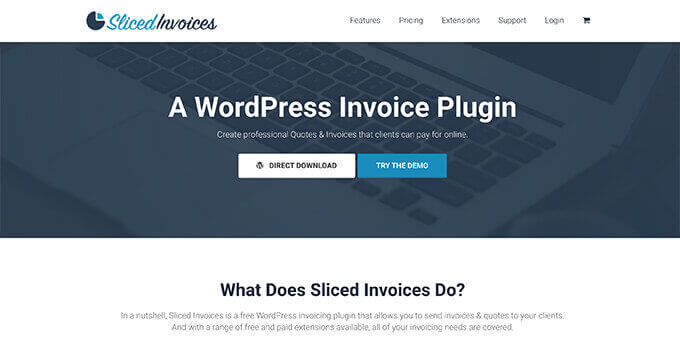
The first thing you need to do is install and activate the Sliced Invoices plugin. For more details, see our guide on how to install a WordPress plugin.
Upon activation, navigate to Sliced Invoices » Settings to set up the plugin.
First, you need to set your ‘Year Start’ and ‘Year End’ dates for your fiscal year and optionally enter any line items that you regularly bill all clients for. Then, click the ‘Save’ button.
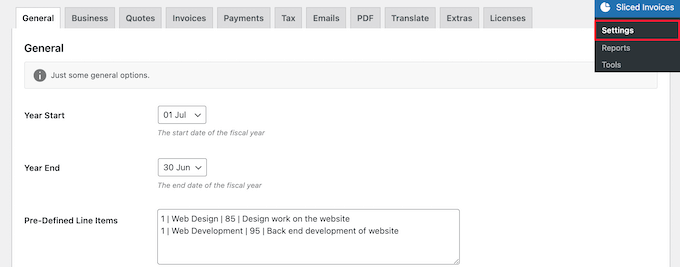
Next, click the ‘Business’ tab to enter more information about your business.
You can upload a logo and add your business name, address, and more.
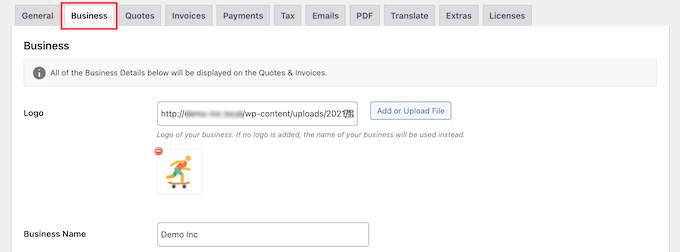
Then, click the ‘Save’ button at the bottom of the screen.
After that, click on the ‘Payments’ tab.
First, you can set the currency symbol and the payment position on your invoices.

Then, scroll down to the ‘Payment Methods’ section.
Here, you need to set up your payment gateways to accept client payments.

The default payment options are PayPal and a bank account. However, the plugin also supports multiple other PayPal alternatives like Stripe, 2Checkout, and more.
Each payment gateway has different settings, which you can configure by logging into your account on that gateway and getting your API keys.

After configuring your payment gateways, click the ‘Save’ button at the bottom of the screen.
Creating an Invoice Using WordPress
Once you’ve set up the plugin and payment settings, you can send your first invoice. The plugin creates invoices as custom post types on your site.
To create an invoice, navigate to Invoices » Add New Invoice, and give your invoice a name and description to help you remember the purpose of the invoice.

Then, you can add line items to the invoice.
To add multiple line items, simply click the ‘Add Another Item’ button.
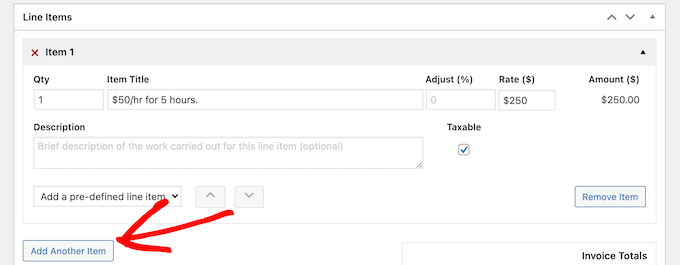
Once you’re finished, click the ‘Add New Client’ button in the ‘Invoice Details’ section in the right-hand corner.
Sliced Invoices uses the built-in WordPress user management system for client management. So, you’ll create a new WordPress user who will be assigned to your client.

After that, click the ‘Create New User’ radio button and enter their client details.
Then, click the ‘Add New Client’ button at the bottom of the screen.

It will automatically assign the new client you just created to the invoice.
Next, the’ Status’ section offers a few more optional functionality settings, including the ability to change the invoice number, order number, due date, and more.

Then, you can change your currency and payment method in the ‘Payment Settings’ section.
You want to make sure your preferred payment method is checked.

There’s also an option to set your invoice tax settings automatically.
You can automatically add a tax rate and set your tax rate percentage.

Once you’re done customizing your invoice, click the ‘Publish’ button to make it live.
After publishing the invoice, your clients will receive an email notification with a link to the invoice page on your WordPress blog.
When they click this, they’ll be taken to the invoice page, where they can view, print, and make a payment on the invoice.
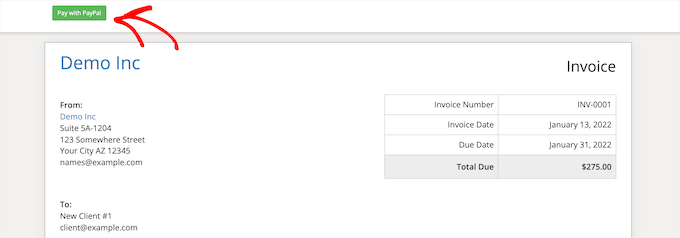
If your clients aren’t getting email notifications, then you should take a look at our guide on how to fix the WordPress not sending emails issue.
Viewing Your Invoice Dashboard in WordPress
You can view all of the invoices you’ve created and sent by going to Invoices » Invoices in your WordPress admin panel.

Here, it will show when the invoice was created, the price, if any invoices are canceled or overdue, and more.
You can also resend invoices from this screen and download invoice PDFs.
Frequently Asked Questions: Creating Invoices in WordPress
Here are some questions frequently asked by our readers about creating invoices in WordPress:
1. Can I customize the look of the invoice to match my brand?
Absolutely. Most plugins allow some form of customization:
- Upload your logo, adjust fonts and colors, and add footer notes (like payment terms).
- Some tools also support custom templates or CSS tweaks if you want more control.
- If you’re using WooCommerce PDF invoice plugins, look for ones that support template editing or come with multiple style options.
A polished invoice that reflects your brand builds trust and makes your business look more professional.
2. Will clients get invoice emails automatically?
Yes, but you’ll need to make sure email notifications are turned on.
- Most plugins like Sliced Invoices let you send invoices as email attachments or links automatically.
- If you’re using WooCommerce, invoice emails are usually sent out when an order is placed, processed, or completed, depending on your settings.
Make sure your WordPress site is set up with a proper SMTP plugin (like WP Mail SMTP) to ensure invoice emails don’t land in spam folders.
3. What’s the difference between using a plugin vs. connecting an external invoicing service?
Both options work, but they serve slightly different use cases:
- Using a WordPress plugin keeps everything inside your site. It’s great if you want full control, faster workflows, and don’t want to rely on third-party billing platforms.
- Connecting an external tool (like FreshBooks or QuickBooks) is better if you already use those platforms for accounting. It’s also a safer option for users who want off-site invoice storage, tax reports, or more advanced features.
If you’re billing occasionally and want simplicity, a plugin will likely be enough. But if invoicing is a big part of your business, a professional tool might scale better.
We hope this article helped you learn how to create invoices for clients using WordPress. You may also want to see our guide on the best freelance websites to find work or how to make money using AI.
If you liked this article, then please subscribe to our YouTube Channel for WordPress video tutorials. You can also find us on Twitter and Facebook.


Khalil
Nice!! I liked this article very much. Thank you.
Helene Childs
Hi is there a quickbooks option?
Thanks!
Helene
FreshLindsay
Thanks for the FreshBooks mention!
Scott DeLuzio
Thanks for the info. I’ve been looking for something better than PayPal invoices for a while now. While PayPal invoices offer a lot of options, they are lacking some features I’d like to see. This write up gives some good alternatives. Thanks!
Kristof Loyens
I love Freshbooks currently in the trial run. But so far pretty impressed.