Recently, a reader came to us with an interesting problem: they wanted to show ads to free users while giving paid subscribers an ad-free experience on their WordPress site.
As WordPress developers who’ve been building sites for over a decade, we knew this was a common challenge many site owners face.
The good news is, you can set up this two-tier experience in WordPress without slowing down your site or writing custom code. We’ve helped many users do this and tested a few different methods ourselves.
In this guide, we’ll show you exactly how to set up an ad-free experience for your subscribers while still monetizing your content for free users.
We’ve broken down the process into simple steps that anyone can follow, regardless of their technical expertise.
Why Create an Ad-Free Version of Your WordPress Site for Subscribers?
Running ads is one of the easiest ways we’ve found to make money online. But let’s be honest — ads can get in the way when someone just wants to read, watch, or explore without constant interruptions.
Many businesses that we have worked with have started offering an ad-free experience to their paid subscribers. It’s a small perk that goes a long way in keeping readers happy and coming back for more.
Instead of removing ads for everyone, you can add a simple subscription option. Readers who prefer a cleaner layout can choose the ad-free version, while you still earn ad revenue from casual visitors. It’s the best of both worlds.
Big platforms are already doing this. Tumblr gives subscribers an ad-free feed. YouTube Premium lets fans watch without interruptions. We’ve seen this model work for creators big and small, including on WordPress sites.
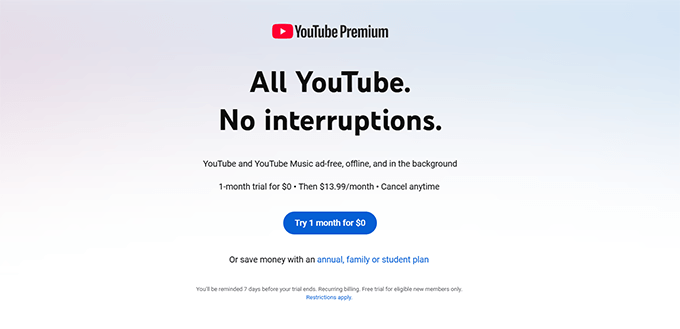
Other platforms like X (formerly Twitter) and Hulu have done this too. This strategy builds stronger customer loyalty while opening up new revenue streams.
If you have already created content that people love, this can be a smart way to monetize even further. You could even turn your site into a kind of Patreon alternative, offering perks like ad-free access or exclusive content.
For some businesses, we have used this model to hide ads from logged-in users in WordPress, which helped us grow the number of registered users very quickly.
when selling pay-per-view content and other subscriber-only posts. It helps you build deeper connections with your audience while still earning from casual traffic.
Next, we’ll show you how to set up your subscription plan and create an ad-free experience that works for your site.
Creating Ad-Free Subscription Plans in WordPress
One of the easiest ways we’ve found to offer ad-free content is by using MemberPress. It’s a powerful membership plugin that makes it simple to restrict content based on user roles.
We’ve used MemberPress across multiple sites to manage memberships, and it’s been a game-changer. You don’t need to mess with code, just install the plugin and start building your subscription plans.
Why we recommend MemberPress:
- Easy Setup: You can create subscription plans for ad-free content in minutes, no technical background needed.
- Recurring Payments: It works with popular payment services and handles automatic recurring billing for you.
- Smoothly Integrated with WordPress: No theme conflicts or plugin issues — it just fits right in.
- Clear Analytics: You can easily track how your ad-free subscriptions are performing.
We use MemberPress on our WordPress Video Courses site. It helps us manage access, sell courses, and keep everything organized in the backend.
If you want a full breakdown of what it offers, check out our MemberPress review.
To get started, install and activate the MemberPress plugin. If you’re new to this, see our guide on how to install a WordPress plugin.
Tip 💡: If you’re building a membership site from scratch, don’t miss our ultimate guide to creating a WordPress membership site.
Once the plugin is active, head to MemberPress » Settings and add your payment gateway under the ‘Payments’ tab.
Click the ‘+ Add Payment method’ button and follow the instructions for your preferred payment service.
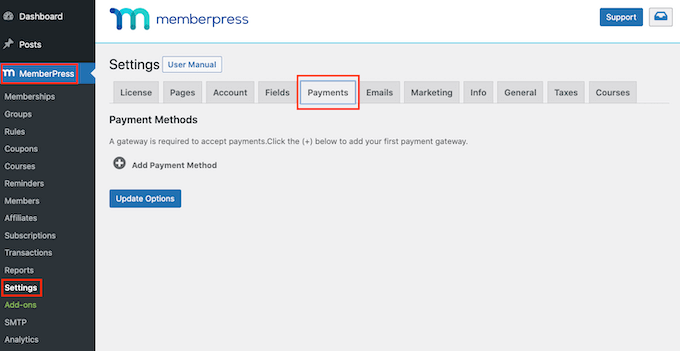
MemberPress supports PayPal Standard, Stripe, Authorize.net, and even offline payments. We usually go with Stripe because it’s quick and reliable.
Next, go to MemberPress » Memberships and click ‘Add New’ to create your first plan.
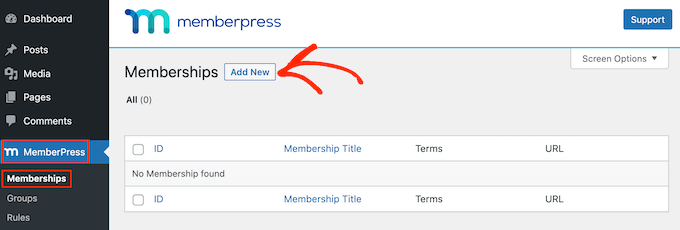
Give your plan a name and a short description. Then, choose a price and how long the subscription should last, one-time or recurring.
For recurring billing help, check our guide on how to accept recurring payments in WordPress.
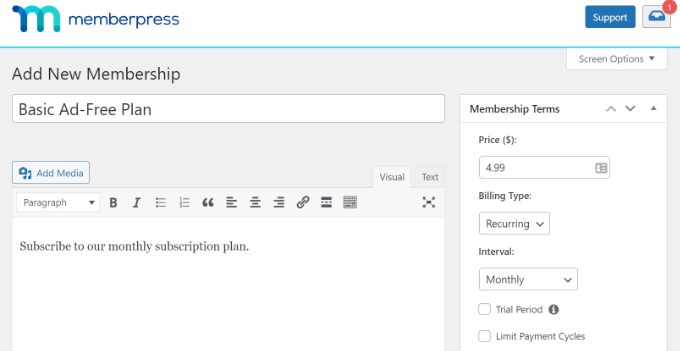
Scroll down to the Membership Options area to adjust settings like permissions and pricing display.
In the ‘Advanced’ tab, enable ‘User Roles for this Membership’ to control who gets access.
You can pick any WordPress user role you want — for this guide, we’ll use the Subscriber role.
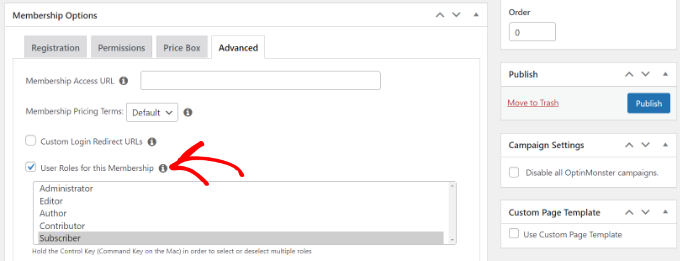
Click ‘Publish’ to save your changes. You can repeat this to create as many plans as you need, each with its own rules and access controls.
Create a Pricing Page to Show Subscription Plans
Now let’s build a pricing page that shows your subscription plans side by side. Go to MemberPress » Groups and click ‘Add New’.

Give the page a title — this will also become the page URL.
In the ‘Group Options’ section, choose which membership plans to feature on the page.
Click the ‘+’ button to add plans and use drag and drop to arrange the order.
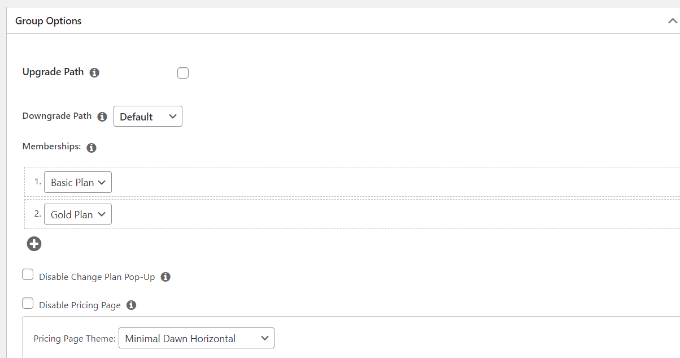
MemberPress also includes ready-made templates for your pricing table. You can tweak the design or add custom CSS to match your branding.
When you’re done, hit ‘Publish’ and visit the page to see your pricing table in action.
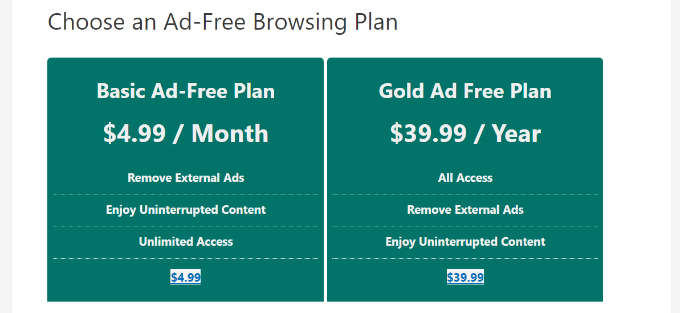
Up next, we’ll show you how to add and control ads on your WordPress site.
Inserting Ads in Your WordPress Website
The easiest way to manage ads on your website is to use the AdSanity plugin. It is the best ad management plugin for WordPress.
Using the plugin, you can easily insert and manage your banner ads in WordPress. Plus, it offers a ‘User Role Ad Visibility’ addon that allows you to hide ads from different WordPress user roles.
First, you’ll need to install and activate the AdSanity plugin. For more details, please see our guide on how to install a WordPress plugin.
Once the plugin is active, you can go to the AdSanity » Settings page and switch to the ‘Licenses’ tab.
Next, enter the key and click the ‘Activate License’ button. You can easily find the license key in your account area.
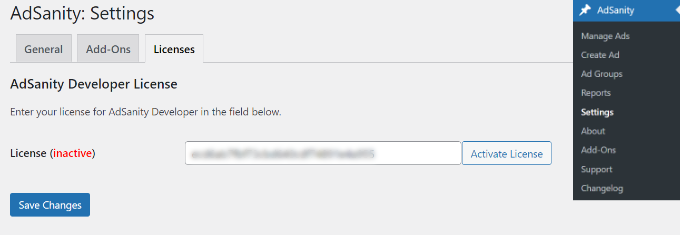
Don’t forget to click the ‘Save Changes’ button when you’re done.
After that, you can head to AdSanity » Create Ad from your WordPress dashboard and set up an ad.
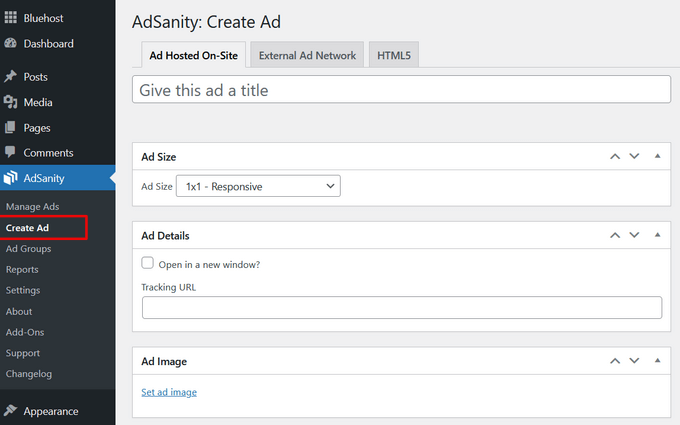
AdSanity lets you create all types of ads. You can set up a self-hosted ad and manually add banners and graphics.
On the other hand, you can also add ads from external networks like Google AdSense. The plugin also lets you schedule ads, set a specific time frame to display them, or run them indefinitely.
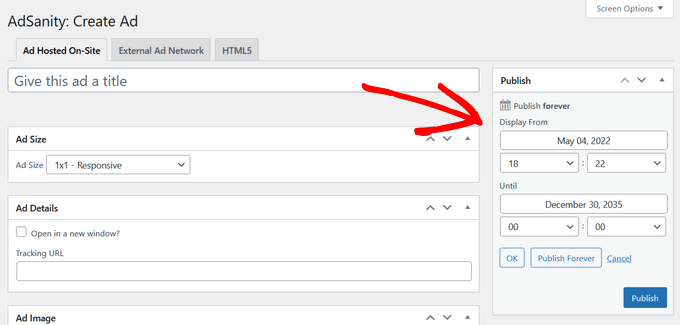
When you’re done, click the ‘Publish’ button.
You can now insert your ads anywhere on your website using the AdSanity widget block or shortcodes.
It is one of the best places to show banner ads on your website sidebar. This increases the visibility of your ads and helps you get more clicks.
Simply go to Appearance » Widgets from the WordPress admin panel. Next, click the ‘+’ button and add the ‘AdSanity Single Ad’ widget block.
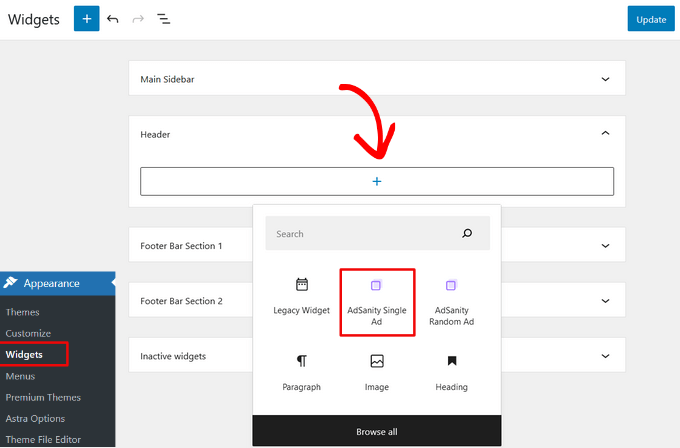
Go ahead and click the ‘Update’ button to show ads in your website sidebar or another widget-ready area.
For more details, please see our guide on how to sell ads on your WordPress blog.
How to Hide Ads for Members in WordPress
Next, you can hide your ads for subscribers in WordPress using the AdSanity User Role Ad Visibility addon.
First, you will need to head to AdSanity » Add-Ons from your WordPress admin.
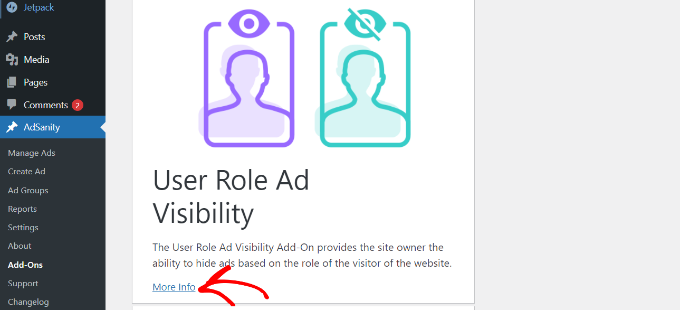
After that, scroll down to the User Role Ad Visibility addon and click the ‘More Info’ button.
You can now subscribe to the addon on the AdSanity website. Simply click the ‘Checkout’ button to purchase the addon.
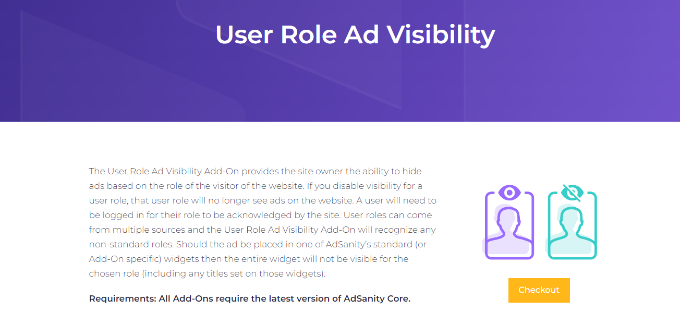
Next, you can download and install the addon on your website. If you need help, then please see our guide on how to install a WordPress plugin.
Once the add-on is active, you can go to AdSanity » Settings from your WordPress dashboard and head to the Licenses tab.
From here, enter the key under the ‘AdSanity User Role Ad Visibility’ headline and click the ‘Activate License’ button.
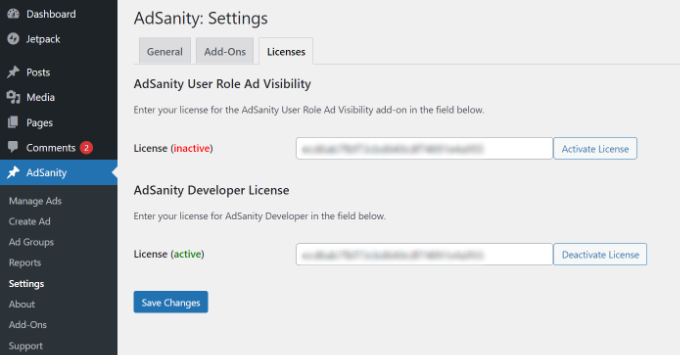
You can find the license key in your AdSanity account area. When you’re done, don’t forget to click the ‘Save Changes’ button.
Next, you’ll need to switch to the ‘Add-Ons’ tab in AdSanity Settings.
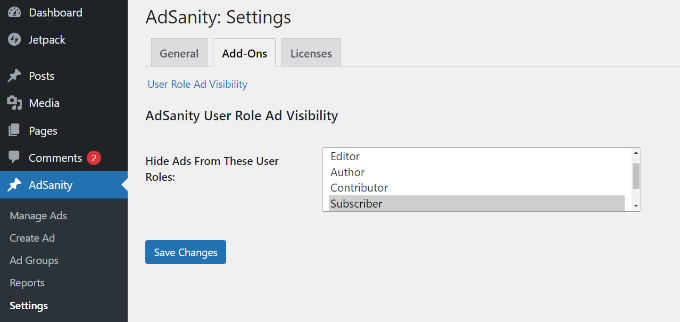
Here, you can hide ads from different user roles on your website.
For instance, let’s select the ‘Subscriber’ role. This way, users who subscribe to a paid membership plan will not see ads on your website.
Once you’re done, click the ‘Save Changes’ button.
Bonus Resources
We are often asked by users about different ways to monetize their WordPress content. Here are some useful resources for diversifying your website’s revenue streams:
- The Ultimate Affiliate Marketing Guide for Beginners
- How to Build Trust and Make Money With Ethical Affiliate Marketing
- Best Blogging Niche – 7 That Will Make Money (Easily)
- How to Raise Money with Crowdfunding in WordPress (2 Easy Ways)
We hope this article helped you learn how to create an ad-free version of your WordPress site for subscribers. You may also want to see our guide on how to start an online store or our expert pick of must-have WordPress plugins for business.
If you liked this article, then please subscribe to our YouTube Channel for WordPress video tutorials. You can also find us on Twitter and Facebook.


Jiří Vaněk
I’ve had AdSense prepared and approved for my website for about a year now. I haven’t implemented it on the website yet because I’m waiting until I achieve better traffic. It’s slowly approaching, and currently, it’s on the rise. This is a very good way to ‘monetize’ visitors who consume free content and users who, for instance, donate or might pay for membership in the future. A very good alternative for everyone.