Popups offer a powerful way to catch your customers’ attention and drive more sales in your WooCommerce store. They let you share exclusive discounts, promote limited-time offers, or even easily grow your email list.
However, creating popups that actually convert can be tricky. Poorly designed popups can frustrate visitors, leading to higher bounce rates instead of boosting sales.
It’s all about using the right strategy and tools to create effective popups without annoying your customers.
After thoroughly researching this topic, we’ve come to the conclusion that OptinMonster, one of our favorite tools, is perfect for designing high-converting WooCommerce popups tailored to your goals.
In this guide, we’ll show you six proven methods to create WooCommerce popups that increase sales and keep your customers engaged.
Why You Need to Create a WooCommerce Popup
Have you ever wondered why you keep seeing popups on all major eCommerce websites?
It’s because popups do a great job of converting website visitors into paying customers. They help online stores quickly grab customer attention by showing them targeted messages at just the right time.
If you run a WooCommerce store, you can use popups to help you:
- Increase sales by delivering timely messages to your customers. For instance, you could make the popup appear when users are about to leave your store.
- Recover abandoned cart sales by offering a coupon or free shipping.
- Sell more products through cross-sells (promoting related products) and upsells (promoting a better-featured product).
- Build your email list or social following, or remind your customers of ongoing sales and promotions.
We’ll be using OptinMonster for this tutorial. It is the best WordPress popup plugin and a powerful conversion optimization tool that lets you turn abandoning visitors into subscribers and customers.
It seamlessly integrates with WooCommerce and has powerful personalization options built specifically for WooCommerce stores.
Tip: To create coupons for your offers, we recommend using Advanced Coupons. It allows you to create lots of different smart coupons for your WooCommerce site.
Getting Started with OptinMonster
Before you begin creating a WooCommerce popup, you need an OptinMonster account that’s connected to your WordPress site.
First, you can go to the OptinMonster website and sign up for an account. Simply click the ‘Get OptinMonster Now’ button to get started.
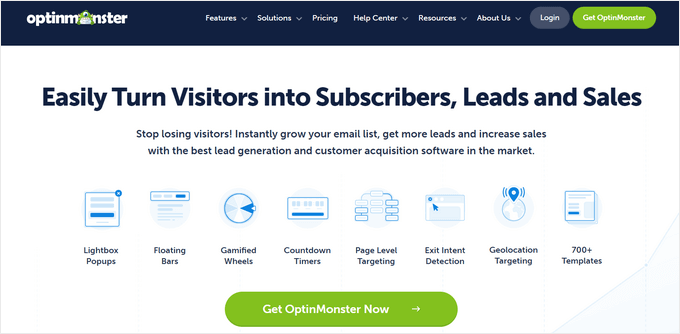
OptinMonster’s Pro plan lets you use most of the features we’ll cover, including the exit intent targeting rule. If you want to create a spin-to-win campaign or set up geolocation targeting, then you’ll need a Growth plan.
Once you’ve signed up for OptinMonster, you need to connect your OptinMonster account to your WordPress site.
To do this, you first need to install and activate the OptinMonster plugin on your WordPress site. For more details, see our step-by-step guide on how to install a WordPress plugin.
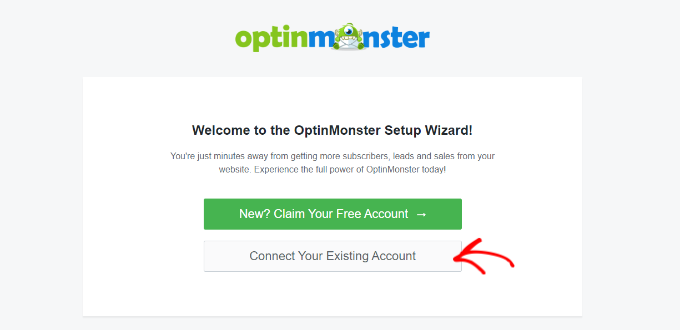
Upon activation, you should see the OptinMonster welcome screen. Go ahead and click the ‘Connect Your Existing Account’ button.
A new window will now open.
Simply click the ‘Connect to WordPress’ button to connect your OptinMonster account with your website.

Next, you’ll also need to connect your OptinMonster account with the WooCommerce account.
First, let’s go to OptinMonster » Settings from your WordPress dashboard.
Then, under the ‘General’ tab, simply click the ‘Auto Generate Keys + Connect WooCommerce’ button.
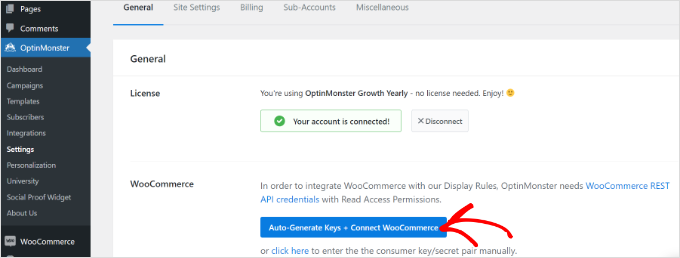
WooCommerce will generate keys automatically and connect to your OptinMonster account.
In the rest of this tutorial, we’ll cover several different types of WooCommerce popups. You can use these quick links to jump straight to the instructions for each one:
- How to Create a WooCommerce Coupon Popup
- How to Create a WooCommerce Cart Abandonment Popup
- How to Create a WooCommerce Cross-Sell Popup
- How to Create a WooCommerce Upsell Popup
- How to Create a Gamified WooCommerce 'Spin to Win' Popup
- How to Create a Fullscreen Popup for WooCommerce
- Putting Your WooCommerce Popup Live on Your Site
Ready? Let’s jump right in!
How to Create a WooCommerce Coupon Popup
Coupons are a great way to increase sales. You can use a popup to ensure that customers know about your coupon and encourage them to use it.
First, you can go to OptinMonster » Campaigns from your WordPress admin panel and click the ‘Create Your First Campaign’ button.

After that, simply select the ‘Popup’ campaign type.
Then, select your template by bringing your mouse over it and clicking the ‘Use Template’ button. We’re going to use the ‘Coupon’ template for this tutorial.
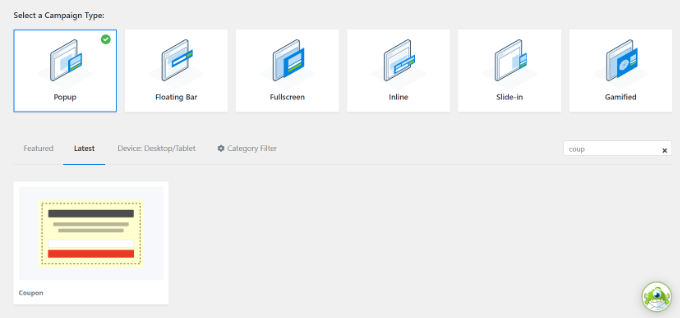
When you select the template, a popup window will open.
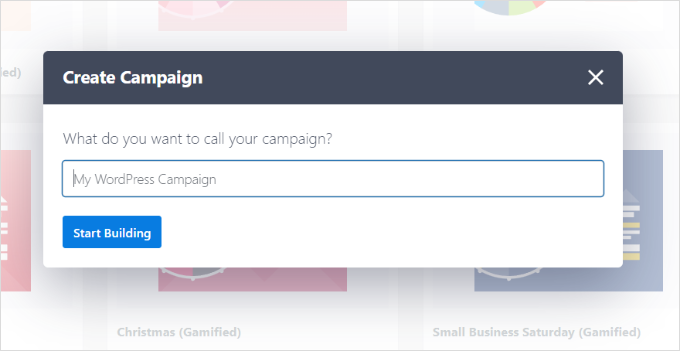
OptinMonster will prompt you to name your campaign. Go ahead and add a name and click the ‘Start Building’ button.
Now, it’s time to design your coupon.
The drag-and-drop campaign builder is very easy to use and lets you customize your popup the way you want. OptinMonster offers different blocks to add to your template.
Plus, you can click on any part of the coupon popup template to edit it. You can change the text, font, colors, and more.
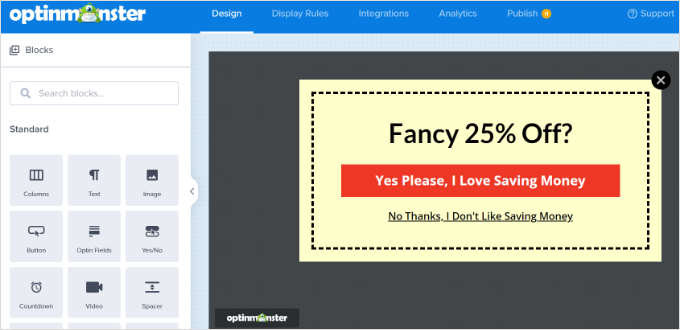
You can also remove parts of the coupon. For instance, you might decide that you don’t want to have an email sign-up box. You could simply display a coupon code within the popup to encourage the customer to use it instantly.
The default coupon code is ‘SAVE25.’ This is displayed on the screen after the customer enters their email address. It’s easy to change or remove this under the ‘Success’ view for your popup.
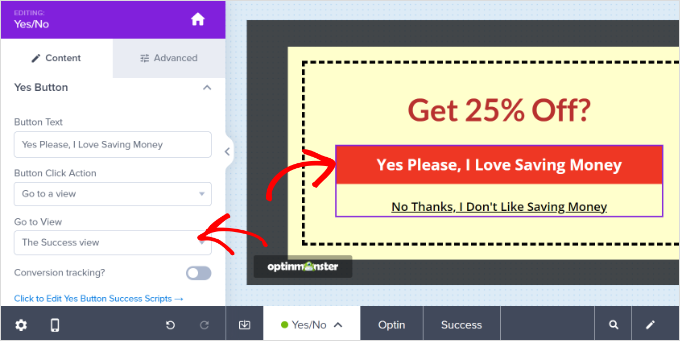
Don’t forget to save your popup once you’re finished making changes to the coupon design.
For more help, please take a look at our step-by-step instructions on creating a coupon popup. That tutorial also explains how to integrate OptinMonster with your email list.
Once you’ve created your coupon popup, you need to set the display rules.
Simply click the ‘Display Rules’ tab in the top bar. By default, the coupon will appear after 5 seconds has expired on all pages of your site.
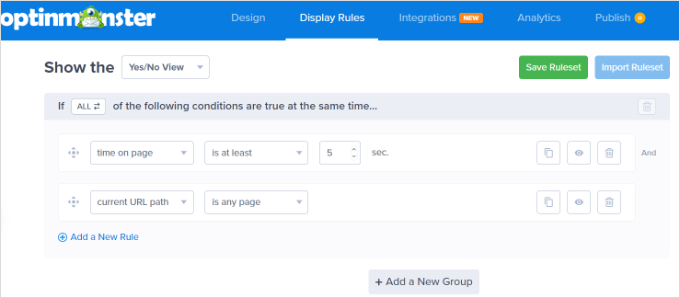
You might want to change this to a longer or shorter duration or base it on how long the visitor has been on your site. You might also want to show the coupon only on certain pages of your site.
The final step is to publish your coupon popup and make it live on your site. We’ll show you how to do that at the end of the article.
You may also want to see our guide on how to use the psychology of popups to boost signups by 250%.
How to Create a WooCommerce Cart Abandonment Popup
You may be losing a huge amount of money to cart abandonment.
A popup is a great way to prompt visitors to finish checking out. You can create a special WooCommerce popup to appear when a user is on the shopping cart page and moves to leave your site.
First, create a new campaign in OptinMonster. You need to select ‘Popup’ for the campaign type. Then, go ahead and choose a template for your popup. We’re going to use the ‘Abandoning Checkout’ template.
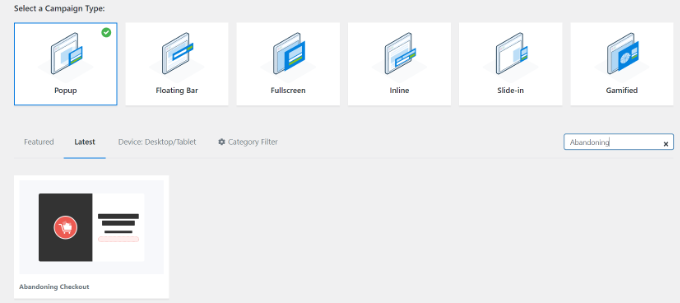
Next, OptinMonster will open a popup window.
You can now give your popup campaign a name and click the ‘Start Building’ button.

Your chosen template will open up in the campaign builder.
To customize your campaign template, you can drag and drop different blocks or change the text, colors, fonts, and more.
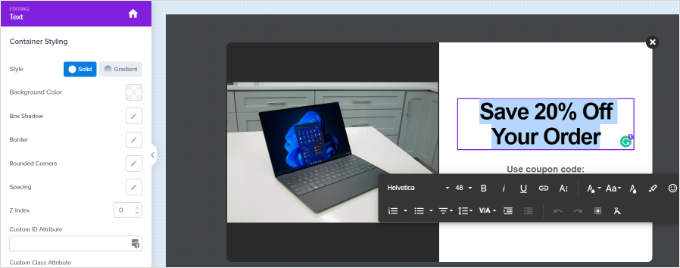
Next, it’s time to set your popup to display on your WooCommerce shopping cart page.
First, click the ‘Display Rules’ tab at the top of the screen and then select the ‘Exit Intent’ option. You can also select the sensitivity of exit intent.
OptinMonster’s exit intent technology allows you to show your message at the precise moment the user shows the intent to leave your website.
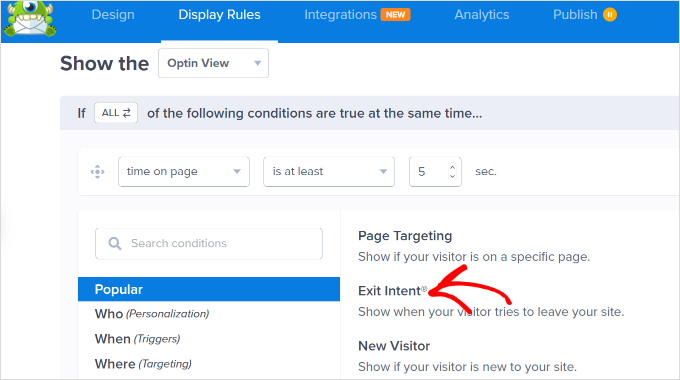
Next, scroll down the page and leave the first dropdown here as the ‘current URL path’ and set the second dropdown to the ‘exactly matches’ option.
In the box that appears, enter the URL of your shopping cart page.

Don’t forget to save your changes. Then, go to the Publish tab to put your coupon live on your online store.
How to Create a WooCommerce Cross-Sell Popup
Another great way to boost sales is to cross-sell your popular products. Cross-selling is promoting a product that goes with something the customer is already buying.
For instance, if your customer buys a summer shirt, then they might also be interested in buying a sun hat. Or if they buy greeting cards, then they may also want wrapping paper.
To create a cross-sell popup in OptinMonster, you first need to create a new campaign. Make sure you select ‘Popup’ for the campaign type, then choose any template you want.
We’re going to use the ‘Shopping’ template for our popup.
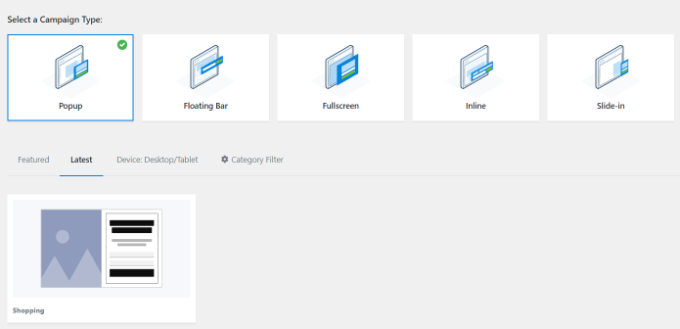
Next, OptinMonster will prompt you to name the campaign.
Once you’ve done this, simply click the ‘Start Building’ button.

You will be taken into the campaign editor. Here, you can change any aspect of your template by clicking on it.
We’ve uploaded a different image for our campaign.
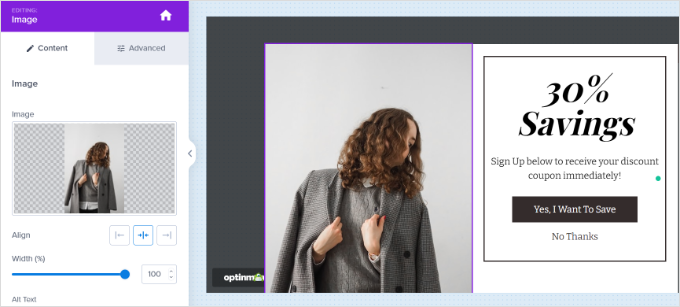
You can then add different blocks to the template from the menu on your left.
Simply drag and drop blocks like images, buttons, texts, videos, and more onto the template.
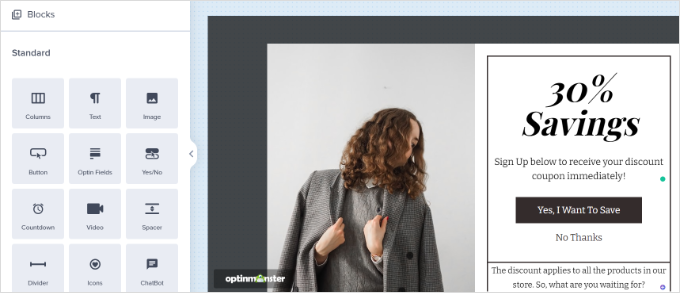
If you keep the email sign-up, make sure you edit the ‘Success’ view of the popup to display your chosen coupon code.
Tip: If you do use the email sign-up, you also need to link OptinMonster to your email provider under the ‘Integrations’ tab. There are instructions on this in our step-by-step guide on creating a coupon popup.
Once you’ve finished creating your campaign, don’t forget to click the ‘Save’ button on the top right.
Next, you can click on the ‘Display Rules’ tab and select the ‘WooCommerce Product Targeting’ rule.
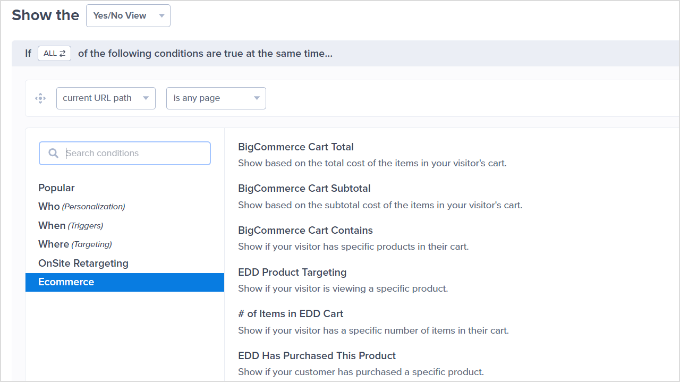
After adding another new rule, you can again select the ‘WooCommerce Product Targeting’ rule.
Then, add your product as before.
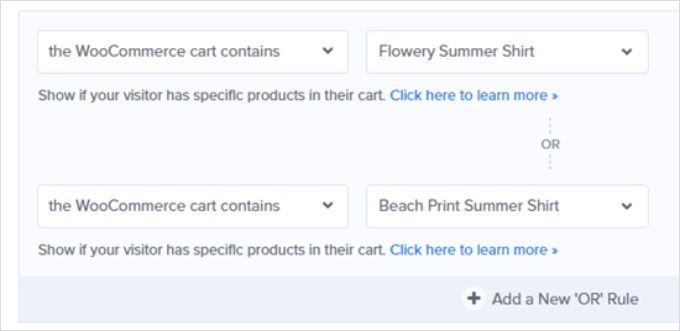
Don’t forget to save your settings. Now, you just need to follow the instructions at the end of this tutorial to put your popup live on your site.
How to Create a WooCommerce Upsell Popup
A WooCommerce upsell popup lets you encourage customers to buy a product that’s more expensive than the one they were considering.
For instance, if you sell a software package, you might offer a special deal on a higher-priced plan or encourage users to buy add-ons.
To create your upsell popup, you first need to create a new OptinMonster campaign. Select ‘Popup’ for the campaign type and choose any template you want.
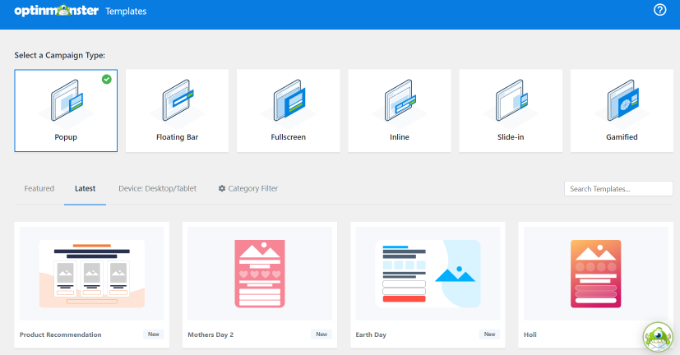
Once you’ve selected your template, OptinMonster will prompt you to name your campaign.
After you’re done, simply click the ‘Start Building’ button.

You can change anything you like about the campaign by clicking on the item.
If you want to give customers the coupon straight away, simply remove the email field. It’s easy to add blocks in the campaign builder using the drag-and-drop feature.
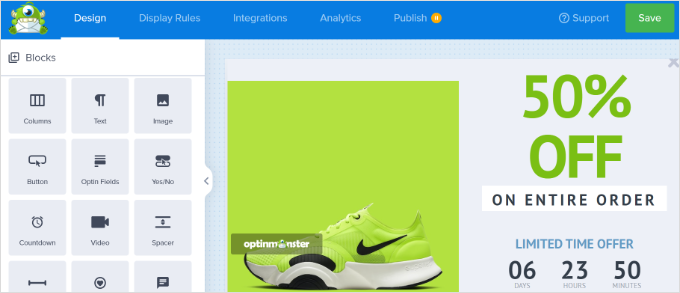
Once you’re happy with your coupon, click the ‘Save’ button on the top right. Then, click the ‘Display Rules’ tab.
Next, set a display rule to show the popup when the user looks at a specific product. To do that, simply select the ‘WooCommerce Product Targeting’ rule.

After that, you just need to specify the product on which the campaign will run.
Tip: Don’t want to go through the steps of connecting OptinMonster and WooCommerce? You could instead use OptinMonster’s page targeting rule to target the URL of your product page instead.
Once you’ve set your display rules, go ahead and save your popup. Then, simply put it live on your site by following the instructions at the end of this tutorial.
How to Create a Gamified WooCommerce ‘Spin to Win’ Popup
The gamified ‘spin to win’ popup gives customers a special offer or coupon. It’s a fun alternative to boost conversions and overall engagement.
First, create a new campaign in OptinMonster and select the ‘Gamified’ campaign type. Next, you can choose any template that you’d like to use.
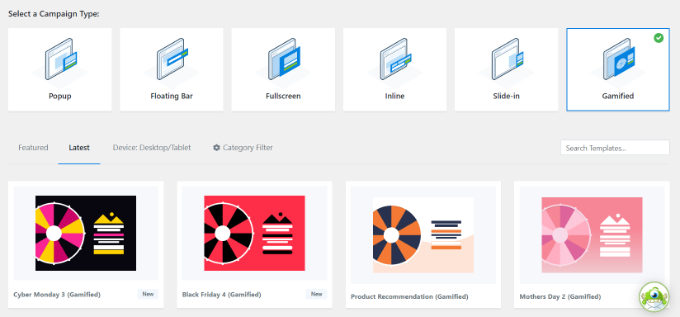
OptinMonster will prompt you to give your campaign a name.
Once you’ve done this, just click the ‘Start Building’ button.

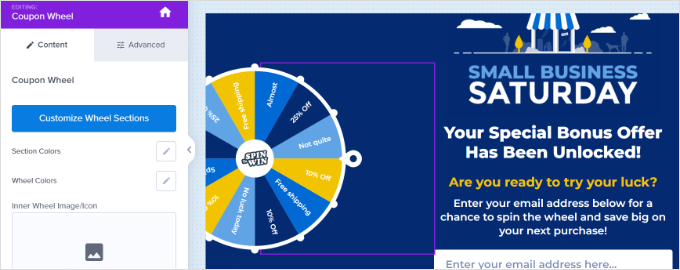
You will now see the coupon wheel template in the OptinMonster campaign editor.
Simply click on any element that you want to change. Plus, you can add more blocks to your templates, like an image, video, button, and more.
To edit the different options on the wheel, click on it, then click the ‘Customize Wheel Sections’ button.
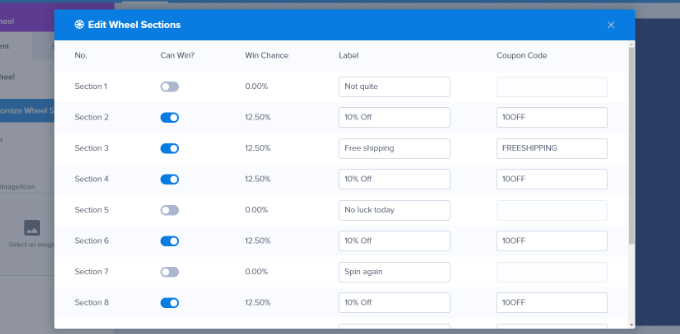
This will open a new popup window where you can see all the sections on your spin-to-win wheel.
Simply adjust or edit the coupon codes, percentages, and special offers on the wheel.
Once you’re happy with your coupon wheel, go ahead and save your settings.
Just follow our step-by-step guide to creating a ‘spin to win’ popup if you want more help with setting up your coupon wheel.
After that, you can head to the ‘Display Rules’ tab and choose when to show your campaign. For instance, you can show the gamification wheel when the user is about to exit the website using the Exit Intent feature.

Now, you can put the popup live on your site by following the instructions at the end of this tutorial.
How to Create a Fullscreen Popup for WooCommerce
Another very effective popup you can create for your online store is a fullscreen WooCommerce popup. This lets you welcome new visitors and encourage them to join your email list. You could offer them a special discount or free shipping in return.
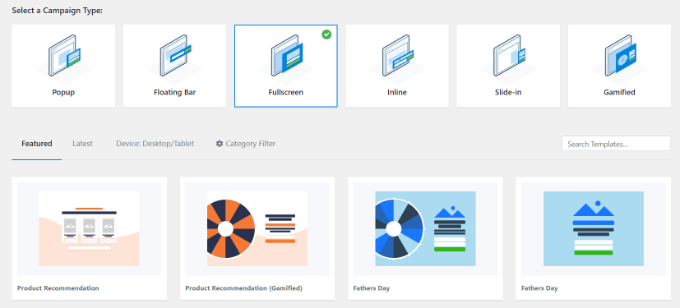
To create a fullscreen popup in OptinMonster, you’ll want to create a new campaign, choose the ‘Fullscreen’ campaign type, and select a template.
Next, you need to enter a name for your campaign.
Once you’re ready, simply click the ‘Start Building’ button.

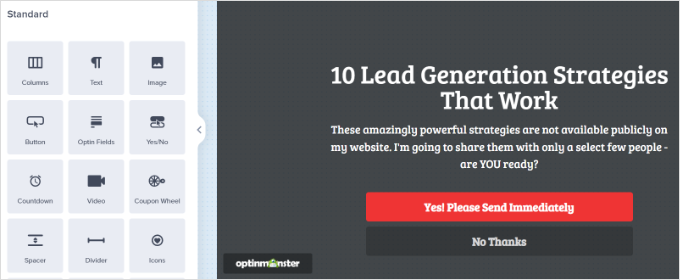
You’ll now see your fullscreen welcome mat in the OptinMonster builder. You can now add, remove, and rearrange blocks on your template.
Plus, there are more options to edit existing blocks, like the text and the image, to suit your store. Simply click on whatever you want to change.
Next, you need to integrate OptinMonster with your email list by clicking the ‘Integrations’ tab.
From here, you can click the ‘+ Add New Integration’ button and select your email marketing tool. You can then follow the onscreen instructions to connect to the email marketing service.
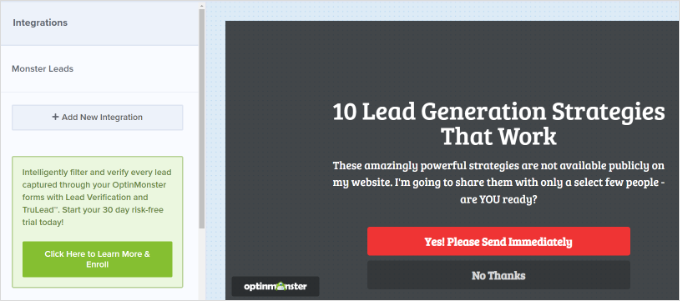
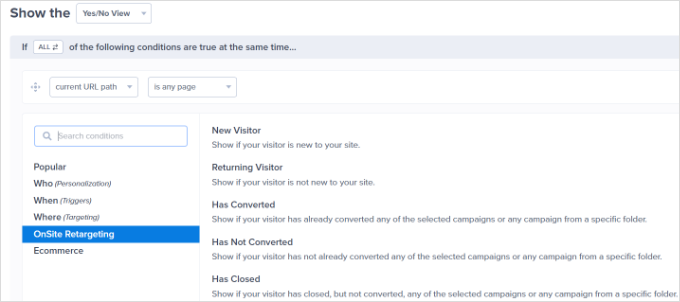
Next, you can then move to the ‘Display Rules’ tab. For the display rules, you want to set your welcome mat to only display to first-time visitors.
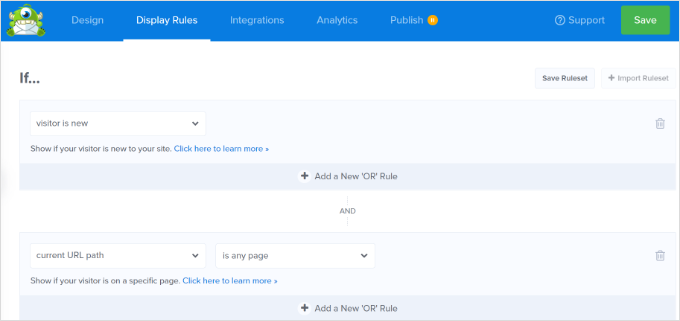
To do this, simply select the ‘New Visitor’ option.
If you want the welcome mat to display on all pages of your site, simply leave the ‘current URL path’ dropdown set to ‘is any page.’
Don’t forget to click the ‘Save’ button at the top of the screen.
You can now go ahead and put your popup live on your site by following the instructions below.
For more tips, check out our guide to creating a welcome mat for your WordPress site. You’ll find some useful examples there, too.
Putting Your WooCommerce Popup Live on Your Site
After creating any popup, you must make it live before it appears on your website.
First, you need to click the ‘Publish’ tab in the OptinMonster app. Then, change the ‘Publish Status’ to set it to Publish.
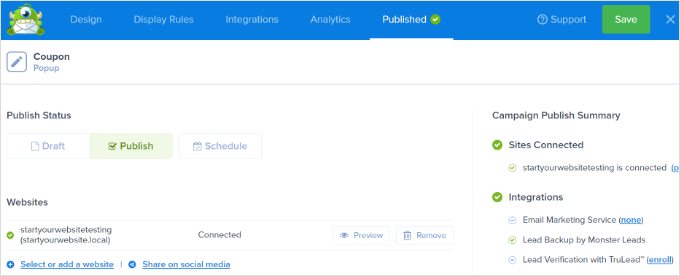
Note: It’s important to note that your popup will not be live straight away. You still need to go live with it in WordPress.
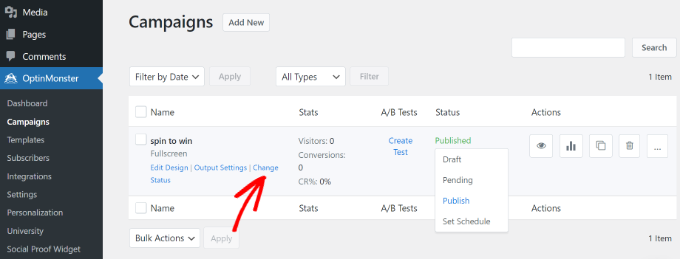
Now, go back to your WordPress admin and head to OptinMonster » Campaigns. From here, you can click the ‘Change Status’ option for any campaign and then select ‘Publish’ from the dropdown menu.
It’s always a good idea to check your site to ensure your popup is displaying as intended.
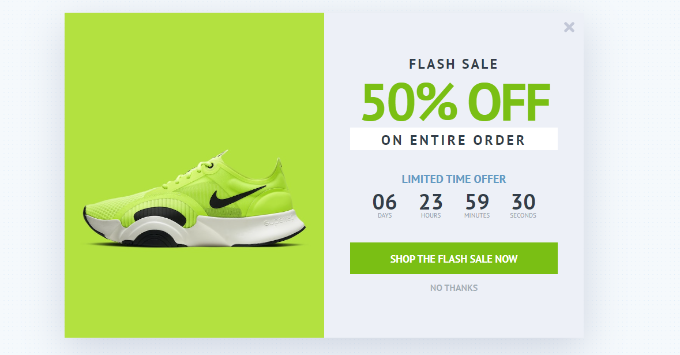
Here’s our up-sell campaign in action, promoting shoes to customers.
We hope this article helped you learn how to create a WooCommerce popup to increase sales. You might also like our list of the best WooCommerce plugins for your store and our comparison of the best WooCommerce hosting providers to speed up your store.
If you liked this article, then please subscribe to our YouTube Channel for WordPress video tutorials. You can also find us on Twitter and Facebook.


Have a question or suggestion? Please leave a comment to start the discussion.