When building websites, we sometimes like to add the brand’s Facebook feed to one of its page. This allows visitors to see the latest updates, announcements, and community interactions without leaving the site.
While manual methods exist, they’re not the most efficient for displaying Facebook content.
Many of our readers have asked about this feature, and after exploring various options, we’ve settled on Smash Balloon for our custom Facebook feeds. It’s user-friendly, packed with features, and suits WordPress users of all levels.
In this guide, we’ll walk you through creating a custom Facebook feed in WordPress using our tried-and-tested method.
Why Create a Custom Facebook Feed in WordPress?
According to our social media statistics report, Facebook has over 3 billion monthly active users. That makes it the biggest social media site in the world. As a website owner, you may have already created a Facebook page or group where you engage with your audience.
However, people who only visit your website won’t see your Facebook posts. By adding a custom Facebook feed, you can show visitors what’s happening on your group or page.
This can make your website more engaging and interesting, especially if you post multimedia content to Facebook, such as videos and images.
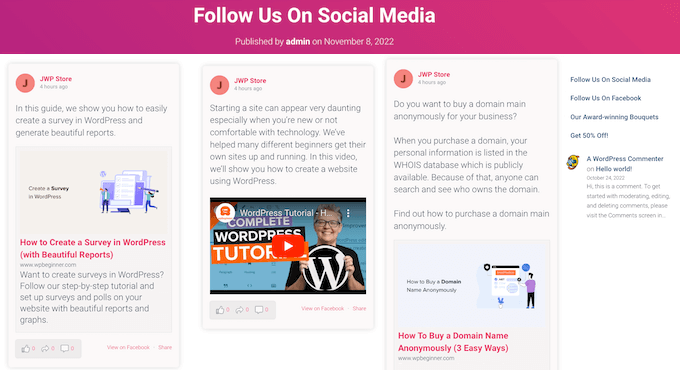
It’s also a great way to promote your Facebook page or group, which will help you get more Facebook likes and grow your following.
Having said that, let’s see how to add a custom Facebook feed to your WordPress.org site. You can use the quick links below to navigate this step-by-step guide:
- Step 1: Install the Smash Balloon Custom Facebook Feed Plugin
- Step 2: Connect Your Facebook Page or Group to WordPress
- Step 3: Create a Custom Facebook Feed in WordPress
- Step 4: Customize Your Facebook Feed
- Step 5: Add Your Custom Facebook Feed to WordPress
- Bonus Tip: How to Add More Social Media Feeds to WordPress
Step 1: Install the Smash Balloon Custom Facebook Feed Plugin
The best and most beginner-friendly way to add a custom Facebook feed to your WordPress website is by using the Smash Balloon Custom Facebook Feed plugin.
This Facebook plugin lets you show your content and comments directly on your site and even combine posts from multiple Facebook feeds. It also makes it easy to display powerful social proof by embedding Facebook reviews and community posts on your website.
The first thing you need to do is install and activate the Smash Balloon Custom Facebook Feed Pro plugin. For more details, see our guide on how to install a WordPress plugin.
In this post, we will be using the pro version of Smash Balloon as it allows you to show videos and photos in your Facebook feed, choose different layouts, filter your feed based on post type, and more.
However, there’s also a free version that allows you to create a custom Facebook feed for WordPress, no matter what your budget.
Upon activation, you will need to go to Facebook Feed » Settings and enter your license key into the ‘License Key’ field.
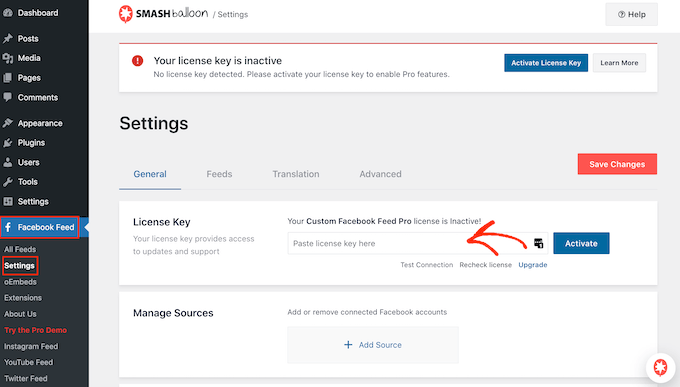
You will find this information in your account on the Smash Balloon website.
After entering the key, simply click on the ‘Activate’ button.
Step 2: Connect Your Facebook Page or Group to WordPress
Smash Balloon Custom Facebook Feed allows you to create multiple feeds from your different Facebook pages and groups. You can even merge feeds to create a custom feed.
To create your first feed, go to Facebook Feed » All Feeds and then click on ‘Add New.’
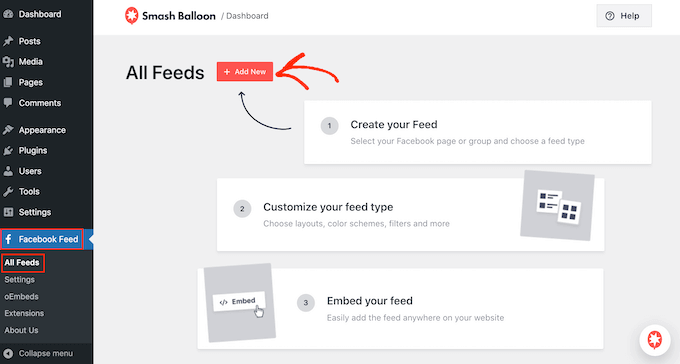
Smash Balloon lets you display Facebook albums, posts from your timeline, videos, events, and more. For this guide, we will create a ‘Timeline’ Facebook feed, but you can select any feed type you want.
After choosing a feed type, click on the ‘Next’ button.
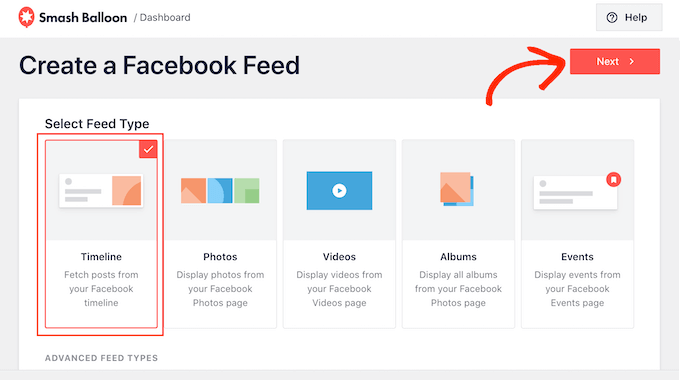
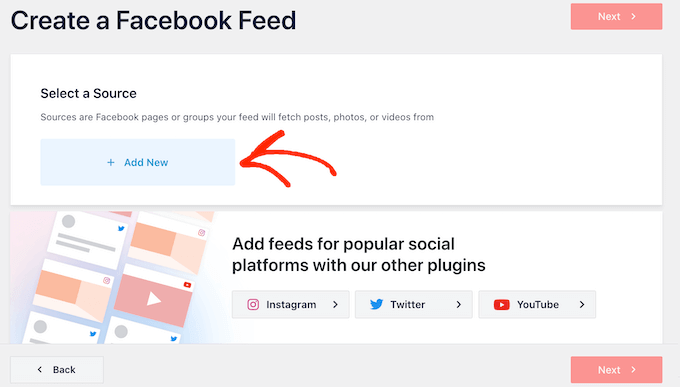
Now, you need to select the Facebook page or group where you will get the content from.
To get started, click on ‘Add New.’
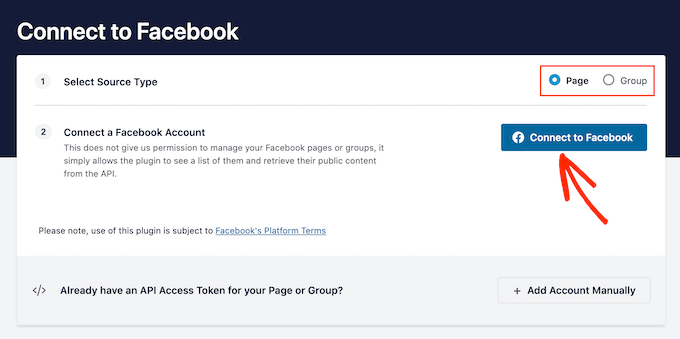
On the next screen, choose whether you want to embed a Facebook group feed in WordPress or create a Facebook page feed.
Then, simply click on ‘Connect to Facebook.’
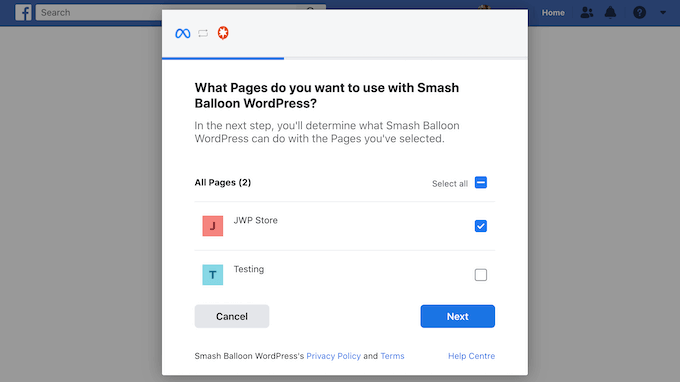
This opens a popup where you can log in to your Facebook account and choose the pages or groups that you want to use in your feed.
After making your selection, click on the ‘Next’ button.
Once you have done that, Facebook will show all the information that Smash Balloon will have access to and the actions it can perform.
To restrict Smash Balloon’s access to your Facebook account, simply click any of the switches to turn them from ‘Yes’ to ‘No.’ Just be aware that this may affect the content that you can show in the social media feed.
With that in mind, we recommend leaving all these switches enabled.
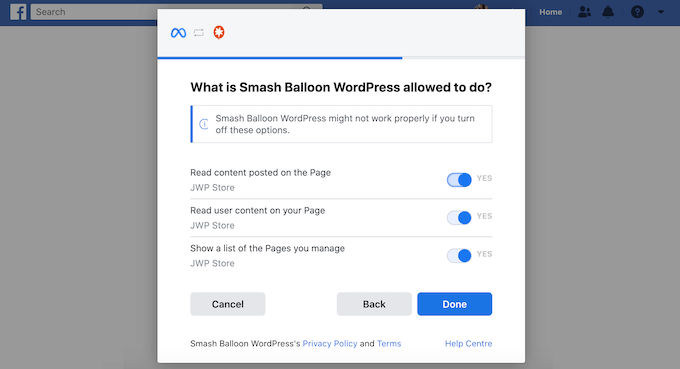
When you are ready, click on ‘Done.’
After a few moments, you should see a message that you have successfully linked your WordPress website to Facebook. You can now click on ‘OK.’
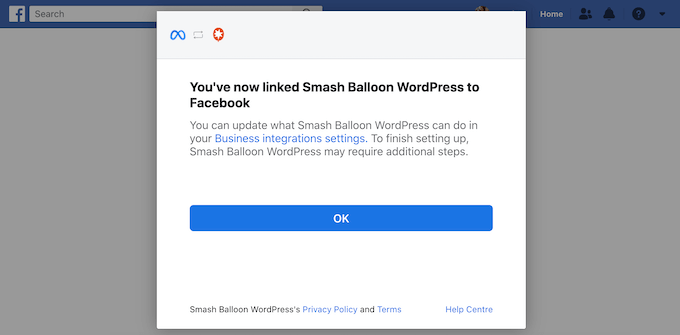
With that done, Smash Balloon will return you to the WordPress dashboard automatically.
Step 3: Create a Custom Facebook Feed in WordPress
You will now see a popup with the group or page you just linked to your WordPress website. Simply select the radio button next to your source and then click on the ‘Add’ button.
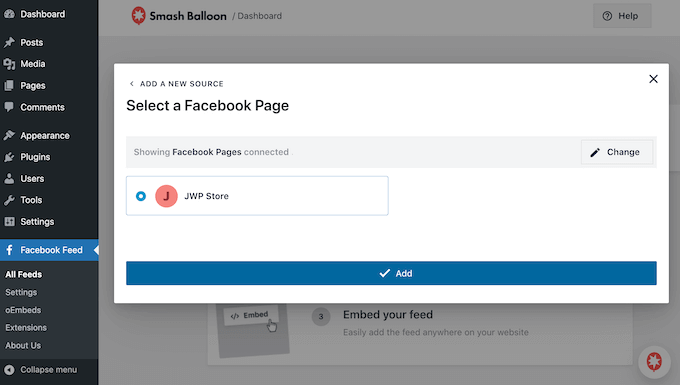
If you accidentally closed the popup, then don’t panic. You can simply refresh the tab to reopen the popup.
Once you have done that, you will be returned to the Facebook Feed » All Feeds page.
Just like before, click on the ‘Add New’ button and then choose the type of custom Facebook feed you want to create, such as Timeline, Photos, or Videos.
Then, click on ‘Next.’ Now, under ‘Select a Source’, you will see your Facebook group or page as an option.
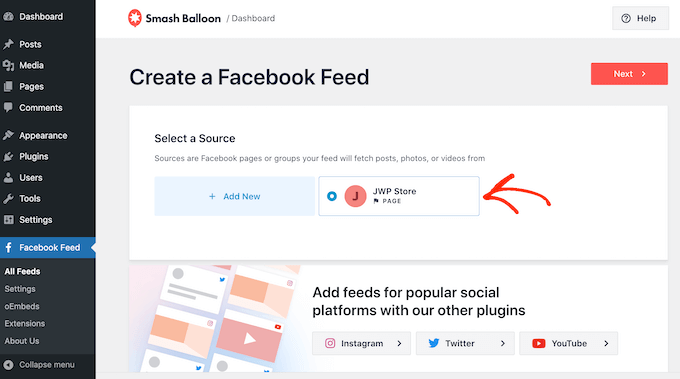
Go ahead and select the page or group, and then click on ‘Next.’
You can now choose the template you want to use as the starting point for your feed. All of these templates are fully customizable, so you can fine-tune them to perfectly fit your WordPress blog or website.
We will be using the ‘Default’ template, but you can use any template you want.
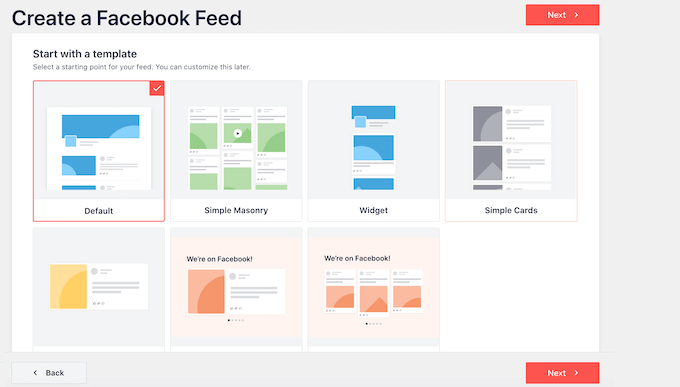
After choosing a design, click on the ‘Next’ button.
Smash Balloon will now go ahead and create a Facebook feed based on your source and chosen template. This is a great start, but you may want to fine-tune how this feed appears on your website.
Step 4: Customize Your Facebook Feed
The Smash Balloon Custom Facebook Feed plugin gives you lots of customization options to edit your feed. With that in mind, it’s worth seeing what changes you can make.
On the Facebook Feed » All Feeds screen, find the feed you just created and click on its ‘Edit’ button, which looks like a small pencil.

This opens the feed editor, which shows a preview of how the custom Facebook feed will look on your website. Here, you can see all the embedded Facebook videos, status updates, and other content that will appear on your WordPress website.
On the left-hand side, you will see all the different settings you can use to customize the feed. Most of these settings are self-explanatory, but we will quickly cover some key areas.
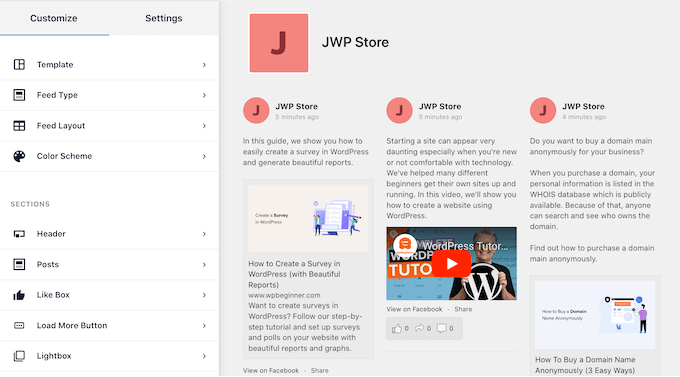
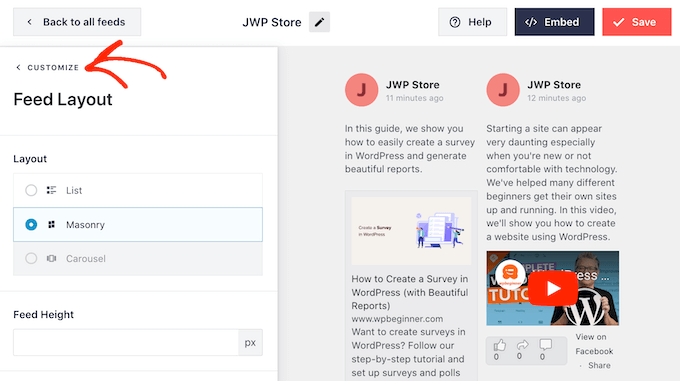
To start, you can change how your posts are displayed by clicking on ‘Feed Layout.’
On this screen, you can switch between different layouts and change the feed height. You can even create a responsive slider by selecting the ‘Carousel’ layout.
As you make changes, the preview will update automatically, so you can try different settings to see what works best for your website.
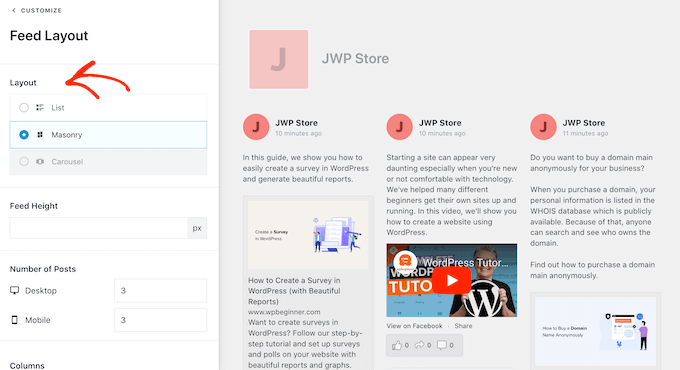
By default, the feed will show the same number of posts on desktop computers and mobile devices such as smartphones.
However, mobile devices usually have smaller screens and less processing power, so you may want to show fewer posts on tablets and smartphones. To do this, just type a different number into the ‘Mobile’ field under ‘Number of Posts.’
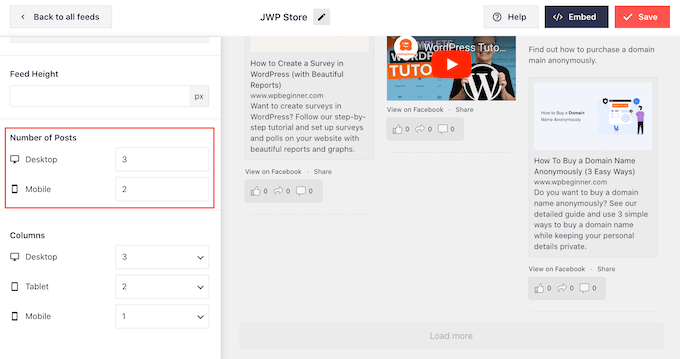
You can preview how your changes will look on desktop computers, tablets, and smartphones using the row of buttons in the upper-right corner.
By trying out different layouts, you can create a custom feed that looks great, no matter what device the visitor is using.
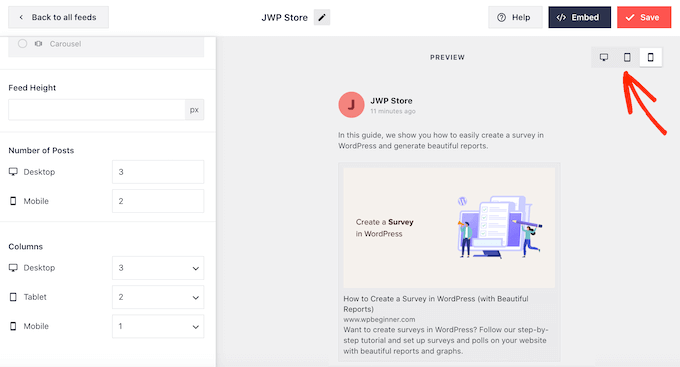
By default, the Facebook feed shows fewer columns on smartphones and tablets compared to desktop computers. This helps all your content fit comfortably on smaller screens.
However, after testing the mobile version of your WordPress website, you may be unhappy with how the columns look on smartphones and tablets. If this is the case, then you can adjust the columns by changing the numbers in the ‘Columns’ section.
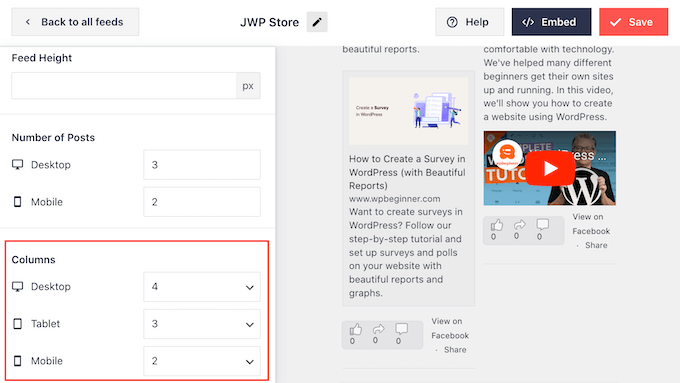
When you are happy with the changes you have made, click on the ‘Customize’ link at the top of the menu.
This will take you back to the main Smash Balloon editor.
Next, you can click on ‘Color Scheme’ in the left-hand menu and take a look at the different colors you can add to the Facebook feed.
By default, Smash Balloon uses a color scheme inherited from your WordPress theme, but you can also choose ‘Light’ or ‘Dark’ or even create your own custom color scheme.
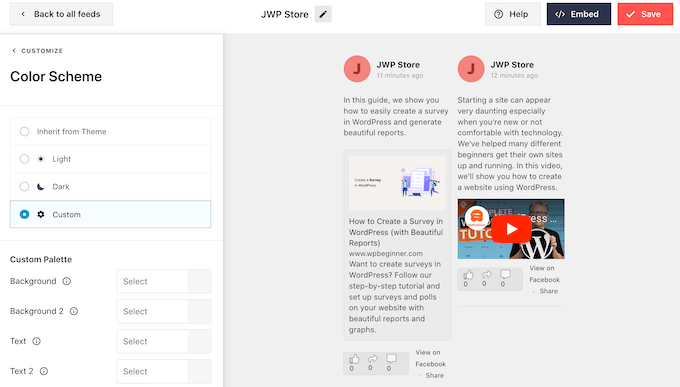
For example, you might change the text color so that it stands out from your theme’s background.
By default, Smash Balloon adds a header to your feed, which is your Facebook profile picture and the name of your page or group. This can add some extra context, rather than simply displaying your Facebook timeline in WordPress.
To change how this looks, click on ‘Header’ in the left-hand menu.
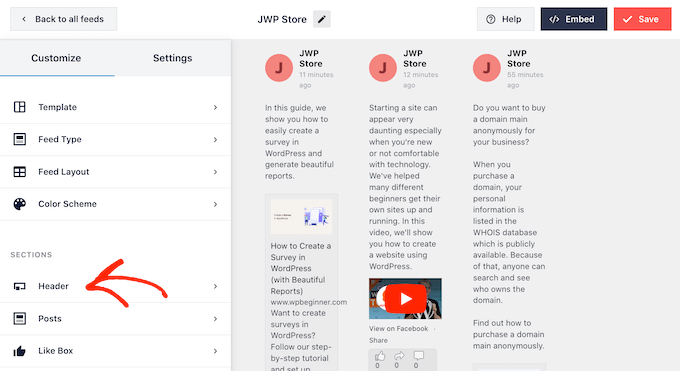
On this screen, you can change the size and color of the header, hide or show your Facebook profile picture, and more.
If you want to remove the header completely, then click the toggle to turn it from blue (enabled) to grey (disabled).
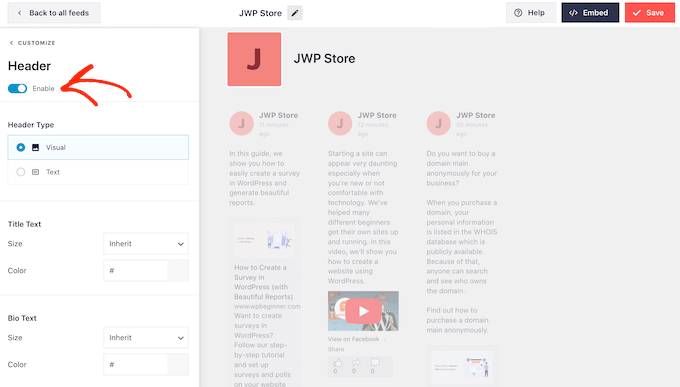
Next up is the ‘Posts’ screen. Here, you can change how the individual posts look inside the custom Facebook feed.
For example, you can switch between regular and boxed styles, change the background color, add a box shadow, and more.
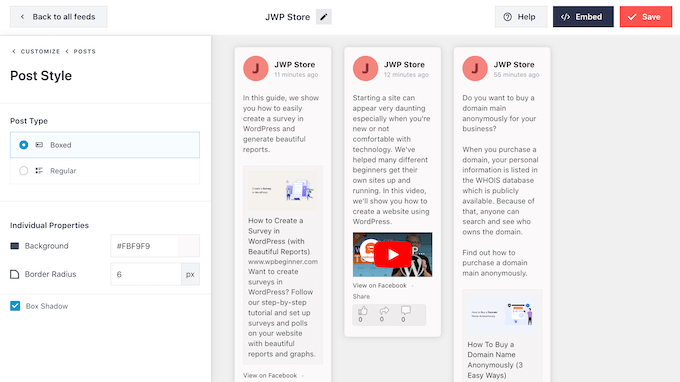
By default, Smash Balloon doesn’t include the Facebook ‘like’ button in your feed.
To encourage more visitors to follow your Facebook page, you may want to add this button by selecting ‘Like Box’ from the editor’s left-hand menu.
After that, simply click on the ‘Enable’ button so that it turns blue. Now, if you scroll to the bottom of the preview, you’ll see a ‘like’ button.
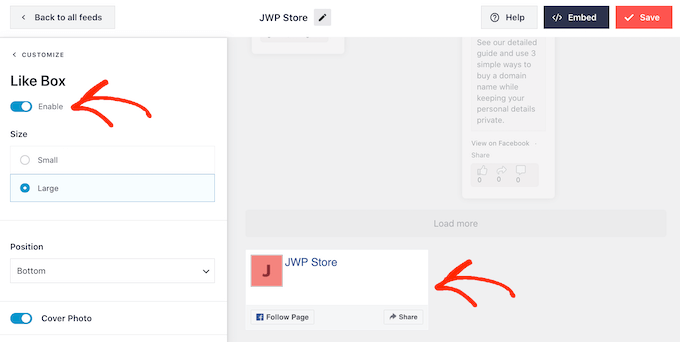
You can style this area using different settings. For example, you can choose whether the button appears at the top or bottom of the feed and whether to include the cover photo from your Facebook page.
When you are happy with how the ‘like’ button looks, you can move on to the ‘Load More Button’ screen.
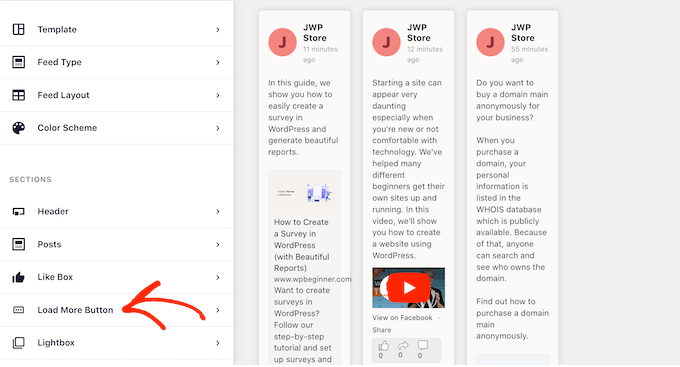
The ‘Load More’ button encourages visitors to scroll through more of your Facebook feed.
For this reason, you may want to make the button more eye-catching by changing the background color, text color, and label.
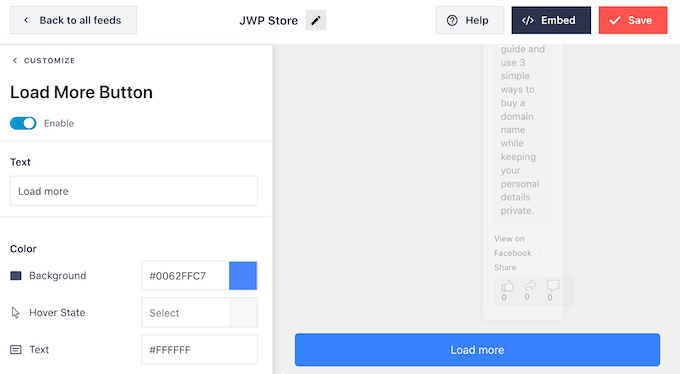
Another option is to remove the ‘Load More’ button completely by clicking on the ‘Enable’ toggle so that it turns grey.
Disabling the ‘Load More’ button is useful if your Facebook feed is time-sensitive. For example, if you mainly post about your Facebook events calendar, then visitors may not need to scroll through your previous posts as they are no longer relevant.
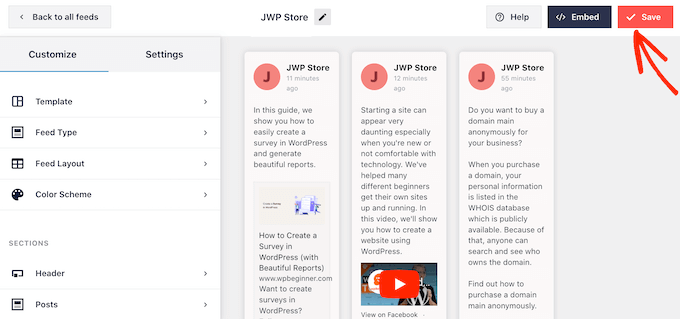
When you are happy with how the custom Facebook feed is set up, don’t forget to click on ‘Save’ to store your changes.
You are now ready to add the Facebook feed to your WordPress website.
Step 5: Add Your Custom Facebook Feed to WordPress
To embed Facebook feeds to WordPress, click the ‘Embed’ button next to ‘Save.’
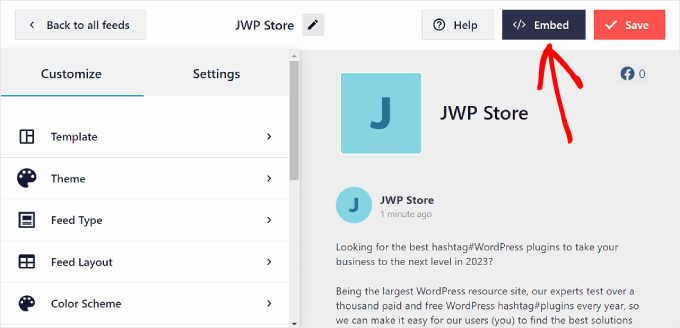
You will now see two options to add your Facebook feed: shortcode or block.
In our experience, it’s easier to insert your Facebook feed using a block. To do so, you can either click ‘Add to a Page’ or ‘Add to a Widget’ if your theme has a widget-ready area.
Our guide will use the Add to a Page button for the sake of example.
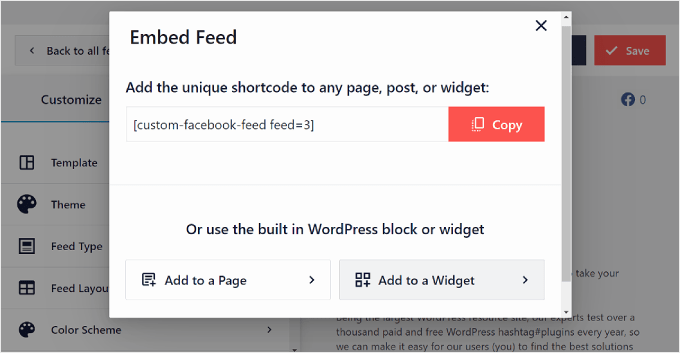
Now, you will have to choose a page to insert the Facebook feed to.
Simply select one and click ‘Add.’
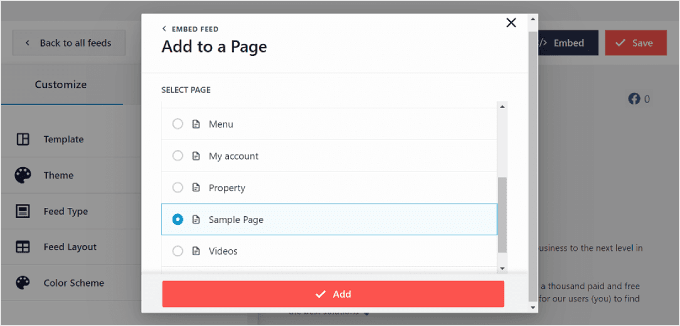
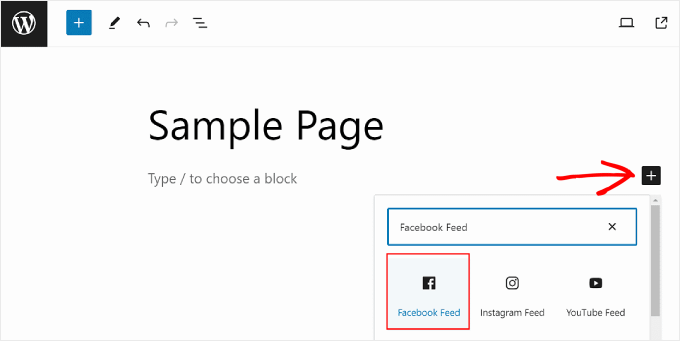
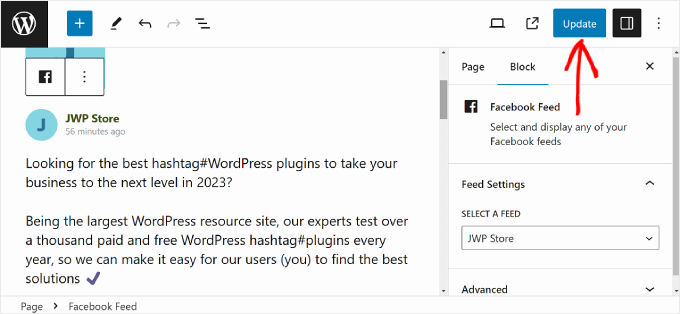
You will be redirected to the block editor. After that, just click the ‘+ Add block’ button and search for the Facebook Feed block.
At this stage, you can just drag and drop it wherever looks best.
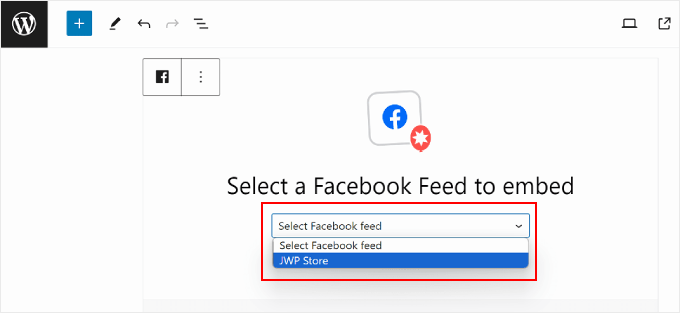
Once you’ve done that, go ahead and select a Facebook feed source.
Like so:
Your Facebook feed should now show up.
Just click ‘Update’ to make the changes official.
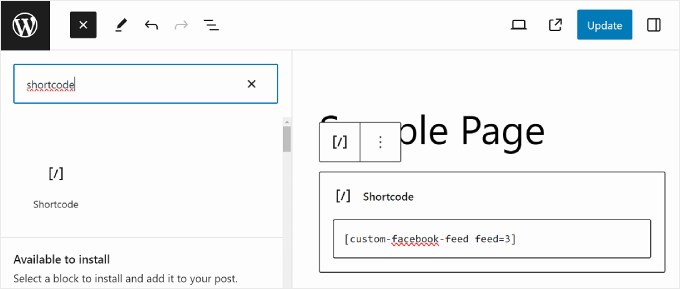
If you want to use the shortcode method, then you can copy the shortcode from the Embed Feed popup earlier.
Then, simply paste the shortcode into a shortcode block in the content editor when editing a WordPress page, post, or widget. Once done, go ahead and click ‘Update.’
For more information on how to place the shortcode, please see our guide on how to add a shortcode in WordPress.
Bonus Tip: How to Add More Social Media Feeds to WordPress
If you want to embed Facebook status posts in WordPress, show your timeline, display Facebook albums, and more, then Custom Facebook Feed is the best WordPress plugin for it.
However, many websites have multiple social media accounts, such as a YouTube channel, Twitter profile, and Instagram account. If you create unique content for each platform, then it makes sense to show this content on your WordPress website.
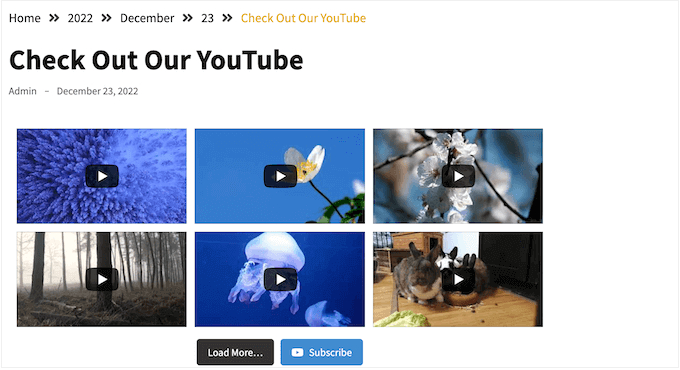
You can show the latest videos from your YouTube channel in WordPress using the free Smash Balloon Feeds for YouTube plugin.
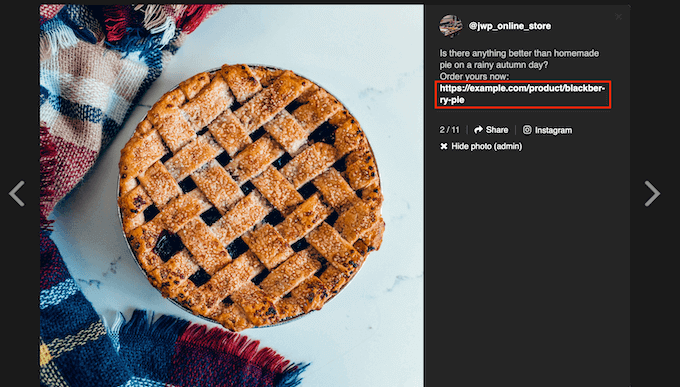
With more than 1 billion monthly active users, Instagram is a great place to promote your products, services, and blog posts.
If you have an Instagram account, then you create a custom Instagram feed and then add it to any web page, post, or widget-ready area. You can even add Instagram shoppable images in WordPress.
We hope this article helped you add a custom Facebook feed in WordPress. You may also want to see our ultimate guide to social commerce for WordPress users and our article on how to automatically post on Facebook via WordPress.
If you liked this article, then please subscribe to our YouTube Channel for WordPress video tutorials. You can also find us on Twitter and Facebook.


Mike S
Can you cover how to automatically copy posts to 2 FB pages?
Darknote
Hi,
Putting the page ID does not work, you will get on debug, it is indicated in error
developers.facebook.com/tools/debug/You absolutely have to create a Facebook apps, the only good method!
RickH
Any plugin that will grab a FB ‘status’ from a personal (publicly visible) FB account into a separate post? So that each new status will create a new post?
Thanks…
Anthony
Thanks for this article. Have tried and success but i use this tool to find facebook ID, it can find group id and page id too
Shubha das
Thanks for sharing this post. Please let me know if free plugin are available for creating custom facebook feed.
melanie martins
Facebook feed by arrow is free, though i would love to see a tutorial to create my own facebook feed “plugin”
Munna Hossain
Great sharing. I am new in WordPress. I don’t know everything about WordPress. Your article will help to create custom facebook feed in my WordPress site. Thank you for sharing such an informative article.
WPBeginner Support
Glad you found it helpful
Admin
Tracy TC
Do you recognize the feed on the homepage of I like the fact that it includes thumbnail pictures from each post. I find that more visually interesting than showing my logo over and over in the feed. I don’t control that area of the website (although I do know that it is WP) and the host has no interest in sharing which plugin is used.
Thank you!!