Since we run multiple online businesses, we’ve seen firsthand how payment methods can make or break a sale. When we first started accepting payments on our WordPress sites, options were limited, especially for in-person transactions.
But now, with solutions like Stripe QR codes, you can make in-person payments smoother than ever.
If you’re running a business that needs to accept both online and in-person payments, you’ll love how simple Stripe QR codes make the whole process.
In this guide, we’ll show you exactly how to add Stripe QR code payments to your WordPress site. We’ve broken everything down into simple steps that anyone can follow, even if you’re not tech-savvy.
After helping hundreds of business owners set up their payment systems, we know what works and what doesn’t – and we’re excited to share these proven methods with you.

Why Add Stripe QR Code Payment in WordPress?
Stripe is a popular payment gateway that lets you accept online payments on your WordPress site or eCommerce store. It makes it very easy for customers to pay using their credit cards.
The best part is that customers don’t have to go through a lengthy signup process. They can simply enter their credit card on the website to make a purchase.
Adding Stripe QR code payments to your site gives customers the flexibility to complete a purchase quickly. Customers can simply scan the code to open the payment link.
This makes the checkout process very simple and fast. It helps people to easily buy a product and service on your online store. As a result, you’ll see a boost in conversions and reduced cart abandonments.
That said, let’s look at how you can add a Stripe QR code payment to your WordPress website.
Create a Stripe Payment Form in WordPress
First, you’ll need to add a Stripe payment form on your website to accept online payments from customers.
The best way to do that is using WPForms. It is the best contact form plugin for WordPress that’s super easy to use and easily integrates with Stripe. There are many form templates to choose from, and you can customize them using the drag-and-drop builder.
We have used it at WPBeginner to build contact forms and annual surveys and have found it to be super beginner-friendly. To learn more, see our complete WPForms review.
To start, you’ll need to download and install the WPForms plugin. If you need help, then please see our guide on how to install a WordPress plugin.
📌 Note: For this tutorial, you’ll need the WPForms Pro license because it includes the Stripe addon. There’s also a WPForms Lite version that you can use for free. It allows you to accept Stripe payments, but there’s a 3% transaction fee for payments made through your forms.
Upon activation, you can go to WPForms » Settings from your WordPress dashboard and enter the license key. You can find the key in your account area on the WPForms website.
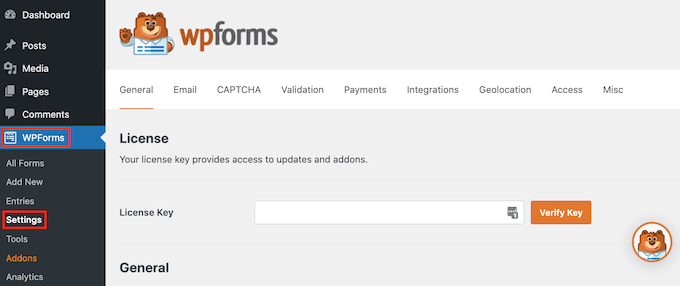
Simply enter the key and click the ‘Verify Key’ button.
Once that’s done, you’ll need to go to the WPForms » Addons page and install the Stripe addon.
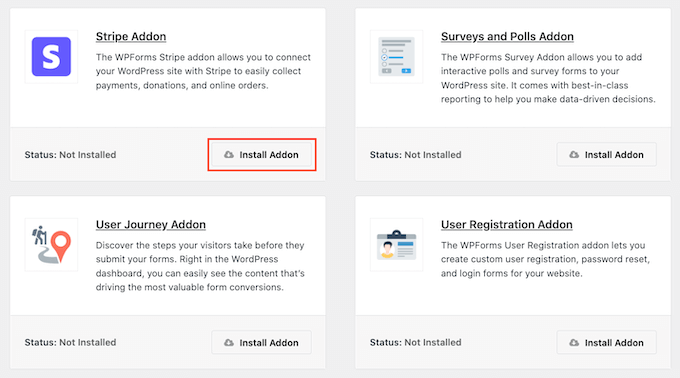
Go ahead and click the ‘Install Addon’ button, and WPForms will automatically install and activate it.
From here, you can head to WPForms » Settings from the WordPress admin panel and go to the ‘Payments’ tab.
Next, simply click the ‘Connect with Stripe’ button and follow the onscreen instructions to connect your account with WPForms.
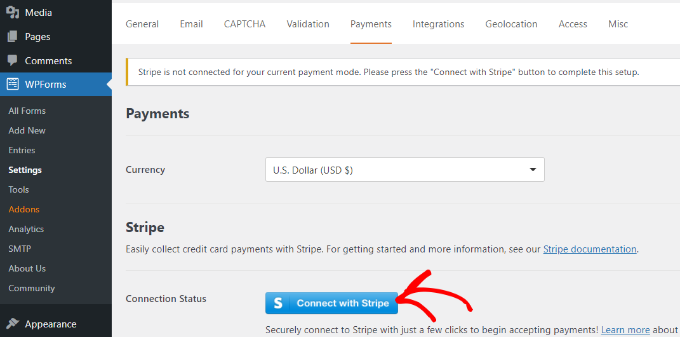
Once Stripe is connected, you can go to WPForms » Add New to create a new form.
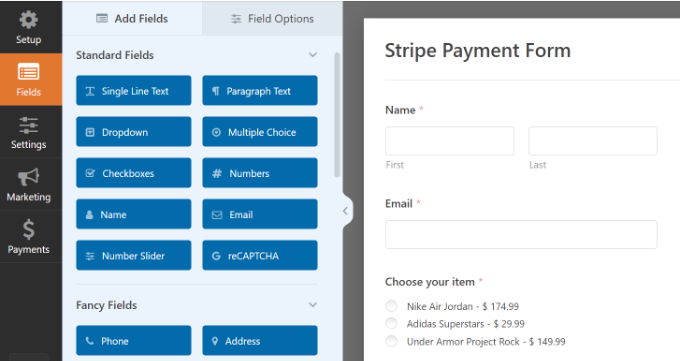
WPForms offers lots of form templates from which to choose. You can select a simple contact form, an order form, or a Stripe payment form and customize it.
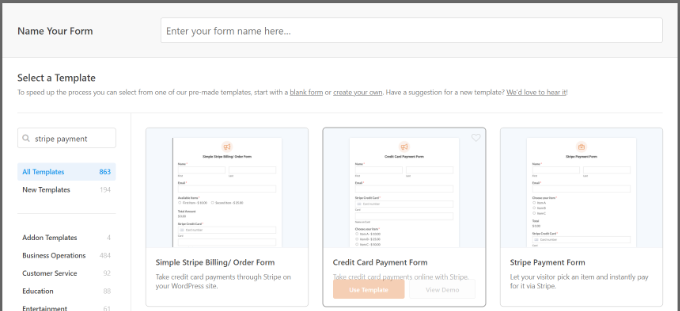
For this tutorial, we will use the ‘Stripe Payment Form’ template.
Next, you can customize your form using the drag-and-drop form builder. By default, you’ll see different form fields in the template.
However, WPForms lets you add more form fields to the template, like a dropdown, checkboxes, email, phone, address, website, and more.
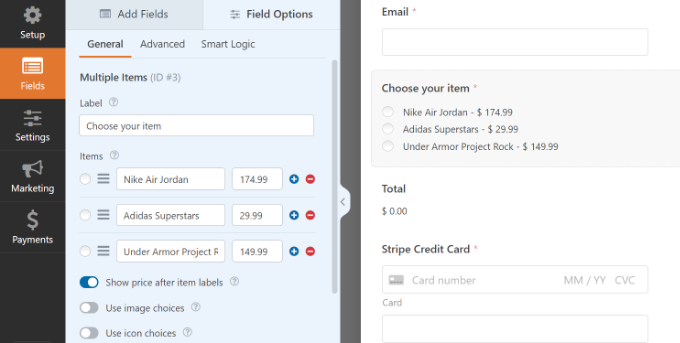
You can also click any form field on the template to customize it further.
For instance, we changed the text for each item on your demo form and enabled the option to show prices after the item label.
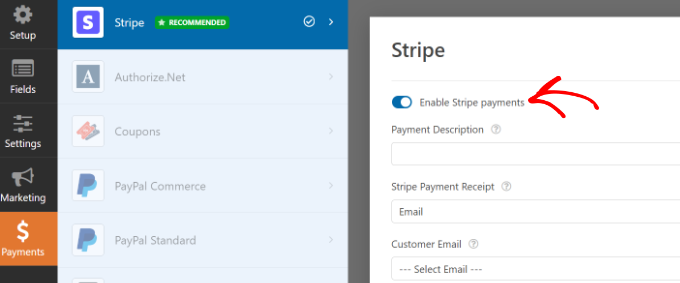
Once you’re done editing the form, simply switch to the ‘Payments’ tab and select ‘Stripe’ from the menu on the left.
From here, ensure the ‘Enable Stripe payments’ option is enabled.
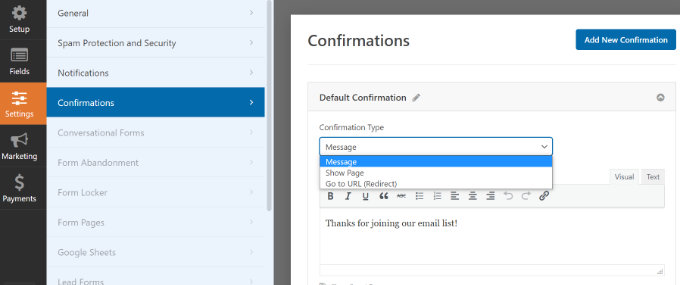
Next, you can switch to the Settings tab. Here, you’ll see options to change the notification and confirmation settings.
For instance, you can select what action should take place once a user submits a form. WPForms lets you show a message or a page or even redirect users to a URL.
You’re now ready to display your Stripe payment form on your website.
Simply click the ‘Save’ button to store your changes, and then click the ‘Embed’ button at the top.

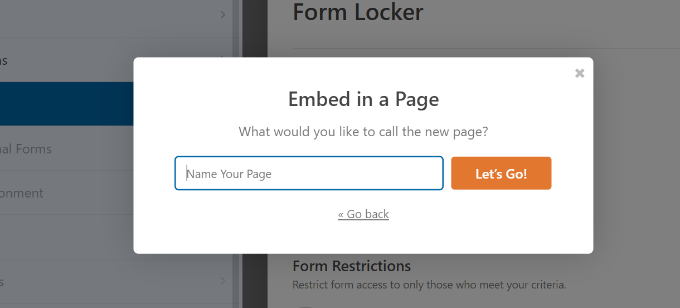
Next, WPForms will show a popup where you can choose an existing page or create a new one to embed your form.
We will choose the ‘Select Existing Page’ option for this tutorial.

Next, you’ll need to enter a name for your new page.
Once that’s done, simply click the ‘Let’s Go’ button.
After that, you’ll see a preview of your Stripe payment form in the WordPress content editor.
You can go ahead and publish the page and visit the website to see it in action.
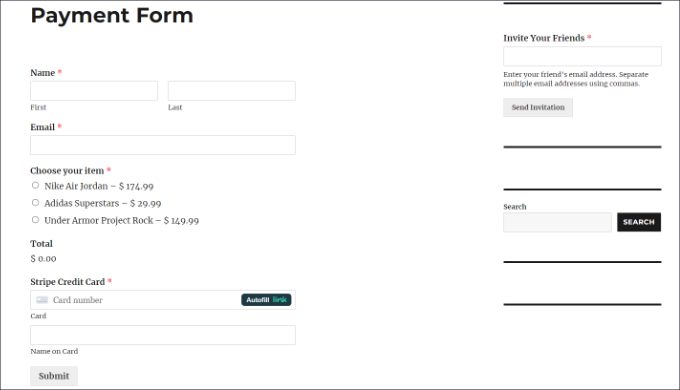
Now, go ahead and copy the link to your payment form page, as you’ll need it to create a QR code.
Alternative Method: You can also create a Stripe payment form using WP Simple Pay. It is the best Stripe payment plugin for WordPress that helps you collect online payments without setting up a shopping cart.
WP Simple Pay is a more straightforward option than WPForms. It is perfect if you’re just looking to create a basic form to accept credit card payments.
However, if you’re looking for more customization options and form templates, then we recommend using WPForms.
For more details, you can see our detailed guide on how to accept payments with Stripe in WordPress.
Add QR Code for Stripe Payments in WordPress
Now that your Stripe payment form is ready, you can create a QR code for it and display it anywhere on your site.
There are 2 ways you can add a QR code to your site. You can use the Google Chrome browser’s feature or use a WordPress QR code plugin.
1. Create QR Codes using Google Chrome
If you’re using the Google Chrome browser, then you can use it to share a webpage via a QR code.
First, you’ll need to open the Stripe payment form page in a new tab or window.
Next, you can click the share icon in the top right corner of the site address bar. From here, simply select the ‘Create QR Code’ option.
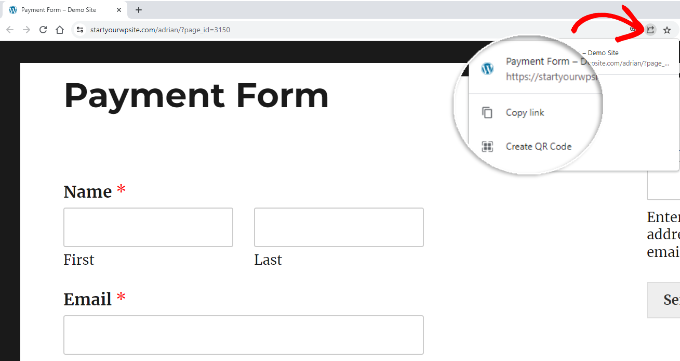
After that, Google Chrome will generate a QR code for your Stripe payment form page.
You can go ahead and download the QR code as an image.
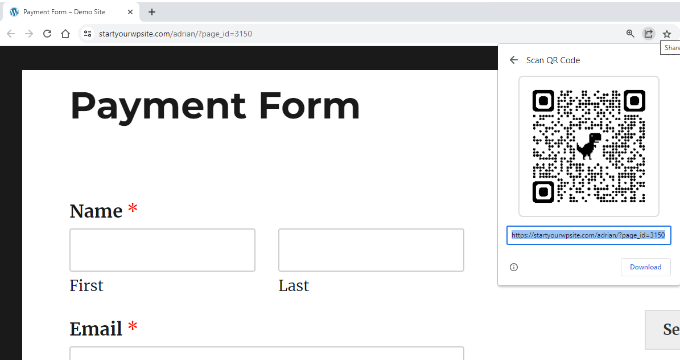
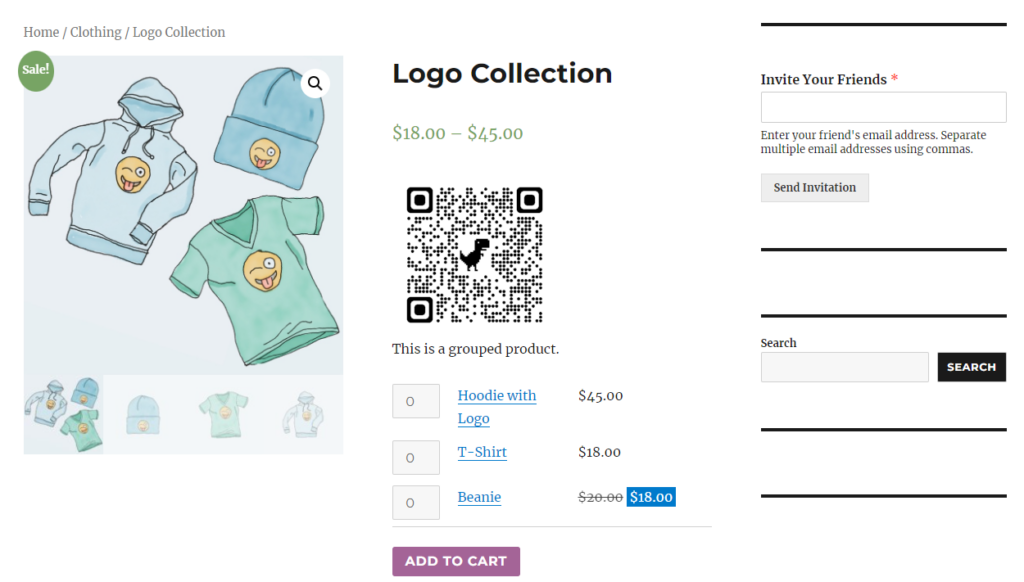
Next, simply place the image anywhere on your site.
For example, you can show the QR code on product pages so customers can quickly scan them and open the form to make a purchase.
2. Create a Stripe Payment QR Code using a WordPress Plugin
You can add QR codes to your site using a WordPress plugin like Shortcodes Ultimate. It is a free plugin that lets you create over 50 different types of shortcodes, including QR codes. You can learn more in our detailed Shortcodes Ultimate review.
First, you’ll need to install and activate the Shortcodes Ultimate plugin. If you need help, then please see our guide on how to install a WordPress plugin.
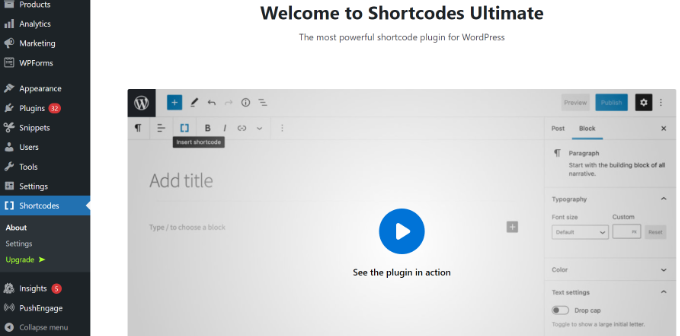
Upon activation, you will see the Shortcode Ultimate welcome screen.
Next, you’ll need to edit a page or post to add your QR code.
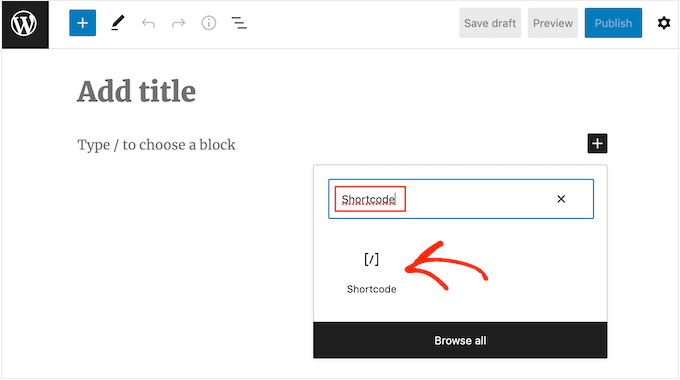
Once you’re in the content editor, simply add a shortcode block.
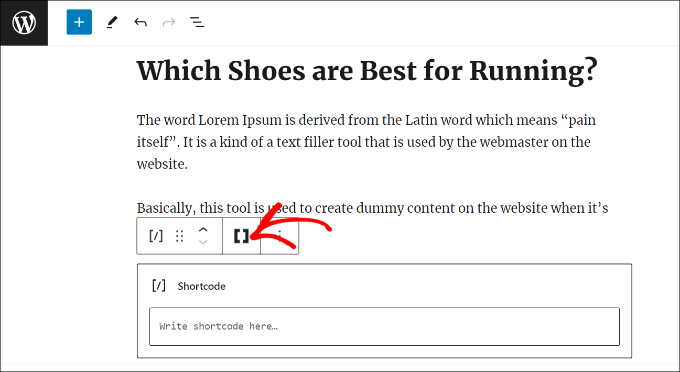
After that, you should see an ‘Insert shortcode’ option.
You can simply click the double brackets icon to add your QR code.
Next, the plugin will display different shortcode options for your site.
Go ahead and select the ‘QR Code’ option.
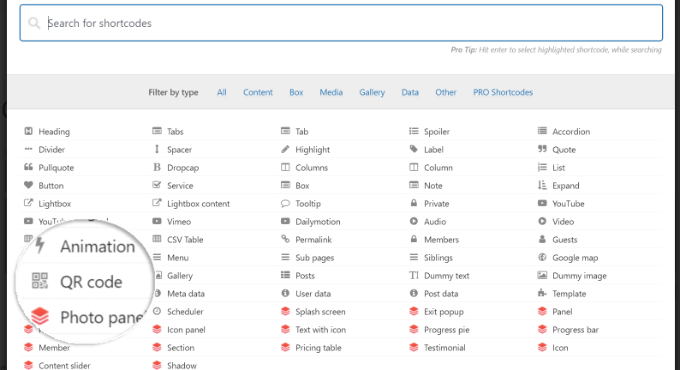
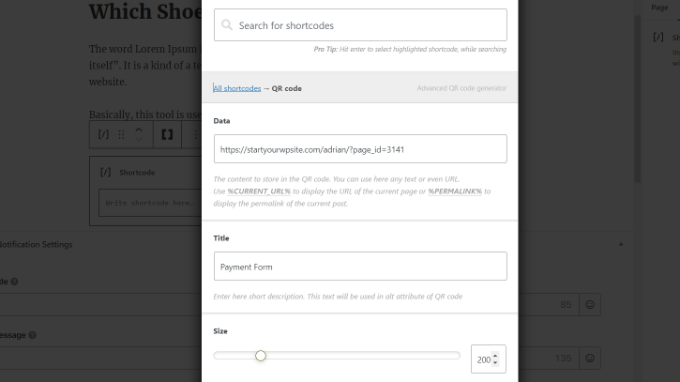
After that, you’ll see options to enter details for your QR code.
In the Data field, you can enter the URL of your Stripe payment form that you created earlier.
Besides that, there is an option to enter a title for the code, which acts as an alt-text. You can also adjust the size of your QR code.
If you scroll down, then you’ll see more options to customize your QR code. For instance, you can change the primary color, background color, and more.
Once you’re done, simply click the ‘Insert shortcode’ button.
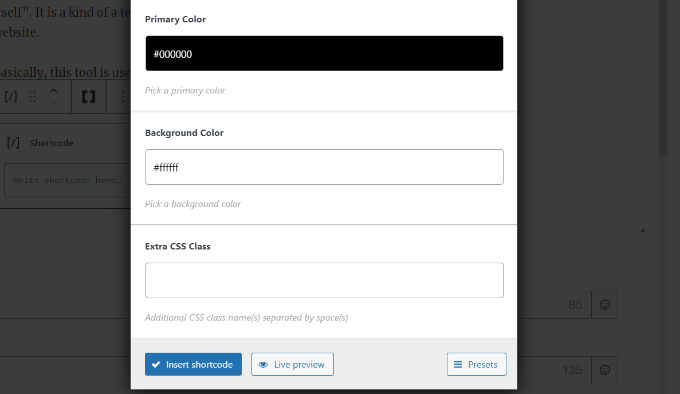
The plugin also lets you see a live preview of the code on your blog post or landing page.
Go ahead and publish your page to see the Stripe payment form QR code in action.

We hope this article helped you learn how to add Stripe QR code payment in WordPress. You may also want to see our guide on how to accept recurring payments in WordPress and our tutorial on accepting bitcoin payments in WordPress.
If you liked this article, then please subscribe to our YouTube Channel for WordPress video tutorials. You can also find us on Twitter and Facebook.


Moinuddin Waheed
This is one of the potential use of QR code for the simple reason that it smoothens the whole process of payment.
It not only helps businesses to avoid the bulky task of writing and displaying the whole payments form but also helps customers for easy navigation.
thanks for the step by step process.
Jiří Vaněk
We started using Stripe fairly recently, based on recommendations from several articles here on WPBeginner. The QR code is a great option to simplify payment for users. Thanks for the great article. I would like to ask, is it possible to further personalize the QR code to include, for example, the company’s logo (brand)?
WPBeginner Support
For the moment you would need another tool to customize the QR code.
Admin
Ralph
Paying with QR code is more and more popular. I think it is becuase of its ease of use. It’s just faster than old methods and we want to save more and more time.
I have a question – Scaning QR code with phone from laptop screen is easy, but is it also such a easy thing with smartphones themselves? I mean, i scroll website on my phone and see QR code, my phone do not recognize QR code like that, only with photo app. Is it normal or it’s just my phone and having qr code for mobile users is just as good as for desktop users?
WPBeginner Support
It would depend on the phone, if you have not done so already you would want to try taking a screenshot with your phone.
Admin
Ralph
Oh, I did not think of that… Thank you for your suggestion, this should do the trick!