Adding rotating testimonials to your WordPress site is a simple yet effective way to showcase social proof and build trust with your audience.
While static testimonials are helpful, they might not grab visitors’ attention as much.
Rotating testimonials, on the other hand, keep the content dynamic and engaging, allowing you to show more customer feedback without overwhelming your visitors.
However, setting up rotating testimonials can be tricky for those not familiar with custom coding or plugins.
That’s why we researched the easiest ways to get this feature up and running smoothly on your site. During testing, we found 3 plugins, including SeedProd, that make it simple to add rotating testimonials.
In this guide, we’ll walk you through 3 methods for how to add rotating testimonials in WordPress.

Why Add Rotating Testimonials to WordPress?
Many businesses use rotating testimonials to help them win new customers, get more sales and signups to their email list, and more.
If you are running an online store, then strong testimonials are a powerful form of social proof that can help turn visitors into customers and boost your conversion rates.

When it comes to social proof, positive reviews from multiple people are far more credible than a single one with a five-star rating. With that in mind, it’s good to collect testimonials to show lots of positive comments in a small space.
A rotating testimonial widget also add animation to your WordPress website, which can make your site more eye-catching and engaging.
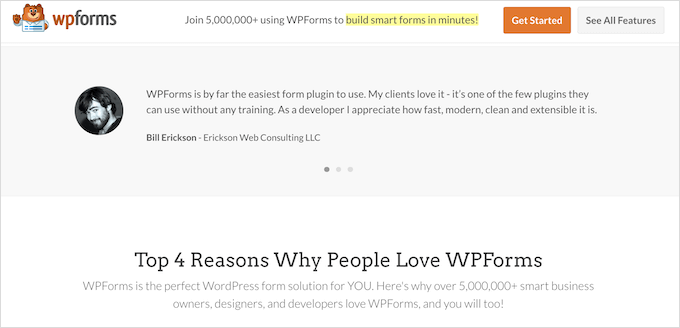
With that in mind, we’ll show you how you can add rotating testimonials to your WordPress site. We will use three different testimonial plugins for this guide. Simply use the quick links below to jump to the method you want to use:
- Method 1: Add Rotating Testimonials to WordPress With WP Testimonials Rotator (Free)
- Method 2: Add Custom Rotating Testimonials to WordPress With SeedProd (Recommended)
- Method 3: Add Rotating Testimonials to WordPress With Reviews Feed (Social Media)
- Bonus Tip: Submit Your WordPress Products to WPBeginner Solution Center
Let’s get started!
Method 1: Add Rotating Testimonials to WordPress With WP Testimonials Rotator (Free)
If you want to create a simple rotating testimonial slider, then you can use a free testimonial rotator plugin such as WP Testimonials with Widget.
The first thing you need to do is install and activate this free testimonial carousel plugin. For more details, see our step-by-step guide on how to install a WordPress plugin.
Upon activation, you can go to WP Testimonials » Add New in your WordPress dashboard.
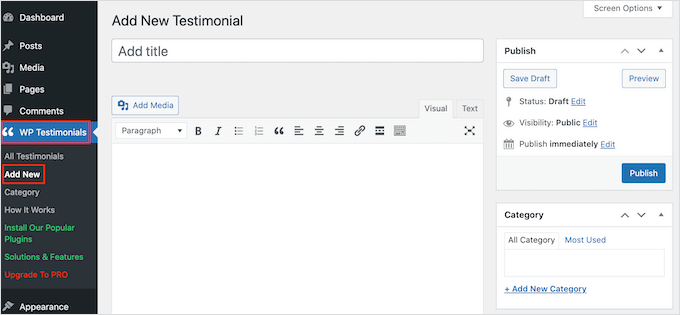
To get started, type in the title that will appear above the testimonial quote.
You can then add the testimonial in the main text editor, which looks similar to the classic editor.
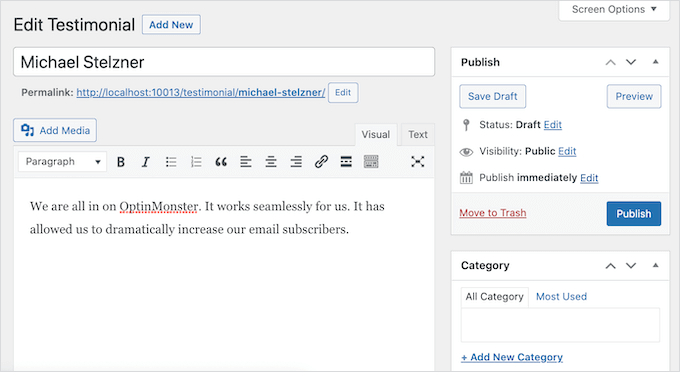
To help organize your client testimonials, you may want to add some categories in the same way that you add categories and subcategories in WordPress.
After that, you’ll scroll to the ‘Testimonial Details’ box and add information such as the client’s name, job title, and company.
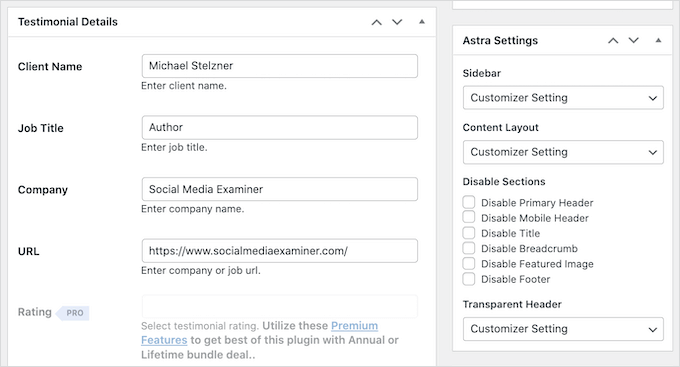
Another testimonial option is adding a featured image, which will appear above the testimonial title. For example, you might use the person’s headshot or your product’s custom logo.
When you are happy with the information you’ve entered, go ahead and click the ‘Publish’ button to make it live.
The number of testimonials you can add is unlimited, so feel free to add more by repeating the same process described above. Once you’ve created all your customer testimonials, it’s time to show them on your website.
Simply open up the post or page where you want to add your rotating testimonials.
Then, click the ‘Plus’ icon to open the WordPress block editor. You can then type in ‘Shortcode’ and select the right block when it appears.
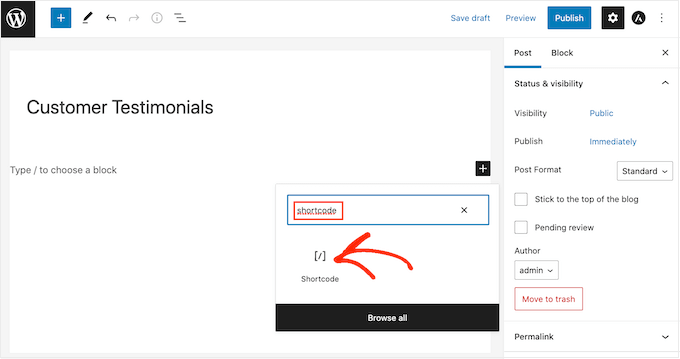
After that, you’ll need to add the following shortcode to the box: [sp_testimonials_slider]
Then, you can simply click the ‘Update’ or ‘Publish’ button to save your changes.
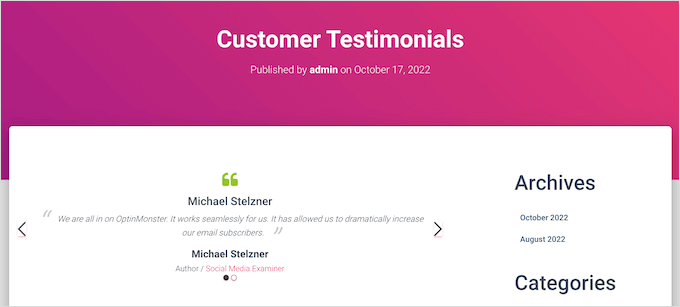
Now, your visitors can see all your positive customer testimonials. After each testimonial displays for a few seconds, it will automatically rotate.
Method 2: Add Custom Rotating Testimonials to WordPress With SeedProd (Recommended)
If you want to create a beautiful, fully customizable page with a testimonials section, then we recommend using a page builder plugin.
SeedProd is one of the best drag-and-drop WordPress page builders on the market and is used by over 1 million websites.
It comes with 90 ready-made blocks and more than 350 templates that allow you to create custom pages in WordPress and easily add rotating testimonials to your website.

First, just install and activate the plugin. For more details, you can see our beginner’s guide on how to install a WordPress plugin.
Note: The SeedProd free version is available, but we will be using the Pro version since it has a ready-made Testimonials block. It also integrates with all of the best email marketing services you may already be using to promote your products and services.
Upon activation, you need to visit SeedProd » Settings and enter your license key.
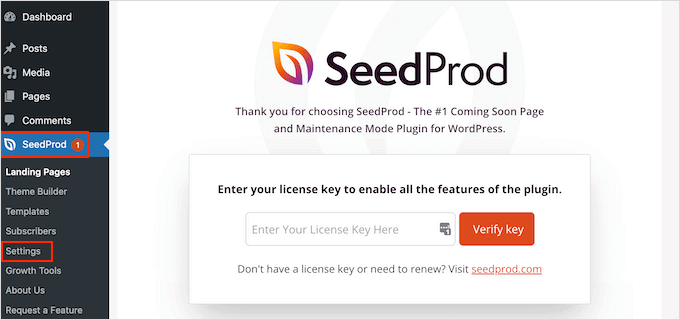
You can find this information in your account on the SeedProd website. After entering the key, click the ‘Verify Key’ button.
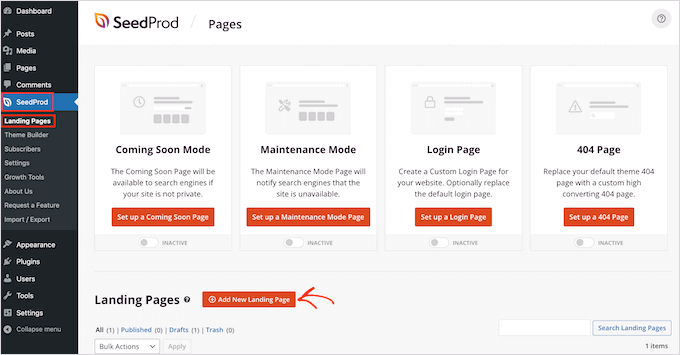
For our example, we will create a custom testimonial page where we want to display reviews about the product. To do so, go to SeedProd » Pages and then click on the ‘Add New Landing Page’ button.
On the next screen, you’ll be asked to choose a template. SeedProd has a ton of professionally designed templates organized into different categories, such as coming soon, sales, and maintenance mode.
To choose a template, you can hover over it and then click the ‘Checkmark’ icon.
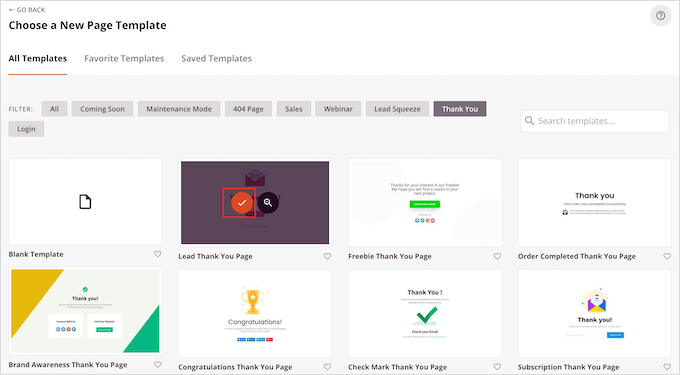
If you want to start from scratch, then SeedProd also has a blank template that you can use. We will be using the ‘Juicy Sales Page’ template in all our images, but you can use any design you want.
Next, go ahead and type in a name for the custom page. SeedProd will automatically create a URL based on the page’s title, but you can change this URL to anything you want.
A descriptive URL will help search engines understand what the page is about so they can show it to the right users. With that in mind, you may be able to improve your WordPress SEO by adding some relevant keywords.
For more information, please see our guide on how to do keyword research for your WordPress blog.
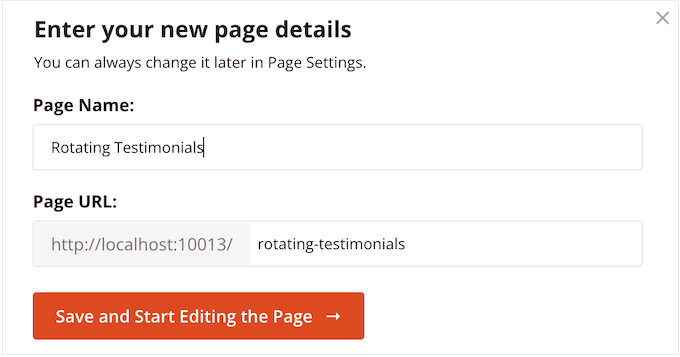
After entering this information, you can click the ‘Save and Start Editing the Page’ button.
This will load the SeedProd page builder interface, like this:

It is a simple drag-and-drop builder showing your page’s live preview to the right. You will also see block settings on the left.
The left-hand menu has blocks that you can add to your page using drag and drop.
First, we’ll add a customer testimonial block. Simply drag the ‘Testimonials’ block onto the page where you want it to appear.
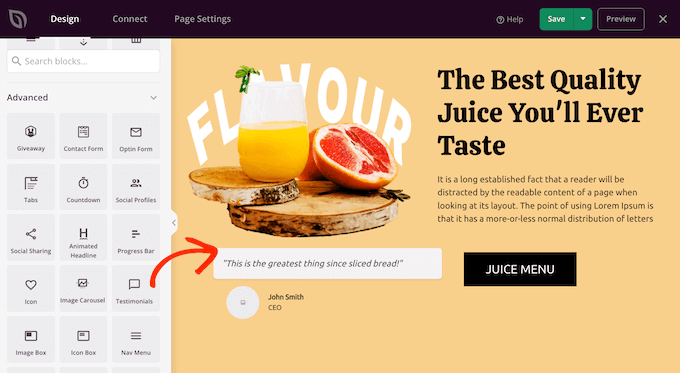
You can now customize the testimonial by adding images, changing the text, adding the customer’s name, and more.
To make these changes, simply click to select the testimonials block and then use the settings in the left-hand menu.
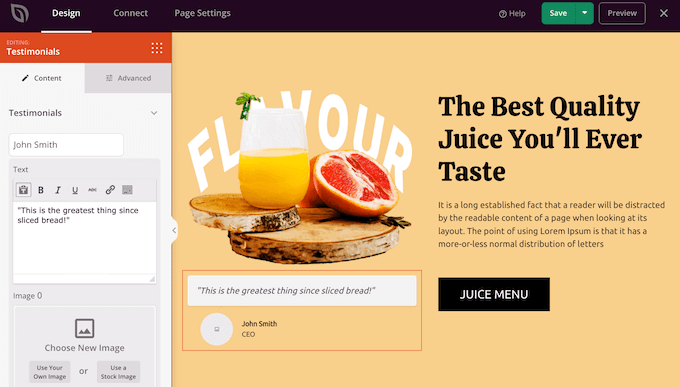
To turn this into a rotating section, you’ll need to add at least one more testimonial.
Simply click the ‘Add Testimonial’ button and then customize it by following the same process described above.
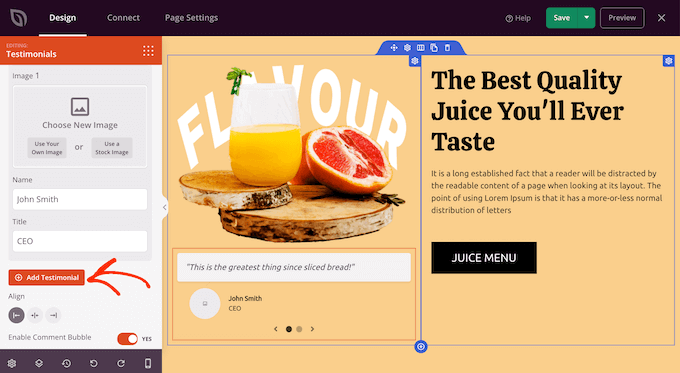
Keep repeating these steps until you’ve added all the customer reviews and quotes you want to show.
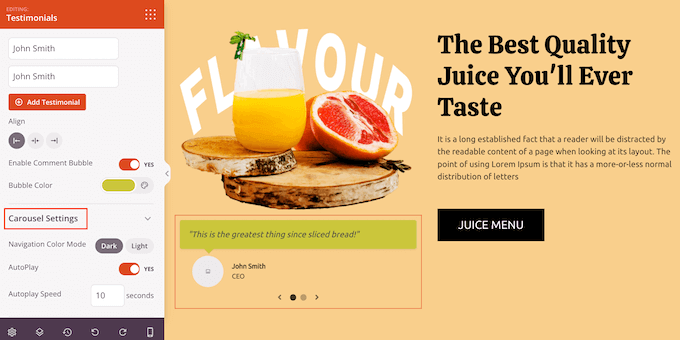
After that, you can change how the rotating testimonials will look and act by clicking on ‘Carousel Settings’ to expand that section.
Here, you can change the color scheme, the slider speed, and whether the slider will scroll through the different customer testimonials automatically.
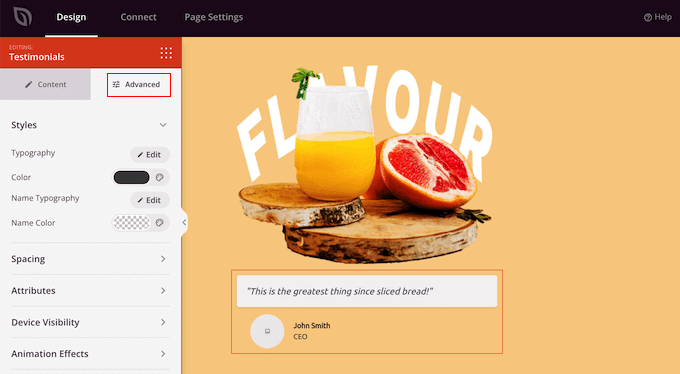
If you click on the ‘Advanced’ tab, then you’ll find even more settings.
For example, you can really make the customer testimonial stand out by changing the text color, adding CSS animations, and more.
When you are happy with how the testimonials are set up, you can continue to customize the page by adding more blocks and changing the settings in the left-hand menu.
When you’ve finished customizing your page, it’s time to publish it by clicking the dropdown arrow next to ‘Save’ and then selecting the ‘Publish’ option.
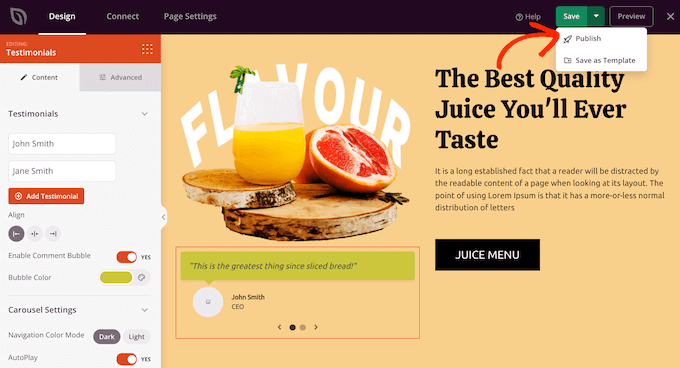
Now, if you visit your WordPress blog or website, you’ll see the page with your rotating testimonial live.
Method 3: Add Rotating Testimonials to WordPress With Reviews Feed (Social Media)
There are lots of third-party websites where customers can review your company, such as Yelp and Google. Sometimes, users may even post reviews on your Facebook page. However, potential customers will need to visit these third-party websites in order to see the reviews.
With that in mind, it’s a good idea to add testimonials from these sites to your WordPress website so everyone can see them.
While you could copy and paste these reviews manually, it’s far easier to embed a review feed that updates automatically as customers post new reviews.
Reviews Feed Pro allows you to show reviews from Yelp, Google, TripAdvisor, and Facebook.
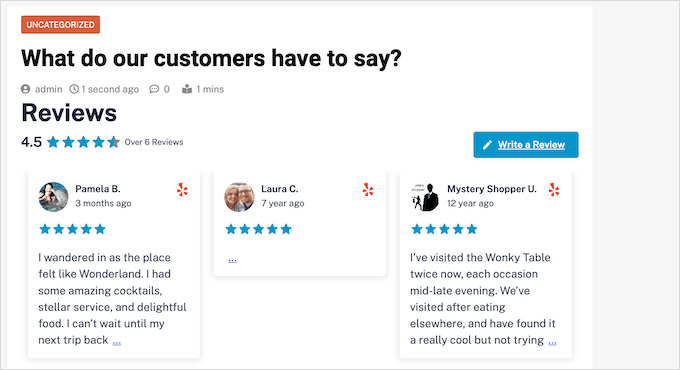
Reviews Feed Pro automatically copies your website’s design. As a result, the embedded reviews perfectly suit your WordPress theme and look like a natural part of your website rather than content embedded from another platform.
It also comes with a built-in testimonial carousel layout, so you can show a ton of reviews in a small amount of space.
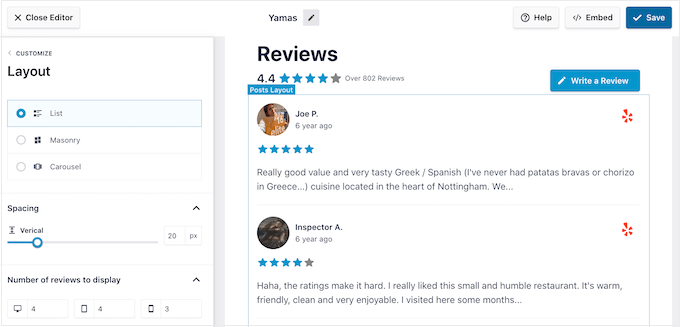
After placing the feed, new testimonials will appear on your online marketplace, store, or website in real time. This way, visitors will always see the latest reviews.
Since the feed updates automatically, your site will seem more trustworthy as it’s clear you’re not moderating or controlling the review feed in any way.
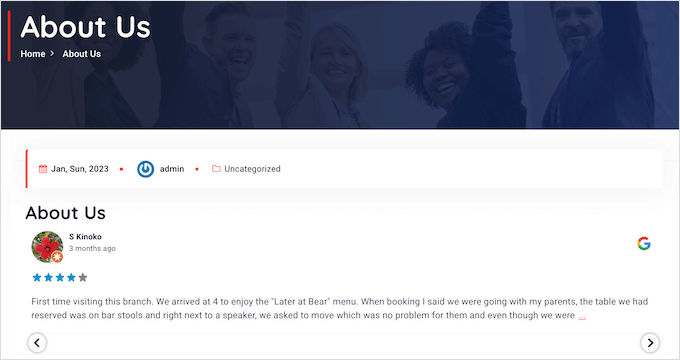
For step-by-step instructions, please see our guide on how to show Google, Facebook, and Yelp reviews in WordPress and our tutorial on how to display reviews from Trustpilot in WordPress.
Bonus Tip: Submit Your WordPress Products to WPBeginner Solution Center
At WPBeginner, we understand the struggle of finding the best WordPress plugins, themes, and tools to boost your website. With tons of review sites out there, it’s tough to know which ones to trust.
That’s why we created the WPBeginner Solution Center, a one-stop shop for discovering the best WordPress themes, plugins, and all sorts of handy software

Here, you can explore products handpicked by our experts. We only feature products that we believe will work best and benefit our customers.
You can also check out real user testimonials to get a sense of what a product is really like.
Note: Do you have a WordPress plugin, theme, or tool you want us to check out? You can submit it to us here for free for review. Once approved, you can display testimonials from our experts and users on your website to boost your business website’s credibility.
We hope this article helped you add rotating testimonials to your WordPress website. You may also want to see our expert list of the key design elements for an effective WordPress website and our guide on how to get website design feedback.
If you liked this article, then please subscribe to our YouTube Channel for WordPress video tutorials. You can also find us on Twitter and Facebook.


Jiří Vaněk
I installed SeedProd on one of my websites and have been exploring all the features to create a beautiful personal portfolio. This guide is perfect for adding testimonials to the portfolio I’m working on. I followed your step-by-step instructions, and it turned out really well. With SeedProd and a detailed guide, it’s really a breeze.
WPBeginner Support
Glad to hear our guide made it easy
Admin
Omotoso Yusuf
Glad to finally get this, I was just having single images or screenshots on my sales page before now.
Thanks as always
WPBeginner Support
You’re welcome
Admin
Tonisha
Thank you for this article. I have been trying to find a testimonial carousel for months and this is the only thing that has worked for me.
WPBeginner Support
Hey Tonisha,
Glad you found it helpful. Don’t forget to join us on Twitter for more WordPress tips and tutorials.
Admin
Keri
How do we change the font? I would like to use Playfair Display, but it’s not a font option listed on the testimonial page.
Scott
Surprised WPBeginner recommends a plug-in that relies on shortcodes.
WPBeginner Support
Hi Scott,
We don’t mind recommending plugins that use shortcodes. Please take a look at our article on using shortcodes in WordPress.
Admin
Esther
Wow, thank you for this article. I’ve followed every step and now my business website looks awesome!
WPBeginner Support
Hi Esther,
Glad you found it helpful. Don’t forget to join us on Twitter for more WordPress tips and tutorials.
Admin