Adding image choices to your WordPress forms is a great way to boost user engagement and improve the overall experience.
Instead of using standard text-based options, image choices allow users to interact with your forms in a more visual and engaging way. This can be particularly useful for surveys, quizzes, product selections, and any form where you want to make the decision-making process more intuitive.
Over the years, we have built numerous forms on WordPress, which has given us valuable insights into what makes forms engaging and what causes users to abandon them.
In this article, we will show you how to easily add image choices in WordPress forms to boost user engagement.

Why Use Image Choices in Your WordPress Forms?
Image choices are photos, illustrations, graphics, or icons that your users can choose between when filling out a form on your WordPress website.
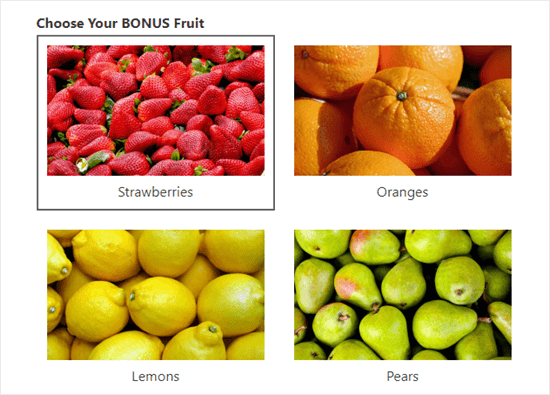
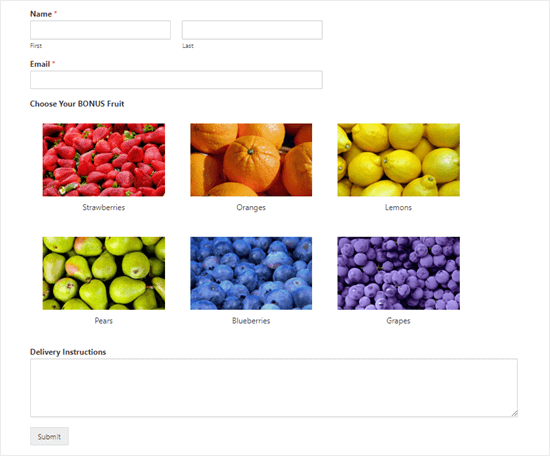
Here’s an example of a form using image choices rather than regular text options. The first choice, Strawberries, has been selected:
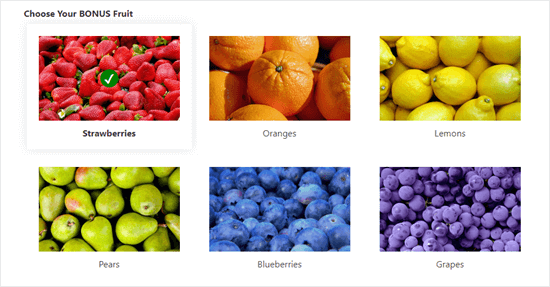
Image choices can make your forms look more polished, professional, and visually appealing, which can help users decide faster.
For instance, if you run a restaurant website that offers delivery, then you’ll want to have an order form on your website. You can now use images of your different dishes to help potential customers choose what they want.
Other than that, image choices can make it easier for an audience with reading difficulties or someone who isn’t fluent in your language to fill in your form, improving user experience.
Having said that, let’s see how to easily add image choices in WordPress forms.
How to Add Image Choices to Your WordPress Forms
You can easily add image choices to your WordPress forms with WPForms to boost engagement.
It is the best WordPress form builder plugin on the market and allows you to easily create forms using a simple drag-and-drop form builder.
We have been using this plugin on several of our websites and have always had excellent results because it is super user-friendly and scalable. To find out more about our experience, see our WPForms review.
First, you’ll need to install and activate the WPForms plugin. For detailed instructions, see our step-by-step guide on how to install a WordPress plugin.
Note: You can also use WPForms Lite, which is completely free to add image choices to your form. However, we will be using the pro version as it has more features.
Upon plugin activation, head over to the WPForms » Add Form page in your WordPress dashboard to create a new form.
This will take you to the ‘Select a Template’ page, where you can start by typing a name for your form.
After that, click the ‘Use Template’ button under a pre-made template of your choice. For this tutorial, we will be using the ‘Simple Contact Form’ template.
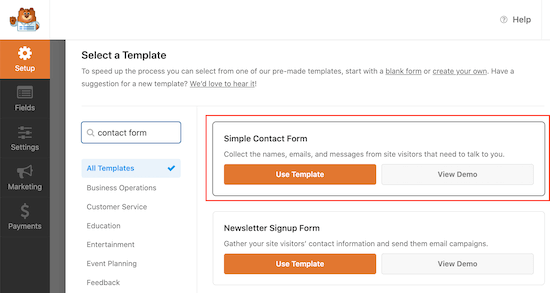
This will launch the WPForms form builder interface, where you’ll see a form preview on the right side of the screen and a column with form fields in the left corner.
You can now edit any form field of your choice by clicking on it, move it up and down, or delete it.
For more detailed instructions, you may want to see our tutorial on how to create a contact form in WordPress.
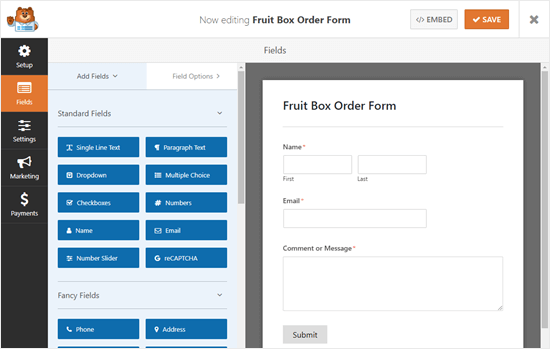
Next, you have to add the Multiple-choice field from the left column into the form preview so that you can create image choices for customers.
We are going to place it just above the ‘Comment or Message’ box.
Note: Image choices also work with the Checkboxes field. Use that if you want your user to be able to pick more than one option.
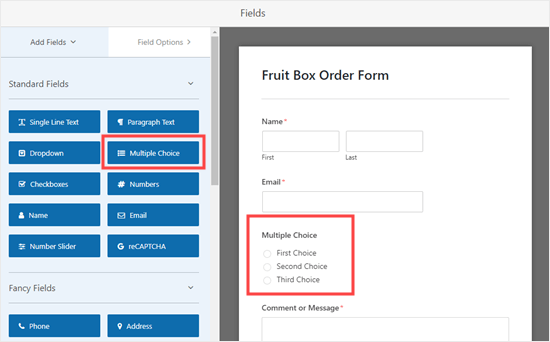
After that, click on the Multiple Choice field to edit it. This will open the field options on the left-hand side of your screen.
You’ll now notice that this field allows you to add text options by default.
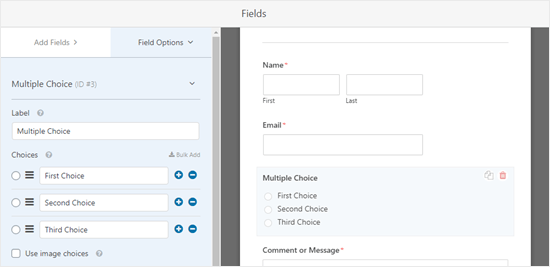
However, you can easily change that by toggling the ‘Use Image Choices’ switch.
Once you do that, an ‘Upload Image’ button will appear under each multiple-choice field.
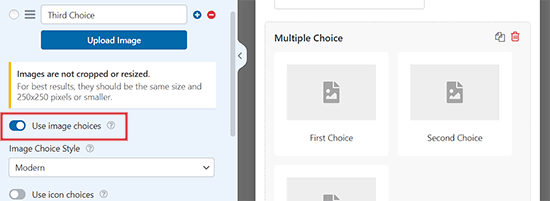
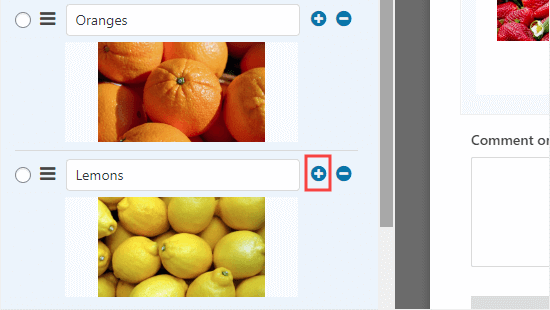
Next, you can type in whatever you want for the field text label and then click the ‘Upload Image’ button.
You can now upload an image from your computer or select one from the WordPress media library.

We recommend using .jpg or .png images that are no more than 250px by 250px.
Keep in mind that your pictures will look the best in your form if they are all the same size.
Important: WPForms won’t resize your images. You’ll need to make sure they’re the size you want before uploading them. Alternatively, you can edit your images in WordPress itself before adding them to your form.
If you have more than 3 options to include, just click the (+) button to add a new choice. You can also use the (-) button to remove a choice.
Changing How Your Image Choices Are Displayed in Your Form
WPForms makes it easy to change the layout and other settings for your image choices field.
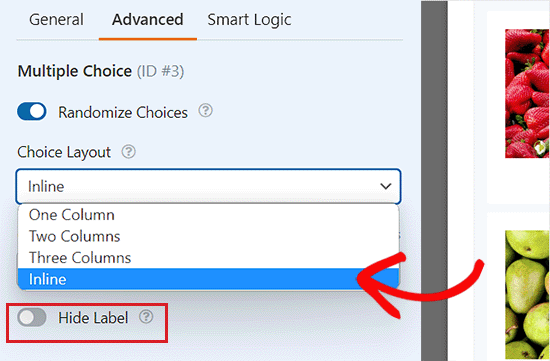
To do this, head over to the ‘Advanced’ tab in the left column.
You can now toggle the ‘Randomize Choices’ switch if you want to display your image choices randomly rather than in a particular order.
This is useful if you are creating a survey and want to eliminate first-choice bias in results.
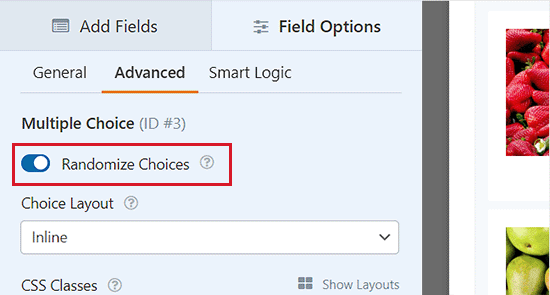
If you want, you can also change how your choices are laid out using the ‘Choice Layout’ dropdown.
The default is ‘Inline’ with your choices appearing next to one another until they wrap onto a new line.
You may choose to display your choices in a number of columns instead. If you want a vertical list, simply choose ‘One Column’ from the dropdown.
There’s also the option here to ‘Hide Label’ for your image choices. This means there won’t be any text below the images. In some cases, it may make sense to do this.
For instance, you might be asking people to vote for which new logo design they like best.
Make sure you enter a relevant and helpful label where possible, though. This will be displayed as alt text for your images, making your site more accessible to visually impaired users.
Once you have done that, switch back to the ‘General’ tab from the left column and scroll down to the ‘Image Choice Style’ section.
From here, you can choose how you want to style your images from the dropdown menu.
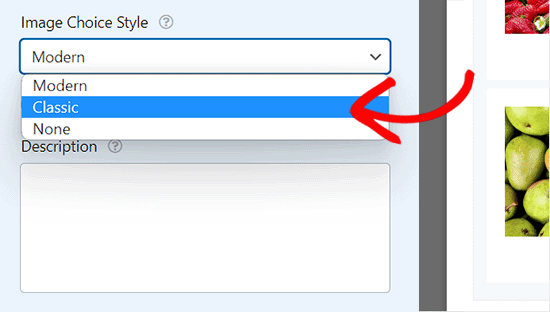
The default style is Modern, where a checkmark will appear for the image that is selected.
However, you can pick the Classic style instead, which looks like this when an option is selected:
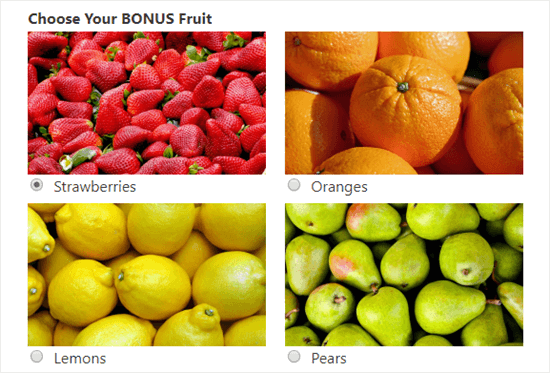
Alternatively, you can also choose ‘None’ for the style.
In this case, your images will simply be regular images with no border or other styling. The labels will be shown with radio buttons.
Once you are happy with your form, just click the ‘Save’ button at the top of the screen.
Adding Your Form to Your Website
You can add your form to any post or page on your site with just a couple of clicks. We are going to create a new page for ours.
First, visit the Pages » Add New screen from the WordPress admin sidebar and click the ‘Add Block’ (+) button at the top left corner of the screen.
This will open the block menu from where you have to find and add the WPForms block to the page.
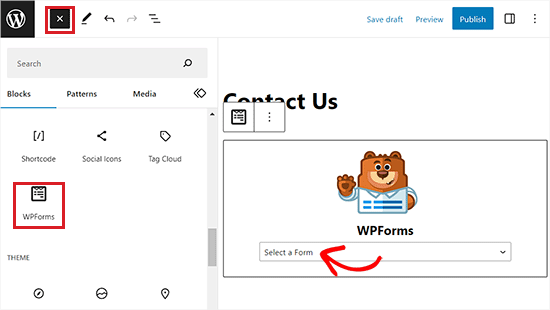
After that, select the form that you just created from the dropdown menu within the block itself.
Finally, click the ‘Publish’ or ‘Update’ button to store your form settings.
Now, visit your website to view the image choices in your WordPress form.
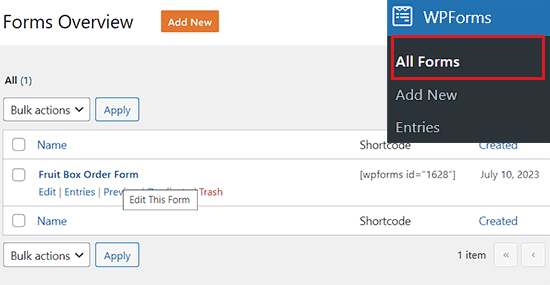
If you want to make more changes to your form, then you can easily do that by visiting the WPForms » All Forms page from the WordPress dashboard.
Once you are there, click on your form to open it in the form builder.
After making your changes, simply click the ‘Save’ button to store your changes. Your form will automatically be updated on your page, too.
Bonus: Accept Images With Your WordPress Forms
Apart from giving image choices, you can also accept images from different users with a WordPress form.
This can come in handy if you are a photographer looking to hire someone or if you are running a photography contest.
Other than that, accepting user-generated content can even help boost user engagement on your website.
You can easily create a file upload form in WordPress with WPForms because it is the best file upload plugin on the market.
It comes with a premade File Upload Form template that you can use to accept any kind of document, including jpeg, png, gif, pdf, ppt, and more.
To accept images, you must simply click the ‘File Upload’ field to open its settings in the left column. After that, you must enter the image file types that you want to accept under the ‘Allowed File Extensions’ option.
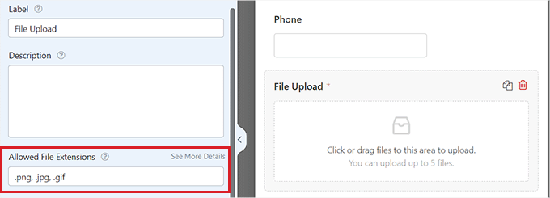
Once you are satisfied, don’t forget to click the ‘Save’ button to store your settings.
You can then add the form to your website with the user-friendly WPForms block. For more detailed instructions, see our tutorial on how to create a file upload form in WordPress.
Video Tutorial
If you prefer visual instructions, then you can check out our video tutorial.
We hope this article helped you learn how to add image choices in WordPress forms. You may also want to see our beginner’s guide on how to create an interactive poll on your WordPress site and our comparison of the best WordPress calculator plugins.
If you liked this article, then please subscribe to our YouTube Channel for WordPress video tutorials. You can also find us on Twitter and Facebook.


Mrteesurez
This is exciting, I never thought this would be so easy to setup like this, WPForms is really a good plugin to have for forms and all input related matters. I like how it works with image choice.
Michael Laboulle
Hi,
I got a question how do you allow to make multiple choices.
What do I need to do if I want somebody to pick 2 or 3 fruits?
Thanks!
WPBeginner Support
Then you would want to use checkboxes instead of multiple choice
Admin