Do you use WordPress contact forms for appointment bookings, consultations, or other event-based interactions? Manually adding these events to your Google Calendar can be time-consuming and prone to errors.
At WPBeginner, we use Sugar Calendar for all our calendar needs. However, many of our users have found that automatically sending events from your WordPress contact form straight to Google Calendar improves efficiency and streamlines their workflow.
In this article, we will show you how to easily add Google Calendar events from your WordPress contact form, saving you valuable time and ensuring a smooth scheduling process.
Why Add Google Calendar Events From a WordPress Form?
Normally, you can add a contact form to your WordPress website and get notifications via email or in your WordPress dashboard.
You can use a contact form to allow customers to book appointments, request a callback, get a quote, and more. However, managing contact form leads manually is not very efficient, and you may lose customers because of it.
This is where Google Calendar can help. It works on any device, and you can get instant notifications or reminders for each calendar event.
Automatically sending your form entries to Google Calendar ensures that you don’t miss any bookings, appointments, orders, or calls.
That being said, let’s look at how to easily create a Google Calendar event from your WordPress form entries.
Connecting Your Contact Form and Google Calendar
For this tutorial, we will be using WPForms, which is the best form builder for WordPress. It comes with an intuitive drag-and-drop interface that lets you easily create any type of form.
We will then use Zapier to connect your contact form to Google Calendar. Zapier works as a bridge, connecting 2 different apps with no need for any code.
Let’s get started.
Creating Your Contact Form in WPForms
First, you need to install and activate the WPForms plugin. For more details, see our step-by-step guide on how to install a WordPress plugin.
Note: You need the Pro version or higher to use the Zapier addon for WPForms.
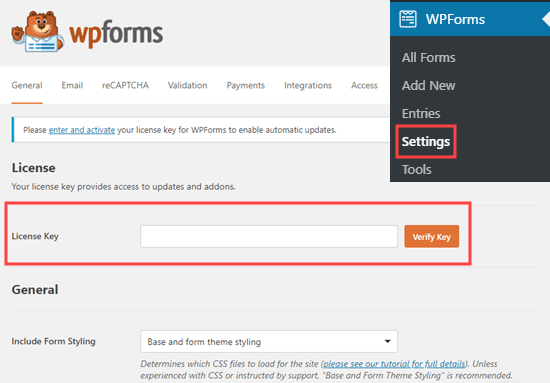
Upon activation, go to the WPForms » Settings page and enter your license key. You will find your license key in your account area on the WPForms website.
Now, it’s time to create your contact form. If you already have a contact form set up, simply edit it by going to the WPForms » All Forms page and clicking on its name.
Otherwise, visit the WPForms » Add New page in your WordPress admin to launch the WPForms builder and create a new form.
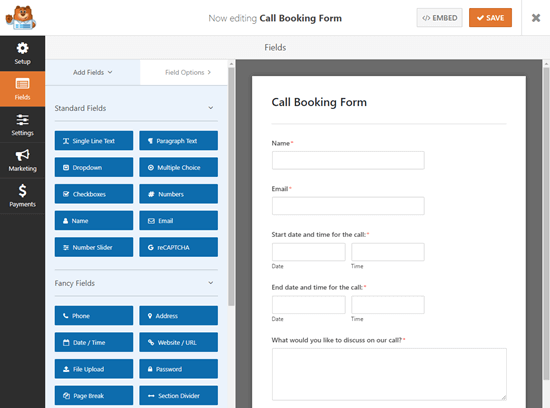
We are going to use a simple contact form template with added date/time fields for the start and end times of the call. If you need help creating your form and adding fields, check out our step-by-step guide to creating a contact form.
Tip: Want to use a specialized event form template instead? Simply install the Form Templates addon in WPForms » Addons for access to the Event Planner Form and 1300+ other templates.
Once you’ve set up your form, you need to add it to your WordPress website. Simply edit the page (or post) where you want to include it or add a new one by going to Pages » Add New.
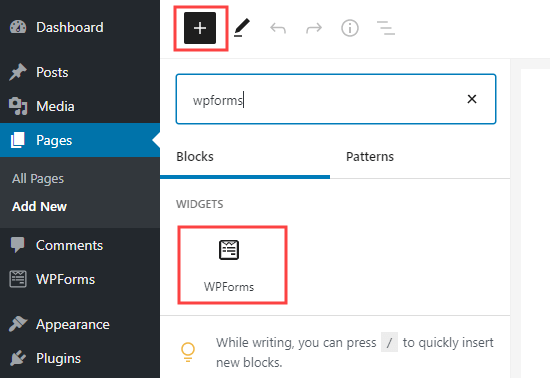
First, you need to click the ‘+’ icon to add a new block. Then, search for the WPForms block and add it to your content area:
Once you’ve added your form to your website, go ahead and publish or preview the page.
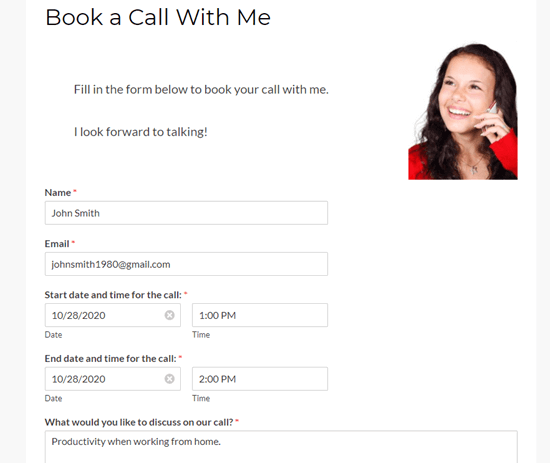
Make sure that you submit a test entry using your form. This test entry is necessary to set up and check the connection between WPForms and Google Calendar.
Here’s our test entry, with name, email, date, start and end time, plus a message:
Preparing to Connect WPForms and Zapier
We are going to use Zapier to link WPForms and Google Calendar. This means you need to install and activate the WPForms Zapier addon.
Simply go to the WPForms » Addons page in your WordPress admin. Search for the Zapier addon and then click the ‘Install Addon’ button to install and activate it.

Now, you need to visit the WPForms » Settings » Integrations page. From here, you simply need to click on the Zapier logo to get an API key.
You may want to copy your API key somewhere safe or keep your tab open. You’ll need this later to connect Zapier to your WPForms account.
Creating Your Zap to Send Data From Your Contact Form to Google Calendar
Now, it’s time to go to the Zapier website. If you don’t already have an account, then go ahead and create a free account here.
Once you are logged in to the Zapier dashboard, click on the ‘Make a Zap’ button. This is on the top left of the screen.

Note: In Zapier, a ‘Zap’ is a process that has both a trigger and an action. In this case, our trigger will be someone filling in the contact form, and our action will be to create a new event in Google Calendar.
Now, you need to give your Zap a name at the top of the screen. After that, it’s time to set up the trigger.
First, type ‘WPForms’ into the search bar for the ‘Choose App & Event’ box. Then, simply click on the WPForms icon that appears:
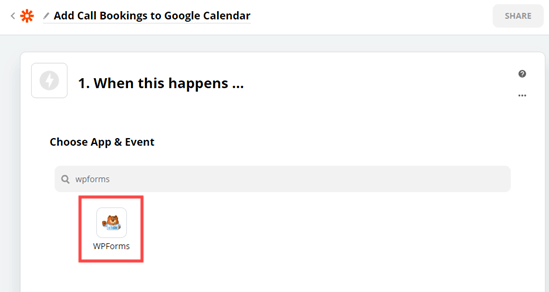
Zapier will automatically fill in the trigger event of ‘New Form Entry’.
All you need to do is click the ‘Continue’ button.
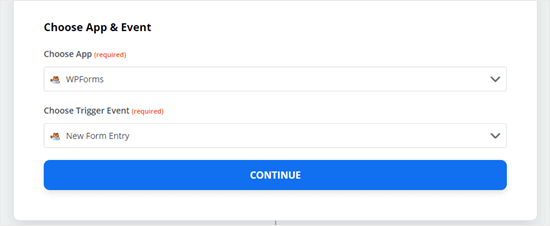
Next, Zapier will prompt you to sign in to your WPForms account.
Just click the ‘Sign in to WPForms’ button to do so:

You should now see a popup window where you need to enter your API key. This is the API key that you found earlier on the WPForms » Settings » Integrations page in your WordPress admin.
You also need to add the URL of your website.
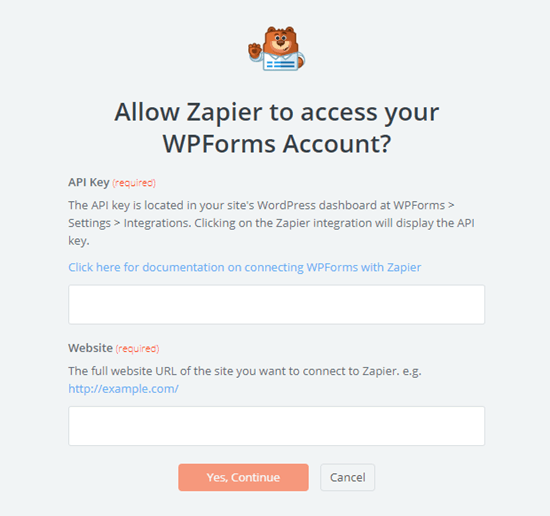
After doing that, simply click the ‘Yes, Continue’ button to move to the next step.
Zapier will now ask you to select your contact form from the dropdown list.
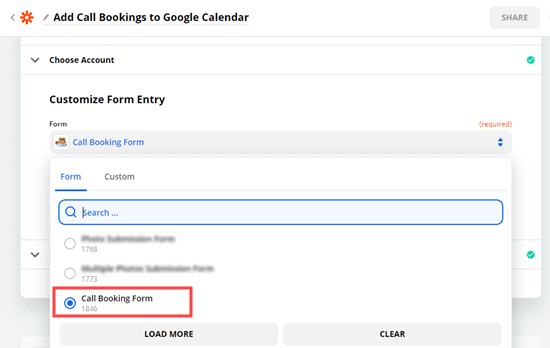
If you have several different forms on your site, then make sure you select the right one:
Next, go ahead and click the ‘Test trigger’ button.
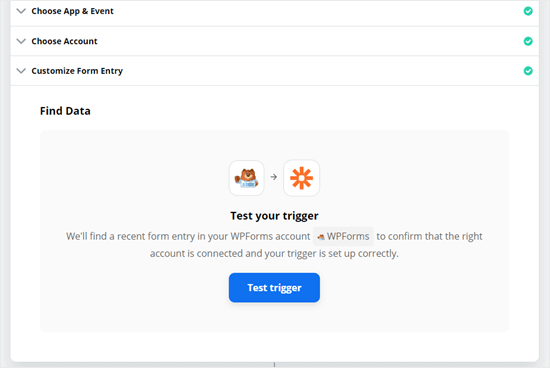
Zapier will now find the test entry you created earlier.
You will see this displayed on the screen.
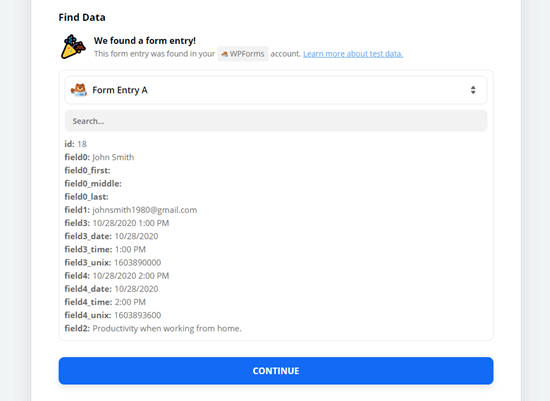
Click the ‘Continue’ button, and you’ll move on to the Action part of the Zap.
This is where you need to choose your second app, Google Calendar.
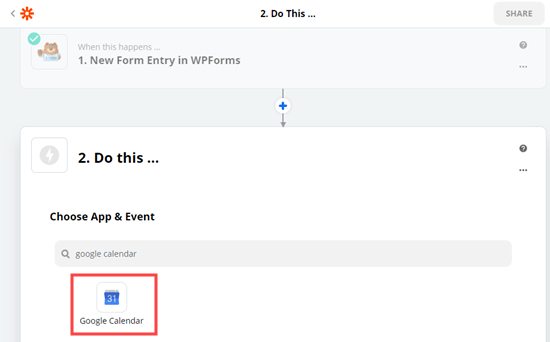
Next, click on the ‘Choose Action Event’ dropdown.
You need to select the ‘Create Detailed Event’ option.
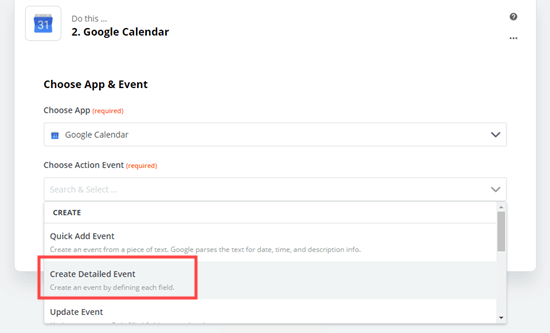
This will open the ‘Create Detailed Event in Google Calendar’ page.
Zapier will now prompt you to sign in to your Google Calendar account.
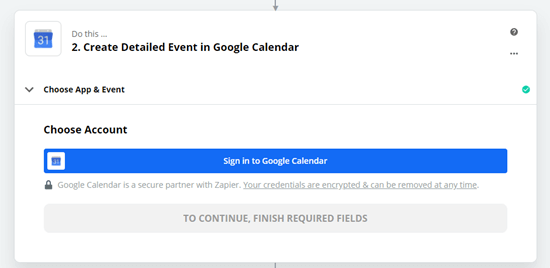
You need to give Zapier permission to access your Google Calendar.
This will allow Zapier to create events for you.
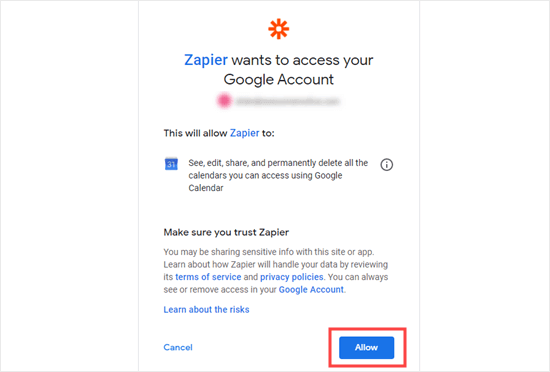
Once you’ve signed into Google Calendar, click the ‘Continue’ button to carry on.
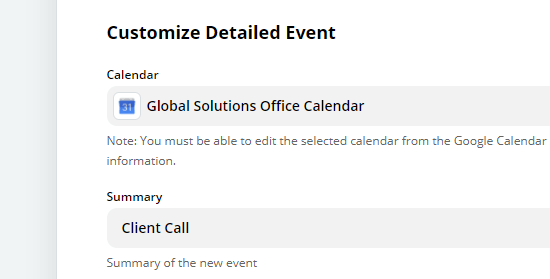
Next, you will see the Customize Detailed Event section. Here, you need to select the correct calendar from the first dropdown:
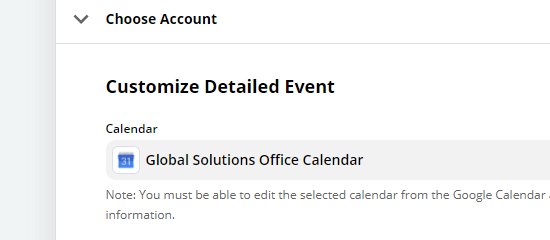
Once you’ve done that, type in an event summary for the event.
We’re going to use Client Call for ours. You could also choose a form field here if you have an appropriate field on your form for this.
For the event description, we are going to use the message from the form.
Just click on the ‘Description’ box, then click on the field from the form that you want to use. Your test data will be shown alongside the field name.
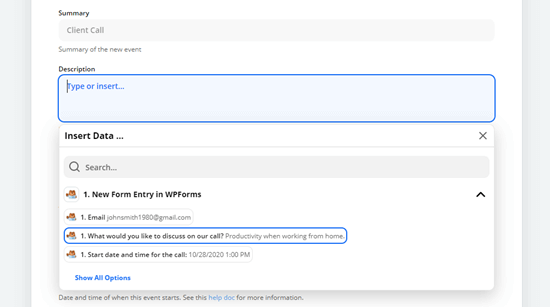
You can include other fields here, such as the person’s name and/or email address.
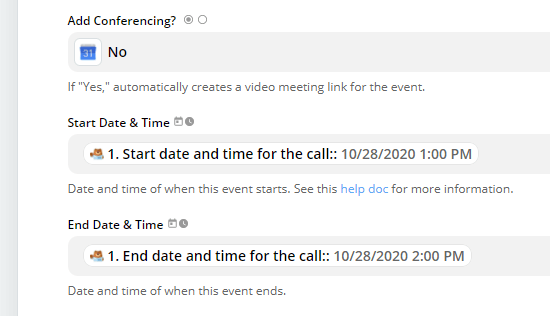
You also need to make sure you add the Start Date & Time and the End Date & Time. Again, click on the box and select the appropriate field from your form:
You may also want to include the email address of the person who booked the call or event.
This means they’ll be sent an invite, so they can easily add the event to their own calendar.
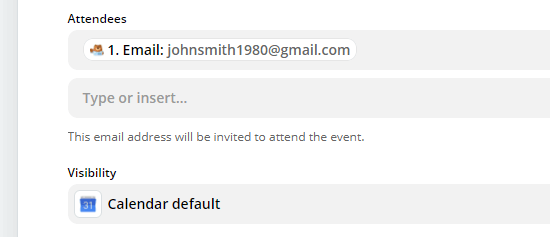
You can change other settings here, as well. Once you are happy with your settings, click the ‘Continue’ button.
Now, Zapier gives you the opportunity to test out your Zap.
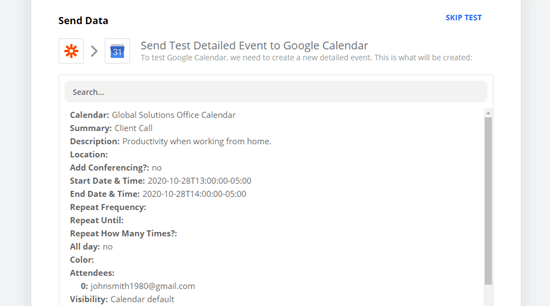
First, you will see the details of what’s going to be sent to Google Calendar.
Below this, simply click the ‘Test & Continue’ button to test out your Zap.

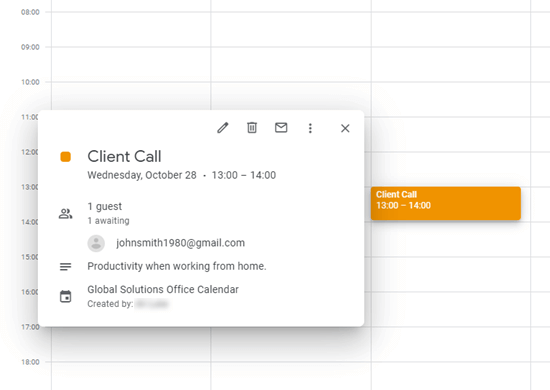
Next, you should check that the Zap worked.
You need to go ahead and view your Google Calendar to check that the test event has been successfully added.
Finally, you need to switch on your Zap.
Simply click the blue ‘Turn on Zap’ button.

Tip: If your event has been added at the wrong time of day, check the timezone settings in your Zapier profile. If these are incorrect, set them to the correct timezone and test your Zap again.
That’s it. Your contact form entries will now be automatically sent to your Google Calendar.
Expert Guides on Using Calendars in WordPress
We hope this article helped you learn how to add Google Calendar events from your WordPress contact form. You may also want to see some other guides related to calendars, events, and bookings in WordPress:
- How to Add a Google Calendar in WordPress (Step by Step)
- How to Add a Facebook Event Calendar in WordPress
- How to Create a Simple Event Calendar with Sugar Calendar
- How to Create a User-Submitted Events Calendar in WordPress
- How to Create a Booking Form in WordPress
- Best WordPress Calendar Plugins Compared
- Best WordPress Appointment and Booking Plugins
- Best WordPress Event Plugins Compared
- How to Add a Hotel Room Booking System in WordPress
- How to Add Beautiful Event Timelines in WordPress
If you liked this article, then please subscribe to our YouTube Channel for WordPress video tutorials. You can also find us on Twitter and Facebook.


Lana
Thanks for another great tutorial. I would be lost without you and your team. Great, easy to understand information and you don’t make me feel odd for asking questions. Thanks to you and all your team.memebers.
WPBeginner Support
You’re welcome, glad our guides are helpful to you
Admin