Offering a smooth and fast checkout process is important for improving conversions and customer satisfaction in your WooCommerce store.
Express checkout buttons streamline the payment process by allowing customers to complete their purchases with just a few clicks. This reduces cart abandonment and boosts sales.
In our opinion, the best way to add express checkout buttons in WooCommerce is to use a sales funnel plugin like FunnelKit. Keep reading to learn how!
Why Add Express Checkout in WooCommerce?
Adding express checkout to your WooCommerce store provides a better shopping experience for your customers.
It allows customers to go directly to the payment page and skip the shopping cart or checkout pages. They also won’t have to go to a payment provider page or fill out a checkout form to complete their purchases.
Express checkout buttons make the entire buying process quicker. Customers can simply click the buttons and log in to pay for the products they wish to buy in an instant. As a result, you may see a boost in conversions and fewer abandoned carts.
Adding express checkout also helps mobile users where their screen sizes are small. Customers will just tap the buttons to quickly purchase the products.
However, WooCommerce doesn’t offer an express checkout option by default. You will need to use a WooCommerce plugin to add the feature to your online store.
That said, let’s see how you can add express checkout buttons in WooCommerce.
Setting Up FunnelKit on Your WooCommerce Store
FunnelKit is the best WooCommerce sales funnel plugin on the market. It lets you add express checkout buttons and create different funnel pages for your online store.
The best thing about using the plugin is that it works with Stripe, Apple Pay, Google Pay, PayPal Express, Amazon Pay, and other payment gateways for express checkout. This way, you don’t have to add each payment provider to your online store using third-party plugins or extensions.
FunnelKit also provides user-friendly templates and lets you do A/B testing. You can easily customize your funnels using different drag-and-drop page builders. Plus, there are multiple pre-built templates and automation features for your marketing campaigns.

Note: For this tutorial, we will be using the FunnelKit Pro plugin because it includes premium templates and more customization options. You can also use the free Funnel Builder for WordPress by FunnelKit plugin to add express checkout buttons in WooCommerce.
First, you will need to install and activate the FunnelKit plugin. If you need help, then you can follow our guide on how to install a WordPress plugin.
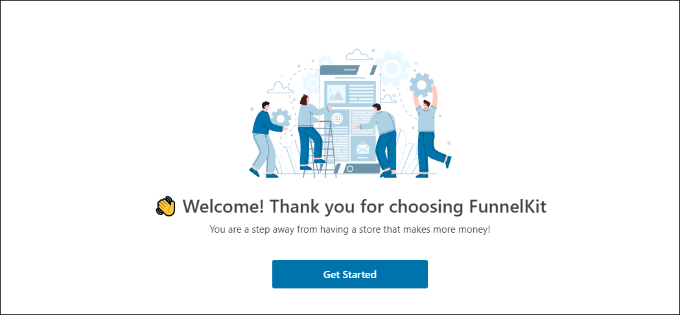
Upon activation, you will see the FunnelKit setup wizard. Go ahead and click the ‘Get Started’ button.
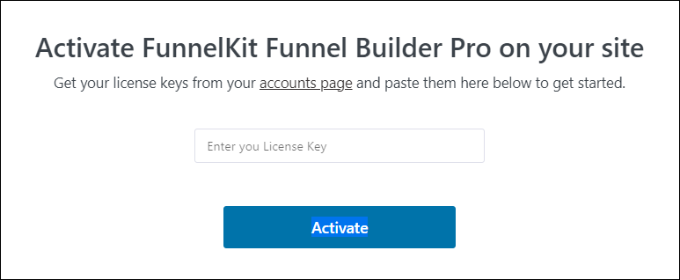
After that, you will need to enter your license key. You can find the key in the FunnelKit account area.
Simply click the ‘Activate’ button after entering the license key.
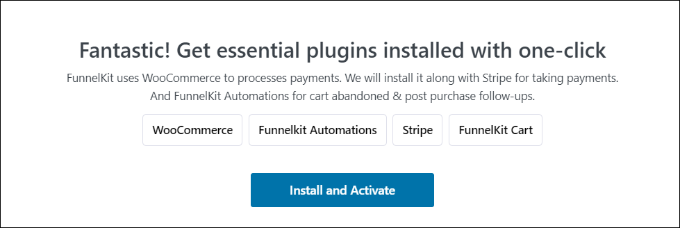
Next, FunnelKit will ask you to install essential plugins. These include WooCommerce, Stripe, FunnelKit Automations, and FunnelKit Cart.
The best part is that you just have to click the ‘Install and Activate’ button, and FunnelKit will take care of the rest.
After the plugins are active, the final step is to enter your email address.
Once that’s done, simply click the ‘Submit & Finish’ button.
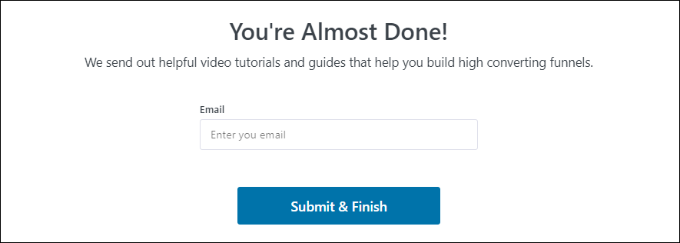
You will now see a success message. You are ready to create funnels using the plugin and add express checkout buttons to your WooCommerce store.
Go ahead and click the ‘Go to Funnels’ button to continue.

Enabling Payment Gateways in WooCommerce
Before moving forward, make sure you have set up at least one payment service in your WooCommerce store.
To do that, simply go to WooCommerce » Settings from your WordPress dashboard and click on the ‘Payments’ tab.
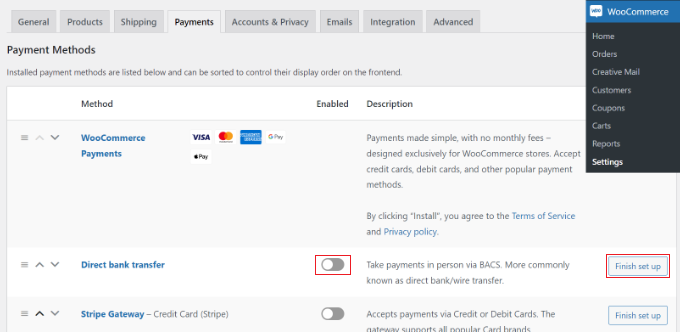
After that, you can click the toggle to enable the payment gateway of your choice and click the ‘Finish set up’ button to complete the configuration.
To learn more, you can follow our guide on how to allow users to choose payment methods in WooCommerce.
Adding Express Checkout Buttons to WooCommerce
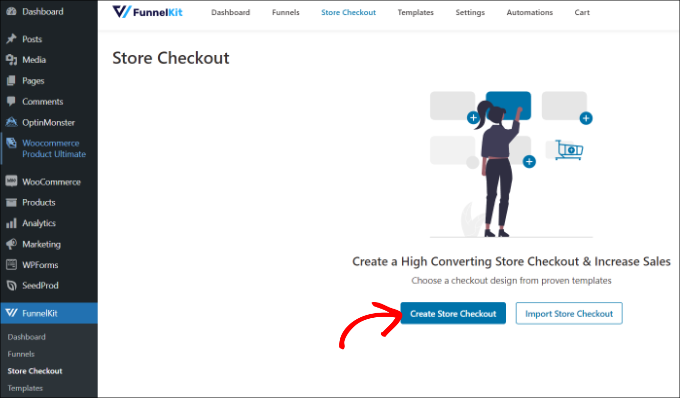
Once you have enabled your preferred payment gateways, you can head to the FunnelKit » Store Checkout page from your WordPress admin panel.
From here, simply click the ‘Create Store Checkout’ button.
On the next screen, FunnelKit will show you professionally-designed templates for your checkout page. It will also let you create a checkout page from scratch.
However, we recommend using a template and quickly customizing it according to your requirements.
Simply hover over a template you’d like to use and click the ‘Preview’ button.
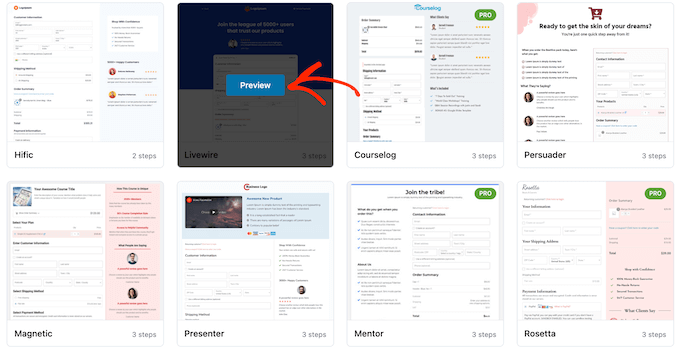
For this tutorial, we will use the Livewire template.
Next, go ahead and click the ‘Import This Funnel’ button at the top.
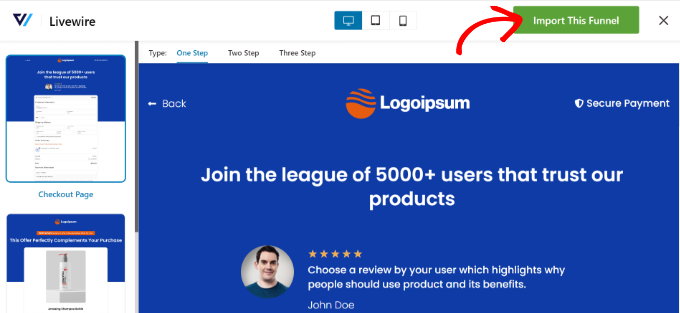
Depending on the template you use, FunnelKit may ask you to install additional plugins like Elementor to edit the checkout page.
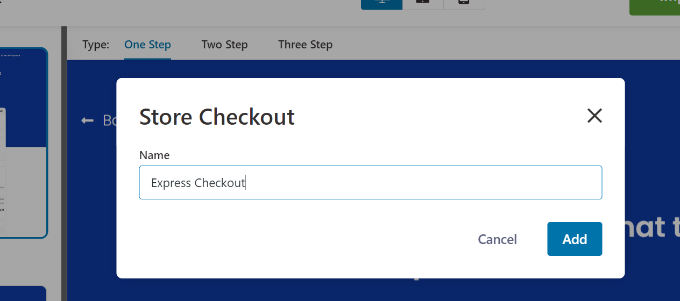
Next, you will need to enter a name for your store checkout and click the ‘Add’ button.
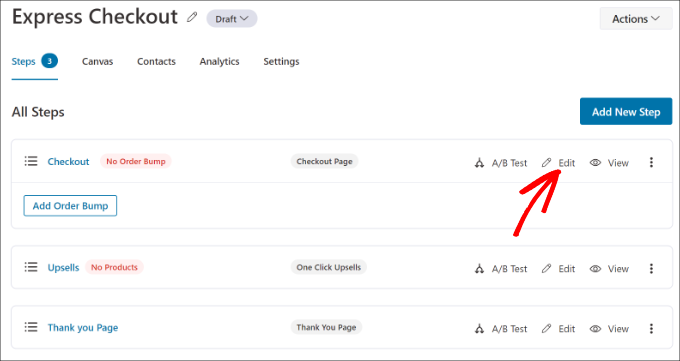
After that, you will see all the steps that are included in the template.
You can simply click the ‘Edit’ button for the Checkout page to continue.
Next, you can switch to the ‘Optimizations’ tab. From here, simply enable the ‘Express Checkout Buttons’ option.
FunnelKit will also let you choose the position of the buttons from the following options:
- Top of the checkout page
- Before/after the product switcher
- Before/after the order summary
- Above the payment gateways
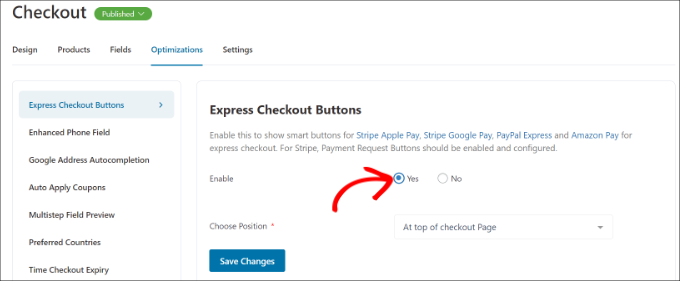
When you are done, simply click the ‘Save Changes’ button.
That’s it, you have successfully added express checkout buttons to your online store.
If you want to edit the appearance of the checkout page, then you can switch to the ‘Design’ tab and click the ‘Edit Template’ button.
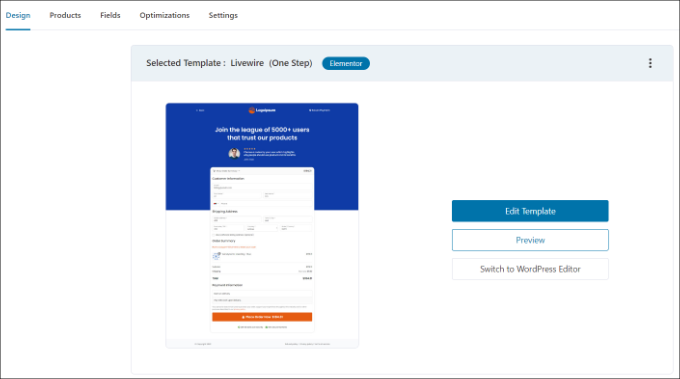
You can learn more by following our guide on how to customize the WooCommerce checkout page.
Once you have made your changes, simply visit your online store to view the express checkout buttons in action.
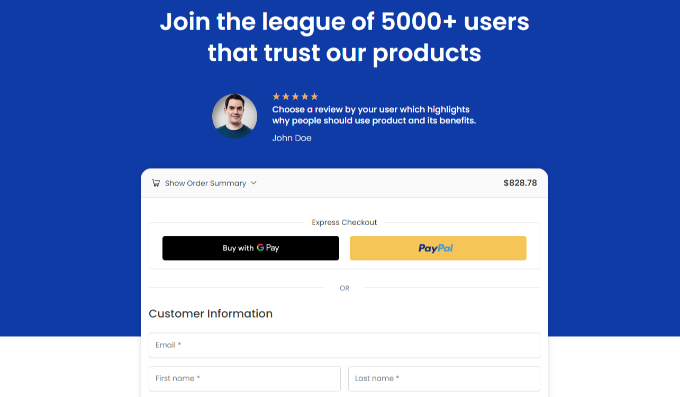
Additionally, FunnelKit helps you upsell products in WooCommerce. This way, you can boost sales by encouraging users to buy more products.
You can also set up automated emails in WooCommerce using FunnelKit Automations, a sister product of FunnelKit. This plugin lets you create automated workflows and send email campaigns to customers.
Bonus: Create a One Click Checkout in WooCommerce For GPay
If the above method seems complex and expensive, then you can also add a one click checkout button in WooCommerce for GPay. It is a mobile payment service by Google that lets you pay using your Android phone, watch, or tablet.
For this, you can use the Direct Checkout for WooCommerce plugin which is completely free. However, keep in mind that it only adds a button for GPay and won’t support Stripe or PayPal.
Upon plugin activation, just visit the WooCommerce » Settings » Payments page and switch to the ‘Express Checkout’ tab. Here, check the ‘Enable Express Checkout’ option.
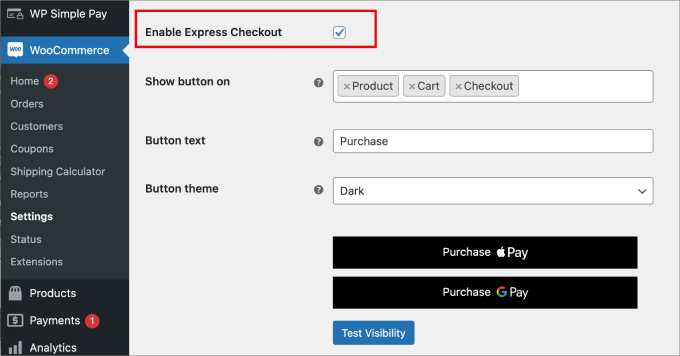
After that, you can configure the rest of the settings to customize your button. Finally, click the ‘Save Changes’ button to store your settings.
You have now added a ‘Purchase GPay’ button to your store. For details, see our tutorial on how to create a one-click checkout in WordPress.
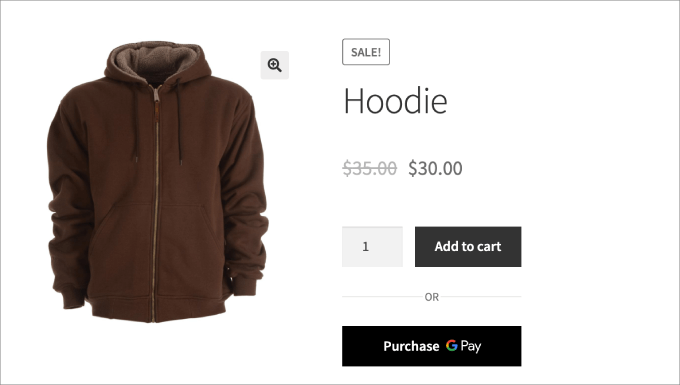
We hope this article helped you learn about how to add express checkout buttons in WooCommerce. You may also want to see our list of the best WooCommerce plugins for your store and how to create a WooCommerce popup to increase sales.
If you liked this article, then please subscribe to our YouTube Channel for WordPress video tutorials. You can also find us on Twitter and Facebook.


Jiří Vaněk
Any simplification of the customer’s journey from selecting a product to payment is great and can lead to increased profits. Thanks for the detailed guide. I know myself that I much prefer using apps that take me directly from selecting a product to payment, and I literally avoid e-shops with lots of unnecessary steps that slow down the process. Since I enjoy working with WooCommerce and we are still finalizing the e-shop, this will be another point on the list of things I definitely want to implement along with the article.
Ralph
The easier the purchasing process, the more customers will be converted. This is what I learned years ago. Express checkout bumped my earning by almost 10% and I always lurk into articles how to make it even better. I may use method presented in this guide on my new website. This looks really solid.