When we design WordPress websites, one of the most overlooked yet crucial elements is the 404 error page. Many site owners don’t realize that a well-crafted 404 page can be a powerful tool for user retention and engagement.
In our experience, a default 404 page is a missed opportunity. We’ve seen firsthand how a customized 404 page can turn a potential exit point into a chance to guide visitors back to valuable content.
In this article, we’ll show you 2 effective methods to improve your WordPress 404 page template.

Why Improve Your 404 Page Template in WordPress?
Most WordPress themes come with a basic 404 template, including the default WordPress themes.
For example, in the following image, you can see ThemeIsle Hestia’s 404 page.
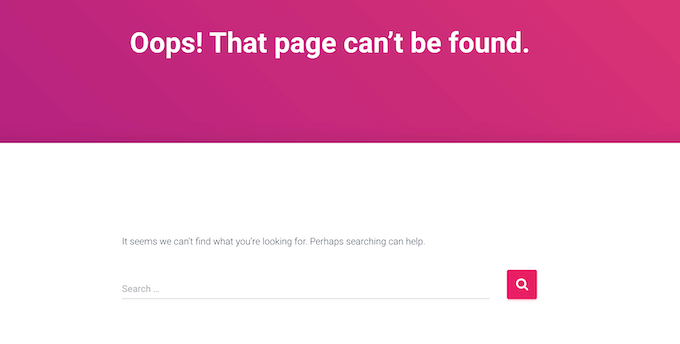
Most of these default templates are simple and don’t show any content from your site. This means anyone who lands on your 404 page is more likely to leave your WordPress website, which will increase your bounce rate.
This is bad news for your WordPress SEO and may affect where your site appears in the search engine rankings.
That said, it’s a good idea to create a 404 page with your own content and branding.
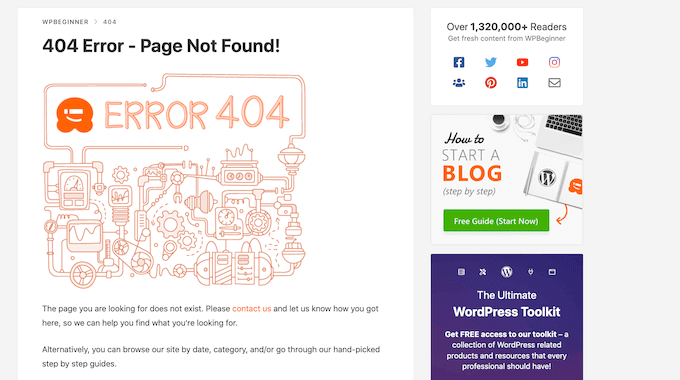
A custom 404 page is a great way to promote content, such as the most popular posts or products from your online store. You can also include links to your social media profiles, highlight your latest comments and more.
If you are looking for inspiration, then we’ve collected the best 404 error page design examples for you to look at.
With that said, let’s take a look at how you can improve your 404 page template in WordPress. You can use the quick links below to jump straight to the method you want to use:
Method 1: Create a Custom 404 Page in WordPress With No Code (Recommended)
The best way to improve your site’s 404 page is by using SeedProd.
SeedProd is the best landing page builder for WordPress. It lets you create, edit, and customize your WordPress pages without writing any code.
SeedProd comes with more than 300+ ready-made templates, including plenty of 404 designs. This means you can create a professionally designed 404 page within minutes.
The first thing you need to do is install the SeedProd plugin. For more details, see our step-by-step guide on how to install a WordPress plugin.
Note: There is a free version of SeedProd that allows you to create beautiful maintenance and coming soon pages. However, we will be using the premium plugin since it lets you replace your theme’s built-in 404 template.
After activating the plugin, SeedProd will ask for your license key.

You can find this information in your account on the SeedProd website. After entering the license, click on the ‘Verify Key’ button.
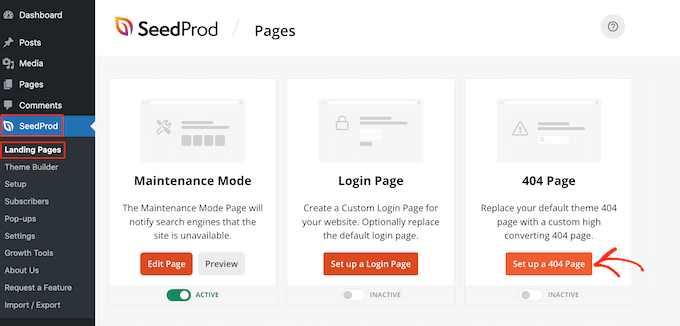
Once you’ve done that, go to SeedProd » Landing Pages. In the ‘404 Page’ section, click on ‘Set up a 404 Page.’
You can now choose a template for your 404 page.
To preview a design, simply hover your mouse over it and then click on the magnifying glass.
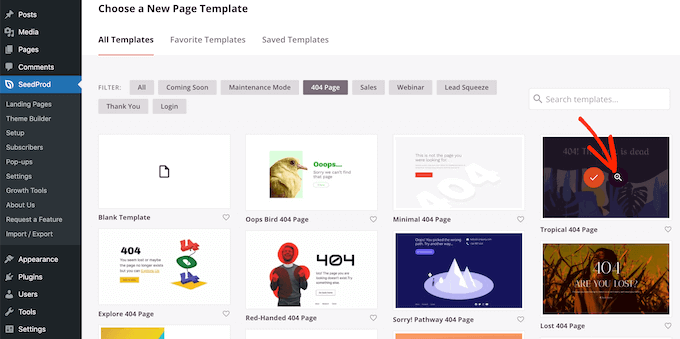
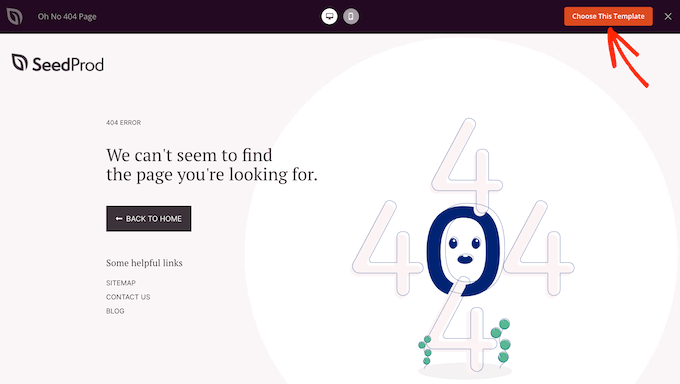
When you find a design that you like, just click on ‘Choose This Template.’
We’re using ‘Oh No 404 Page’ in all our images, but you can use any design you want.
After selecting a template, you’ll be taken to the drag-and-drop builder, where you can start customizing the 404 page.
On the left side of the screen, you’ll find blocks and sections that you can add to your design. The right side of the page shows a live preview.
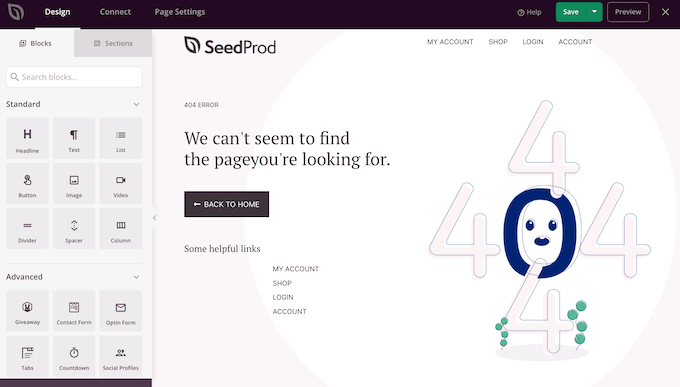
Most 404 templates already have some blocks, which are a core part of all SeedProd designs.
To customize any of these blocks, simply click to select that block in your layout. You can then make changes using the settings in the left-hand menu.
To add a new block to your design, simply find the block in the left-hand menu. Then, drag it onto your layout. You can now customize the block following the process described above.
To start, you’ll typically want to add your website logo to the 404 page so visitors know they are still on your site.
To replace the SeedProd logo with your own branding, simply click to select the placeholder logo in your layout. Then, hover your mouse over the image in the left-hand menu.
When it appears, click on the ‘Select Image’ button.
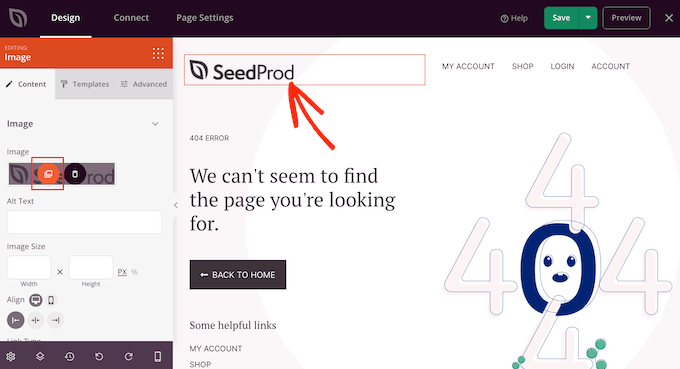
This launches the WordPress media library, where you can select any image or upload a new file from your computer.
Many 404 templates also show your site’s main navigation menu. If you have multiple menus, then you may prefer to show a different menu instead.
To make this change, simply click on the ‘Nav Menu’ block in your template. You can then open the ‘Menu’ dropdown and choose any menu from the list.
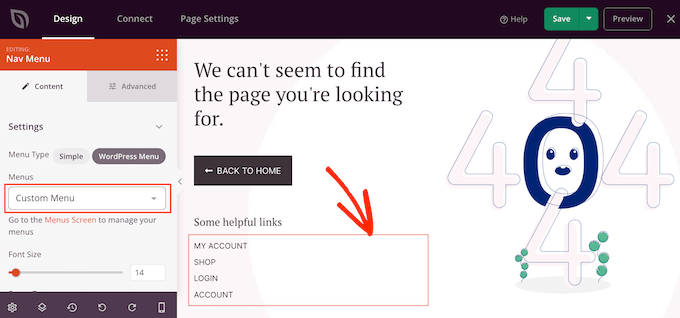
For more information, please see our guide on how to add custom navigation menus in WordPress themes.
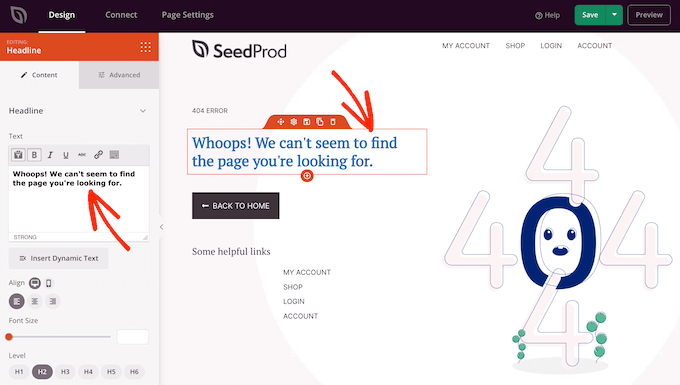
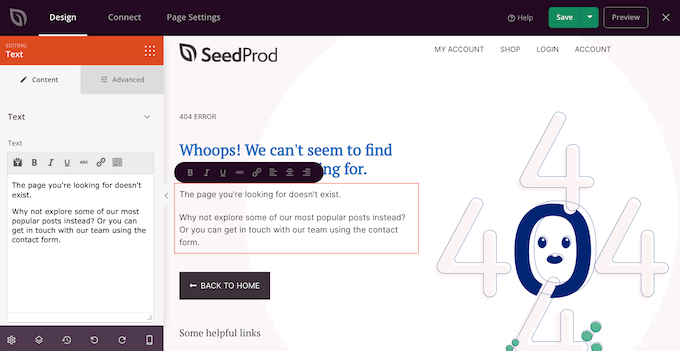
When a visitor lands on your 404 page, they may be confused about how they got here and what to do next. With that being said, it’s a good idea to add some text explaining that the content can’t be found and suggesting some actions to take next.
To do this, add a ‘Headline’ and a ‘Text’ block to your design. You can then type your message into the text editor in the left-hand menu.
Next, we are going to change the ‘Back To Home’ button so it encourages people to check out a specific post instead of simply returning to the homepage.
For example, you might promote your most recent posts or show your most commented posts.
To customize the button, simply click to select it in the page layout. In the ‘Link’ field, type in the URL that you want to use instead.
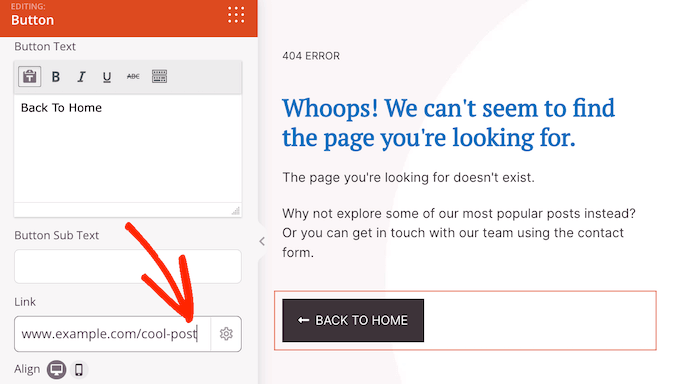
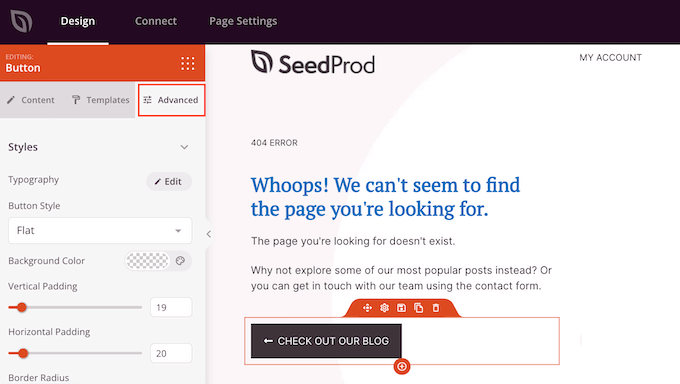
Since the button no longer links to the homepage, you’ll want to replace the ‘Back To Home’ label. Simply go ahead and type a new message into the ‘Button Text’ box.
Once you’ve done that, click on the ‘Advanced’ tab. Here, you can change the button’s color, size, and more.
This is all you need to create a simple custom 404 page. However, there are a lot of other features and content that can improve the visitor experience, keep people engaged, and even help you get more conversions.
With that being said, let’s look at some advanced features you can add to your 404 page.
Add Your Most Popular Posts to Your WordPress 404 Page
To start, you may want to show a list of your most popular posts. Since these articles are popular, there’s a good chance visitors will find something they like.
You can create this list automatically using the MonsterInsights plugin. It’s the best analytics solution for WordPress, used by over 3 million websites.
MonsterInsights can see which posts get the most visitors and add them to your 404 page. For more details, see our guide on how to display popular posts by views in WordPress.
After activating MonsterInsights, you can display your most popular posts by adding a shortcode in WordPress. In SeedProd’s left-hand menu, simply find the ‘Shortcode’ block and drop it onto your layout.
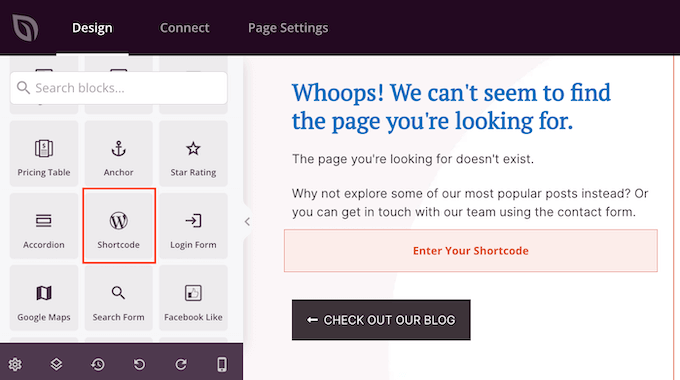
Now, copy the following shortcode:
[monsterinsights_popular_posts_widget theme="beta"]
After that, click to select the Shortcode block in the SeedProd editor. You can now paste the code into the left-hand menu.
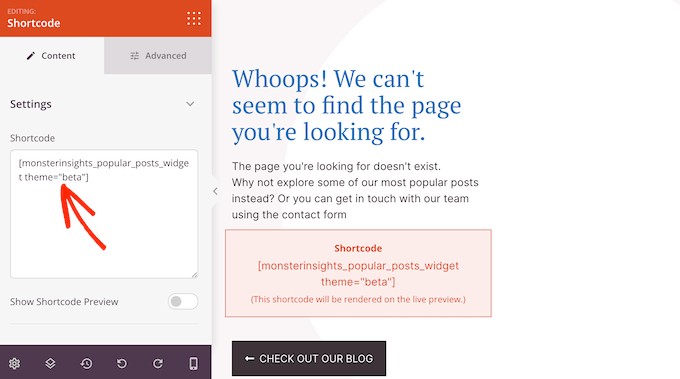
By default, SeedProd doesn’t show a preview of your most popular posts inside the page editor, so you’ll need to click on the ‘Preview’ button in the upper-right corner to see the shortcode in action.
If you want to see the popular posts list inside the SeedProd editor, then simply click on the ‘Show Shortcode Preview’ switch.
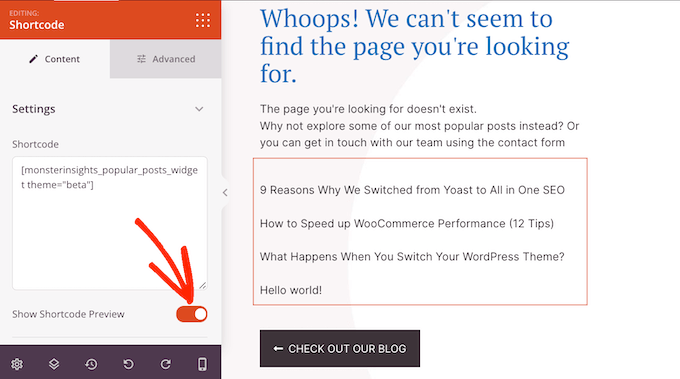
In the shortcode above, we are using theme=“beta” for our list, but MonsterInsights has a few different themes you can use.
To see the different themes, go to Insights » Popular Posts in the WordPress dashboard and then click on ‘Popular Posts Widget’.
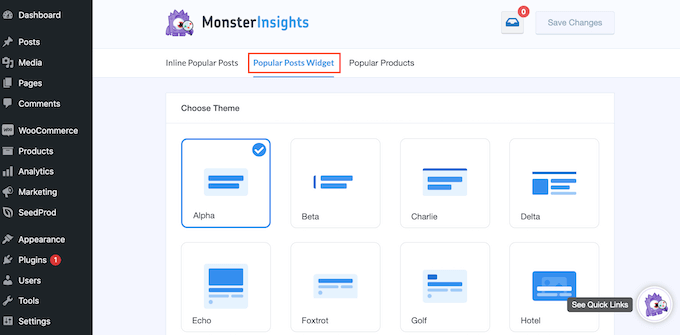
You can now click on the different themes to see a preview.
When you find a design you like, simply update the shortcode in SeedProd. For example, if you want to use the ‘Alpha’ theme, then you would need to type in:
[monsterinsights_popular_posts_widget theme="alpha"]
Show Your Most Popular WooCommerce Products
If you have an online store, then you may want to show your best-selling WooCommerce products on the 404 page. In this way, your custom 404 page can help you get more sales.
In the left-hand menu, find the Best Selling Products block and drag it onto your layout.
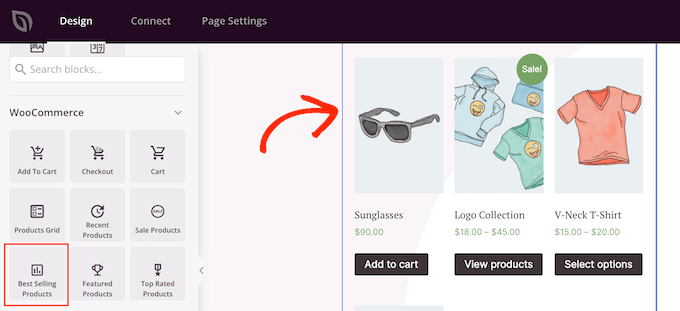
SeedProd will show some products automatically. However, you can fine-tune this block by selecting it in the editor and then using the settings in the left-hand menu.
For example, you can change the number of columns in the block, add pagination, allow shoppers to filter the best-selling products, and more.
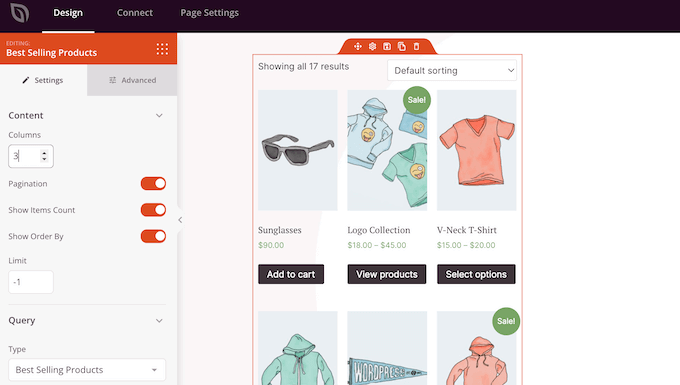
For more information, see our guide on how to display popular WooCommerce products.
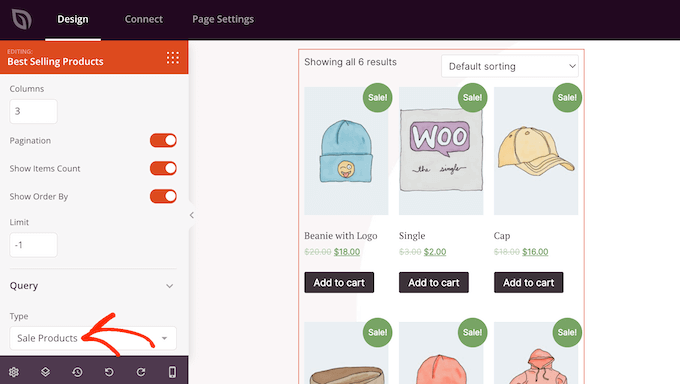
Despite the name, you can use this block to show other types of products. For example, you might show products that are on sale or your top-rated items.
To take a look at the different options, open the ‘Type’ dropdown menu and then choose an option from the list.
Add a Contact Form to Your WordPress 404 Page
You may also want to add a contact form so visitors can reach out if they can’t find what they are looking for. This form also gives people an easy way to report 404 errors so you can fix these broken links and improve the experience for future visitors.
For more information, please see our complete guide on how to fix broken links in WordPress.
The best way to add a contact form to your site is by using the WPForms plugin. It’s the best contact form plugin for WordPress and comes with a drag-and-drop form builder.
For more details, see our step-by-step guide on how to create a contact form in WordPress.
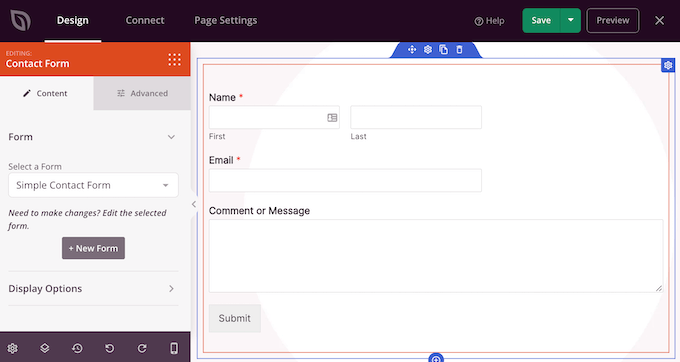
Once you’ve created a contact form, you can add it to your 404 page using the ‘Contact Form’ block. Simply find the block in the left-hand menu and drag it onto your design.
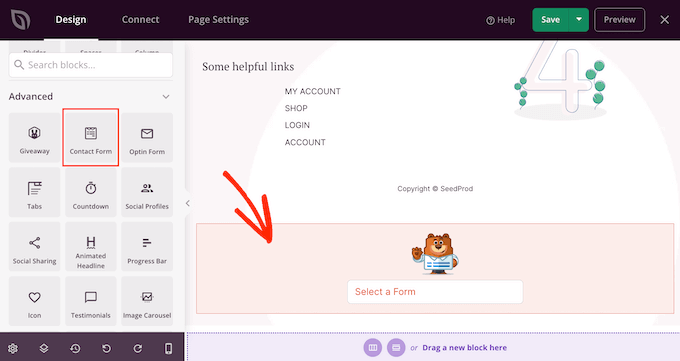
Then, open the ‘Select a Form’ dropdown and choose your contact form from the list.
The page editor will now show a preview of the contact form.
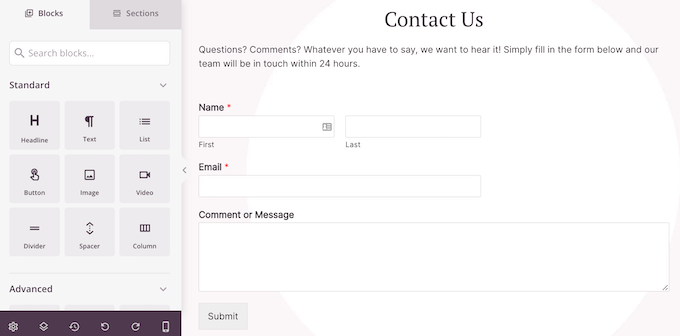
You might want to add some text introducing your contact form or encouraging visitors to get in touch.
To do this, simply add a ‘Headline’ or ‘Text’ block above your contact form and then type in the text that you want to use.
How to Publish the 404 Page
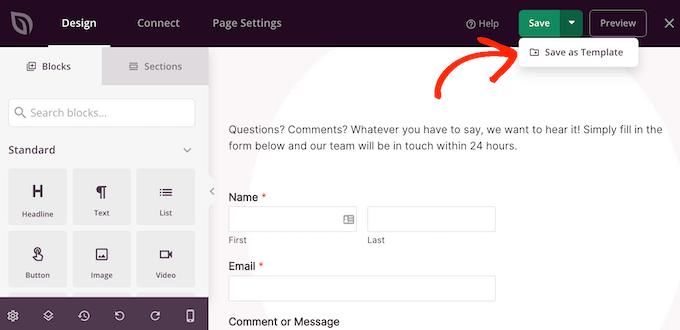
When you are happy with how the 404 page looks, it’s time to publish it.
Simply click the dropdown arrow next to ‘Save’ and then select ‘Save as Template.’
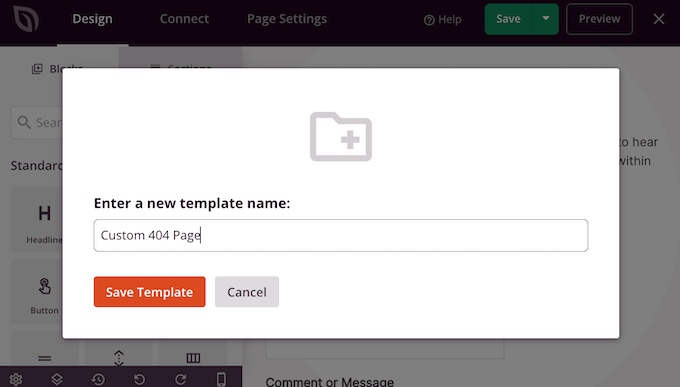
When asked, go ahead and type in a name for the template. This is just for your reference, so you can use anything you want.
After that, click on ‘Save Template.’
In the next popup, click on ‘Return to Page Editor.’ You can then click on the ‘X’ button in the upper-right corner to close the SeedProd page editor.
At this point, you may see a popup asking whether you want to publish your 404 design. If you’re happy to go ahead, then click on ‘Yes, Activate.’

If you don’t want to publish the template right now, then click on ‘No, Close’ instead.
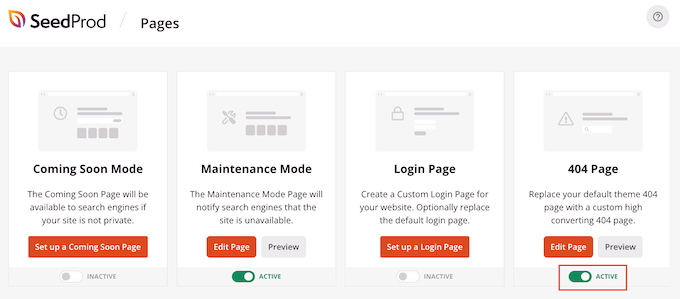
After that, you can publish the design at any point by going to SeedProd » Pages. Here, click on the switch in the ‘404 Page’ section so it shows ‘Active.’
To see your 404 page in action, just add /404 to the end of your domain name.
After publishing your custom 404 page, it’s a good idea to track how people are engaging with that page. This allows you to see what’s working and what isn’t working so you can fine-tune your 404 design to get more conversions and engagement.
To learn more, see our beginner’s guide on how to install Google Analytics in WordPress.
Method 2: Create a 404 Page Using the Full Site Editor (Block Themes Only)
If you are using a block-enabled WordPress theme, then you can edit your site’s 404 page in the full site editor.
To get started, head over to Appearance » Editor in the WordPress dashboard.
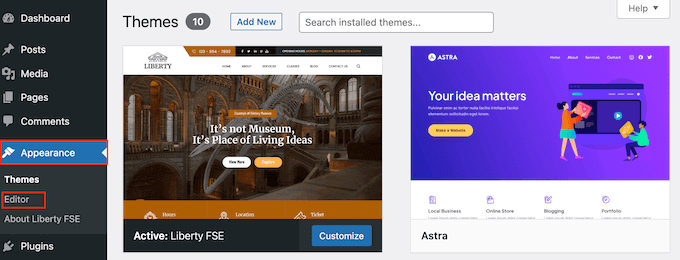
By default, the full site editor shows your theme’s home template.
To edit the 404 page, go ahead and click on ‘Templates.’
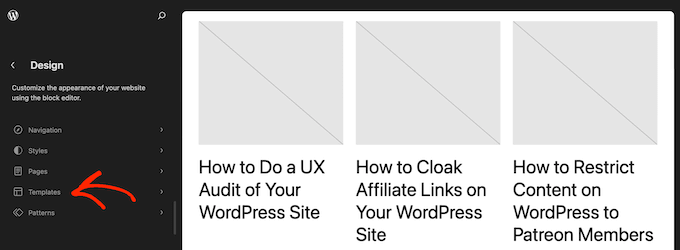
You’ll now see a list of all the templates that make up your block-based theme, such as your blog page and archives page.
Simply go ahead and click on ‘404.’
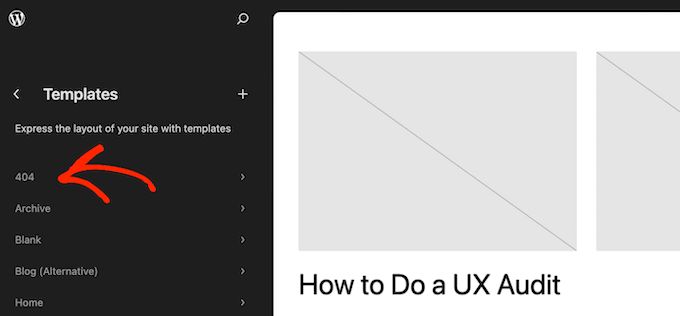
WordPress will now show a preview of the current 404 design.
To go ahead and edit this template, click on the small pencil icon.
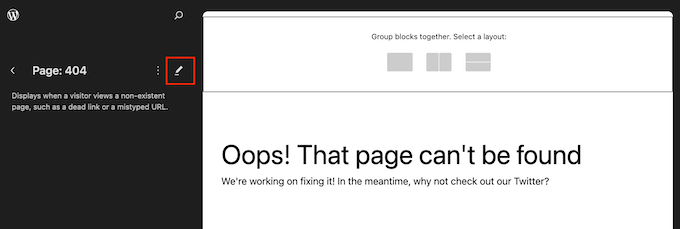
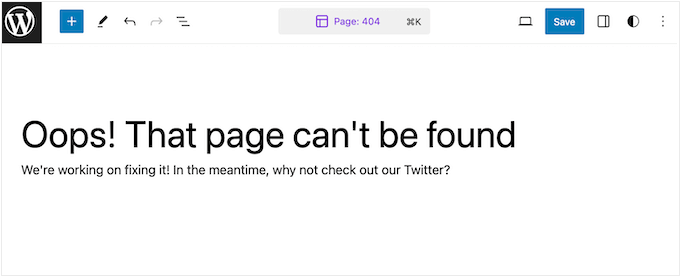
The full-site editor works similar to the standard WordPress content editor.
To add blocks to the design, click on the ‘+’ button.
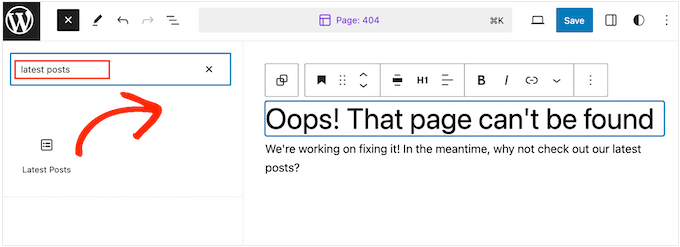
You can now type in the block that you want to add to the 404 page.
For example, you may want to display your recent posts. To do this, simply type in ‘Latest Posts’ and then drag the block onto your design.
After adding a block, you may want to customize it.
You can go ahead and click to select the block in the preview. The right-hand menu will then show all the settings you can use to change the block’s contents and appearance.
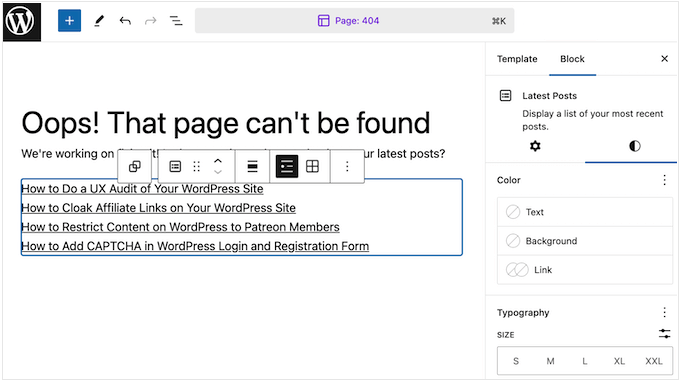
The options you see may vary depending on the block you’ve selected. However, you’ll typically be able to change the background color, text color, and change the font size.
You may even want to display the recent posts as a dropdown menu if needed.
You can now continue adding blocks to your design and fine-tuning them following the same process described above. You may also want to arrange your WordPress widgets in columns or use WordPress block patterns to create a custom 404 page faster.
When you are happy with how the 404 page looks, click on ‘Save’ to make it live.
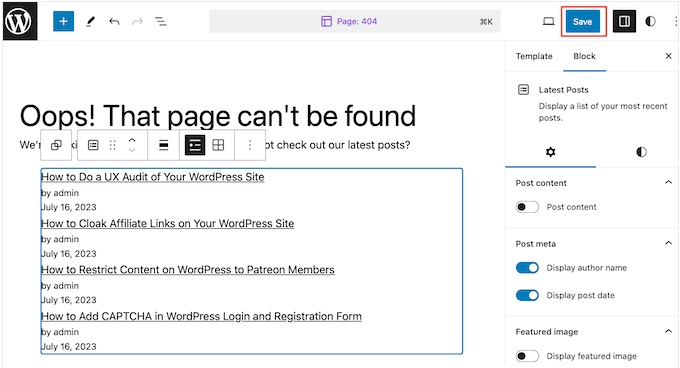
Now, if you add /404 to the end of your website’s domain name, you’ll see the custom 404 page in action.
When Should You Redirect 404 Pages?
One of the most common causes of 404 errors is when the visitor genuinely made a mistake when entering the URL.
In this case, you usually don’t need to redirect the user to another page. But we recommend following the best practices we’ve shown you to get them back on track.
That said, if you don’t have time to create a custom 404 page template, you may want to redirect users to the homepage in the meantime. This way, you can still keep users on your website.
Other than that, we also strongly suggest tracking and redirecting 404 errors. Doing this lets you find what links users failed to access, and you can redirect them to the most relevant pages.
As a result, you can maximize the opportunity to increase pageviews and reduce bounce rates. Plus, you can keep the backlinks that have been linked to these pages to maintain your domain authority.
The All in One SEO plugin has a handy 404 error log and redirection feature you can use. You don’t need any technical knowledge to use it properly as it’s pretty user-friendly out of the box.
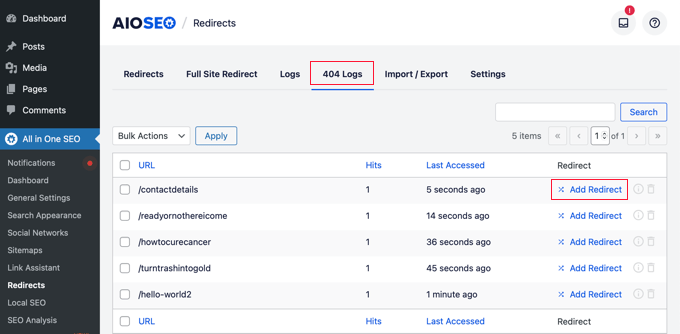
If you want more plugin recommendations, check out our list of the best free 404 redirect plugins for WordPress.
Video Tutorial
We hope this article helped you improve your 404 page template in WordPress. You may also want to see our expert picks of the best popular posts plugins for WordPress and our article on the anatomy of a high-converting landing page.
If you liked this article, then please subscribe to our YouTube Channel for WordPress video tutorials. You can also find us on Twitter and Facebook.


Olaf
The 404 page is a mix of fun and challenge for me. I try to design it so that it not only matches the website’s style but also brings a bit of humor to an otherwise frustrating situation where the content simply no longer exists and won’t return. At that moment, the user is obviously frustrated and ready to search elsewhere. How do you keep them? That’s the secondary goal of a 404 page. It’s interesting to experiment with different ways to retain the user and avoid unnecessarily increasing the bounce rate. There are quite a few methods, and the most effective one seems to be offering alternative content that might interest them, so they don’t immediately leave.
What I enjoy most, though, is coming up with humorous designs and concepts to make the user smile, even in such an unpleasant situation. I think this helps prevent the user from becoming frustrated and helps build a good relationship right from the start. And above all, if you can make someone smile, you can easily turn a disadvantage into an advantage. That’s why I truly love creating 404 pages and coming up with ideas for them.
Jiří Vaněk
Having a custom 404 page instead of the default one offered by WordPress is very important to me for several reasons. It looks better thanks to custom graphics, which can even lighten the user’s frustration from not finding what they were looking for. Additionally, it can direct the user to another similar article, keeping them on the site much longer than a typical, boring 404 page provided by WordPress. Personally, I used to create 404 pages in Elementor, but your example in SeedProd is very inspiring. I’d like to create a 404 page on a website where I’m already using SeedProd, and this is a great source of inspiration and help for me.
Tracy A
Thanks for the article, this is a good start. If possible, are there other method’s that are possible if one is not code literate? I’m trying to reduce the number of plugins since installing them seems to slow down some websites.
WPBeginner Support
Our plugin recommendation is what we recommend for users who do not have coding knowledge. For your plugin concerns, we would recommend taking a look at our article below that covers why this should not be a concern
https://www.wpbeginner.com/opinion/how-many-wordpress-plugins-should-you-install-on-your-site/
Admin
Dennis Muthomi
After reading this, I think its time to improve my plain 404 page by adding links to some of my most popular articles.
That way, visitors who happen to land on my 404 page will have some helpful content to engage with and TAKE ACTION, rather than just seeing an error message.
Thank you for this!
Jiří Vaněk
That’s honestly a very good idea, and I ended up adopting it as well. I was thinking about how to keep people on the site who were looking for something I might have removed because it was outdated. That’s why I placed a widget on my 404 page that shows the most-read articles, and then I monitored whether users clicked on those links. And yes, they did. Thanks to this, the 404 page not only serves its informative purpose by letting users know the content is no longer available but also helps keep people on the site by offering them other content they might be interested in. It’s not a perfect solution, but it’s definitely something that helps.
Mrteesurez
As regard to Redirecting users.
You have shared the best practice suggesting tracking and redirecting 404 errors.
If one is able to find the particular link that leads to 404 error, it will definitely helpful either to create a contents around it or redirect users to a related page which might be relevant to them.
Moinuddin Waheed
Thanks for giving the design options for making intuitive and innovative 404 page error.
I have been seeing good 404 error pages and was not sure that making it is so easy.
Seedprod gives so much options to tweak on 404 error page and make it as intuitive and innovative as possible so that users bad experience turns into good experience.
Pramendra Singh
Thank you sir. This is what I was searching for long time. Great Post.
Joe Wocoski
Hi,
I just read about the 404 page, but I am not code literate. Your article seems complicated and the popular posts does not float my boat.
What would is a simple widget that I can use to display a single list of my main tabs on the 404 page under the search.
Do you have a widget to send readers back to my main blog page or my other main 9 tabs?
Thank you very much
Joe Wocoski
arman
This code is showing headings of post but i want to show content of posts also .Thanks in advance
WPBeginner Staff
Try updating your permalink structure by visiting Settings -> Permalinks. Simply click on save changes button without making any changes to your permalink structure.
On Boit Quoi Ce Soir
Hello there, very nice article, thanks ! However something simply does not work. When calling on 404.php page (once plug-in activated), it just does not show. Anyway idea why this is happening?
Ali Sajjad
Thanks for this usefull post, i want to know how i can bend my first post from header just like a curve with shadow?
CANALWP
Thank you for this awesome article. I was wondering how can i add my category to this page and as well images. Thanks.
Cheri- CreationScience4kids
Thanks! I’d used wp.com for 2 years before moving to selfhosting. It was exciting to take out all the dates on my articles, but then I started realizing my most popular page by far was the 404! I did the work to use the redirect plugin (also great for posts with rotten original headlines), but haven’t done it for all 400+.
The email alert will be a relief and the most recent/popular/etc posts idea is great.