
Makalelerimizden birinin altına doğru ilerlediyseniz, muhtemelen “WPBeginner’da Şu An Popüler!” widget’ımızı fark etmişsinizdir. Bu özellik, okuyucularımızın en değerli içeriklerimizi keşfetmelerine yardımcı olarak ve onları sitemizi daha fazla keşfetmeye teşvik ederek çok beğenildi.
En popüler WordPress blog yazılarınızı öne çıkararak okuyucuların en iyi içeriklerinizi bulmasına yardımcı olmakla kalmaz, aynı zamanda sitenizin etkileşim metriklerini de artırırsınız. Bu bir kazan-kazan: ziyaretçiler harika içeriklere ulaşır ve siz de onları sitenizde daha uzun süre tutarsınız.
Bu makalede, WordPress’te en popüler yazılarınızı görüntülenme sayılarına göre nasıl kolayca görüntüleyebileceğinizi göstereceğiz.

WordPress’te Popüler Yazılar Neden Görüntülenme Sayılarına Göre Görüntülenir?
Kullanıcılar en popüler WordPress blog yazılarınızı gördüklerinde, diğer okuyucuların en çok hangi içeriği sevdiğini keşfedebilirler. Bu şekilde, bu makaleleri kontrol edebilir ve sohbete katılabilirler.
Dahası, WordPress’te en popüler içeriklerinizi görüntülemek sosyal kanıtınızı artırabilir. Bu, yeni kullanıcılara “Hey, diğer insanlar bu gönderileri gerçekten yararlı buldu, siz de bulabilirsiniz!” demek gibidir.

Son olarak, trend blog yazılarınızı göstermek insanların web sitenizde daha uzun süre kalmasını sağlayarak sayfa görüntülemelerinizi artırabilir ve hemen çıkma oranınızı azaltabilir.
Kullanıcı etkileşiminiz arttıkça, Google içeriğinizin iyi ve önemli olduğunu daha fazla düşünür. Buna karşılık, WordPress SEO ‘nuz gelişir ve siteniz daha üst sıralarda yer alabilir.
Ne yazık ki, WordPress’in en popüler yazılarınızı sayfa görüntülemelerine göre görüntülemek için yerleşik bir özelliği veya bloğu yoktur. Bu kılavuzda, bir eklenti ve kod ile tam olarak bunu nasıl yapacağınızı göstereceğiz.
Tercih ettiğiniz yönteme doğrudan geçmek için aşağıdaki hızlı bağlantılardan birine tıklamanız yeterlidir:
Yöntem 1: MonsterInsights ile Popüler WordPress Yazılarını Görüntülenme Sayılarına Göre Görüntüleyin (Önerilen)
WordPress’te popüler yazıları görüntülenme sayılarına göre görüntülemenin en kolay yolu bir eklenti kullanmaktır. Aslında birçok WordPress popüler yazı eklentisi mevcut, ancak bize göre en iyi seçim MonsterInsights.

Dünya çapında 3 milyondan fazla web sitesi tarafından kullanılan MonsterInsights, WordPress için en iyi Google Analytics eklentisidir. Ana işlevi analitik olsa da, en popüler gönderilerinizi göstermek için kullanıcı dostu bir özelliğe de sahiptir.
Öncelikle MonsterInsights eklentisini yüklemeniz ve Google Analytics hesabınıza bağlamanız gerekir. Daha fazla ayrıntı için, yeni başlayanlar için WordPress’te Google Analytics’in nasıl kurulacağına ilişkin adım adım kılavuzumuza bakın.
Not: MonsterInsights’ın ücretsiz bir sürümü mevcut olsa da, popüler gönderiler özelliğini içerdiği için Pro sürümünü kullanacağız.
Bir Popüler Gönderiler Widget TemasıSeçin
Eklentiyi etkinleştirdikten ve kurduktan sonra WordPress panosundan Insights ” Popular Posts bölümüne gidin. Ardından, ‘Popüler Yazılar Widget’ı’ menü öğesine tıklayın.

Aşağı kaydırdığınızda, popüler gönderiler widget’ını görüntülemek için bir tema seçmeniz gerekecektir. Çeşitli seçenekler vardır.
Bazıları gönderi için öne çıkan bir görsel içerirken, bazıları daha minimal görünümlüdür.

Seçiminizi yapmadan önce temanın neye benzediğini görmek istiyorsanız, sayfanın aşağısındaki Tema Önizleme bölümüne gidin.
Temayı Geniş veya Dar formatta da önizleyebilirsiniz. Geniş formatta, gönderilerinizin sayfa veya gönderi içeriğinin altında listelendiğini göreceksiniz; Dar formatta ise gönderiler bir kenar çubuğu gibi sağ tarafta görüntülenir.

Ardından, ‘Tasarımı Özelleştir’ bölümüne ilerleyelim. Burada temanın renklerini, yazı tipi boyutunu, düzenini ve görüntülenecek gönderi sayısını değiştirebilirsiniz.
Buradaki özelleştirme seçenekleri kullandığınız temaya göre değişebilir. Bu nedenle, hangisinin size en uygun olduğunu görmek için farklı temaları keşfettiğinizden emin olun.

Popüler Gönderiler Widget Davranışını Yapılandırma
Temanın tasarımını yapılandırdıktan sonra Davranış bölümüne gitmelisiniz. Burası popüler yazılar widget’ının WordPress web sitenizde nasıl görüneceğini kontrol edeceğiniz yerdir.
Widget Stili ayarlarında, yukarıda yaptığınız tasarımı kullanmayı seçebilir veya widget’ı hiç şekillendirmemeyi tercih edebilirsiniz. İkinci seçenekte widget, WordPress site temanızın CSS’sini takip edecektir.
Ardından, widget’ın en popüler gönderilerinizi nasıl seçeceğini seçebilirsiniz. Bu eğitim için ‘Küratörlü’ seçeneğini seçin, ancak en popüler gönderileri yorum sayısına göre de görüntüleyebilirsiniz.

Daha sonra yapmanız gereken, aşağıdaki ‘Google Analytics’ten En İyi 5 Gönderi Ekle’ seçeneğini etkinleştirmektir. Ancak bunu yapmadan önce MonsterInsights Dimensions Add-On ‘a ve Post type’ı yeni bir özel boyut olarak eklemeye ihtiyacınız olacak.
Bu, MonsterInsights’ın Google Analytics verilerine göre en popüler gönderileri seçmesini sağlar.
Bunu yapmak için MonsterInsights Dimensions Eklentisini indirmeniz ve WordPress’e bir eklenti olarak yüklemeniz gerekir. Adım adım talimatlar için WordPress eklentisi yükleme kılavuzumuza göz atın.
Ardından, Insights “ Ayarlar bölümüne gidin ve ‘Dönüşümler’ sekmesine geçin. Bundan sonra, ‘Yeni Özel Boyut Ekle’ye tıklayın.

Bunu yaptıktan sonra, açılır menüden ‘Gönderi türü’nü seçin.
Bu, MonsterInsights’ın blog gönderilerinizin ve diğer özel gönderi türlerinin performansını izlemesini sağlar.

Şimdi, Insights ” Popular Posts bölümüne dönün ve ‘Popular Posts Widget’a gidin.
‘Google Analytics’ten En İyi 5 Gönderi Ekle’ geçiş düğmesini etkinleştirmeniz yeterlidir. Ardından, kurulumun başarılı olup olmadığını görmek için ‘Otomatik Gönderileri Test Et’e tıklayın.

Evet ise, bir başarı mesajı açılır penceresi göreceksiniz.
Şöyle demeli: ‘Popüler Yazılar verileri doğru şekilde alınabilir. Lütfen dikkat: Özel Boyutlar ayarlarını ne zaman yaptığınıza bağlı olarak, Google Analytics’ten ilgili Popüler Yazılar verilerinin yüklendiğini görmek 7 güne kadar sürebilir.

Sonraki adımlara geçerek, artık widget’ın üzerinde görünecek bir başlık ekleyebilirsiniz. ‘En Popüler Yazılarımıza Göz Atın’ veya benzeri bir şey olabilir.
Bunun altında, widget’ın tüm gönderi türlerinde görüntülenip görüntülenmeyeceğini, belirli gönderilerden hariç tutulup tutulmayacağını ve/veya yalnızca belirli gönderi kategorilerinde görünüp görünmeyeceğini seçebilirsiniz.
Bu ayarlar, blog gönderileri dışında özel gönderi türleri oluşturduysanız ve popüler gönderiler widget’ının burada alakasız görüneceğini düşünüyorsanız kullanışlıdır.

Son adımlardan biri de popüler gönderiler widget’ını yerleştirmektir. Birkaç seçenek vardır: otomatik olarak yerleştirmek, bir Gutenberg bloğu kullanmak, kenar çubuğu widget’ı olarak eklemek veya bir kısa kod kullanmak.
Her bir seçeneği tek tek inceleyelim.

Popüler Gönderiler Widget’ını Otomatik Olarak Yerleştirin
Widget’ın önceden ayarladığınız Davranış ayarlarıyla eşleşen tüm gönderilerde görünmesini istiyorsanız Otomatik Yerleştirme önerilir.
Bunun için tek yapmanız gereken Otomatik Yerleştirme düğmesini etkinleştirmektir.

Bu seçeneğin dezavantajı, widget’ın tasarımını yazı veya sayfada en iyi görünene göre ayarlayamamanızdır. Bu tür bir işlevselliğe ihtiyacınız varsa, bir sonraki yöntemi deneyebilirsiniz.
Popüler Gönderiler Bloğunu Bir Sayfaya veya Gönderiye Yerleştirme
Widget’ın bir sayfada veya gönderide nasıl görüneceği üzerinde daha fazla kontrole sahip olmak istiyorsanız, bu yöntem tam size göre.
İlk olarak, widget’ın olmasını istediğiniz gönderinin veya sayfanın blok düzenleyicisine gidin. Bundan sonra, düzenleyicinin herhangi bir yerindeki ‘+’ blok ekle düğmesine tıklayın ve Popüler Yazılar bloğunu arayın.

Blok ayarları panelinde, widget’ın temasını, yazı tipi boyutunu, renklerini, başlığını, düzenini ve gönderi sayısını değiştirmek için seçenekler olduğunu göreceksiniz.
Bu ayarlar MonsterInsights eklentisinde gördüklerimize benzer.

Tek fark, widget’ta hangi gönderilerin seçileceğini değiştirememenizdir.
Bununla birlikte, Davranış Ayarları’nda yalnızca belirli kategorilerdeki gönderileri göstermek mümkündür. Bu şekilde, popüler gönderi seçeneklerini ihtiyaçlarınıza daha uygun hale getirebilirsiniz.

Blok ayarlarından memnun olduğunuzda, yazı ve sayfa düzenleyicisindeki ‘Güncelle’ düğmesine tıklamanız yeterlidir.
Test web sitemizde Popüler Gönderiler bloğu şu şekilde görünür:

Popüler Yazılar Widget’ını Kenar Çubuğuna Yerleştirme
Widget’a hazır bir kenar çubuğu alanına sahip blok olmayan bir WordPress teması kullanıyorsanız, Popüler Yazılar widget’ını buna ekleyebilirsiniz. WordPress kenar çubuğunuza öne çıkan yazılar nasıl eklenir makalemizde yaptığımız şey buydu.
Tek yapmanız gereken Görünüm ” Widget‘lar bölümüne gitmek. Ardından, Kenar Çubuğu alanındaki ‘+’ widget ekle düğmesine tıklayın ve Popüler Gönderiler – MonsterInsights widget’ını arayın.

Önceki yöntemde olduğu gibi, widget temanızın görünümünü özelleştirmek için benzer ayarlar içerir.
Farklı olan şey, arayüzün kullanımının biraz daha zor olmasıdır. Ayarları değiştirirken, widget’ın gerçekte neye benzediğini göremezsiniz. Önizleme yapmak için farklı bir widget’a veya başka bir alana tıklamanız gerekecek.
Widget’ın nasıl göründüğünden memnunsanız, sağ üst köşedeki ‘Güncelle’ye tıklamanız yeterlidir.

Kenar çubuğunun doğru görünüp görünmediğini kontrol etmek için web sitenize gittiğinizden emin olun.
İşte bizimki böyle görünüyor:

Popüler Yazılar widget’ının yalnızca belirli sayfalarda görünmesini istiyorsanız, belirli WordPress sayfalarında widget’ların nasıl gösterileceği veya gizleneceği hakkındaki kılavuzumuzu okuyabilirsiniz.
Popüler Yazılar Widget’ını Bir Kısa Kodla Yerleştirme
Son seçenek ise bir kısa kod kullanmaktır. Yukarıdaki seçenekler özel kullanım durumunuz için işe yaramazsa bu yöntem önerilir.
Popüler Yazılar Widget’ı sekmesinde, ‘Yerleştirme Seçenekleri’ bölümüne kadar kaydırın. Ardından, ‘Kısa Kod Kullanarak Görüntüle’yi seçin ve ‘Kısa Kodu Kopyala’ düğmesine tıklayın.

Bundan sonra, kısa kodu istediğiniz yere yerleştirmeniz yeterlidir. Daha fazla bilgi için WordPress’te kısa kod ekleme kılavuzumuza göz atın.
Yöntem 2: Popüler WordPress Yazılarını Görünümlere Göre Kodla Görüntüleme (Daha Gelişmiş)
MonsterInsights yöntemi, WordPress’te en popüler ve en iyi içeriğinizi görüntülenme sayısına göre göstermenin en kolay yoludur. Ancak kodlama konusunda rahatsanız, en popüler WordPress gönderilerinizi göstermek için kod da kullanabilirsiniz.
Bu yöntem için, bu kılavuzda kullanacağımız WPCode gibi bir kod parçacıkları eklentisi kullanmanızı öneririz.

WPCode, WordPress dosyalarınızla doğrudan etkileşime girmeden özel kod eklemeyi güvenli hale getirir. Ayrıca, bu yöntem birden fazla kod parçacığı kullanmayı gerektirdiğinden, eklenti hepsini yönetmeyi ve izlemeyi çok daha kolay hale getirecektir.
İlk olarak, WordPress’e WPCode yüklemeniz gerekir. WPCode’un ücretsiz bir sürümü mevcuttur, ancak kodu doğru konumlara eklemek için ihtiyaç duyduğumuz özelliklerle birlikte geldiği için Pro sürümünü kullanacağız.
Adım adım kurulum kılavuzu için WordPress eklentisi nasıl kurulur makalemizi okuyun.
WordPress Gönderi Görüntüleme Sayacı İşlevi Ekleme
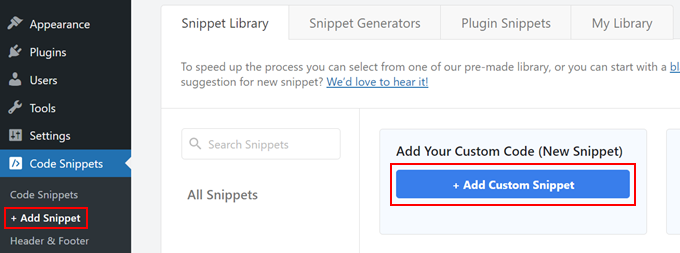
Eklentinin etkinleştirilmesinin ardından, gösterge tablosundan Code Snippets ” + Add Snippet ‘e gitmeniz gerekir. Ardından, ‘Özel Kodunuzu Ekleyin (Yeni Snippet)’ seçeneğinin üzerine gelin ve ‘+ Özel Snippet Ekle’ seçeneğine tıklayın.
Şimdi, WPCode kod parçacığı düzenleyicisinin içindesiniz. Herhangi bir kod eklemeden önce, devam edin ve kod parçacığı için bir başlık ekleyin.
Bu ilk kod için ‘WordPress Yazı Görüntüleme Sayacı İşlevi’ gibi bir isim verebilirsiniz. Bunun nedeni, bu ilk kodun amacının WordPress’te yazı görüntülemelerini saymak için bir işlev oluşturmak olmasıdır.
Ardından, Kod Türünü ‘PHP Parçacığı’ olarak değiştirin. Bu makaleden eklemeniz gereken her kod parçacığının PHP’de olduğunu unutmayın.

Bundan sonra, aşağıdaki kodu kopyalayıp yapıştırabilirsiniz:
1 2 3 4 5 6 7 8 9 10 11 12 13 14 | function wpb_set_post_views($postID) { $count_key = 'wpb_post_views_count'; $count = get_post_meta($postID, $count_key, true); if($count==''){ $count = 0; delete_post_meta($postID, $count_key); add_post_meta($postID, $count_key, '0'); }else{ $count++; update_post_meta($postID, $count_key, $count); }}//Get rid of prefetching to keep the count accurateremove_action( 'wp_head', 'adjacent_posts_rel_link_wp_head', 10, 0); |
Şimdi, ‘Ekleme’ bölümüne gidin ve Ekleme Yöntemi için ‘Otomatik Ekle’ ve Konum için ‘Her Yerde Çalıştır’ seçeneğini seçin. Bu, kodu temanızın functions.php dosyasına eklemekle aynı şekilde çalışır.
Bundan sonra, sayfanın sağ üst tarafına gidin ve kodu aktif hale getirin.
Ardından, ‘Snippet’i Kaydet’e tıklayın.

Bu aşamada, yeni bir özel kod parçacığı daha eklemeniz gerekir. Buna ‘Track Post Views Function Call’ adını verebilirsiniz.
Bu kod yukarıdaki işlevi çağıracak ve tek yazı sayfalarınızda etkinleştirecektir.
Bunu yaptıktan sonra, aşağıdaki parçacığı kopyalayıp yapıştırın:
1 | wpb_set_post_views(get_the_ID()); |
Bu kod parçacığında farklı olan şey, tek yazı sayfalarınızda çalışması gerektiğinden ‘Yazıdan Sonra Ekle’ konumunu seçecek olmanızdır.

İşiniz bittiğinde, kodu etkin hale getirin ve kaydedin.
WordPress Gönderi Görüntüleme İzleme Kancası Ekleme
Şimdi, geçerli sayfanın tek bir yazı olup olmadığını kontrol eden yeni bir kod parçacığı eklemeniz gerekir. Eğer öyleyse, yazının görüntülenme sayısını izlemek ve güncellemek için WordPress Yazı Görüntüleme Sayacı İşlevini çağıracaktır.
Bu şekilde, bir kullanıcı gönderiyi her ziyaret ettiğinde, görüntüleme sayısı güncellenecektir.
Bu snippet’e ‘WordPress Yazı Görüntüleme Takip Kancası’ adını verelim. Ardından, aşağıdaki kod satırlarını ekleyin:
1 2 3 4 5 6 7 8 9 | function wpb_track_post_views ($post_id) { if ( !is_single() ) return; if ( empty ( $post_id) ) { global $post; $post_id = $post->ID; } wpb_set_post_views($post_id);}add_action( 'wp_head', 'wpb_track_post_views'); |
Ekleme yöntemini ‘Otomatik Ekleme’ ve konumu ‘Yalnızca Ön Uç’ olarak seçebilirsiniz.
Önceki adımlarla aynı şekilde, devam edin ve kodu etkinleştirin ve kod parçacığını kaydedin.

Not: Eğer bir önbellekleme eklentisi kullanıyorsanız, bu teknik varsayılan olarak çalışmayabilir. Çalışması için W3 Total Cache gibi bazı önbellekleme eklentileri tarafından sunulan parça önbellekleme özelliğini kullanabilirsiniz.
Gönderi Görüntüleme Sayısını Almak ve Görüntüleme Sayılarıyla En Popüler Gönderileri Görüntülemek için İşlevler Ekleyin
Şimdi bu kılavuzun son adımlarındayız. Belirli bir WordPress gönderisi için görüntülenme sayısını alan ve biçimlendiren bir kod parçacığı eklemeniz gerekir. Bu, daha sonra en çok görüntülenen yazıların listesini görüntülerken kullanışlı olacaktır.
Bu kodu ‘Gönderi Görüntüleme Sayısı İşlevini Al’ olarak adlandırabilir ve konumu ‘Her Yerde Çalıştır’ olarak ayarlayabilirsiniz.
İşte kod parçacığı:
1 2 3 4 5 6 7 8 9 10 | function wpb_get_post_views($postID){ $count_key = 'wpb_post_views_count'; $count = get_post_meta($postID, $count_key, true); if($count==''){ delete_post_meta($postID, $count_key); add_post_meta($postID, $count_key, '0'); return "0 View"; } return $count.' Views';} |
Yine, kodu WPCode’da etkin hale getirdiğinizden ve ardından kaydettiğinizden emin olun.
Bunu yaptıktan sonra tekrar yeni bir kod parçacığı oluşturun ve adını ‘Görüntüleme Sayılarıyla En Popüler Gönderileri Göster’ olarak değiştirin. Bu, blog gönderilerinizin altında en popüler gönderilerinizi gösterecek koddur.
Kod Önizleme kutusuna aşağıdaki kod parçacığını ekleyin:
1 2 3 4 5 6 7 8 9 10 11 12 13 14 15 16 17 18 19 20 21 22 23 24 | // Customize the query parameters as needed$popularpost = new WP_Query( array( 'posts_per_page' => 3, // Feel free to adjust the number of posts to display 'meta_key' => 'wpb_post_views_count', 'orderby' => 'meta_value_num', 'order' => 'DESC'));?><div class="popular-posts"> <h2>See Our Most Popular Posts</h2> <!-- Feel free to customize the title --> <ul> <?php while ( $popularpost->have_posts() ) : $popularpost->the_post(); ?> <li> <a href="<?php the_permalink(); ?>"><?php the_title(); ?></a> - <?php echo wpb_get_post_views(get_the_ID()); ?> </li> <?php endwhile; ?> </ul></div><?php wp_reset_postdata(); |
Kodda belirtildiği gibi, görüntülenecek gönderi sayısını ayarlamaktan ve bu bölümün başlığını özelleştirmekten çekinmeyin.
WPCode Ekleme bölümünde, Konum için ‘Gönderiden Sonra Ekle’yi seçtiğinizden emin olun. Ardından, kodu etkin hale getirin ve kod parçacığını kaydedin.
Şimdi yapmanız gereken tek şey blog yazılarınızdan birini ziyaret etmek ve kodun çalışıp çalışmadığını görmek. İşte test WordPress blogumuzda görüntülenme sayısına göre en popüler yazılar bölümü:

Uzman İpucu: Kodu daha fazla özelleştirmek istiyorsanız ancak kodlama deneyiminiz yoksa, size yardımcı olması için WPCode’un AI Code Generator özelliğini kullanabilirsiniz. Bu özellik, mevcut kodunuzu tam ihtiyaçlarınıza uyacak şekilde düzenleyebilir.
Daha fazla bilgi için WPCode incelememizin tamamına göz atın.
Video Eğitimi
Görsel talimatları tercih ediyorsanız, lütfen bu eğitimin video versiyonunu aşağıda izleyin:
Umarız bu WordPress eğitimi popüler yazıları görüntülenme sayılarına göre nasıl görüntüleyeceğinizi öğrenmenize yardımcı olmuştur. Ayrıca WordPress için en iyi ilgili yazılar eklentileri uzman seçimimize ve yüksek dönüşüm sağlayan bir açılış sayfasını neyin oluşturduğuna dair yazımıza da göz atmak isteyebilirsiniz.
If you liked this article, then please subscribe to our YouTube Channel for WordPress video tutorials. You can also find us on Twitter and Facebook.


 in 2024")

Mrteesurez
I think it would be easier to use a plugin maybe Monsterinsights or another as it straight forward than using custom code, but the issue is, I don’t think using Monsterinsights will shows view counts ??
WPBeginner Support
MonsterInsights would mot show the view count by default if that is what you want to include with your popular posts.
Admin
mohadese esmaeeli
The display of popular posts is beneficial as it helps increase website traffic statistics. However, on the other hand, competitors can easily identify which posts and topics have been popular on your site. One of the sections I always explore for competitor analysis and finding trending topics is the “most popular articles” section on various websites.
WPBeginner Support
While that can be something to keep in mind, we normally find it best to add what is most important to your visitors instead of being concerned that your competitors will follow your content.
Admin
Mrteesurez
Yes, competitors can use it to analytics ones website but you can just display it like WPbeginner, without adding the views count/counter.
But mind you, visitors can use Semrush, Google, Similarweb and some other ways to analyze your site. You own is just to know how you are playing your games.
Thanks for the insight.
Moinuddin Waheed
Popular posts and related posts makes the user engagement intact and reduced bounce rate.
it helps in more user interaction with the posts and articles.
I have seen many bloggers showing views count and read time of the posts, like 5 minutes read or 3 minutes read.
can we have popular posts and related posts where ever we want with this method? and
Is this method can be used for achieving both these objectives like having read time based on word counts?
WPBeginner Support
You should be able to place it wherever widgets are allowed. For the time to read, it would depend on the plugin you use for that and if it has an integration or not.
Admin
Jiří Vaněk
I would like to ask if the snippet also works on the new WordPress 6.4.2. I followed the instructions, cleared the cache, but the most read articles do not appear under the article
WPBeginner Support
The code snippets should still work with the most up to date version of WordPress.
Admin
Jiří Vaněk
Thank you for the reply. It’s already working. I had a mistake somewhere and unfortunately I don’t know where. In the end, I repeated the whole procedure twice more and it worked on the third try. Unfortunately, I don’t know what I did wrong, but the snippets really work. Thank you.
WPBeginner Support
Glad they started working for you, it’s always difficult to tell what went wrong when trying the same code again works when the previous time it didn’t.
Amy Ling
Is there a way to make it so it’s based on user vs in general?
WPBeginner Support
We do not have a recommended method for user specific popular posts at the moment.
Admin
Chris
If we have caching enabled, can we avoid the caching problem by resorting to JavaScript (AJAX) to send the command to record the view? Would that work?
WPBeginner Support
While there is a complex way to have that workaround, we do not have a method we would recommend at this time.
Admin
thomas
How can I reset the meta keys or reset the counting??
Is there any function?
WPBeginner Support
If you’re using the custom code method, it is saved as a custom field in which case you can edit the count in the edit post area itself. You can see more on custom fields in our guide below:
https://www.wpbeginner.com/wp-tutorials/wordpress-custom-fields-101-tips-tricks-and-hacks/
Admin
saikat
yes, very helpful tutorial
WPBeginner Support
Glad our guide was helpful!
Admin
Amir
Hello, thank you very much.
It is very simple and practical.
But with each reload, one visit is added.
How can I fix this problem?
Thankful
WPBeginner Support
Any time a user would reload a page or visit the page again would be another visit. For specifically excluding refreshes you would need to use a plugin with more advanced features.
Admin
locas
only 4 posts
I’ve tried to change to 10 but still 4 posts show up
‘posts_per_page’ => 10
WPBeginner Support
You may want to try clearing all caching checking with your theme’s support to ensure they don’t have anything that would conflict with this
Admin
za
Thank you for the tutorial. I applied it and it works. No need another plugin to show popular posts and the customized counter in single.
Thanks!
WPBeginner Support
Glad our article could help
Admin
Chris
Is it beyond the scope of this article to explain had you assign the functions to those buttons as in your screenshot:
Recent Articles – Popular Posts – editor’s picks
That is basically what I want to do…have buttons at the top of my posts page for recent, popular/trending, editors picks. I haven’t found any plugins that can do that. The all focus on side bar widgets.
It looks like your article is starting to talk about this but where to go from there is beyond my current knowledge level.
Thanks,
Chris
Sakshi Grover
This was very helpful.!!! Thanks a ton.!
Amit Biswas
Getting double view count on refresh (single.php). Don’t know if the remove action is working or not for “adjacent_posts_rel_link_wp_head”. Useless so far. I tried everything that is possible to remove double count. Using this code in a custom made plugin.
Hans
Thsi thing works greats.
Now I want the columnn in admin to be sortable. any idea how to do this?
many thanks!
Trevor
Hey, thanks for the code. Only issue I’m having is the view count is incrementing by 2 instead of 1 on refresh. Any thoughts?
Shwet
I have the same problem with this code.
Have you found any solution of this?
Fuchel
This was happening for me because I had:
`set_post_views(get_the_ID());` in single.php
AND
`add_action( ‘wp_head’, ‘track_post_views’);` in my functions.php which was also adding `set_post_views(get_the_ID());` within it.
By removing the line on single.php I fixed the double count.
Maya
How to show most popular posts on my home page?
Shaq
How do I do this for a weekly basis, most viewed posts each week?!
iftkhar hussain
ah , this works fine ;
thanks dear !
Bülent Sakarya
Hello..
Using w3total cache but count not working correctly.
don’t use child theme. how can I fix it?
thanks..
Ryley Ameden
Fixed this issue:
Cannot use WP_Query, used get_posts and it is now working. Then use a foreach look to loop through the posts and display them. See below:
$blog_cat_array = get_the_category();
$blog_cat = $blog_cat_array[0]->term_id;
$popularpost = array(
‘posts_per_page’ => 2,
‘meta_key’ => ‘wpb_post_views_count’,
‘orderby’ => ‘meta_value_num’,
‘order’ => ‘DESC’,
‘category’ => $blog_cat,
‘post_type’ => ‘post’,
);
$pop_posts = get_posts($popularpost);
foreach($pop_posts as $pop_post){
the_title();
}
Philipp
Is there a possibility to count only unique visitors? Thank you
Zeeshan
Simple Awesome …. (Y)
Erwin Barendregt
I really like this option and have built it into my site.
I have one question regarding the count. I found that the counts were rather high so I changed the code around a bit. With every count increase I wrote the IP address to a log file. I found hat two-third of the counts were legit and the other ones came from googlebot, apple, etc. and just now apews Is there any way to get the counts right and do you know if the ‘regular’ plugins have found a way around this?
Thx!
BTW: Keep up the good work, I thoroughly enjoy this site!
bah
you can take maxmind ISP IP database and only count humans. This is the best option. Second just dont count common bots user-agent-names
Erwin Barendregt
Thanks so much. I will definitely look into that.
In the mean time I implemneted the solution which was implemented in the WordPress Popular Posts plugin. That works for now, but the solution you recommended seems more future-proof. Thanks again!
HiepTD
Hello, I am using WP Super Cache.
I do not know how this code works correctly.
Krishna
It is not working for Custom Post Type. Can you help me on this please..
John
Hi! Awesome! This code helped me a lot!
Do you know how to display the posts with 0 views? I have to enter to the post page by using the url the first time, otherwise it doesn’t show.
Gianmarco
Awesome thanks this is really useful, but a question. Doesn’t it slow down the loading of the page significantly?
ayaz
Hi,
This is very useful post, i really appreciate. Can i filter the post in category, I wanted to show the post of specific category.
Thanks.
Md Maruf Adnan Sami
How can i set Features post on Mobilepress Hompage?
Please give me that code.
gift charles
Thank you for this awesome post, you guys are the best
Bojan
Ok this is great. For some reason, post count doesnt show numbers, not sure is it because i work on a local., but what i wanted to ask even more, is how to add so it count only in the last 7 days?
Blown
Hi, How can I show the most popular posts for the current week??
Ashish
Awesome Article !! Thanks. Would be better if code was explained in detail.
Dhiraj Kataria
I need advice on how r u to Load Word files to a WordPress website please. Is there an easy way?
DarkSafka
Sadly this does not work with W3 Total Cache with Page Caching enabled. Coul not get any “fragmented caching” to work either.
Fakrul
Same here @DARKSAFKA . Not working.
Riya
nice code. work perfectly….
hmmm
you are right
REIBI
Hey,
This works great. But I need to show popular post of a day, this code shows popular posts of all time. Is there anyway to show popular posts of a day only.
Any help will be greatly appreciated.
Thanks
Dimitrios Arkolakis
Try to add something like this in the WP Query
‘date_query’ => array(
array(
‘year’ => $today[‘year’],
‘month’ => $today[‘mon’],
‘day’ => $today[‘mday’],
),
Nick Heurter
This doesn’t seems to work. Is there anyone who figures out how to display the most popular posts of the lasts 7 days?
Thanks!
Yonatan
Add this code to the query
‘date_query’ => array(
array(
‘after’ => ‘1 week ago’
)
)
Mawardiy
Hi, I use Goodnews 5.7.2 theme, but where i put “wpb_get_post_views(get_the_ID());” in my theme, thank for u’r guidance
Alex
Hey, thanks for the information.
There’s a little problem. I put:
function wpb_set_post_views($postID) {
$count_key = ‘wpb_post_views_count’;
$count = get_post_meta($postID, $count_key, true);
if($count==”){
$count = 0;
delete_post_meta($postID, $count_key);
add_post_meta($postID, $count_key, ‘0’);
}else{
$count++;
update_post_meta($postID, $count_key, $count);
}
}
//To keep the count accurate, lets get rid of prefetching
remove_action( ‘wp_head’, ‘adjacent_posts_rel_link_wp_head’, 10, 0);
function wpb_track_post_views ($post_id) {
if ( !is_single() ) return;
if ( empty ( $post_id) ) {
global $post;
$post_id = $post->ID;
}
wpb_set_post_views($post_id);
}
add_action( ‘wp_head’, ‘wpb_track_post_views’);
function wpb_get_post_views($postID){
$count_key = ‘wpb_post_views_count’;
$count = get_post_meta($postID, $count_key, true);
if($count==”){
delete_post_meta($postID, $count_key);
add_post_meta($postID, $count_key, ‘0’);
return “0 View”;
}
return $count.’ Views’;
}
and my visits counts always as two. What’s happening? Thanks.
6b
Really great instruction no need of plugin.works perfect.
Paritosh Arya
What table does this custom field get stored into? Is it the posts table or the postmeta?
ScoDal
I modified this a little to use it as a shortcode. To use this with a shortcode, add this to your functions.php:
function wpb_set_post_views($postID) {
$count_key = ‘wpb_post_views_count’;
$count = get_post_meta($postID, $count_key, true);
if($count==”){
$count = 0;
delete_post_meta($postID, $count_key);
add_post_meta($postID, $count_key, ‘0’);
}else{
$count++;
update_post_meta($postID, $count_key, $count);
}
}
//To keep the count accurate, lets get rid of prefetching
remove_action( ‘wp_head’, ‘adjacent_posts_rel_link_wp_head’, 10, 0);
function wpb_track_post_views ($post_id) {
if ( !is_single() ) return;
if ( empty ( $post_id) ) {
global $post;
$post_id = $post->ID;
}
wpb_set_post_views($post_id);
}
add_action( ‘wp_head’, ‘wpb_track_post_views’);
function wpb_get_post_views($postID){
$count_key = ‘wpb_post_views_count’;
$count = get_post_meta($postID, $count_key, true);
if($count==”){
delete_post_meta($postID, $count_key);
add_post_meta($postID, $count_key, ‘0’);
return “0 View”;
}
return $count.’ Views’;
}
function wpb_most_viewed_posts() {
// start output buffering
ob_start();
?>
4, ‘meta_key’ => ‘wpb_post_views_count’, ‘orderby’ => ‘meta_value_num’, ‘order’ => ‘DESC’);
//begin loop
while ($query->have_posts()) : $query->the_post(); ?>
<?php
// Turn off output buffering
$theResult = ob_get_clean();
//Return output
return $theResult;
}
// Create shortcode
add_shortcode('wpb_most_viewed', 'wpb_most_viewed_posts');
//Enable shortcode execution in text widgets
add_filter('widget_text', 'do_shortcode');
Then simply add [wpb_most_viewed] to your desired page/post and it should display your most popular posts.
Marcos
Hello. Huge thanks for that. Works very well in my theme.
John
Hello, great tutorial but I have one question.
After following all of the steps the template isn’t paginating. It’s only showing the default 10 posts. Should this happen or is there a way to get it to paginate?
Varange
Folks, please help. Just cannot figure it out.
How do I change the args to the wp-query to show the most popular posts for the last week? Or month?
Denis
Hello,
can I do this with comments? I dont use any comments on my site so I could use this comment count to check my most popular page without adding a comment?
Cheers,
Denis
Kes
How do i make this work with w3 total cache? I’ve tried the fragment cache suggestion but changes nothing
Kes
I’ve found a number of tuts covering this topic but none seem to spell out where the line goes.
I’ve tried it inside PHP tags and it breaks the page. If i place it in the HTML it just renders as a comment when you view source and no php is generated.
Any ideas? I’m w3 total cache and my page views aren’t getting updated
jarc100
Thanks, this works as charm, but i didn’t get how to use it with the W3 Total Cache.
Jorge
Hello! How can I show the most popular posts for the current week?? Is there any possible? Thanks in advance.