Yıllarca WordPress web siteleri oluşturduktan sonra, bilgisayarınızda yerel bir WordPress kurulumuna sahip olmanın ne kadar önemli olduğunu öğrendik.
WordPress’in kişisel makinenizde olması, canlı sitenizi riske atmadan yeni özellikleri denemenize, WordPress geliştirmeye derinlemesine dalmanıza ve hatta yayına girmeden önce tüm web sitelerini oluşturmanıza olanak tanır. Tüm WordPress projeleriniz için özel bir sandbox’a sahip olmak gibi.
Eğer bir Windows kullanıcısıysanız, WordPress’i yerel olarak kurmanın çok sayıda yolu vardır. Ancak biz bunu en kolay iki yönteme indirgedik. Bu kılavuzda, hangi sürümü kullanıyor olursanız olun, WordPress’i bir Windows bilgisayara nasıl kolayca yükleyebileceğinizi göstereceğiz.
WordPress’i Neden Windows’a Kurmalısınız?
Windows kullanıcısıysanız, WordPress’i bilgisayarınıza yerel olarak yüklemek çeşitli avantajlar sunar.
Yerel bir WordPress kurulumu, canlı web sitenizi etkilemeyen bir test ortamı oluşturur. Genellikle yerel sunucu veya localhost olarak adlandırılan bu kurulum, WordPress için kişisel oyun alanınızdır.
WordPress geliştiricileri çalışmaları için düzenli olarak yerel kurulumları kullanır. Örneğin, yeni eklentileri veya temaları denemek ya da Gutenberg blok düzenleyicisine güncellemeden önce siteyi test etmek için kullanabilirler.
Ancak bu sadece profesyoneller için değildir. WordPress’te yeniyseniz, yerel bir kurulum öğrenmek için mükemmeldir. Özellikleri keşfedebilir, temaları ve eklentileri test edebilir ve canlı bir siteyi bozma endişesi olmadan özgürce denemeler yapabilirsiniz.
WordPress’i Windows’a yerel olarak yüklediğinizde siteyi yalnızca sizin görebileceğinizi unutmamak önemlidir. Herkese açık bir web sitesi oluşturmak istiyorsanız, bir alan adına ve web barındırma hizmetine ihtiyacınız olacaktır.
Şimdi, teknik olarak, XAMPP kullanarak Windows’a WordPress yükleyebilirsiniz ve daha önce bu konuda bir eğitim yazmıştık.
Bununla birlikte, yerel bir WordPress ortamı kurmak için XAMPP’den daha basit 2 yol bulduk, bu da onları yeni başlayanlar veya hızlı bir şekilde yerel bir site oluşturması gereken kullanıcılar için harika hale getiriyor. İlgilendiğiniz herhangi bir yönteme geçmek için aşağıdaki bağlantıya tıklayabilirsiniz:
Yöntem 1: Studio Kullanarak Windows’a WordPress Yükleyin (Hızlı ve Basit)
İlk yöntem için Studio’yu kullanacağız. WordPress yazılımına dayalı bir web sitesi oluşturucu olan WordPress.com‘u yöneten ve çalıştıran şirket olan Automattic tarafından yapılan yerel bir WordPress yazılımıdır.
İlk olarak bu yöntemden bahsedeceğiz çünkü takip etmesi çok daha hızlı ve basittir, bu da onu tamamen yeni başlayanlar için mükemmel kılar.
İlk olarak, Studio by WordPress.com web sitesini açmanız gerekir. Ardından, ‘Windows için İndir’ düğmesine tıklayın.
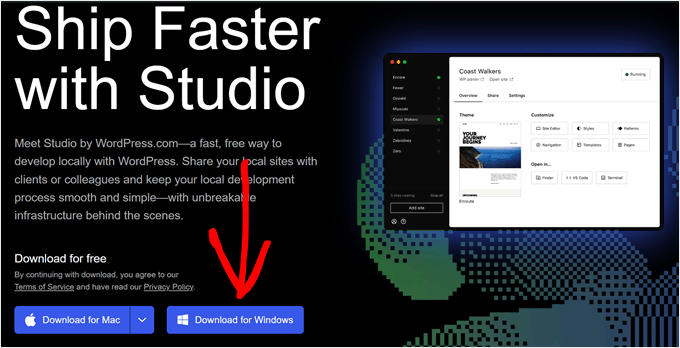
Bunu yaptıktan sonra, kurulumu başlatmak için indirilen dosyayı açmanız yeterlidir.
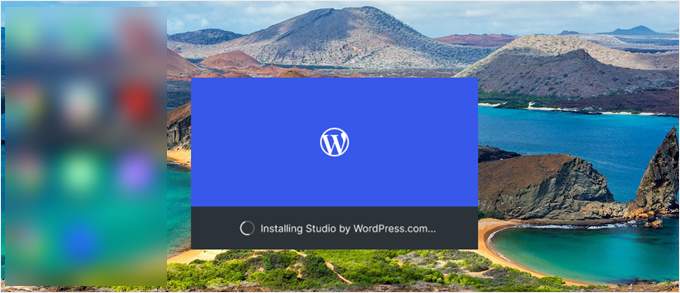
Şimdi size uygulamanın yüklendiğini gösteren bir açılır pencere görünecektir.
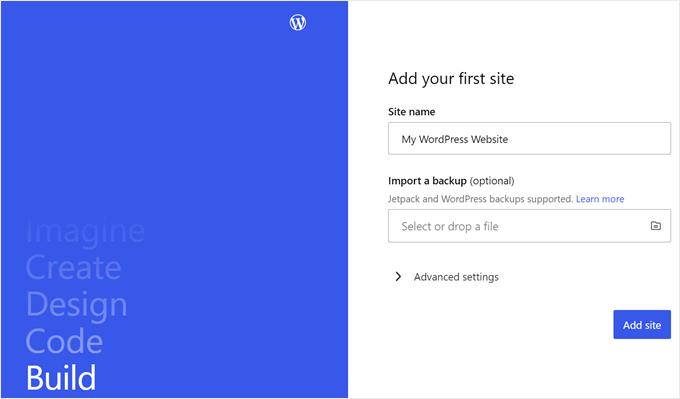
Bunu yaptıktan sonra ilk sitenizi ekleyebilirsiniz.
Bunu yapmak için yeni yerel WordPress sitenizin adını girin ve ‘Site ekle’ye tıklayın. Siteyi kolayca tanımlamanıza yardımcı olduğu sürece siteyi istediğiniz gibi adlandırabilirsiniz.
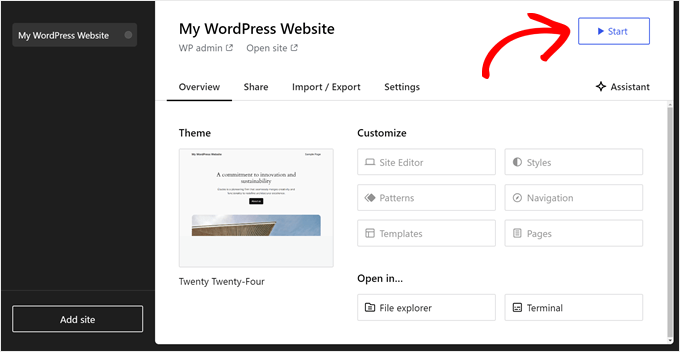
Şimdi yerel WordPress sitenizin panosunu görmelisiniz.
WordPress kontrol panelinize erişmek ve web sitenizi düzenlemek için sağ üst köşedeki ‘Başlat’ düğmesine tıklamanız yeterlidir. Bu, yerel web sitenizi bilgisayarınızdan erişilebilir hale getirecektir.
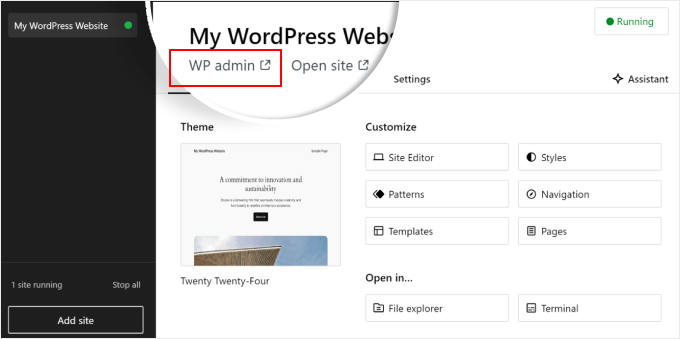
‘Başlat’ düğmesi ‘Çalışıyor’ olarak değiştiğinde, sayfanın sol üst tarafındaki ‘WP Admin’ bağlantısına tıklayabilirsiniz.
Bu sizi yerel WordPress yönetici sayfanıza getirecektir.
Ve kurulum için hemen hemen hepsi bu kadar. Yerel web sitenizi oluştururken gerekli olabilecek diğer ayarları inceleyelim.
‘Genel Bakış’ sekmesinde görebileceğiniz gibi, WordPress tam site editörü menüsüne doğrudan Studio kontrol panelinden erişebilirsiniz. Ayrıca WordPress web sitenizin klasörlerini ve dosyalarını açmak için ‘Dosya gezgini’ne tıklayabilir ve WP-CLI kullanarak web sitenizi yönetmek için ‘Terminal’e tıklayabilirsiniz.
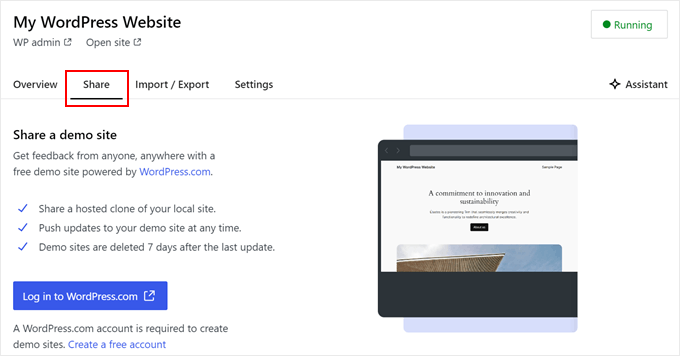
‘Paylaş’ sekmesine geçerseniz, WordPress.com hesabınızda oturum açabilir, yerel web sitenizi klonlayabilir ve WordPress.com sunucularına yükleyebilirsiniz. Bu, klonlanmış siteyi geçici olarak çevrimiçi hale getirecektir, bu da demo sitelerini müşterilerinizle veya ekip üyelerinizle paylaşmak için kullanışlıdır.
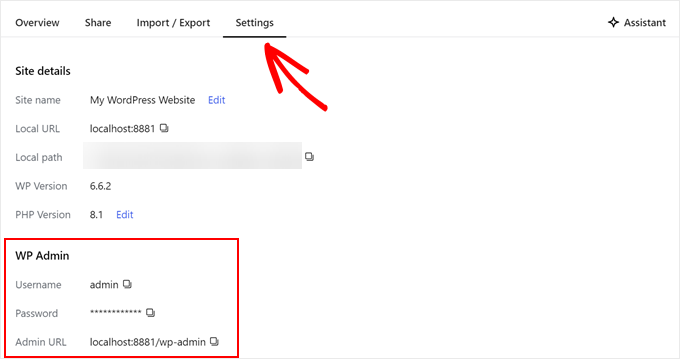
Bazen, Studio’yu kullanmak yerine doğrudan tarayıcınız üzerinden yerel web sitenize giriş yapmak isteyebilirsiniz. Bu durumda, wp-admin kimlik bilgilerinizi bilmeniz gerekir.
Bunları bulmak için ‘Ayarlar’ sekmesine geçebilir ve orada WordPress yönetici kullanıcı adınızı, şifrenizi ve giriş URL’ nizi bulabilirsiniz.
Studio’nun bir başka güzel özelliği de ‘Asistan’ düğmesine tıklayarak iletişim kurabileceğiniz yerleşik yapay zeka sohbet robotu.
Burada Studio’dan tüm eklentilerinizi aynı anda güncellemek, çekirdek WordPress sürümünüzü güncellemek veya özel bir blok için kod oluşturmak gibi görevler için yardım isteyebilirsiniz.
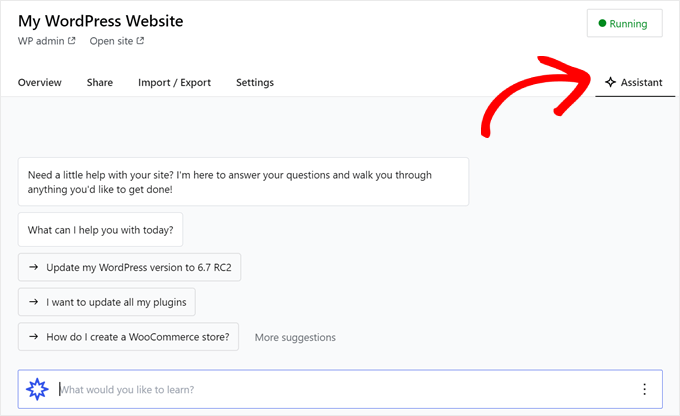
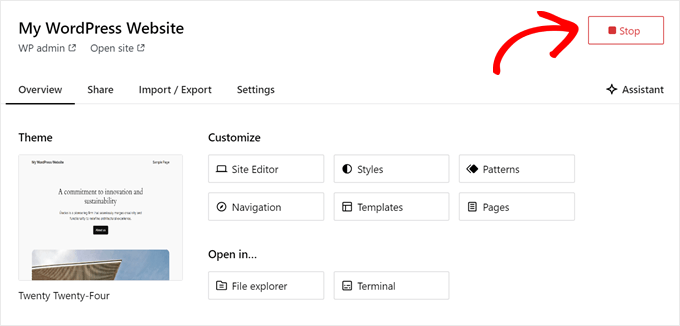
Yerel sitenizde çalışmayı bitirdiğinizde, sağ üst köşedeki ‘Çalışıyor’ düğmesinin üzerinde ‘Durdur’ yazana kadar bekleyin.
Ardından, web sitesini durdurmak için düğmeye tıklayın.
Studio’nun bir dezavantajı, WordPress ortamını kendi isteğinize göre yapılandıramamanızdır. Bu, sizin için önceden seçilmiş olan PHP sürümünü, web sunucusunu ve veritabanını kullanmanız gerektiği anlamına gelir.
Web sitenizi veya eklentinizi belirli sunucu yapılandırmalarıyla test etmeniz gerekiyorsa bu bir dezavantaj olabilir.
Yerel WordPress ortamınız üzerinde daha fazla kontrole ihtiyacınız varsa veya yerel kurulumunuzu belirli bir canlı sunucu yapılandırmasıyla eşleştirmeniz gerekiyorsa, Local WP kullanarak bir sonraki yönteme göz atabilirsiniz.
Yöntem 2: Yerel WP Kullanarak Windows’a WordPress Yükleyin (Daha Özelleştirilebilir)
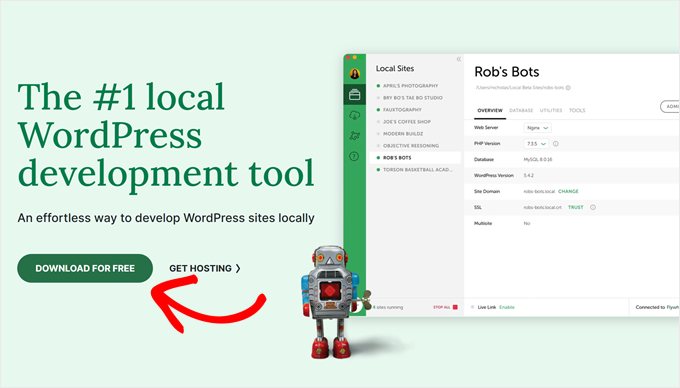
Öncelikle, Local WP yazılımını Windows bilgisayarınıza indirmeniz ve kurmanız gerekir. Bunun için Local WP web sitesine gidin ve ‘Ücretsiz İndir’ butonuna tıklayın.
Bundan sonra, platformunuzu seçmeniz gereken bir açılır pencere görünecektir. Devam edin ve açılır menüden ‘Windows’u seçin.
Ardından, yazılımı indirmek için adınız ve soyadınız, iş e-posta adresiniz ve telefon numaranız gibi bilgilerinizi girebilirsiniz.
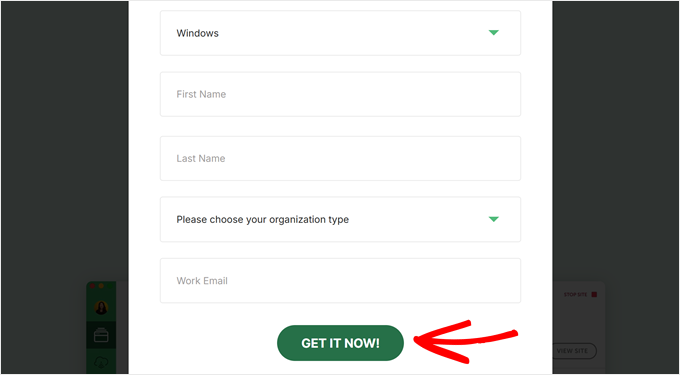
Ayrıntıları girdikten sonra ‘Şimdi Al’ düğmesine tıklamanız yeterlidir.
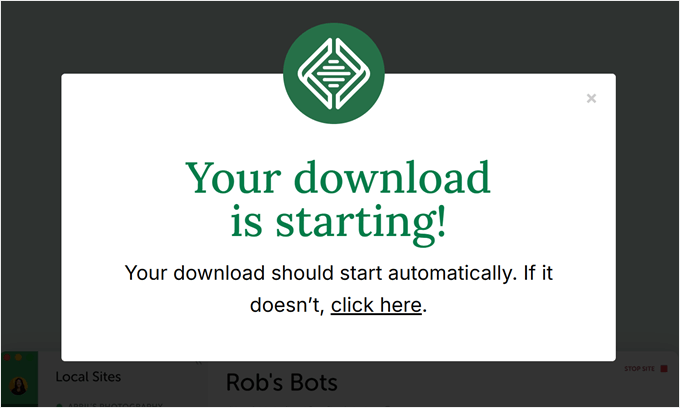
Bundan sonra, yazılım otomatik olarak bilgisayarınıza indirilecektir. Aksi takdirde, indirmeyi başlatmak için ‘buraya tıklayın’ bağlantısına tıklayabilirsiniz.
Dosya indirildikten sonra, devam edin ve kurulum sihirbazını başlatın.
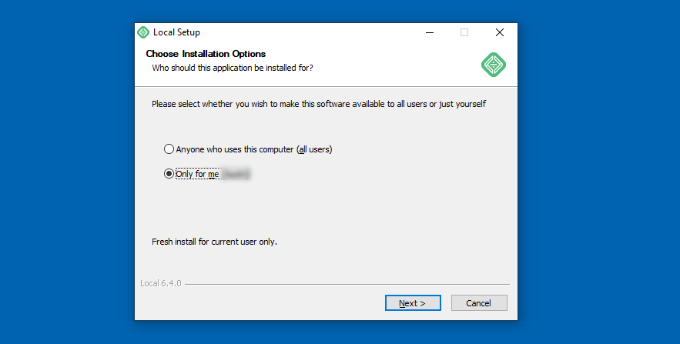
Şimdi, yazılımı tüm kullanıcılar için mi yoksa yalnızca kendiniz için mi yüklemek istediğinizi seçmeniz gerekecektir.
Bir seçenek belirledikten sonra ‘İleri’ düğmesine tıklayın.
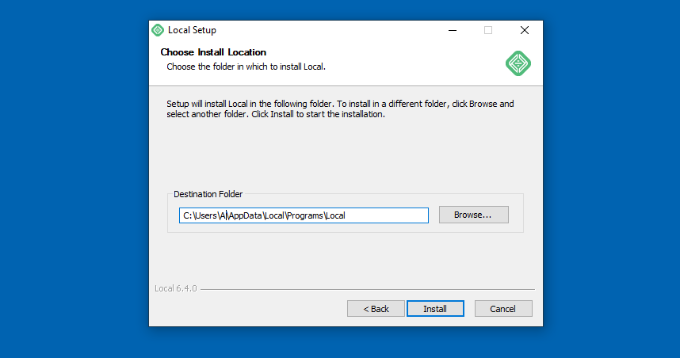
Bir sonraki adımda, yazılımın yükleneceği ‘Hedef Klasörü’ seçebilirsiniz.
Yolu ayarlamak için ‘Gözat’ düğmesine tıklamanız ve ardından ‘Yükle’ düğmesine tıklamanız yeterlidir.
Local WP yazılımı şimdi Windows bilgisayarınıza yüklenecektir.
İşlem tamamlandıktan sonra, ‘Yerel Çalıştır’ onay kutusunu işaretleyebilir ve kurulum sihirbazındaki ‘Son’ düğmesine tıklayabilirsiniz.
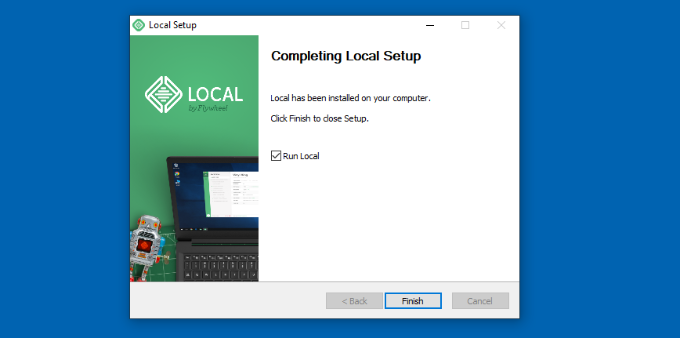
Yazılım şimdi Windows cihazınızda başlayacaktır.
Bir sonraki adım yeni bir yerel web sitesi eklemektir. Bunu yapmak için, alttaki artı ‘+’ düğmesine tıklamanız yeterlidir.
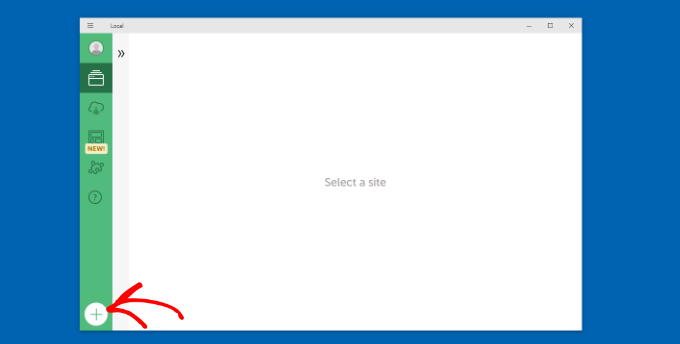
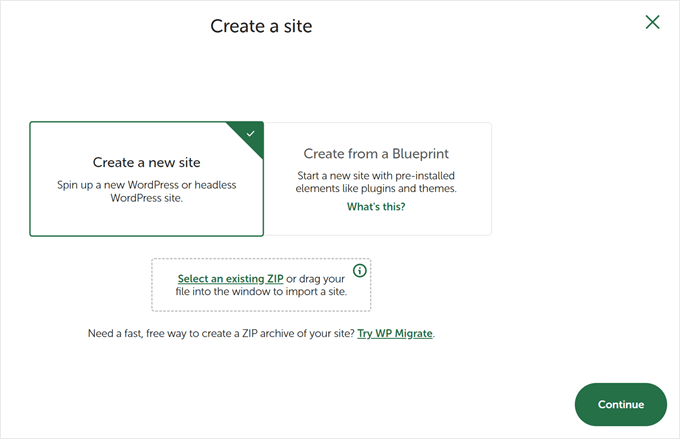
Bundan sonra, Yerel yazılımda bir site oluşturabilirsiniz.
‘Yeni bir site oluştur’ seçeneğini seçin ve ‘Devam Et’ düğmesine tıklayın. Siteyi bir plandan veya mevcut bir web sitesi dosyasından oluşturma seçenekleri de vardır, ancak gösterim amacıyla ilk seçeneği kullanacağız.
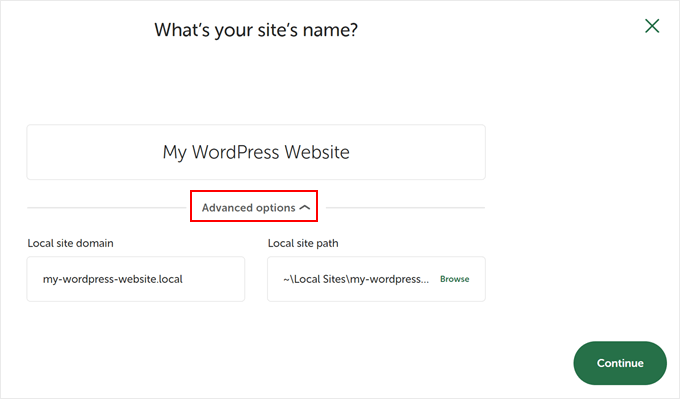
Ardından, yerel web siteniz için ‘WordPress Web Sitem’ gibi bir ad girebilirsiniz.
Yerel site alan adını ve yerel site yolunu girebileceğiniz gelişmiş seçenekler de vardır. Varsayılan olarak, etki alanı web sitenizin başlığını kullanacak ancak tire ile ayrılacaktır.
İşiniz bittiğinde, ‘Devam’ düğmesine tıklamanız yeterlidir.
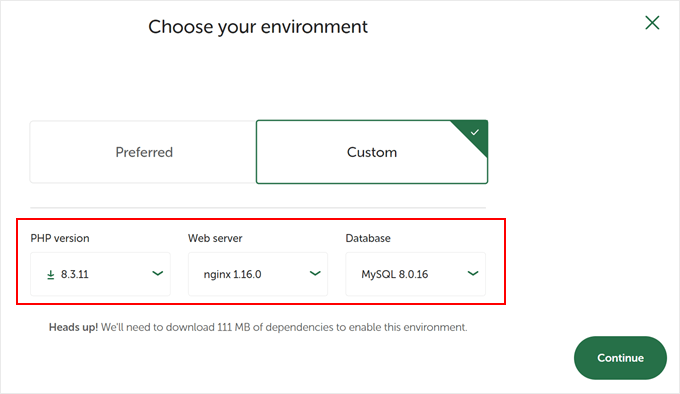
Bundan sonra, yerel web siteniz için bir ortam seçmeniz gerekecektir.
Yazılımın PHP sürümünü, web sunucusunu ve MySQL sürümünü otomatik olarak seçeceği ‘Tercih Edilen’ ortamı kullanabilirsiniz. Öte yandan, ‘Özel’ seçeneğini de seçebilir ve ortam ayrıntılarını girebilirsiniz.
Local WP en son PHP sürümlerini sunar. Web sunucusuna gelince, Nginx veya Apache arasında seçim yapabilirsiniz. Ayrıca veritabanları için MySQL veya MariaDB arasında seçim yapabilirsiniz.
Bazı PHP, web sunucusu ve veritabanı sürümlerinin düzgün çalışması için bazı bağımlılıkların indirilmesi gerektiğini unutmayın.
Ardından, yerel web siteniz için bir WordPress kullanıcı adı ve şifresi girebilirsiniz. Ayrıca, tüm e-posta bildirimlerini alacağınız bir WordPress e-posta adresi seçme seçeneği de vardır.
Bunun dışında, yazılımın bir WordPress çoklu site ağınız olup olmadığını soracağı gelişmiş bir seçenek vardır. Eğer yoksa, sadece ‘Hayır’a tıklayın.
Bu ayrıntıları girdikten sonra, ‘Site Ekle’ düğmesine tıklamanız yeterlidir.
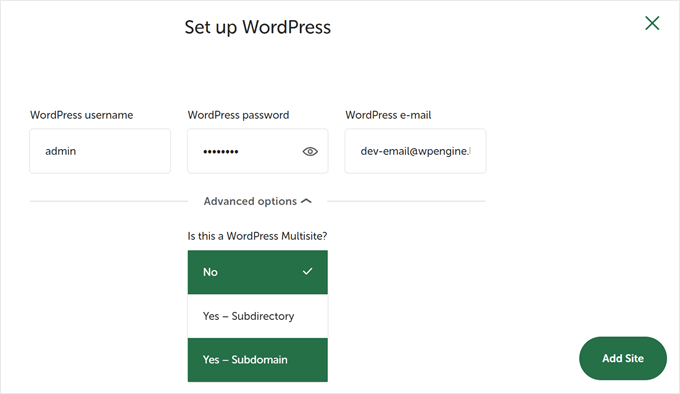
Yazılım şimdi WordPress’i yükleyecek ve web sitenizi kuracaktır.
Yerel web sitesini başlatmak için devam edin ve sağ üst köşedeki ‘Siteyi başlat’ düğmesine tıklayın.
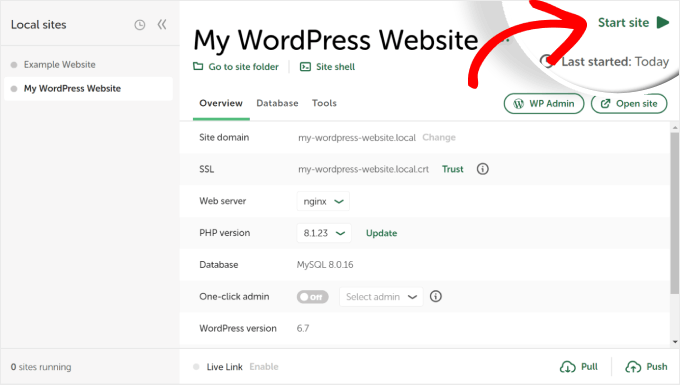
Ardından, ‘WP Admin’ düğmesine tıklayın ve WordPress yönetici giriş sayfasını göreceksiniz.
Yerel web sitesini kurarken daha önce girdiğiniz kullanıcı adı ve şifreyi girmeniz ve ardından ‘Oturum Aç’ düğmesine tıklamanız yeterlidir.
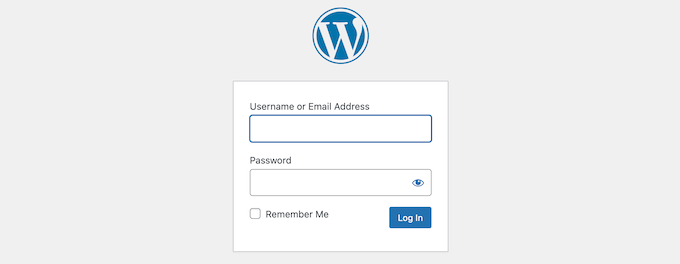
Artık Windows bilgisayarınızda yerel web sitenizi düzenleyebilirsiniz.
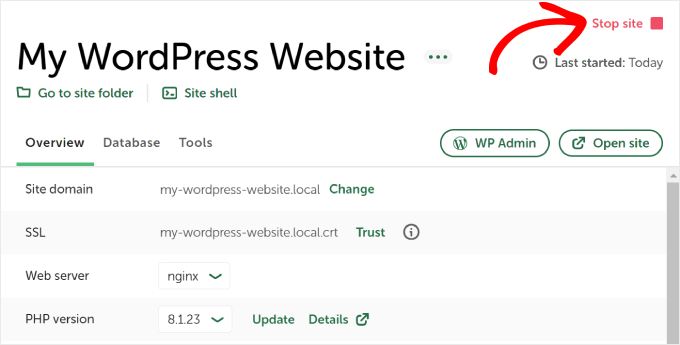
İşiniz bittiğinde, ‘Siteyi durdur’ düğmesine tıklayarak web sitesini Local WP yazılımından durdurmayı unutmayın.
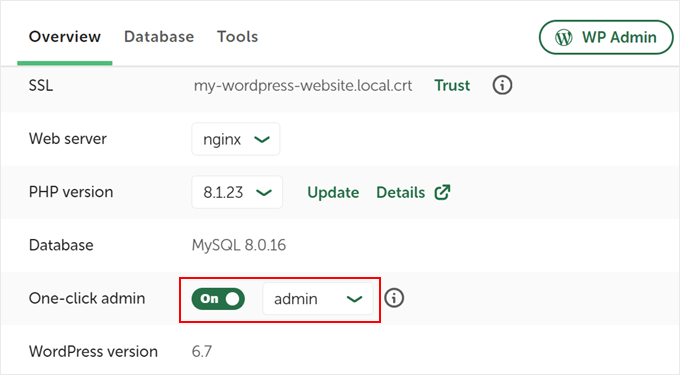
Profesyonel İpucu: Oturum açma işlemini atlamak istiyorsanız, Local WP’de tek tıklamayla yönetici oturum açma özelliğini etkinleştirebilirsiniz.
Bunu yapmak için Local WP kontrol paneline geri dönün ve ‘Tek tıkla yönetici’ düğmesini ‘Açık’ yazana kadar değiştirin. Ardından, açılır menüden bu tek tıklamayla oturum açma özelliğini kullanabilecek yönetici kullanıcıyı seçin.
Alternatif: Temaları, Eklentileri ve Daha Fazlasını Test Etmek için WordPress Playground’u Kullanın
WordPress Playground, WordPress ile doğrudan web tarayıcınızda denemeler yapmanızı sağlayan yenilikçi bir araçtır. Herhangi bir gerçek web sitesini etkilemeden yeni WordPress temalarını, eklentilerini ve özelliklerini deneyebileceğiniz sanal bir kum havuzudur.
WordPress Playground, yerel bir WordPress ortamından birkaç önemli yönden farklıdır.
İlk olarak, bilgisayarınıza kurulum gerektirmez ve kalıcı yerel kurulumların aksine her kullanımdan sonra sıfırlanır. Yerel kurulumlar tek bir bilgisayara bağlıyken, tarayıcıya sahip herhangi bir cihazdan erişebilirsiniz.
WordPress Playground hızlı testler ve öğrenme için ideal olsa da, Windows bilgisayarınızdaki yerel bir WordPress ortamı uzun vadeli geliştirme projeleri için daha fazla esneklik sunar.
Ayrıntılı bir kılavuz için tarayıcınızda WordPress Playground’u nasıl kullanacağınıza ilişkin kılavuzumuza göz atın.
Windows Bilgisayarıma WordPress Yükledim, Şimdi Ne Olacak?
Artık bilgisayarınızda WordPress olduğuna göre, işte yapabileceğiniz bazı şeyler:
- Sitenizi daha iyi kullanmak için temel WordPress ipuçlarını ve püf nokt alarını öğrenin.
- Sitenizin nasıl görünebileceğini görmek içinfarklı WordPress temalarını deneyin.
- Sitenize yeni özellikler eklemek için olmazsa olmaz WordPress eklentilerini yükleyin ve test edin.
- Yaygın WordPress hatalarını kendi başınıza nasıl düzelteceğinizi öğrenin.
- Sitenizin güzel görünmesini sağlamak için farklı sürükle ve bırak sayfa oluşturucuları deneyin.
- Sitenize erişimi kurtarmak için localhost’ta WordPress yönetici şifresini nasıl sıfırlayacağınızı öğrenin.
- Sitenizi yönetmeyi kolaylaştırmak içinotomatik iş akışları kur un.
- Sitenizi bilgisayar korsanlarına karşı güvende tutmak için WordPress güvenliği hakkında bilgi edinin.
- Yerel WordPress sitenizi herkesle paylaşmaya hazır olduğunuzdacanlı bir sunucuya taşıyın.
Umarız bu makale WordPress’i yerel olarak bir Windows bilgisayara nasıl yükleyeceğinizi öğrenmenize yardımcı olmuştur. WordPress ‘i Mac bilgisayara yerel olarak yükleme hakkındaki makalemizi ve WordPress hazırlık sitesi oluşturma hakkındaki nihai kılavuzumuzu da görmek isteyebilirsiniz.
If you liked this article, then please subscribe to our YouTube Channel for WordPress video tutorials. You can also find us on Twitter and Facebook.


Mituka
Awesome Stuff. Worked like a charm.
WPBeginner Support
Glad our guide could help
Admin
Noreen Naz
Great.. but i want to make another data base what should i do?? should i register again?? reply as soon as possible please
WPBeginner Support
For making another database for your local install, rather than visiting localhost/yoursite you would go to localhost which should have a link in the bottom left to get you to phpMyadmin
Admin
Asadullah
Great Tutorials:
My eyes have been opened.
That was all,which I was looking for.
Best….
WPBeginner Support
Glad our article could help
Admin
pawan
nice article
WPBeginner Support
Glad you like our article
Admin
Jan
Great tutorial. Worked straightaway – thanks!
Steve
Hey guys.
Thought you should know that your tutorials are being used by a scammer on YouTube to gain affiliate commissions from Bluehost.
Did you upload this video onto this channel? –
WPBeginner Support
Hi Steve,
No, we did not. They just downloaded and reuploaded it on their channel. Thank you for notifying us.
Admin
Bharat Suneja
Why not use IIS instead of Apache? It’s a native web server on Windows and offers much better functionality and manageability, particularly for Windows users/admins who’s used to managing Windows via the GUI tools, commands and/or PowerShell.
WPBeginner Support
Hi Bharat,
Most users would move their websites to a live server, or create a development environment for a site. Most likely those hosting providers will be running Apache.
Admin
Bob
How much load does running this take on my machine? Could I put on a spare machine on my local network and access it via my LAN?
WPBeginner Support
Hi Bob,
Depends on how fast your machine is. Yes, you can do that but that would require some extra steps to configure your network and server.
Admin
Noz
WaMp is bulky, full of problems and never know when it will break and you lose your databases… never use it.
Sharon Y
This site can’t be reached localhost refused to connect.
Search Google for localhost mysite
ERR_CONNECTION_REFUSED
Please help!
WPBeginner Support
Hi Sharon,
This means that WAMP is not running Apache. You need to restart it and then retry.
Admin
Sharon Y
I can’t login to localhost/mysite/
Forbidden
You don’t have permission to access /mysite/ on this server.
Apache/2.4.35 (Win64) PHP/7.2.10 Server at localhost Port 80
Please help!
SULAIMAN OLUWO
while installing i received warning message which was not part of the expected actions stated in the WAMP instruction steps above,. It went thus: do you want this programme (WAMP) to make changes to your pc….
Julio
Hi
I followed every step the tutorial said, but when i enter the db info before installing wordpress, i get an “error estabilishing connection to the database”.
WAMP is running ok, apache green, MySQL green, i created the database by accessing PhpMyAdmin, all the info is exactly like written in the tutorial… i searched all over the web and found absolutely nothing related to this error.
Can someone help me out?
WPBeginner Support
Hi Julio,
The only reason you will get this error is when WordPress is unable to connect to your database. You need to check your database settings to make sure they are correct.
Admin
Tracy
I’m trying to upload a theme but when I click to upload the zip file from my computer I get a message saying “the link you followed has expired” please try again.
WPBeginner Support
Hi Tracy,
Most likely, your theme file size is too big and it gets killed during the upload. Please try the steps in our tutorial on increasing file upload size limit in WordPress.
Admin
Hazel Andrews
I’m getting that error as well… brill thanks for the link to follow!
Tanja
Hi, how to start my word press today. I installed it yesterday, using your instruction, but today I cannot find any icon or anything that will help me to start with it
WPBeginner Support
Hi Tanja,
You will first need to start WAMP and after that you will be able to open your site in the browser.
Admin
Henry
Awesome. This worked perfectly. Thanks for sharing
Mike
I want to install WordPress on my W7 computer for experimental purposes.
But I want to use WordPress 4.9.1, instead of the latest version.
This is because I have an excellent tutorial that’s based on 4.9.1.
Is this possible?
WPBeginner Support
Hi Mike,
Yes it is possible. You can download the older versions of WordPress from official website and install it following the instructions above.
Admin
Nina
Every time I try to open up Wamp, it keeps giving me this message: “Error: This program can only be installed on versions of Windows designed for the following processor architectures: x64”
My computer is a Windows 7 32-bit operating system and I’ve downloaded both the 62-bit and 32-bit wamp version yet it gives me the same message. It’s so frustrating because I’ve installed Wamp on my computer last year, then uninstalled it this year. Now, I’m trying to install it again and it gives me the same message over and over again. Does anyone know how to fix this? It’s literally driving me nuts. I’ve got a link below of the message if you want to see it:
Aasim Unia
Thank you for sharing ! it worked in first try.
Jim Zapapas
Installed successfully 1st try.
Thank you!
Jordens Cadet
Thanks so much, much better than silent videos on youtube.
Jazz
Thanks a ton for sharing your knowledge with all of us here!
WordPress is installed successfully for me
But, now my skype has stopped…it says MSVCP140.dll missing. How can I fix this without causing any trouble to WordPress and Wamp functioning?
Aniket Thanage
Perfect tutorial…thanks a lot
Lucky
Thanks for this. but do i need to install wordpress again each time I put on my laptop to edit my site or create a new site? pls reply asap. thanks
henry paul
The WampServer site has two versions of the software – 32 BITS or 64 BITS. Click on the version you prefer to download.
Click on “download directly,” and you’ll be taken to the website. The download will automatically start in 5 seconds.
Tristan
Got it working without a hitch! Thank you so much for this. But I have another question:
As a web developer I will be creating multipule websites. If I use local WP to create 1 site, do I have to create a separate DP for each new website? And if I eventually wish to attatch it to a domain/host, is there another tutorial that I can follow that will teach me to do just that? Thank you!!
Chandan
i changed wordpress name to mysite but it shows below error
Further, I tried pasting http;//localhost/wamp64 in my browser, it gives the error 404. Also, I want to build my website locally before I go live. Please assist me.
Chandan
Further, I tried pasting http;//localhost/wamp/mysite but shows error. in my browser, it gives the error 404 with below mentioned
The requested URL /mysite/ was not found on this server.
Apache/2.4.23 (Win32) PHP/5.6.25 Server at localhost Port 80
Rudy
Wow! without any problems Wamp on my pc and after that my website local!
Thank you very much for your time and effort to write this tutorial!
Alhaji ZiC
your guideline perfectly worked for me while installing wampserver and wordpress though it was not easy but i combined persistence and trial and error till i see the end.
A million pounds applause there.
but, please, i have no knowledge on web designing, so, what step can i take to design a good looking and professional website?
kind regard
sahil
Not able to download wampserver from the link.
It says file has been removed.
Please provide the new link.
WPBeginner Support
Hi Sahil,
The link is working. May be it was a temporary error. Please try again.
Admin
kym
Hi, If i want say try out with a Thrive theme and their page builder would it be possible with WAMP?
WPBeginner Support
Hi kym,
Yes you can try it on your local server using WAMP.
Admin
Lyson
Im getting password is wrong.
I need your help guys.
Steve Baer
Thanks for this guide, it was smooth sailing…..everything installed perfectly.
Elliot McClintock
Thank for the tutorial. Everything went smooth in the first attempt.
I have a secondary question: If I want to create a second test website (e.g. mysite2), can I do it within same WAMP64\www folder or would I have to repeat the whole process from start on a separate root folder?
Thanks again.
Muhammad Bilal
there are two methods one is you can use single wordpress for your second website and the second is repeate the same process but the wordpress folder name should be different and database also…
Vegard Svingen
Hoping this will be my breakthrough
Gimel
Thanks a lot for this tutorial, it was extremely helpful. I do however have on issue that is causing me a lot of frustration right now. My wordpress installation is moving extremely slow. it takes about 8 – 10 seconds to perform any action in wordpress. I tried everything i found online, I disabled the cgi_module, I changed localhost to 127.0.0.1 in the wp-config file. I also tried anther solution I found online concerning adding additional code to the wp-config file, nothing works. it’s taking me forever to get anything done. I would deeply appreciate any help I can get on this matter.
Aditya Choudhary
Thank you for this tutorial, this is very helpful for me. Thank you.
Samuel
Thanks for this tutorial, the installation process went smoothly but after installation i tried installing some themes and i activate the themes but they wont take effect please does any body know what i can do about this?
Aika
Hi!, Wondering what to do with this error.
The program can’t start becauseMSVCR110.dll is missing from your computer. Try reinstalling the program to fix this problem.
been reinstalling several times. Thanks in advance!
Robert Wheeler
You need to
1) Uninstall WAMP
2) Install a number of Microsoft C++ Redistributables – do a Google search for this. This will install a number of .DLL files which are needed for WAMP to run.
3) Reinstall WAMP.
I’m not sure why this information is not included with the instructions on how to install WAMP, it is a regular error.
Margie
FANTASTIC! Went off without a hitch! Had trouble with XAMPP install, so decided to try WAMP instead, and your instructions had me up and running in no time…thanks sooo much!
Eddie
Hi,
I pasted the wordpress folder into the C:\wamp64\www folder
and renamed the wordpress folder to mysite. I opened the web browser and typed the url on my browser, http://localhost/mysite/.
The browser shows a blank page so I can’t start the wordpress install. I have changed the local host to 8080 via the Wamp tool menu. I can’t seem to go further, can someone advise me. Thanks
Trevor
If you changed the WAMP (apache) port, you’ll have to include the port number in the URL. ex: localhost:8080/mysite/
Eddie
Hi Trevor,
Thanks it worked.
Regards
Eddie
Eddie
Hi Trevor, Thanks it worked.
Regards
Eddie
Gaz Davies
Can I ask why you would change the port on a local host?
thanks
M.
my local wordpress is settings are for http, while my current online version is set at https. if i use duplicator, will i end up having http and have to force http to https redirect?
Sunday Adeniran
WAMP could not fully function on my 2010 hp laptop. It complained of missing file MSVCR120.dll. Only one service in running. Can somebody help me?
Sunday Adeniran
I was able to solve this problem by installing a lower version of WAMP server (2.5). It then worked well. Many thanks.
Victor Escobar
Great tutorial, but when I installed WamServer 3.1.0, I get a slightly different tools menu, without phpMyAdmin being listed. The following is what’s on the Tools menu, under the Tools section:
– Restart DNS
– Check httpd.conf syntax
– Check state of services
– Check DNS search order
– Check Compiler VC, compatibility and ini files
– Show VirtualHost examined by Apache
– Show Apache loaded modules
– Delete unused versions
The other sections have to do with assigning port numbers and purging logs.
Jeremiah
To access phpMyAdmin, left-click on the WampServer icon in windows taskbar, and you will find it on the list that will appear, but if you right-click on the icon instead, you will get the list you mentioned earlier.
Sheraz Ali
One of the best guide. it works smoothly.
justine
Many thanks – Very easy to follow and worked like a dream
Sunday
Finally, guys. I got it done. Simple but stylish. Many thanks to our friends in WPbeginner.
joran
sir there was an error ..MSVR.dll what is the solution of this error sir? tnx
Sunday Adeniran
It was the same error I got. So what is the solution?
Nanya
whoa! It was a success. Well detailed. I love this, I had no problem at all, it’s very comprehensive. Thanks a lot.