Yıllarca WordPress web siteleri oluşturduktan sonra, bilgisayarınızda yerel bir WordPress kurulumuna sahip olmanın ne kadar önemli olduğunu öğrendik.
Kişisel makinenizde WordPress'in olması, canlı sitenizi riske atmadan yeni özelliklerle denemeler yapmanıza, WordPress geliştirme derinliklerine dalmanıza ve hatta canlıya geçmeden önce tüm web sitelerini oluşturmanıza olanak tanır. Tüm WordPress projeleriniz için özel bir sanal alanınız olması gibidir.
Windows kullanıcısıysanız, WordPress'i yerel olarak kurmanın birçok yolu vardır. Ancak biz bunu en kolay iki yönteme indirdik. Bu kılavuzda, hangi sürümü kullanıyor olursanız olun, bir Windows bilgisayara WordPress'i nasıl kolayca kuracağınızı göstereceğiz.
Neden WordPress'i Windows'a Kurmalısınız?
Eğer bir Windows kullanıcısıysanız, WordPress'i bilgisayarınıza yerel olarak kurmak çeşitli avantajlar sunar.
Yerel bir WordPress kurulumu, canlı web sitenizi etkilemeyen bir test ortamı oluşturur. Genellikle yerel sunucu veya localhost olarak adlandırılan bu kurulum, WordPress için kişisel oyun alanınızdır.
WordPress geliştiricileri işleri için düzenli olarak yerel kurulumlar kullanırlar. Örneğin, yeni eklentileri veya temaları denemek için veya Gutenberg blok düzenleyicisine güncellemeden önce siteyi test etmek için kullanabilirler.
Ancak bu sadece profesyoneller için değil. WordPress'e yeni başlıyorsanız, yerel bir kurulum öğrenmek için mükemmeldir. Canlı bir siteyi bozma endişesi olmadan özellikleri keşfedebilir, temaları ve eklentileri test edebilir ve özgürce deneyler yapabilirsiniz.
WordPress'i yerel olarak Windows'a kurduğunuzda, siteyi yalnızca sizin görebileceğinizi unutmamak önemlidir. Herkese açık bir web sitesi oluşturmak istiyorsanız, bir alan adına ve web barındırmaya ihtiyacınız olacaktır.
Şimdi, teknik olarak XAMPP kullanarak Windows'a WordPress kurabilirsiniz ve bununla ilgili daha önce bir öğretici hazırlamıştık.
Bununla birlikte, yerel bir WordPress ortamı kurmak için XAMPP'ten bile daha basit 2 yol bulduk, bu da onları yeni başlayanlar veya hızlı bir yerel site oluşturması gereken kullanıcılar için harika kılıyor. İlgilendiğiniz herhangi bir yönteme atlamak için aşağıdaki bağlantıya tıklayabilirsiniz:
- Yöntem 1: Studio Kullanarak Windows'a WordPress Kurma (Hızlı ve Basit)
- Yöntem 2: Windows'a Yerel WP Kullanarak WordPress Kurma (Daha Özelleştirilebilir)
- Alternative: Use WordPress Playground to Test Themes, Plugins, and More
Yöntem 1: Studio Kullanarak Windows'a WordPress Kurma (Hızlı ve Basit)
İlk yöntem için Studio'yu kullanacağız. Bu, WordPress.com'u yöneten ve çalıştıran şirket olan Automattic tarafından yapılan yerel bir WordPress yazılımıdır. WordPress yazılımına dayalı bir web sitesi oluşturucudur.
Bu yönteme önce değineceğiz çünkü takip etmesi çok daha hızlı ve basittir, bu da onu tamamen yeni başlayanlar için mükemmel kılar.
Öncelikle, WordPress.com Studio web sitesini açmanız gerekir. Ardından, ‘Windows için İndir’ düğmesine tıklayın.
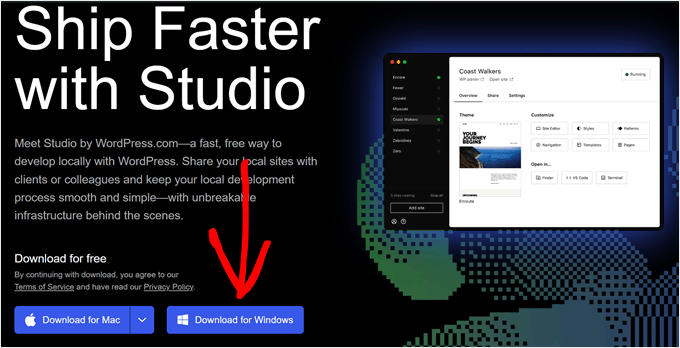
Bunu yaptıktan sonra, kurulumu başlatmak için indirilen dosyayı açmanız yeterlidir.
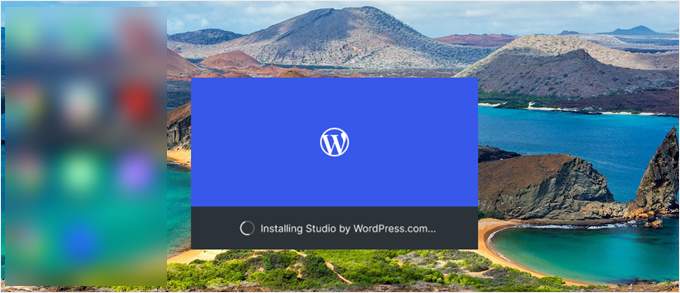
Uygulamanın kurulmakta olduğunu gösteren bir açılır pencere şimdi görünecektir.
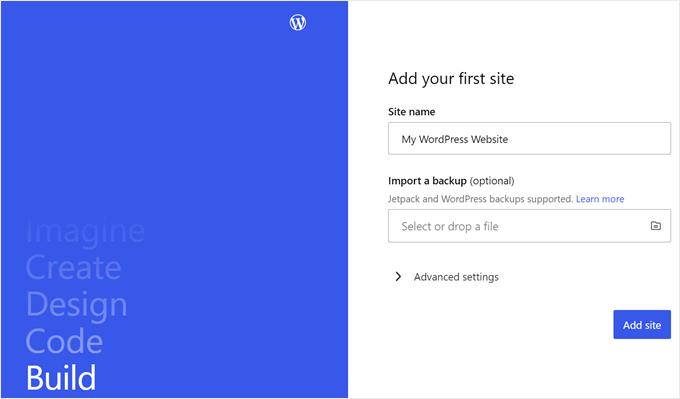
Bu yapıldıktan sonra ilk sitenizi ekleyebilirsiniz.
Bunu yapmak için yeni yerel WordPress site adınızı girin ve ‘Site ekle’ye tıklayın. Siteyi kolayca tanımlamanıza yardımcı olduğu sürece siteyi istediğiniz gibi adlandırabilirsiniz.
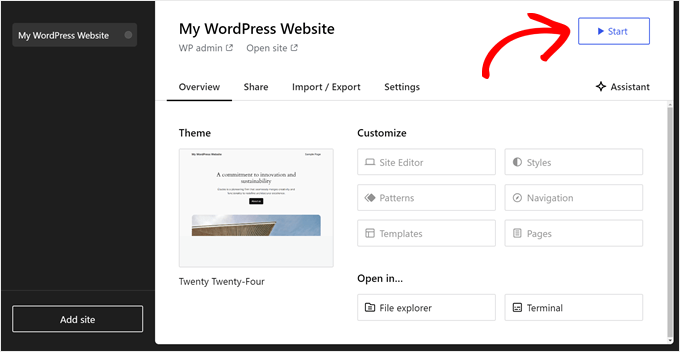
Artık yerel WordPress site kontrol panelinizi görmelisiniz.
WordPress kontrol panelinize erişmek ve web sitenizi düzenlemek için sağ üst köşedeki ‘Başlat’ düğmesine tıklamanız yeterlidir. Bu, yerel web sitenizi bilgisayarınızda erişilebilir hale getirecektir.
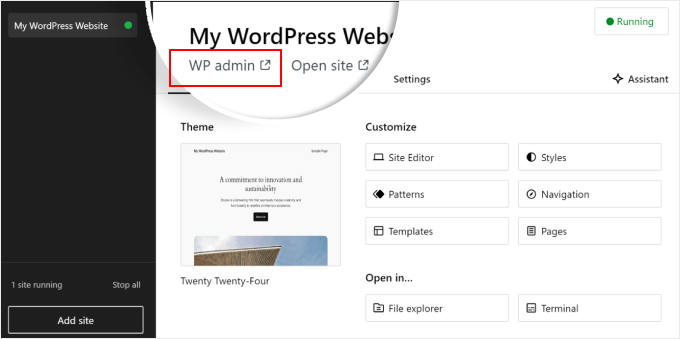
'Başlat' düğmesi 'Çalışıyor' olarak değiştiğinde, sayfanın sol üst tarafındaki 'WP Admin' bağlantısına tıklayabilirsiniz.
Bu sizi yerel WordPress yönetici sayfanıza getirecektir.
Ve kurulum için hepsi bu kadar. Yerel web sitenizi oluştururken gerekli olabilecek diğer ayarları inceleyelim.
‘Genel Bakış’ sekmesinde görebileceğiniz gibi, Stüdyo kontrol panelinden doğrudan WordPress tam site düzenleyici menüsüne erişebilirsiniz. Ayrıca WordPress web sitenizin klasörlerini ve dosyalarını açmak için ‘Dosya gezgini’ne ve WP-CLI kullanarak web sitenizi yönetmek için ‘Terminal’e tıklayabilirsiniz.
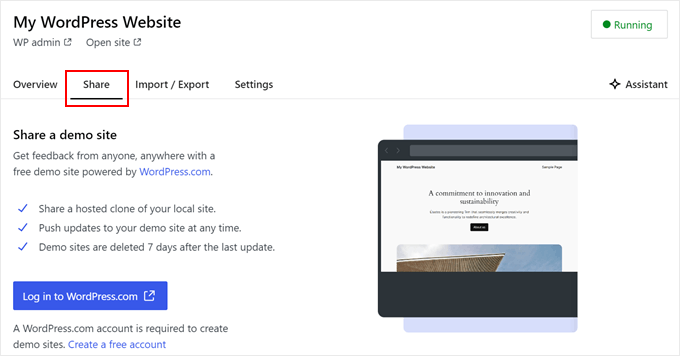
‘Paylaş’ sekmesine geçerseniz, WordPress.com hesabınıza giriş yapabilir, yerel web sitenizi kopyalayabilir ve WordPress.com sunucularına yükleyebilirsiniz. Bu, kopyalanan siteyi geçici olarak çevrimiçi hale getirecektir, bu da demo sitelerini müşterilerinizle veya ekip üyelerinizle paylaşmak için kullanışlıdır.
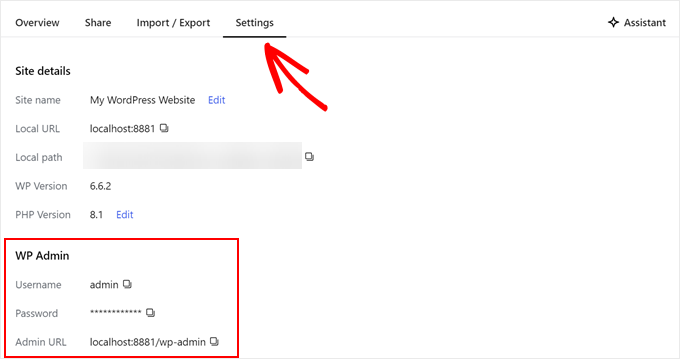
Bazen, Studio'yu kullanmak yerine yerel web sitenize doğrudan tarayıcınız aracılığıyla giriş yapmak isteyebilirsiniz. Bu durumda, wp-admin kimlik bilgilerinizi bilmeniz gerekir.
Bunları bulmak için 'Ayarlar' sekmesine geçebilir ve WordPress yönetici kullanıcı adınızı, şifrenizi ve giriş URL'nizi orada bulabilirsiniz.
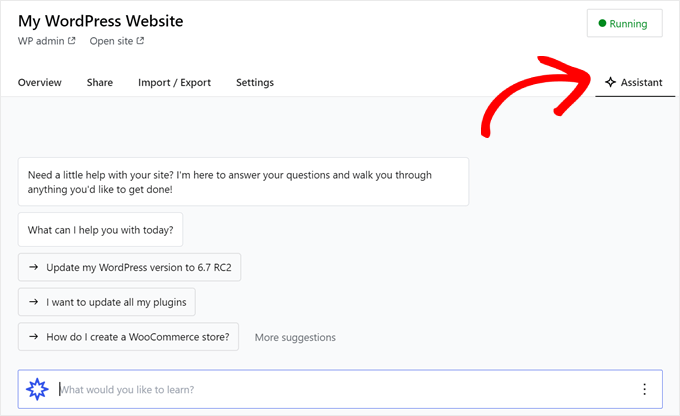
Studio'nun bir diğer harika özelliği, ‘Asistan’ düğmesine tıklayarak iletişim kurabileceğiniz yerleşik yapay zeka sohbet robotudur.
Burada, Studio'dan tüm eklentilerinizi aynı anda güncellemek, çekirdek WordPress sürümünüzü güncellemek veya özel bir blok için kod oluşturmak gibi görevlerde yardım isteyebilirsiniz.
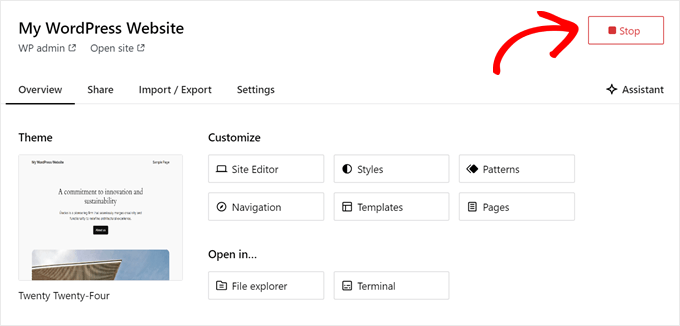
Yerel siteniz üzerinde çalışmayı bitirdiğinizde, üst sağ köşedeki ‘Çalışıyor’ düğmesinin üzerine gelerek ‘Durdur’ olana kadar bekleyin.
Ardından, web sitesini durdurmak için düğmeye tıklayın.
Studio'nun bir dezavantajı, WordPress ortamını istediğiniz gibi yapılandıramamanızdır. Bu, sizin için önceden seçilmiş PHP sürümünü, web sunucusunu ve veritabanını kullanmanız gerektiği anlamına gelir.
Belirli sunucu yapılandırmalarıyla web sitenizi veya eklentinizi test etmeniz gerektiğinde bu bir dezavantaj olabilir.
Yerel WordPress ortamınız üzerinde daha fazla kontrol gerektiriyorsa veya yerel kurulumunuzu belirli bir canlı sunucu yapılandırmasıyla eşleştirmeniz gerekiyorsa, Local WP kullanarak bir sonraki yöntemi inceleyebilirsiniz.
Yöntem 2: Windows'a Yerel WP Kullanarak WordPress Kurma (Daha Özelleştirilebilir)
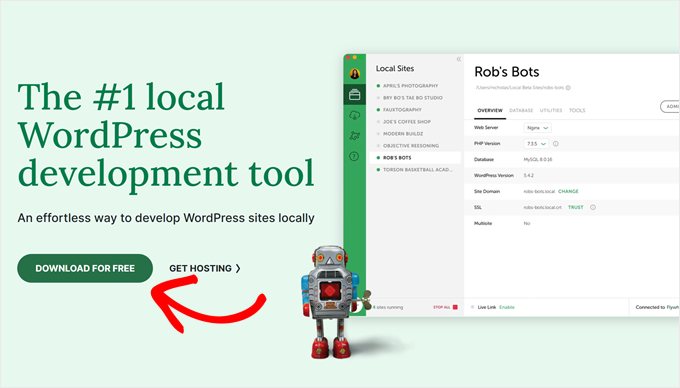
Öncelikle, Local WP yazılımını Windows bilgisayarınıza indirip kurmanız gerekir. Sadece Local WP web sitesine gidin ve 'Ücretsiz İndir' düğmesine tıklayın.
Bundan sonra, platformunuzu seçmeniz gereken bir açılır pencere görünecektir. Açılır menüden 'Windows' seçeneğini seçin.
Ardından, yazılımı indirmek için adınız ve soyadınız, iş e-posta adresiniz ve telefon numaranız gibi bilgilerinizi girebilirsiniz.
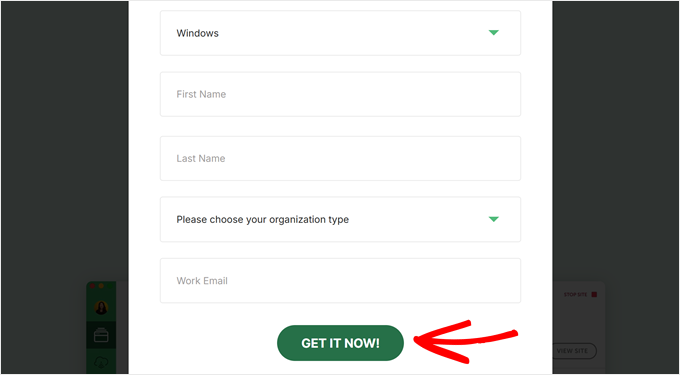
Ayrıntıları girdikten sonra, 'Şimdi Al' düğmesine tıklamanız yeterlidir.
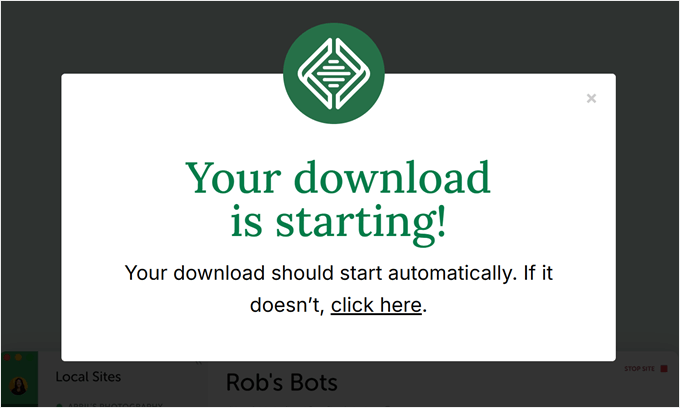
Bundan sonra, yazılım bilgisayarınıza otomatik olarak indirilecektir. Aksi takdirde, indirmeyi başlatmak için 'buraya tıklayın' bağlantısına tıklayabilirsiniz.
Dosya indirildikten sonra kurulum sihirbazını başlatın.
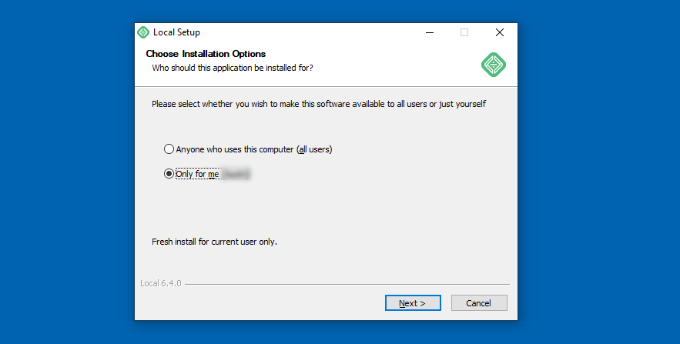
Şimdi, yazılımı tüm kullanıcılar için mi yoksa yalnızca sizin için mi yüklemek istediğinizi seçmeniz gerekecek.
Bir seçenek belirledikten sonra ‘İleri’ düğmesine tıklayın.
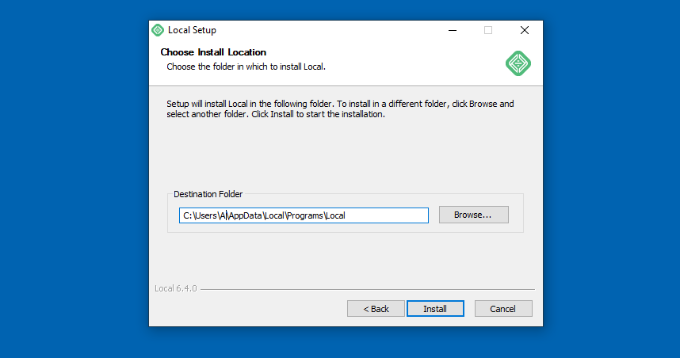
Bir sonraki adımda, yazılımın kurulacağı ‘Hedef Klasör’ü seçebilirsiniz.
Yolu ayarlamak için 'Gözat' düğmesine ve ardından 'Kur' düğmesine tıklayın.
Yerel WP yazılımı şimdi Windows bilgisayarınıza yüklenecektir.
Tamamlandığında, ‘Yerel Çalıştır’ onay kutusunu işaretleyebilir ve kurulum sihirbazındaki ‘Bitir’ düğmesine tıklayabilirsiniz.
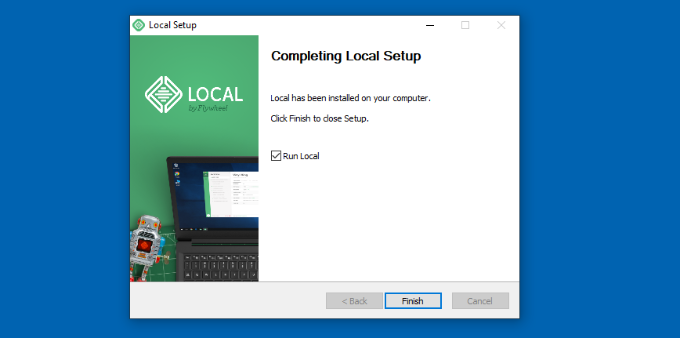
Yazılım şimdi Windows cihazınızda başlatılacaktır.
Bir sonraki adım yeni bir yerel web sitesi eklemektir. Bunu yapmak için alttaki artı '+' düğmesine tıklamanız yeterlidir.
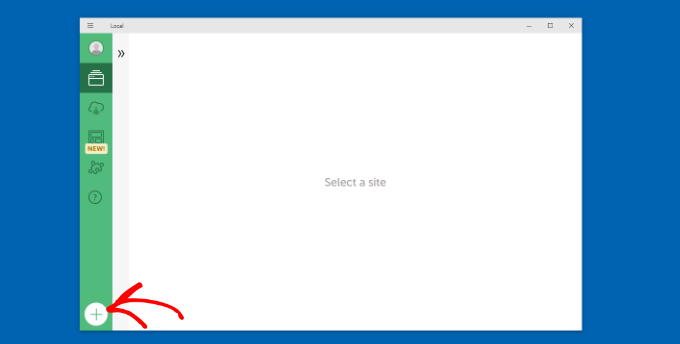
Bundan sonra, Local yazılımında bir site oluşturabilirsiniz.
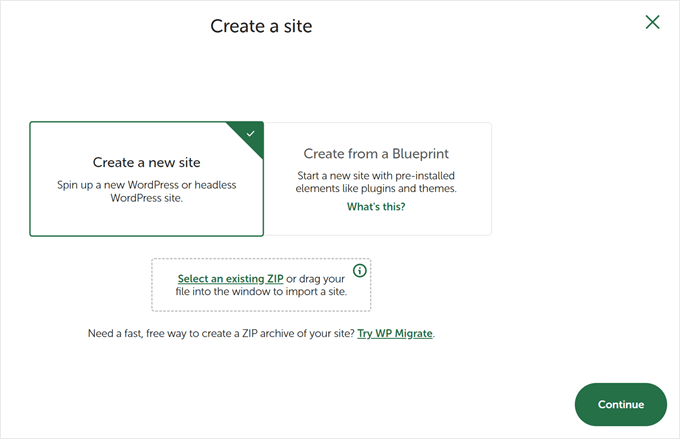
'Yeni bir site oluştur' seçeneğini seçin ve 'Devam et' düğmesine tıklayın. Bir şablondan veya mevcut bir web sitesi dosyasından site oluşturma seçenekleri de vardır, ancak gösterim amacıyla ilk seçeneği kullanacağız.
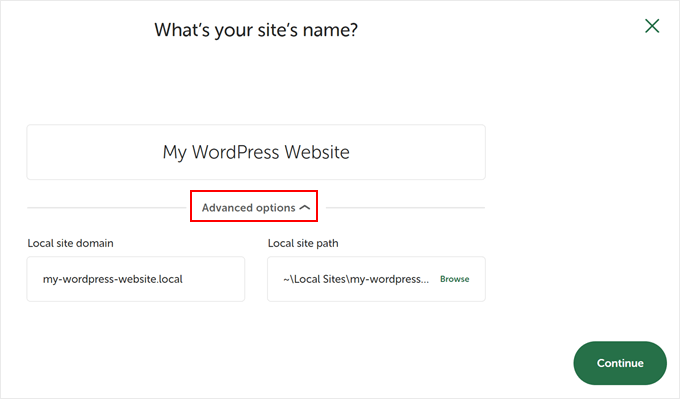
Ardından, yerel web siteniz için 'WordPress Web Sitem' gibi bir ad girebilirsiniz.
Yerel site alan adını ve yerel site yolunu girebileceğiniz gelişmiş seçenekler de mevcuttur. Varsayılan olarak, alan adı web sitesi başlığınızı kullanacaktır ancak tirelerle ayrılacaktır.
İşiniz bittiğinde, ‘Devam et’ düğmesine tıklamanız yeterlidir.
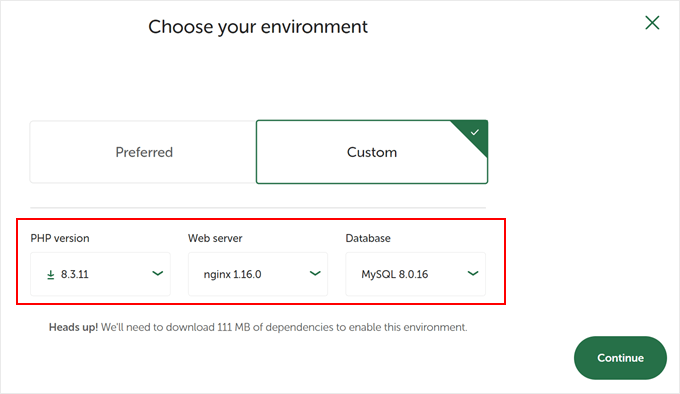
Bundan sonra, yerel web siteniz için bir ortam seçmeniz gerekecektir.
Yazılımın PHP sürümünü, web sunucusunu ve MySQL sürümünü otomatik olarak seçeceği 'Tercih Edilen' ortamı kullanabilirsiniz. Öte yandan, 'Özel'i seçip ortam ayrıntılarını da girebilirsiniz.
Local WP en son PHP sürümlerini sunar. Web sunucusu olarak Nginx veya Apache arasında seçim yapabilirsiniz. Veritabanları için MySQL veya MariaDB arasında da seçim yapabilirsiniz.
Bazı PHP, web sunucusu ve veritabanı sürümlerinin düzgün çalışması için bazı bağımlılıkları indirmeniz gerektiğini unutmayın.
Ardından, yerel web siteniz için bir WordPress kullanıcı adı ve şifresi girebilirsiniz. Ayrıca, tüm e-posta bildirimlerini alacağınız bir WordPress e-posta adresi seçme seçeneği de bulunmaktadır.
Bunun dışında, yazılımın bir WordPress çoklu site ağınız olup olmadığını soracağı gelişmiş bir seçenek bulunmaktadır. Yoksa, sadece ‘Hayır’a tıklayın.
Bu ayrıntıları girdikten sonra, ‘Site Ekle’ düğmesine tıklamanız yeterlidir.
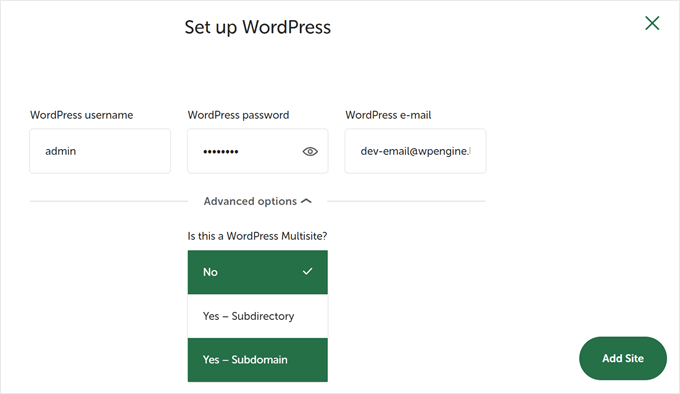
Yazılım şimdi WordPress'i kuracak ve web sitenizi ayarlayacaktır.
Yerel web sitesini başlatmak için sağ üst köşedeki 'Siteyi başlat' düğmesine tıklayın.
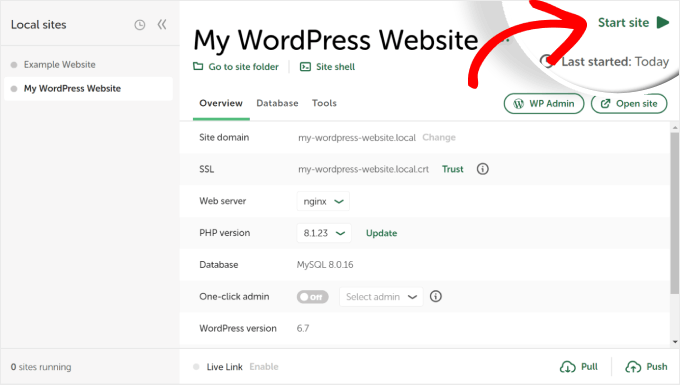
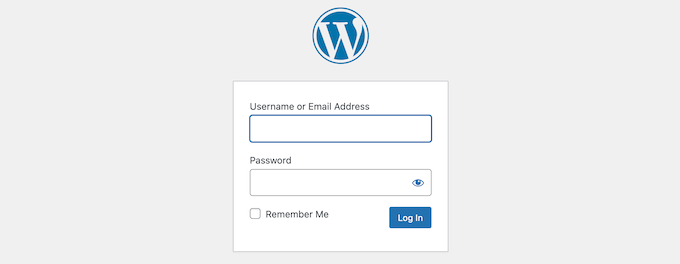
Ardından, ‘WP Admin’ düğmesine tıklayın ve WordPress yönetici giriş sayfasını göreceksiniz.
Yerel web sitesini kurarken daha önce girdiğiniz kullanıcı adını ve şifreyi girmeniz ve ardından ‘Giriş Yap’ düğmesine tıklamanız yeterlidir.
Artık yerel web sitenizi Windows bilgisayarınızda düzenleyebilirsiniz.
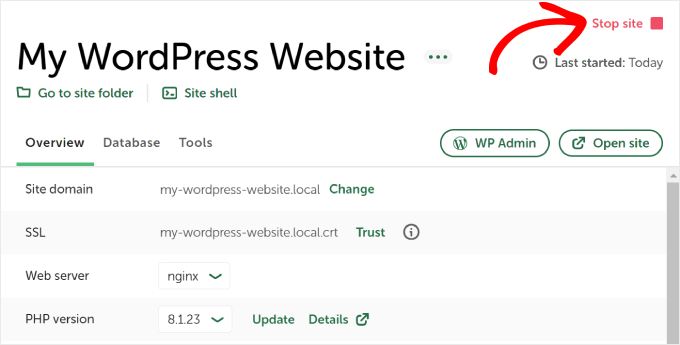
İşiniz bittiğinde, ‘Siteyi durdur’ düğmesine tıklayarak Local WP yazılımından web sitesini durdurmayı unutmayın.
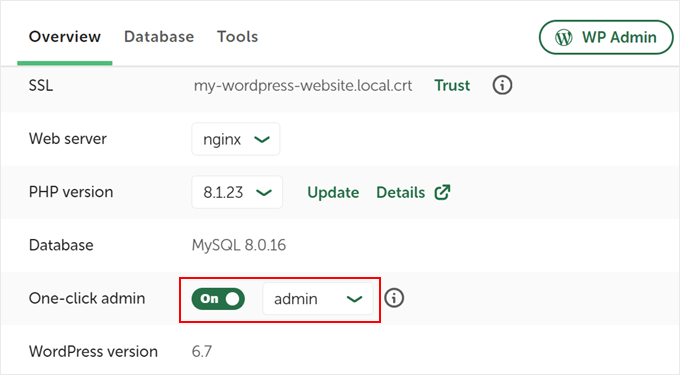
İpucu: Oturum açma işlemini atlamak istiyorsanız, Local WP'de tek tıklamayla yönetici oturumu açmayı etkinleştirebilirsiniz.
Bunu yapmak için Yerel WP kontrol paneline geri dönün ve ‘Tek tıklamayla yönetici’ düğmesini ‘Açık’ olana kadar değiştirin. Ardından, açılır menüden, bu tek tıklamayla giriş özelliğini kullanabilen yönetici kullanıcısını seçin.
Alternatif: Temaları, Eklentileri ve Daha Fazlasını Test Etmek İçin WordPress Playground'u Kullanın
WordPress Playground, WordPress ile doğrudan web tarayıcınızda denemeler yapmanızı sağlayan yenilikçi bir araçtır. Gerçek bir web sitesini etkilemeden yeni WordPress temalarını, eklentilerini ve özelliklerini deneyebileceğiniz sanal bir kum havuzudur.
WordPress Playground, yerel bir WordPress ortamından birkaç önemli şekilde farklıdır.
İlk olarak, bilgisayarınıza kurulum gerektirmez ve kalıcı yerel kurulumların aksine her kullanımdan sonra sıfırlanır. Yerel kurulumlar tek bir bilgisayara bağlıyken, tarayıcısı olan herhangi bir cihazdan erişebilirsiniz.
WordPress Playground hızlı testler ve öğrenme için ideal olsa da, Windows bilgisayarınızdaki yerel bir WordPress ortamı, uzun vadeli geliştirme projeleri için daha fazla esneklik sunar.
Ayrıntılı bir anlatım için tarayıcınızda WordPress'i nasıl kullanacağınıza dair WordPress Playground'u tarayıcınızda kullanma kılavuzumuza göz atın.
Windows Bilgisayarıma WordPress Kurdum, Şimdi Ne Yapmalıyım?
Artık bilgisayarınızda WordPress olduğuna göre, yapabileceğiniz bazı şeyler şunlardır:
- Sitenizi daha iyi kullanmak için temel WordPress ipuçlarını ve püf noktalarını öğrenin.
- Sitenizin nasıl görünebileceğini görmek için farklı WordPress temalarını deneyin.
- Sitenize yeni özellikler eklemek için olmazsa olmaz WordPress eklentilerini yükleyin ve test edin.
- yaygın WordPress hatalarını kendi başınıza nasıl düzelteceğinizi öğrenin.
- Sitenizin güzel görünmesini sağlamak için farklı sürükle ve bırak sayfa oluşturucularını deneyin.
- Yerel bilgisayarınızda WordPress yönetici parolasını yerel bilgisayarda nasıl sıfırlayacağınızı öğrenerek sitenize erişiminizi geri kazanın.
- Otomatik iş akışları ayarlayın sitenizi yönetmeyi kolaylaştırmak için.
- Hacker'lardan sitenizi güvende tutmak için WordPress güvenliği hakkında bilgi edinin.
- Hazır olduğunuzda yerel WordPress sitenizi canlı bir sunucuya taşıyın.
Bu makalenin, Windows bilgisayarda WordPress'i yerel olarak nasıl kuracağınızı öğrenmenize yardımcı olduğunu umuyoruz. Ayrıca Mac bilgisayarda WordPress'i yerel olarak nasıl kuracağınıza dair makalemizi ve WordPress staging sitesi oluşturmaya yönelik nihai rehberimizi de görmek isteyebilirsiniz.
Bu makaleyi beğendiyseniz, lütfen WordPress video eğitimleri için YouTube Kanalımıza abone olun. Bizi ayrıca Twitter ve Facebook'ta da bulabilirsiniz.


mike
wamp Apache/2.4.9 (Win32) PHP/5.5.12 yüklü, wordpress indirildi, wp-config yapılandırıldı hiçbir şey, kesinlikle hiçbir şey olmuyor.
Herhangi bir düşünceniz var mı?
Villi
Hey. So everything worked great and i have been playing around practicing. Now i am going to make another website but keep the practice website also, but i need them to be completely independent from each other since i dont want my “messing around” to affect the new one Should i install wordpress again and follow the same instructions (extract the wordpress folder to C:\wamp\www etc.) and make another database ?
Kısacası, tabii ki wamp'ı tekrar indirmem gerekmeyeceği dışında, süreci eskisiyle tamamen aynı şekilde mi takip etmeliyim.
Teşekkürler
WPBeginner Desteği
Evet, aynı talimatları izlemeniz gerekiyor.
Yönetici
Wayne
Harika bir makale. Her şeyi çalışır duruma getirmeyi başardım. Ancak satın aldığım bir Temayı yüklemeye çalıştığımda takıldım. WordPress kullanan kişisel bir canlı sitem var. Ancak iş yerim için çevrimdışı bir tane oluşturmak istiyordum, bu yüzden phpAdmin kullanıyorum. Satın alınan temalar üzerinde localhost'ta nasıl çalışabileceğim konusunda herhangi bir fikriniz var mı lütfen?
WPBeginner Desteği
Satın alınmış bir temayı yüklemek, yerel barındırma (localhost) sitesinde canlı siteden farklı değildir. Yerel barındırma sitenizde Görünüm > Temalar'a gidin. Yeni Ekle düğmesine ve ardından Yükle düğmesine tıklayın. Bilgisayarınızdaki Tema Zip dosyasını bulmak için dosya seç düğmesine tıklayın ve ardından yükleyin.
Yönetici
Manoj
Merhaba
Buradaki rehbere göre her şeyi kurmuştum ve sitem iyi çalışıyordu. Ancak bugün localhost'a giriş yapmaya çalıştım ve bir hata verdi. Bu web sayfası kullanılamıyor diyor. ERR_CONNECTION_REFUSED
Lütfen yardım edin
naveenraj
Merhaba beyefendi,
Simge turuncu renkte görünüyor ve localhost/phpmyadmin/ sayfasına gittiğimde boş sayfalar alıyorum. Lütfen bunu çözmeme yardım edin.
WPBeginner Desteği
Lütfen WAMP belgelerine ve destek forumlarına bakın.
Yönetici
bella
"C:\wamp\www'a gidin ve wordpress klasörünü oraya yapıştırın."
WordPress klasörümü kabul eden bir yer bulamıyorum. Bunu benim için daha ayrıntılı bir şekilde açıklayabilecek kimse var mı? Paylaşımlarınız için hepinize çok teşekkür ederim
Ayesha
Merhaba,
wordpress.org'a gidip wp'yi kurduğunuzda, bir wordpress zip klasörünüz olacak, içeriğini çıkarın ve bu bir wordpress klasörü oluşturacaktır, bu klasörü açın ve wordpress adlı klasörü kopyalayın. Şimdi wampserver klasörünüze gidin ve ardından wampserver klasörünün içindeki www klasörünü açın, wordpress klasörünü oraya, yani www klasörünün içine yapıştırın.
Sadece wordpress klasörünüzü kopyalayıp wampserver'ın www klasörüne yapıştırmanız yeterlidir.
Umarım yardımcı olur!
Kush Singh
Gerçekten wordpress kurulumu için çok faydalı bir site.
Güzel iş çocuklar devam edin...
Satish Shihani
Harika... Gerçekten beğendim
İlk denememde tüm kurulumu hatasız tamamladım
Bu eğitim için çok teşekkürler
Amir
Smooth and fun, worked like a charm. I had only one problem which was resolved by shutting down a certain Microsoft product…
Thank you.
Paul
Harika bir eğitim, bulduğum için sevindim çünkü wamp ve yerel sunucumu kullanarak wordpress siteleri oluşturmayı yeni öğreniyorum. Ayrıca canlı bir wordpress sitesini yerel sunucuma kopyalamak istiyorum, böylece bir temayı değiştirebilir, sonra onu uzak sunucuya yükleyebilirim ve bunun için bir eğitim olup olmadığını merak ediyordum? Yerel sunucumdan uzak sunucuya bir site yükleme eğitimini buldum ve okudum ama canlı bir siteyi yerel sunucuya kopyalama ve çalışır hale getirme konusunda hiçbir şey bulamadım. Bu mümkün mü ve eğer öyleyse, bunu başarıyla başarmak için bir eğitiminiz var mı? Şimdiden teşekkürler.
Kvaibahv01
Merhaba,
Bu ayın başlarında bir Wordpress blogu oluşturmuştum ve WAMP sunucum bazı nedenlerle kaldırılmıştı…. Yeniden yükledim> aynı adımların hepsini yaptım> ‘wordpress’ klasörünü ‘site’ olarak adlandırdım> localhost/site/wp-admin’i açtım ve şunları söylüyor:
WordPress'e hoş geldiniz. Başlamadan önce, ………………………….devam etmeden önce.
Veritabanı adı
Veritabanı kullanıcı adı
Veritabanı şifresi
Veritabanı ana bilgisayarı
Tablo ön eki (tek bir veritabanında birden fazla WordPress çalıştırmak istiyorsanız)
Devam ediyoruz... Hallettik.
Hepsi... hepsi hazır...
'Hadi başlayalım' düğmesine tıkladım, bu da 'Kurulum yapılandırma dosyası'nı açtı, veritabanı adımı 'site' girdim > 'kullanıcı adı' ve 'şifre'yi düzenledim wp-config-sample.php'de ve kullanıcı adını boş olarak değiştirdim ve şifreyi de aynı şekilde yaptım > sonraki'ye tıkladım ve şimdi bana 'Veritabanı seçilemiyor' hatası gösteriyor:
Biz ………………. veritabanı.
Emin misiniz?
Kullanıcının site veritabanını kullanma izni var mı?
Bazı sistemlerde veritabanınızın adı kullanıcı adınızla ön eklenir, bu nedenle kullanıcıadı_site gibi olur. Sorun bu olabilir mi?
Bir veritabanını nasıl kuracağınızı bilmiyorsanız, barındırma hizmeti aldığınız yere başvurmalısınız. Hiçbir şey işe yaramazsa WordPress Destek Forumlarında yardım bulabilirsiniz.
Lütfen yardım edin!
WPBeginner Desteği
Girilen veritabanı adının doğru olduğunu doğrulamak için localhost/phpmyadmin'i ziyaret edin.
Yönetici
Geraldine
Merhaba. Umarım bu konuda bana yardımcı olabilirsiniz. Test sitesini oluşturduktan sonra, bunu çevrimiçi olarak arkadaşımla nasıl paylaşabilirim?
Rhian Williams
thank you so much for this I have been battling with localhost software all day and this worked first time for me
moneytechnicals
WAMP'ı Windows 7 32 bit'e kurdum. Ve WordPress kullanmak istiyorum. Ancak yapılandırma dosyası oluşturmak için gösterilmiyor. Şöyle bir hata gösteriyor-
Uyarı:
require(C:wampwwwwordpress-trunk/wp-blog-header.php): açılamadı
stream: Böyle bir dosya veya dizin yok
C:wampwwwwordpress-trunkindex.php dosyasında 18. satırda
Lütfen bu durumdan çıkmama yardım edin. Şimdiden teşekkürler.
Campbell Sinclair
Merhaba ve bu hatayı google'da arayan ve benim gibi takılıp kalan herkese,
Muhtemelen zip yükleyicisini indirdiniz ve çıkardınız, belki de çıkarma / klasörün içindeki aktarım yavaş olduğu için bir noktada iptal ettiniz. Ne olduğunu emin değilim, nokta da değil.
Bu hata, tüm dosyalar mevcut olmadığında oluşur. Basit bir arama ile WordPress klasör dizininizde wp-blog-header dosyasını bulmaya çalışın. Dizin (bir tarayıcı bir dizini açtığında ilk yüklenen sayfa) yalnızca bu dosyayı istiyor ancak dizinde bulunmuyor. Index.php, wp-blog-header dosyasını istiyor ve diğer herkes 'aradığın dosya ben değilim' dedi.
Önceki sürümü indirdim ve beklediğim gibi kurulum sayfası olduğu için tamdı. Bu en hızlı ve kesin çözümdür. Bunu yaparsanız, kurduktan sonra en son sürüme de yükseltebilmelisiniz.
WPBeginner Ekibi
Evet, yapabilirsiniz.
ArtaGene
Herhangi bir özellik listelenmediği için eski bilgisayarımda yeterli bellek olup olmadığından emin değilim… taşınabilir bir sürücüye (USB ile bağlanır) kurup bu şekilde kullanabilir miyim?
WPBeginner Ekibi
Görünüşe göre WAMP bilgisayarınıza doğru şekilde yüklenmemiş. Tekrar yüklemeyi veya XAMP'ı denemeyi deneyin.
jerry
Kurulumun tam sonunda bu hatayı alıyorum.
httpd.exe – sistem hatası
Program, bilgisayarınızdan MSVCR110.dll eksik olduğu için başlatılamıyor. Bu sorunu düzeltmek için programı yeniden yüklemeyi deneyin
nikhil
wamp server'ı kurdum ama phpMyAdmin'e gittiğimde şöyle bir hata alıyorum:-
Yasak
Bu sunucuda /phpmyadmin/ adresine erişim izniniz yok.
Roshan Bagdiya
hata
#1045 – Kullanıcı için erişim reddedildi ‘root’@’localhost’ (şifre kullanılarak: HAYIR)
phpmyadmin'e erişirken
bu sorunu nasıl çözebilirim
WPBeginner Ekibi
Lütfen phpMyAdmin'a tıklamadan önce görev çubuğunuzdaki Wamp sunucusu simgesinin Yeşil olduğundan emin olun. Ayrıca tarayıcınızın adres çubuğuna şu URL'yi yazarak phpMyAdmin'a manuel olarak erişmeyi deneyebilirsiniz: http://localhost/phpmyadmin/
Diviya
İşleminizi adım adım takip ettim. Şimdi Wordpress için veritabanı kurmaya çalıştığımda, phpMyadmin'e tıkladığımda 'HTTP Hatası 404. İstenen kaynak bulunamadı' hatası alıyorum.
Syed Balkhi
Tamamlandı – öneri için teşekkürler.
Carrie
Bilginiz olsun, “Skype” hatası, Team Viewer adlı benzer bir programda da yaşanıyor. Benzer basit bir çözüm, programa girip 80 ve 443 numaralı portlarla ilgili onay kutusunu değiştirmek. Diğerlerinin de belirttiği gibi, en azından makalenin hemen ardından sorun giderme bilgilerine bir bağlantı eklemelisiniz. Hata almaya devam ettiğim için sinirlendim ve bir çözüm bulana kadar yorumları incelemeye karar verdim.
Anand Upadhyay
Önerilen düzenleme. Lütfen değiştirin
C:wampwww
ile
C:wampwww
Aditya Pranav
Her şeyi yaptım, ancak phpMyAdmin'e tıkladığımda tarayıcıda bir hata sayfası açılıyor ve bu şöyledir:
HTTP Hatası 404.0 – Bulunamadı
Aradığınız kaynak kaldırılmış, adı değiştirilmiş veya geçici olarak kullanılamıyor.
Derick
Yukarıdaki gibi çevrimdışı çalışılacak birden fazla web sitesi ekleme konusunda bu makaleden devam eden bir öğretici eklemeye ne dersiniz?
Vijay
Bunun için çok teşekkürler. Benim için işe yaradı.
Tek şikayetim, Skype hatasının WAMP kurulum bölümünden hemen sonra ortaya çıkması gerektiği. WAMP simgesini yeşil yapmak yerine turuncu yapmayı nasıl başaracağımı anlamak için çok zaman harcadım. Sonunda IIS 8.5'in 80 numaralı bağlantı noktasını kullandığını ve çalışması için Services.msc'den WWW yayın hizmetlerini durdurmam ve WAMP'taki Apache'yi yeniden başlatmam gerektiğini öğrendim.
M♥ηyαηє Ramołło™
Harika eğitim
Jim
Great tutorial. Big thanks. Only you should post the info on Skype port before in the beginning, as I did everything by myself and changed the port number in wamp folder. Then here I found out that there was easier way doing it on Skype
ıstakozeller
Harika eğitimler. Bu kadar açık ve öz olduğunuz için teşekkür ederim.
Lis
Harika makale! Hepsi yüklendi ve çalışıyor. Ancak, ana sayfanın üzerinde oluşturduğum ek sayfalar çalışmıyor. Sayfayı Wordpress'te oluşturuyorum, ancak 'Görünüm' bağlantısını takip ettiğimde 404 hatası alıyorum. Bir fikriniz var mı?
pramod
Her şeyi indirdim. web'e yazdığımda http://localhost/mysite/ ancak hata gösteriyor
İstenen URL /mysite/ bu sunucuda bulunamadı.
Monica
Çok yardımcı oldu teşekkürler.
St. Buzo of C.O.B. ®
Bingo..!! bu çok yardımcı oldu.!! Birinci aşama tamamlandı, kurdum..!!
anbu
Sayın yetkili,
Bu blog benim için çok faydalı.. Talimatlarınıza göre yerel olarak bir web sitesi oluşturdum. Ancak aynı yerel ağdaki farklı bir makineden aynı siteyi açmaya çalıştığımda açamıyorum. Lütfen bana yol gösterin.
Başka bir bilgisayarda aşağıdaki yöntemi denedim
1.http://192.168.1.88/(sitename).
2.http://localhost/(sitename)
site açılmıyor
anbu
Sayın yetkili,
Bu blog benim için çok faydalı.. talimatlarınıza göre bir web sitesini yerel olarak oluşturdum. ancak aynı siteyi aynı ağdaki farklı bir makineden açmaya çalıştığımda açamıyorum. Lütfen bana rehberlik edin.
Başka bir bilgisayarda aşağıdaki yöntemle denedim
1.http://192.168.1.88/(sitename).
2.http://localhost/(sitename)
Lyle Denman
http://forum.wampserver.com/read.php?2,121118
Bu, sorularınızın çoğunu yanıtlamalıdır. Veritabanınızın seçeneklerini de güncellemeniz gerekeceğini unutmayın (localhost/phpmyadmin/ adresinden). wp_options > siteurl ve wp_options > home, http://localhost/database_name adresinden http://your_local_ip_address/database_name adresine değiştirilmelidir (örneğin http://192.168.0.11/coolsite/).
c:/wamp/bin/apache/apache2.4.9/conf/httpd.conf dosyasını açtığınızdan emin olun
Dosyada, şu satırdan sonra: # onlineoffline tag – kaldırmayın, aşağıdaki 2 satırı ekleyin:
Require all granted
Require ip 192.168.0 (veya yerel ipv4 adresinizin ilk 3 gruplaması ne olursa olsun)
Ardından, aynı dosyada şunu okuyan satırı bulun: #Include conf/extra/httpd-vhosts.conf ve o satırın başındaki # işaretini kaldırın.
Ardından, c:/wamp/bin/apache/apache2.4.9/conf/extra/httpd-vhosts.conf dosyasını açın ve orada bulunan kodu yorum satırı haline getirin (varsayılanları saklamak için) ve aşağıdakini yapıştırın:
ServerName localhost
DocumentRoot c:/wamp/www
AllowOverride All
Bu dosyaları kaydedin, tüm WAMP hizmetlerini yeniden başlatın ve LAN geliştirmenizin keyfini çıkarın.
Lina
Bu gönderi ÇOK yardımcı oldu!! Çok teşekkür ederim!
WPBeginner Ekibi
Öncelikle wampserver'ı bilgisayarınızdan tamamen kaldırmanız gerekir. Ardından yeni bir kopya indirip yeniden yüklemeyi deneyin. Bu işe yaramazsa, Apache, php, mysql gibi neredeyse aynı yazılımlara sahip alternatif bir yazılım olan XAMPP'yi kullanmanızı öneririz.
Jokerman
Ben de EasyPhP'yi denedim ama o da işe yaramadı. Xampp'ı yeni kurdum ve bu çalışıyor gibi görünüyor. Tavsiyeleriniz için çok teşekkürler.
Jokerman
İndirdim ve kurmayı denedim. Eksik bir dll dosyası olduğu için çalışmadı. Gerekli yazılımı MS'ten indirdim ve bu sefer kurulum iyi gitti gibi görünüyor… hata mesajı yok ve istediğiniz gibi masaüstümde Wampserver simgesi göründü. Ancak Wampserver simgesine tıkladığımda şunu soruyor: Bilgisayarınızda değişiklik yapması için aşağıdaki programı bilinmeyen bir yayımcıdan çalıştırmak istiyor musunuz? (Program adı: wampmanager.exe) Evet'e tıkladığımda pencere kapanıyor ve sonra hiçbir şey olmuyor. Sırada ne denemem gerektiği konusunda bir fikriniz var mı lütfen? Teşekkür ederim
cmills
Wamp'ın en son sürümü, Wordpress ile uyumlu olmayan PHP 5.5.12 kullanıyor!
WPBeginner Ekibi
Bunun nedeni muhtemelen sitenizin yerel döngü adresi olan 127.0.0.1'de sunuluyor olmasıdır, oysa diğer IP adresi sizin LAN adresinizdir. Bunlar iki farklı şeydir.
Paylaşımı etkinleştirmek için httpd.conf dosyanıza şu satırı eklemeniz gerekir: Listen 192.168.1.4:80. Bilgisayarınızın statik ip kullandığından ve apache yapılandırma dosyasında girdiğiniz ip adresini kullanacak şekilde ayarlandığından emin olun.
Ayrıca WordPress'in IP adresinizi localhost yerine sitenizin URL'si olarak kaydettiğinden emin olmanız gerekecektir. Bunu başarmak için localhost/mysite yerine 192.168.1.4/mysite adresinden WordPress'i yüklemeniz gerekir.
Naresh
Çok teşekkür ederim.
archetypechris
Merhaba ve harika rehber için teşekkürler! Küçük bir
problemim var. Rehberi takip ettiğimde her şey yolunda gitti ve sitem sorunsuz yükleniyor
ancak evimdeki başka bir bilgisayardan 192.168.1.4/mysite adresini kullanarak bağlanmaya çalıştığımda
sayfayı görüntüleme iznim olmadığını söylüyor.
Bunu nasıl düzeltebileceğimi bilen var mı? Teşekkürler
ederim!
WPBeginner Ekibi
Site transferleri için Duplicator eklentisini veya BackupBuddy'yi kullanabilirsiniz.
Anji
WP'de ilk kez web sitesi oluşturuyorum ve bu gönderi kolaydı ve harika çalıştı! Çok teşekkür ederim!
WPBeginner Ekibi
George,
Yerel bilgisayarınıza kurduğunuz WordPress yalnızca o bilgisayarda kullanılabilir.
Wampserver'ı bir USB belleğe kurmanıza olanak tanıyan ve ardından işinize yanınızda götürebileceğiniz özel yazılımlar bulunmaktadır.
George
Hızlı yanıtınız için teşekkürler,
Bugün iş dizüstü bilgisayarıma Wamp kurdum ve phpadmin kullanarak ev bilgisayarımdan SQL veritabanımı dışa aktardım ve iş dizüstü bilgisayarıma içe aktardım.
Yukarıdaki süreci iş dizüstü bilgisayarımda tekrarlamayı denedim ve veritabanını aynı şekilde adlandırdım. İş dizüstü bilgisayarımda siteme girebildim ancak eklentilerim ve temam aktarılmamış gibi görünüyor. Bir adımı mı kaçırıyorum? Başka bir klasörü aktarmalı mıyım?
İş ve ev arasında bu aktarım dizisini yaparak yerel bir sunucuda çalışmayı planlıyordum ve bunun yapılıp yapılamayacağını merak ediyordum (URL bağlama sorunları hakkında bir şeyler duydum) Yapmam gerekenlerin kısa bir kontrol listesi veya adım adım anlatımı çok yardımcı olacaktır.
Teşekkür ederim,
-George
rustomQ
excellent guide!!!!!! got everything up and running the first time!!! thank you oh so much!!!!
George
Bu harika çalışıyor! Birkaç gündür wordpress kullanıyorum ve hafta sonu boyunca biraz ilerleme kaydettim.
Bir Sorun:
Ev bilgisayarımda bulunanları ofisteki iş bilgisayarımda nasıl çalışabilirim? Bunu wordpress'e yükleyip her yerden üzerinde çalışabilir miyim? (Geliştirme yaparken http://www.website.wordpress.com URL'sine sahip olmaktan memnuniyet duyarım) Yukarıdaki süreci izledikten sonra geliştirme çalışmalarıma nasıl çalışabilir ve bunları nasıl gösterebilirim? Seçeneklerim nelerdir?
Tamamen acemiyim ama öğrenmeye istekliyim, bu süreç ve seçenekler hakkında hızlı bir eğitim büyük ölçüde takdir edilecektir. Şu ana kadar harika iş çıkarmışsınız ve sağladığınız tüm kaynaklar için teşekkürler.
Thomas
*yüzünü avuçla* Sorunu çözmek için hemen yukarıda bir bağlantı var. Bunun için üzgünüm! Bu harika eğitim için tekrar teşekkürler!