Yıllarca WordPress web siteleri oluşturduktan sonra, bilgisayarınızda yerel bir WordPress kurulumuna sahip olmanın ne kadar önemli olduğunu öğrendik.
WordPress’in kişisel makinenizde olması, canlı sitenizi riske atmadan yeni özellikleri denemenize, WordPress geliştirmeye derinlemesine dalmanıza ve hatta yayına girmeden önce tüm web sitelerini oluşturmanıza olanak tanır. Tüm WordPress projeleriniz için özel bir sandbox’a sahip olmak gibi.
Eğer bir Windows kullanıcısıysanız, WordPress’i yerel olarak kurmanın çok sayıda yolu vardır. Ancak biz bunu en kolay iki yönteme indirgedik. Bu kılavuzda, hangi sürümü kullanıyor olursanız olun, WordPress’i bir Windows bilgisayara nasıl kolayca yükleyebileceğinizi göstereceğiz.
WordPress’i Neden Windows’a Kurmalısınız?
Windows kullanıcısıysanız, WordPress’i bilgisayarınıza yerel olarak yüklemek çeşitli avantajlar sunar.
Yerel bir WordPress kurulumu, canlı web sitenizi etkilemeyen bir test ortamı oluşturur. Genellikle yerel sunucu veya localhost olarak adlandırılan bu kurulum, WordPress için kişisel oyun alanınızdır.
WordPress geliştiricileri çalışmaları için düzenli olarak yerel kurulumları kullanır. Örneğin, yeni eklentileri veya temaları denemek ya da Gutenberg blok düzenleyicisine güncellemeden önce siteyi test etmek için kullanabilirler.
Ancak bu sadece profesyoneller için değildir. WordPress’te yeniyseniz, yerel bir kurulum öğrenmek için mükemmeldir. Özellikleri keşfedebilir, temaları ve eklentileri test edebilir ve canlı bir siteyi bozma endişesi olmadan özgürce denemeler yapabilirsiniz.
WordPress’i Windows’a yerel olarak yüklediğinizde siteyi yalnızca sizin görebileceğinizi unutmamak önemlidir. Herkese açık bir web sitesi oluşturmak istiyorsanız, bir alan adına ve web barındırma hizmetine ihtiyacınız olacaktır.
Şimdi, teknik olarak, XAMPP kullanarak Windows’a WordPress yükleyebilirsiniz ve daha önce bu konuda bir eğitim yazmıştık.
Bununla birlikte, yerel bir WordPress ortamı kurmak için XAMPP’den daha basit 2 yol bulduk, bu da onları yeni başlayanlar veya hızlı bir şekilde yerel bir site oluşturması gereken kullanıcılar için harika hale getiriyor. İlgilendiğiniz herhangi bir yönteme geçmek için aşağıdaki bağlantıya tıklayabilirsiniz:
Yöntem 1: Studio Kullanarak Windows’a WordPress Yükleyin (Hızlı ve Basit)
İlk yöntem için Studio’yu kullanacağız. WordPress yazılımına dayalı bir web sitesi oluşturucu olan WordPress.com‘u yöneten ve çalıştıran şirket olan Automattic tarafından yapılan yerel bir WordPress yazılımıdır.
İlk olarak bu yöntemden bahsedeceğiz çünkü takip etmesi çok daha hızlı ve basittir, bu da onu tamamen yeni başlayanlar için mükemmel kılar.
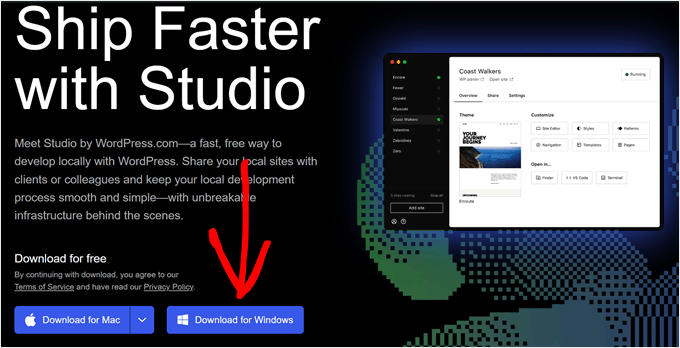
İlk olarak, Studio by WordPress.com web sitesini açmanız gerekir. Ardından, ‘Windows için İndir’ düğmesine tıklayın.
Bunu yaptıktan sonra, kurulumu başlatmak için indirilen dosyayı açmanız yeterlidir.
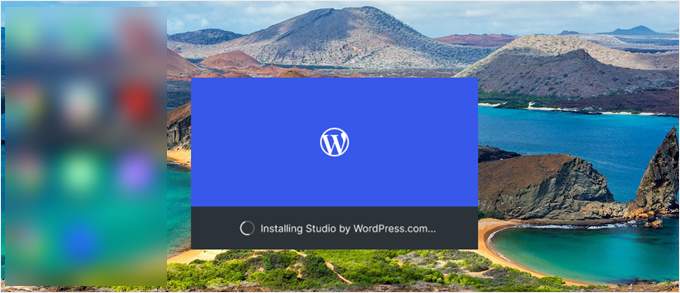
Şimdi size uygulamanın yüklendiğini gösteren bir açılır pencere görünecektir.
Bunu yaptıktan sonra ilk sitenizi ekleyebilirsiniz.
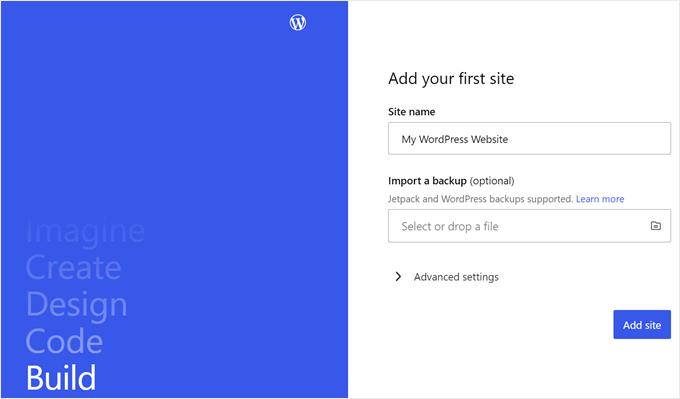
Bunu yapmak için yeni yerel WordPress sitenizin adını girin ve ‘Site ekle’ye tıklayın. Siteyi kolayca tanımlamanıza yardımcı olduğu sürece siteyi istediğiniz gibi adlandırabilirsiniz.
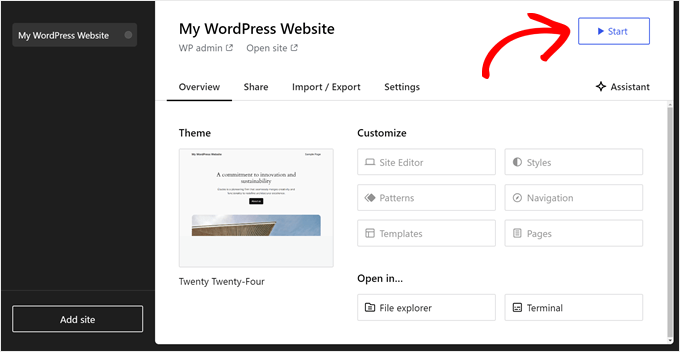
Şimdi yerel WordPress sitenizin panosunu görmelisiniz.
WordPress kontrol panelinize erişmek ve web sitenizi düzenlemek için sağ üst köşedeki ‘Başlat’ düğmesine tıklamanız yeterlidir. Bu, yerel web sitenizi bilgisayarınızdan erişilebilir hale getirecektir.
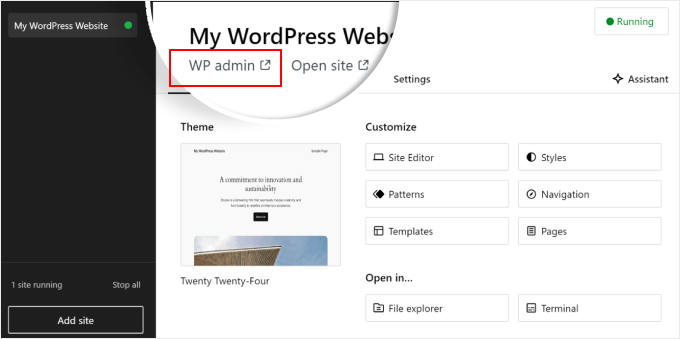
‘Başlat’ düğmesi ‘Çalışıyor’ olarak değiştiğinde, sayfanın sol üst tarafındaki ‘WP Admin’ bağlantısına tıklayabilirsiniz.
Bu sizi yerel WordPress yönetici sayfanıza getirecektir.
Ve kurulum için hemen hemen hepsi bu kadar. Yerel web sitenizi oluştururken gerekli olabilecek diğer ayarları inceleyelim.
‘Genel Bakış’ sekmesinde görebileceğiniz gibi, WordPress tam site editörü menüsüne doğrudan Studio kontrol panelinden erişebilirsiniz. Ayrıca WordPress web sitenizin klasörlerini ve dosyalarını açmak için ‘Dosya gezgini’ne tıklayabilir ve WP-CLI kullanarak web sitenizi yönetmek için ‘Terminal’e tıklayabilirsiniz.
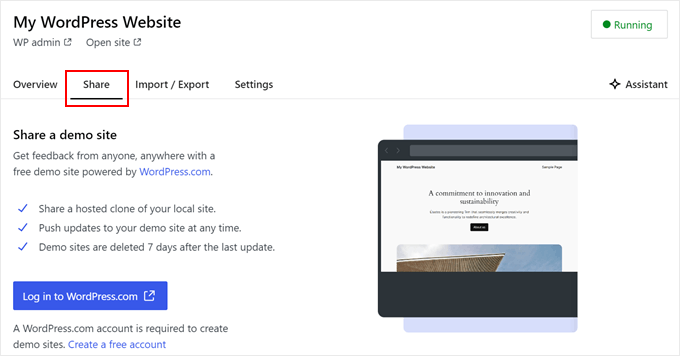
‘Paylaş’ sekmesine geçerseniz, WordPress.com hesabınızda oturum açabilir, yerel web sitenizi klonlayabilir ve WordPress.com sunucularına yükleyebilirsiniz. Bu, klonlanmış siteyi geçici olarak çevrimiçi hale getirecektir, bu da demo sitelerini müşterilerinizle veya ekip üyelerinizle paylaşmak için kullanışlıdır.
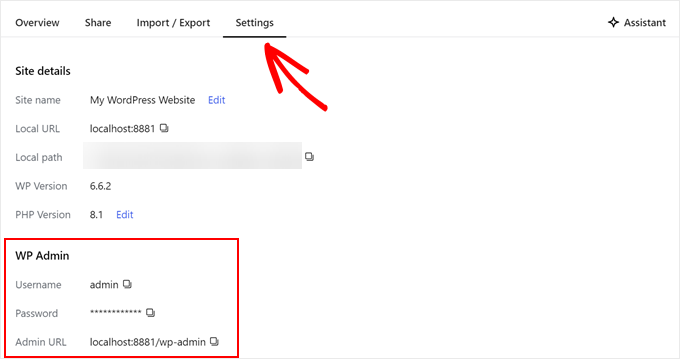
Bazen, Studio’yu kullanmak yerine doğrudan tarayıcınız üzerinden yerel web sitenize giriş yapmak isteyebilirsiniz. Bu durumda, wp-admin kimlik bilgilerinizi bilmeniz gerekir.
Bunları bulmak için ‘Ayarlar’ sekmesine geçebilir ve orada WordPress yönetici kullanıcı adınızı, şifrenizi ve giriş URL’ nizi bulabilirsiniz.
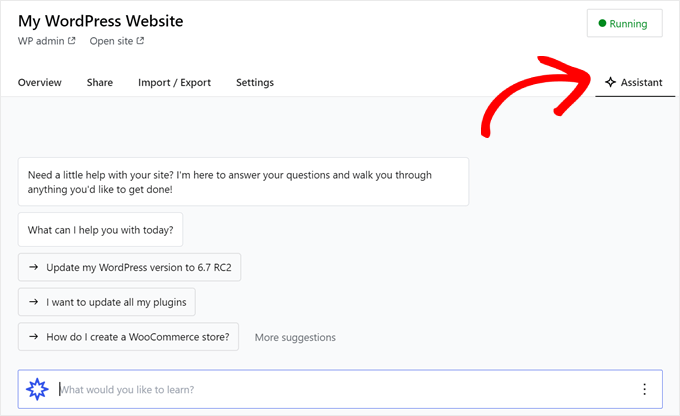
Studio’nun bir başka güzel özelliği de ‘Asistan’ düğmesine tıklayarak iletişim kurabileceğiniz yerleşik yapay zeka sohbet robotu.
Burada Studio’dan tüm eklentilerinizi aynı anda güncellemek, çekirdek WordPress sürümünüzü güncellemek veya özel bir blok için kod oluşturmak gibi görevler için yardım isteyebilirsiniz.
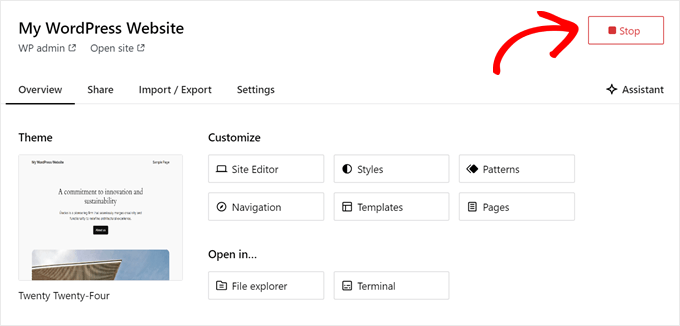
Yerel sitenizde çalışmayı bitirdiğinizde, sağ üst köşedeki ‘Çalışıyor’ düğmesinin üzerinde ‘Durdur’ yazana kadar bekleyin.
Ardından, web sitesini durdurmak için düğmeye tıklayın.
Studio’nun bir dezavantajı, WordPress ortamını kendi isteğinize göre yapılandıramamanızdır. Bu, sizin için önceden seçilmiş olan PHP sürümünü, web sunucusunu ve veritabanını kullanmanız gerektiği anlamına gelir.
Web sitenizi veya eklentinizi belirli sunucu yapılandırmalarıyla test etmeniz gerekiyorsa bu bir dezavantaj olabilir.
Yerel WordPress ortamınız üzerinde daha fazla kontrole ihtiyacınız varsa veya yerel kurulumunuzu belirli bir canlı sunucu yapılandırmasıyla eşleştirmeniz gerekiyorsa, Local WP kullanarak bir sonraki yönteme göz atabilirsiniz.
Yöntem 2: Yerel WP Kullanarak Windows’a WordPress Yükleyin (Daha Özelleştirilebilir)
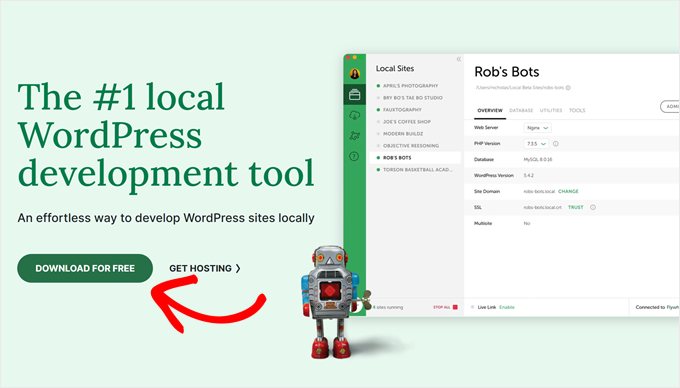
Öncelikle, Local WP yazılımını Windows bilgisayarınıza indirmeniz ve kurmanız gerekir. Bunun için Local WP web sitesine gidin ve ‘Ücretsiz İndir’ butonuna tıklayın.
Bundan sonra, platformunuzu seçmeniz gereken bir açılır pencere görünecektir. Devam edin ve açılır menüden ‘Windows’u seçin.
Ardından, yazılımı indirmek için adınız ve soyadınız, iş e-posta adresiniz ve telefon numaranız gibi bilgilerinizi girebilirsiniz.
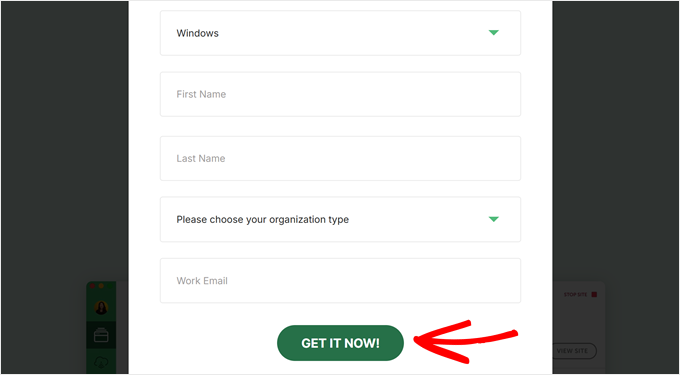
Ayrıntıları girdikten sonra ‘Şimdi Al’ düğmesine tıklamanız yeterlidir.
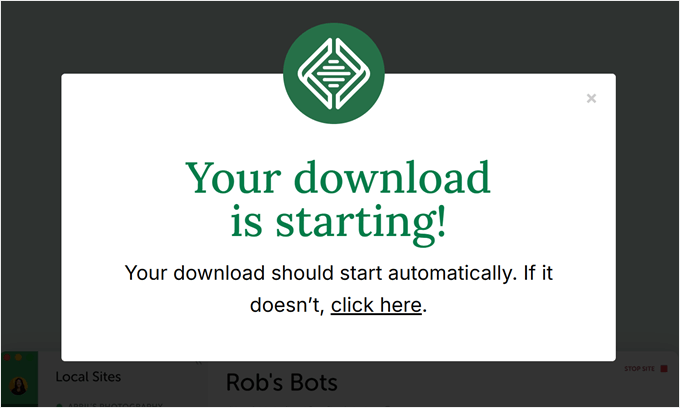
Bundan sonra, yazılım otomatik olarak bilgisayarınıza indirilecektir. Aksi takdirde, indirmeyi başlatmak için ‘buraya tıklayın’ bağlantısına tıklayabilirsiniz.
Dosya indirildikten sonra, devam edin ve kurulum sihirbazını başlatın.
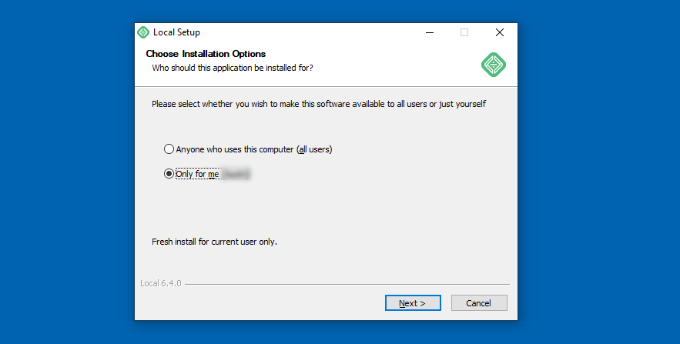
Şimdi, yazılımı tüm kullanıcılar için mi yoksa yalnızca kendiniz için mi yüklemek istediğinizi seçmeniz gerekecektir.
Bir seçenek belirledikten sonra ‘İleri’ düğmesine tıklayın.
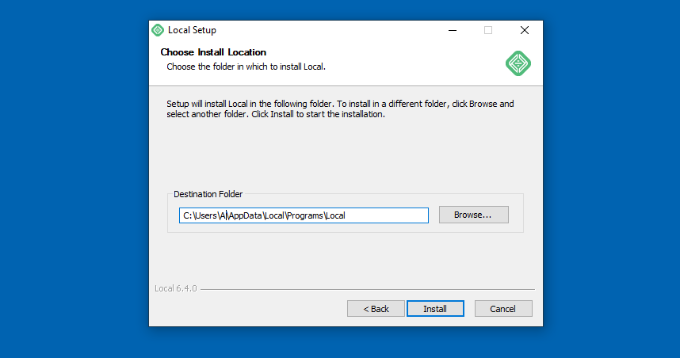
Bir sonraki adımda, yazılımın yükleneceği ‘Hedef Klasörü’ seçebilirsiniz.
Yolu ayarlamak için ‘Gözat’ düğmesine tıklamanız ve ardından ‘Yükle’ düğmesine tıklamanız yeterlidir.
Local WP yazılımı şimdi Windows bilgisayarınıza yüklenecektir.
İşlem tamamlandıktan sonra, ‘Yerel Çalıştır’ onay kutusunu işaretleyebilir ve kurulum sihirbazındaki ‘Son’ düğmesine tıklayabilirsiniz.
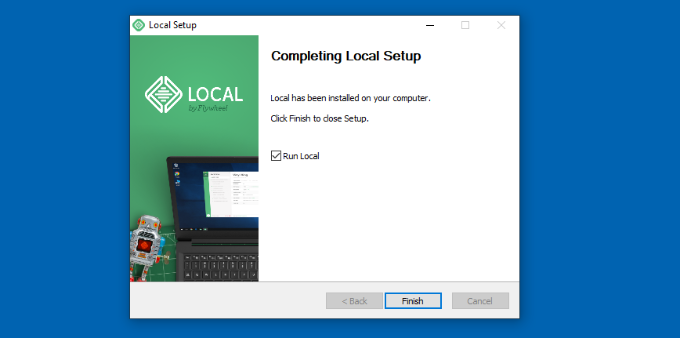
Yazılım şimdi Windows cihazınızda başlayacaktır.
Bir sonraki adım yeni bir yerel web sitesi eklemektir. Bunu yapmak için, alttaki artı ‘+’ düğmesine tıklamanız yeterlidir.
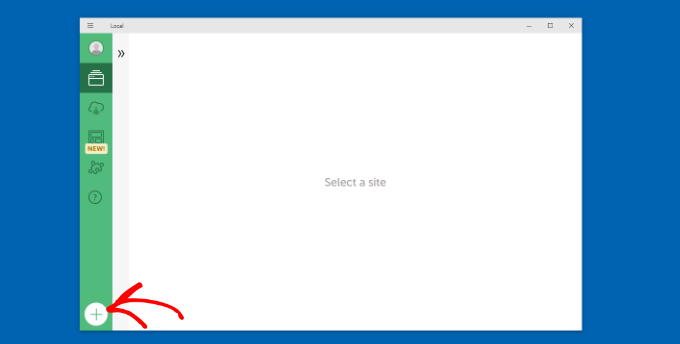
Bundan sonra, Yerel yazılımda bir site oluşturabilirsiniz.
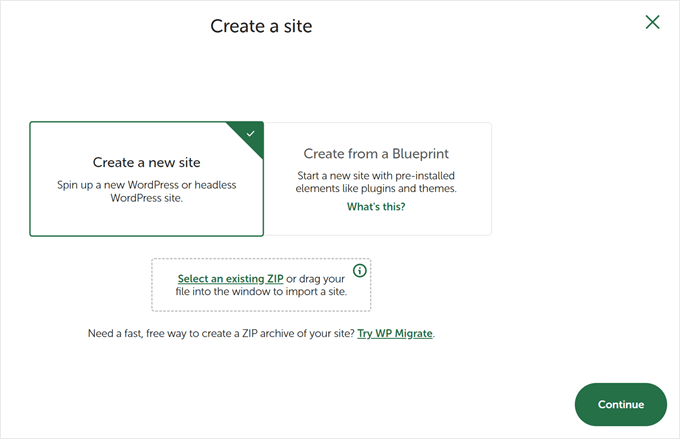
‘Yeni bir site oluştur’ seçeneğini seçin ve ‘Devam Et’ düğmesine tıklayın. Siteyi bir plandan veya mevcut bir web sitesi dosyasından oluşturma seçenekleri de vardır, ancak gösterim amacıyla ilk seçeneği kullanacağız.
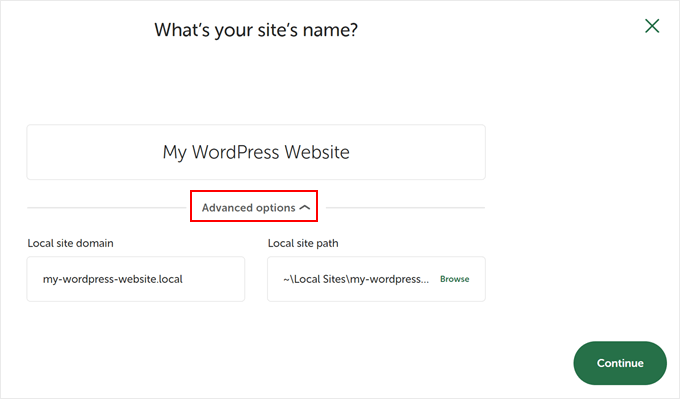
Ardından, yerel web siteniz için ‘WordPress Web Sitem’ gibi bir ad girebilirsiniz.
Yerel site alan adını ve yerel site yolunu girebileceğiniz gelişmiş seçenekler de vardır. Varsayılan olarak, etki alanı web sitenizin başlığını kullanacak ancak tire ile ayrılacaktır.
İşiniz bittiğinde, ‘Devam’ düğmesine tıklamanız yeterlidir.
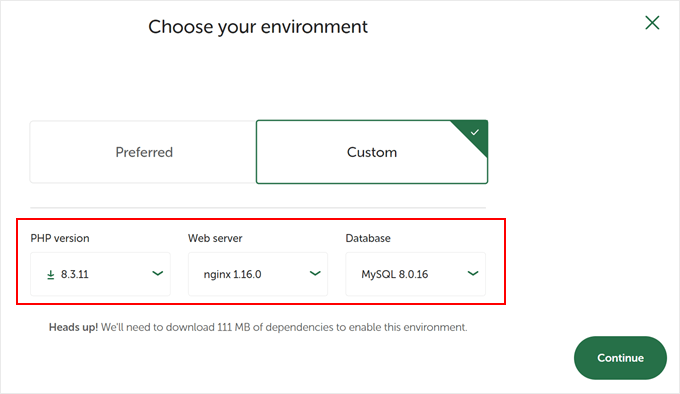
Bundan sonra, yerel web siteniz için bir ortam seçmeniz gerekecektir.
Yazılımın PHP sürümünü, web sunucusunu ve MySQL sürümünü otomatik olarak seçeceği ‘Tercih Edilen’ ortamı kullanabilirsiniz. Öte yandan, ‘Özel’ seçeneğini de seçebilir ve ortam ayrıntılarını girebilirsiniz.
Local WP en son PHP sürümlerini sunar. Web sunucusuna gelince, Nginx veya Apache arasında seçim yapabilirsiniz. Ayrıca veritabanları için MySQL veya MariaDB arasında seçim yapabilirsiniz.
Bazı PHP, web sunucusu ve veritabanı sürümlerinin düzgün çalışması için bazı bağımlılıkların indirilmesi gerektiğini unutmayın.
Ardından, yerel web siteniz için bir WordPress kullanıcı adı ve şifresi girebilirsiniz. Ayrıca, tüm e-posta bildirimlerini alacağınız bir WordPress e-posta adresi seçme seçeneği de vardır.
Bunun dışında, yazılımın bir WordPress çoklu site ağınız olup olmadığını soracağı gelişmiş bir seçenek vardır. Eğer yoksa, sadece ‘Hayır’a tıklayın.
Bu ayrıntıları girdikten sonra, ‘Site Ekle’ düğmesine tıklamanız yeterlidir.
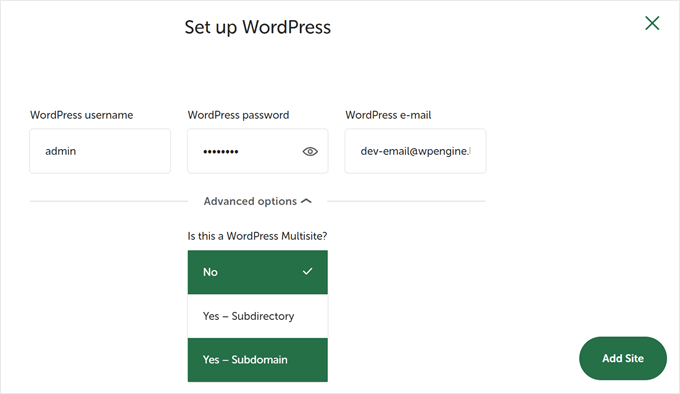
Yazılım şimdi WordPress’i yükleyecek ve web sitenizi kuracaktır.
Yerel web sitesini başlatmak için devam edin ve sağ üst köşedeki ‘Siteyi başlat’ düğmesine tıklayın.
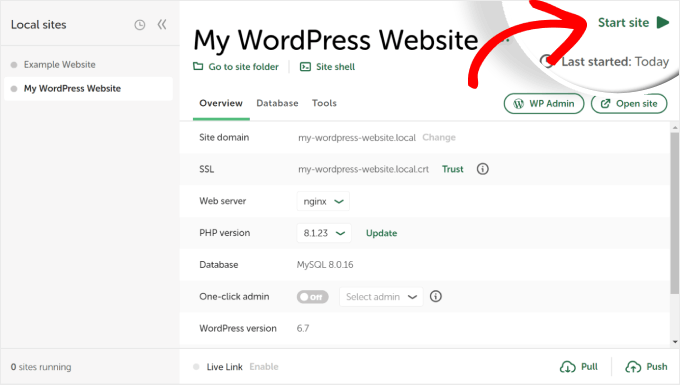
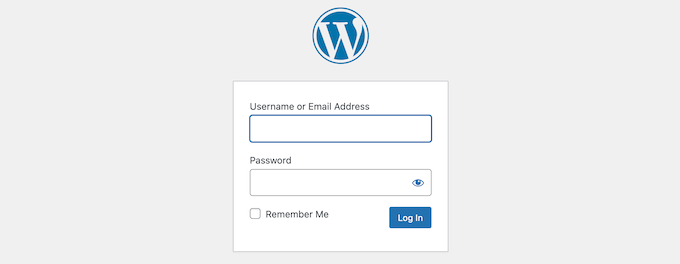
Ardından, ‘WP Admin’ düğmesine tıklayın ve WordPress yönetici giriş sayfasını göreceksiniz.
Yerel web sitesini kurarken daha önce girdiğiniz kullanıcı adı ve şifreyi girmeniz ve ardından ‘Oturum Aç’ düğmesine tıklamanız yeterlidir.
Artık Windows bilgisayarınızda yerel web sitenizi düzenleyebilirsiniz.
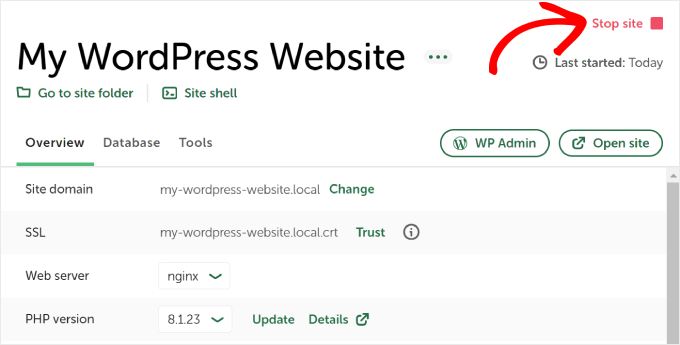
İşiniz bittiğinde, ‘Siteyi durdur’ düğmesine tıklayarak web sitesini Local WP yazılımından durdurmayı unutmayın.
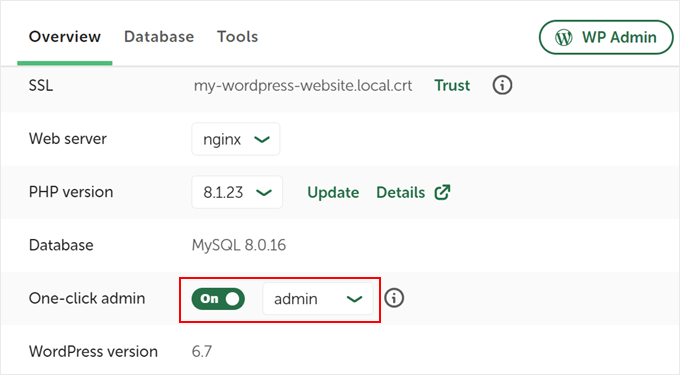
Profesyonel İpucu: Oturum açma işlemini atlamak istiyorsanız, Local WP’de tek tıklamayla yönetici oturum açma özelliğini etkinleştirebilirsiniz.
Bunu yapmak için Local WP kontrol paneline geri dönün ve ‘Tek tıkla yönetici’ düğmesini ‘Açık’ yazana kadar değiştirin. Ardından, açılır menüden bu tek tıklamayla oturum açma özelliğini kullanabilecek yönetici kullanıcıyı seçin.
Alternatif: Temaları, Eklentileri ve Daha Fazlasını Test Etmek için WordPress Playground’u Kullanın
WordPress Playground, WordPress ile doğrudan web tarayıcınızda denemeler yapmanızı sağlayan yenilikçi bir araçtır. Herhangi bir gerçek web sitesini etkilemeden yeni WordPress temalarını, eklentilerini ve özelliklerini deneyebileceğiniz sanal bir kum havuzudur.
WordPress Playground, yerel bir WordPress ortamından birkaç önemli yönden farklıdır.
İlk olarak, bilgisayarınıza kurulum gerektirmez ve kalıcı yerel kurulumların aksine her kullanımdan sonra sıfırlanır. Yerel kurulumlar tek bir bilgisayara bağlıyken, tarayıcıya sahip herhangi bir cihazdan erişebilirsiniz.
WordPress Playground hızlı testler ve öğrenme için ideal olsa da, Windows bilgisayarınızdaki yerel bir WordPress ortamı uzun vadeli geliştirme projeleri için daha fazla esneklik sunar.
Ayrıntılı bir kılavuz için tarayıcınızda WordPress Playground’u nasıl kullanacağınıza ilişkin kılavuzumuza göz atın.
Windows Bilgisayarıma WordPress Yükledim, Şimdi Ne Olacak?
Artık bilgisayarınızda WordPress olduğuna göre, işte yapabileceğiniz bazı şeyler:
- Sitenizi daha iyi kullanmak için temel WordPress ipuçlarını ve püf nokt alarını öğrenin.
- Sitenizin nasıl görünebileceğini görmek içinfarklı WordPress temalarını deneyin.
- Sitenize yeni özellikler eklemek için olmazsa olmaz WordPress eklentilerini yükleyin ve test edin.
- Yaygın WordPress hatalarını kendi başınıza nasıl düzelteceğinizi öğrenin.
- Sitenizin güzel görünmesini sağlamak için farklı sürükle ve bırak sayfa oluşturucuları deneyin.
- Sitenize erişimi kurtarmak için localhost’ta WordPress yönetici şifresini nasıl sıfırlayacağınızı öğrenin.
- Sitenizi yönetmeyi kolaylaştırmak içinotomatik iş akışları kur un.
- Sitenizi bilgisayar korsanlarına karşı güvende tutmak için WordPress güvenliği hakkında bilgi edinin.
- Yerel WordPress sitenizi herkesle paylaşmaya hazır olduğunuzdacanlı bir sunucuya taşıyın.
Umarız bu makale WordPress’i yerel olarak bir Windows bilgisayara nasıl yükleyeceğinizi öğrenmenize yardımcı olmuştur. WordPress ‘i Mac bilgisayara yerel olarak yükleme hakkındaki makalemizi ve WordPress hazırlık sitesi oluşturma hakkındaki nihai kılavuzumuzu da görmek isteyebilirsiniz.
If you liked this article, then please subscribe to our YouTube Channel for WordPress video tutorials. You can also find us on Twitter and Facebook.


Thomas
Great tutorial! I’m trying to download a wordpress site to a local copy. I’ve based my self on this tutorial. So far this is what I’ve done right (I think…):
1- I’ve downloaded all the files from the live website using FileZilla to wamp/www/mysite/.
2 – I’ve exported, downloaded and zipped the live site database.
3 – Using WAMP>phpmyadmin I’ve created a new database and imported the zip file (from 2)
4- Changed the wp-config.php and updated the database name, user and password.
Now at this point, I’m able to see the homepage when I type http::/localhost/mysite. The them has been rest however. Also, the admin side as far as I can tell works perfectly.
The main problem I’m getting is that apart from the homepage I get 404 errors for all the other pages on the local site.
I’m not sure what I’m doing wrong! Thanks in advance!
George
Thanks so much. I have everything up and running. Very helpful. I would not have been able to do this on my own.
maggie
xampp is good for wordpress .It supports max range of url and all
maggie
thanks… It was helpfull and easy
karis
Been postponing this with the misconception that the process is tedious and takes time. Wow, thanks to you, I am now done. So easy. Thanks again for the good work. May it never go unrewarded.
Dmitry M
Thanks for the tut, very easy to follow.
Naaz
great..!! was as simple as 1+1 :p
Marty
Excellent, worked 110%. Thanks dude!
Bob S
This was an awesome tutorial! Thanks for the help
Faisal Masood
Thanks for sharing the nice WordPress resources.
Sabine Blackburn
Have it all installed but can not create a database in MyphpAdmin, it shows ‘No Privileges’ where the create button should be
Any suggestions?
David
After following your instructions, I got everything right except when I wanted to log in with the “root” username. When I log in, I get this message ” #1045 Cannot log in to the MySQL server”. Please what should I do?
WPBeginner Staff
Try to log in with blank password if that does not work you would need to reset root password for your MySQL server.
pran
how to change the root password
Gabriel Popov
Thanks, this article was really useful.
Omar
Amazing!! thanks a ton!!
Aaron
Downloaded everything. I can access wordpress but need to create a database for wordpress. When i click on phpmyadmin it takes me to a 403 forbidden error saying You don’t have permission to access /phpmyadmin/ on this server. I cant figure it out.
Annie L
Hello – your tutorial rocks. I’m able to get pass the 5 min setup and land on the WordPress login page.
One issue, after entering the same credentials provided in the 5-min setup (/wordpress/wp-login.php), I get “SSL connection error.”. Looking at the wp-login.php file, it forces a redirect to SSL.
How do I get around it without installing a SSL locally?
Running Wamp 2.4, Windows 7, Chrome browser.
lubna
really help tutorial bro.I just cant log in to word after the successful installation Help.
Miriam
I think your tutorials are clearer than anything else I find for a newbie like me. Thanks!
Can you offer any suggestions for my problem creating a database? I already have a WP site under Bitnami. I decided to download WAMP to have multiple WP sites using WAMP. After installing WAMP, when I open phpMyAdmin I get a log in window. If I log in using the username/pswd originally set up (with Bitnami installation) it says I don’t have priveliges to create a database. I can log into phpMyAdmin using the usename/pswd from the Bitnami WordPress site and I have priveliges but it gives me a 1044 Error when I try to create a new database. I am not sure what to try next. Thanks in advance for any suggestion you may have.
Miriam
I figured out that problem and am on to a different problem. After installing WAMP and putting WordPress in c:WAMP/WWW… I open a browser and try http://localhost/mysite/ but get a 404 Not Found. Could this be related to the fact that I already have Bitnami/localhost? Thanks!
Win
You didn’t paste it in the www folder. You can’t post it in the main wordpress file — you have to navigate to the www folder and paste it next to the index.html file. This should fix your 404 error problem
Merom
Hi,
I am facing the same problem. what exactly should I paste to www?
thanks
IBAS
I really found this tutorial so helpful to me, thanks for the efforts
Kriss
Wamp Server is an outdate program died on 2013. Probably it is not the best for wordpress
Laurent Lafont
You are not saying what the username and password are when launching phpmyadmin! And all web searches are giving dummy information as well….. So now stuck…. very useful instructions indeed…….
Win
Username: Root
Password: Blank
Helen Magner
Thanks for the instruction. It worked well. I have had a wordpress site up and running for a year now. but now but I would like to be able to import it to to local site so that I can write and save wile I cannot connect to the internet and publish when I can get back on line. Thanks for your help.
ludovic
Simply perfect. Merci !!!
Robert
When i follow the steps wampserver to myphpadmin I get the login page, not the page which allows me to click on the database tab as shown in your very well written tutorial. Suggestions to get the wp-config.php file set up?
Dave
I had the same problem, just leave the password blank & you’ll get in.
Psdfreak.com
On that login page fill Username: “root” and press login (no password required)
Maryam Jamil
thanks alot
your article really helps
Dharmesh Joshi
Thanks you bro…(Y)
Vivi
Hey! Really helpfull article, But… I can’t log in in wordpress..Firstly , in the step of installing wordpress i was directed in a blank page( logo only) , then i reloaded and said it has allready been istalled, so i procceded with the log in, but it seems that my account is not valid..nothing workd..not even the e-mail for getting a new pswrd .
What should i do? I allready copied the steps twice from the beggining with different databases and data.
nel
your tutorial worked PERFECTLY
ty
Andy
Please help . Thanks
installed WAMServer, as according to your instructions, I chose phpMyadmin, and I encountered this error msg, “HTTP Error 404.0 – Not Found
The resource you are looking for has been removed, had its name changed, or is temporarily unavailable.
Detailed Error Information
Module IIS Web Core
Notification MapRequestHandler
Handler StaticFile
Error Code 0×80070002
Requested URL http://localhost:80/phpmyadmin/
Physical Path C:\inetpub\wwwroot\phpmyadmin\
Logon Method Anonymous
Logon User Anonymous”
I installed and re-installed WAMServer, but encounter the same error, how do I proceed from here?
farah
Hi, Thank you for great tutorial, I am facing an issue please help me to solve the issue. After successful installation of WAMP, when I have clicked on PhpMyAdmin , It is asking me to login , but i dont know what is my username and password that can be used here?
Regards
Farah
WPBeginner Support
Try username root and leave password field blank
Admin
Barbara
I had the same error and other sites had very complicated and, frankly, unsuccessful suggestions on how to fix it. Thank you for this clear and simple solution – it worked!
KarSho
Simple, Clear and Helped.
Thanks Dude…
zubekk
thanks dude………..!
Sara
Hey there! I installed WampServer like you said but when i press phpmyadmin it opens a blank chrome webpage. No database menu or anything like the printscreen you showed. it’s just blank. I’ve tried unistalling and installing again but it remains the same. help!
WPBeginner Support
Where do you press phpMyAdmin? Try accessing it using the url http://localhost/phpmyadmin/
Admin
Sara
I pick the WampServer icon out of the taskbar and pick the phpmyadmin just like in your printscreen. No, that didn’t work either. I don’t know what can be wrong!
Sara
Ok, reboot the system and It opened something on the phpmyadmin but it’s asking me login and password!
Omer
Hi. Although this article is helpful, however I would like to give some suggestions in improving it. There are some fill in the blanks in this article which makes it difficult to install wordpress.
1. After instructing on installing Wamp Server 2, you immediately jump to phpmyadmin where as you should have told that we need to install mySQL -service- install service and start it. Then we have to install apache – service – install service and start it. Then after making sure that the wamp icon is green head over to the phpmyadmin.
2. After opening the localhost site, you didn’t mention that the username was “root” and password was blank for the database site and jumped immediately on creating database through database tag.
Apart from that it was great effort.
hujat ul islam
can you help me in installing word press on xampp
sumit
while installing wamp server it wll shows error again and again.. . error is about MSVC3100.dll file error.. . kindly fix this error
LIsa
I installed wamp successfully, renamed database, installed wordpress, entered all fields and then once I hit the final “install wordpress”, got a weird blank screen with the wordpress logo at the top. When I hit the “back button” it said wordpress was already installed so I tried entering the username and password and it says it is not found. I tried entering the email I had entered to reset the password and says it isn’t found. I tried using the instructions above for changing the password within the phpmyadmin found the Wp-users file in my database and clicked on pencil icon to edit users and it says “my sql returned an empy result” … help!
Lisa Tomsio
Never mind … I just deleted wordpress installation, created a new database and started over and it worked. I had unchecked the “allow search engines …” on the wordpress page the first time so I left it checked the second time and it worked fine. Thanks for this information!
Campbell
I installed WAMServer, as according to your instructions, I chose phpMyadmin, and I encountered this error msg, “HTTP Error 404.0 – Not Found
The resource you are looking for has been removed, had its name changed, or is temporarily unavailable.
Detailed Error Information
Module IIS Web Core
Notification MapRequestHandler
Handler StaticFile
Error Code 0x80070002
Requested URL http://localhost:80/phpmyadmin/
Physical Path C:\inetpub\wwwroot\phpmyadmin\
Logon Method Anonymous
Logon User Anonymous”
I installed and re-installed WAMServer, but encounter the same error, how do I proceed from here?
yousef mayeli
hi there
i installed many times with different options but same problem,it’s icon appears and when i click it to proceed it doesn’t appear anything. i don’t know what should i do.just disappointed
yousef mayeli
i installed wamp and its icon came on desk but when i click on it doesn’t open i even went to my skype and changed but didn’t affect anything , thanks
. guide me
WPBeginner Support
Try installing WAMP again.
Admin
sumit
while installing wamp server it wll shows error again and again.. . error is about MSVC3100.dll file error.. . kindly fix this error
please help meee….
Kevin Salt
Good article … Thanks.
I don’t want to nit-pick but I think you’re missing a semi-colon in the Skype section …
“and go to Tools » Options. Click on Advanced and then Connections.”
——————-> »
al b
I seem to be hung up on the http://localhost/mysite/ I get a 404 Not found error.
Al B
Disregard. I overlooked renaming the WP directory when moving to www. Thank you for this tutorial!
WPBeginner Support
make sure you have WordPress installed there. Make sure your WAMServer is running.
Admin
Kenia
I had just installed WAMP and then had no idea how to proceed from there as there is no manual for WAMP. This and the next article on making the wordpress site live are both lifesavers. Seriously. THANK YOU for writing this for beginners, and not assuming we know things we don’t (I see that a lot with experts: they take their knowledge for granted and forget what it’s like to start out and not know things).
THANK YOU, THANK YOU, THANK YOU!!!
Martin
Hello Guys, all done.. no matter what I am doing.. still last step freezes. I see only WP white-blue logo and white unloaded text box. After typing my website I get: “Error establishing a database connection” error. Any ideas? Cheers.
Chris
Thanks so much for this! Successfully installed. Only problem I ran into was with the wp-config.php file. I needed to open the copy of wp-config-sample.php, make changes on my own and then save. Other than that, easy install.
Amelia
When I went to click on “create database” in phpmMyAdmin, it said “X No privileges”. What did I do wrong?
Amelia
No matter, I got that fixed. Now I’m just stuck on the configuration page, info filled out and hit submit but the install wordpress page never comes up!
om gupta
in my laptop wamp server is not working in the local user account .it work only in administrator account but i want to run wamp server in local user account because i do not have administrator access right pls help me how can i run wamp server in my local user account.
WPBeginner Support
Without administrator rights it would be difficult for you to run wamp.
Admin
Ratan
Hi ,
I followed the complete step and dowloaded the WP and started uploading theme . With my first theme only , I got the below message after tryin to install the same :
The uploaded file exceeds the upload_max_filesize directive in php.ini.
Please guide .
Regards ,
WPBeginner Support
Please check out this guide: How to increase the maximum upload size in WordPress
Admin
utpal
after install Wampserver i go to phpmyadmin, inthin a login option is here
where i get pass and id
WPBeginner Support
Try root for username and leave password blank.
Admin
Tony Leary
Same problem – that works. Thanks.
Alan
Hello again,
Per my last comment, I think I figured it out. Sorry for the bother.
Alan
Thanks for the write-up! Wondering if you might have any ideas as to why I cannot create a db from phpmyadmin? After clicking “databases” to create a db, I get a “loading” message for quite some time, then that disappears & nothing…
The same occurs no matter which tab I select in the phpmyadmin dash. Been Googling for over an hour & I haven’t been able to find a solution. Thanks again!
WPBeginner Support
Try uninstalling and then reinstalling WAMP server. If that does not help you can also install XAMPP.
Admin
Maureen
Hi Guys! Step by Step Wonderful! Installed WAMP successfully, set up database, downloaded wp with no problem Sucess! now log in… user name or password invalid… press here to have password sent via email… i receive this message “The e-mail could not be sent.
Possible reason: your host may have disabled the mail() function.” any help is appreciated!
WPBeginner Support
Check out our guide on how to reset a WordPress password from phpMyAdmin
Admin