Yıllarca WordPress web siteleri oluşturduktan sonra, bilgisayarınızda yerel bir WordPress kurulumuna sahip olmanın ne kadar önemli olduğunu öğrendik.
WordPress’in kişisel makinenizde olması, canlı sitenizi riske atmadan yeni özellikleri denemenize, WordPress geliştirmeye derinlemesine dalmanıza ve hatta yayına girmeden önce tüm web sitelerini oluşturmanıza olanak tanır. Tüm WordPress projeleriniz için özel bir sandbox’a sahip olmak gibi.
Eğer bir Windows kullanıcısıysanız, WordPress’i yerel olarak kurmanın çok sayıda yolu vardır. Ancak biz bunu en kolay iki yönteme indirgedik. Bu kılavuzda, hangi sürümü kullanıyor olursanız olun, WordPress’i bir Windows bilgisayara nasıl kolayca yükleyebileceğinizi göstereceğiz.
WordPress’i Neden Windows’a Kurmalısınız?
Windows kullanıcısıysanız, WordPress’i bilgisayarınıza yerel olarak yüklemek çeşitli avantajlar sunar.
Yerel bir WordPress kurulumu, canlı web sitenizi etkilemeyen bir test ortamı oluşturur. Genellikle yerel sunucu veya localhost olarak adlandırılan bu kurulum, WordPress için kişisel oyun alanınızdır.
WordPress geliştiricileri çalışmaları için düzenli olarak yerel kurulumları kullanır. Örneğin, yeni eklentileri veya temaları denemek ya da Gutenberg blok düzenleyicisine güncellemeden önce siteyi test etmek için kullanabilirler.
Ancak bu sadece profesyoneller için değildir. WordPress’te yeniyseniz, yerel bir kurulum öğrenmek için mükemmeldir. Özellikleri keşfedebilir, temaları ve eklentileri test edebilir ve canlı bir siteyi bozma endişesi olmadan özgürce denemeler yapabilirsiniz.
WordPress’i Windows’a yerel olarak yüklediğinizde siteyi yalnızca sizin görebileceğinizi unutmamak önemlidir. Herkese açık bir web sitesi oluşturmak istiyorsanız, bir alan adına ve web barındırma hizmetine ihtiyacınız olacaktır.
Şimdi, teknik olarak, XAMPP kullanarak Windows’a WordPress yükleyebilirsiniz ve daha önce bu konuda bir eğitim yazmıştık.
Bununla birlikte, yerel bir WordPress ortamı kurmak için XAMPP’den daha basit 2 yol bulduk, bu da onları yeni başlayanlar veya hızlı bir şekilde yerel bir site oluşturması gereken kullanıcılar için harika hale getiriyor. İlgilendiğiniz herhangi bir yönteme geçmek için aşağıdaki bağlantıya tıklayabilirsiniz:
Yöntem 1: Studio Kullanarak Windows’a WordPress Yükleyin (Hızlı ve Basit)
İlk yöntem için Studio’yu kullanacağız. WordPress yazılımına dayalı bir web sitesi oluşturucu olan WordPress.com‘u yöneten ve çalıştıran şirket olan Automattic tarafından yapılan yerel bir WordPress yazılımıdır.
İlk olarak bu yöntemden bahsedeceğiz çünkü takip etmesi çok daha hızlı ve basittir, bu da onu tamamen yeni başlayanlar için mükemmel kılar.
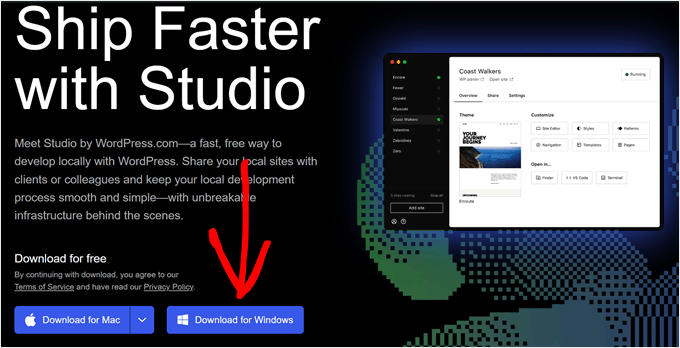
İlk olarak, Studio by WordPress.com web sitesini açmanız gerekir. Ardından, ‘Windows için İndir’ düğmesine tıklayın.
Bunu yaptıktan sonra, kurulumu başlatmak için indirilen dosyayı açmanız yeterlidir.
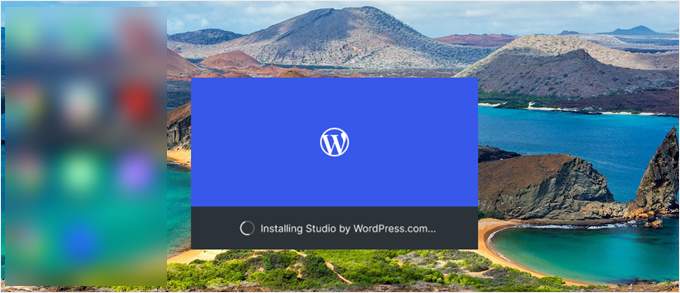
Şimdi size uygulamanın yüklendiğini gösteren bir açılır pencere görünecektir.
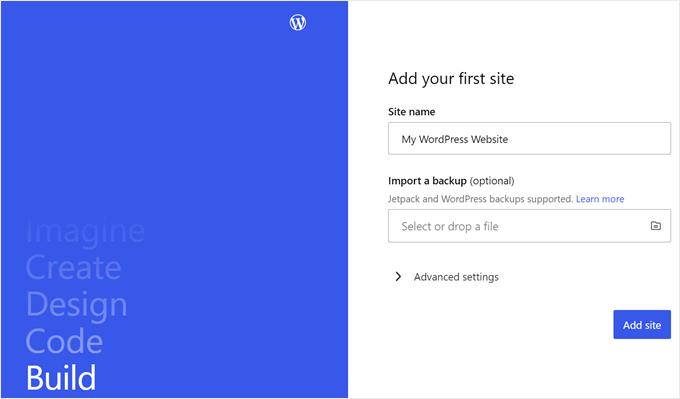
Bunu yaptıktan sonra ilk sitenizi ekleyebilirsiniz.
Bunu yapmak için yeni yerel WordPress sitenizin adını girin ve ‘Site ekle’ye tıklayın. Siteyi kolayca tanımlamanıza yardımcı olduğu sürece siteyi istediğiniz gibi adlandırabilirsiniz.
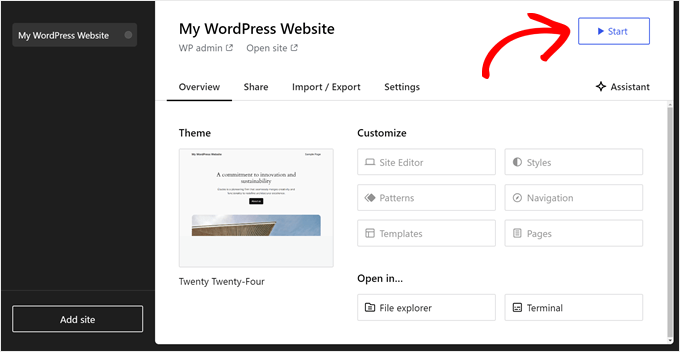
Şimdi yerel WordPress sitenizin panosunu görmelisiniz.
WordPress kontrol panelinize erişmek ve web sitenizi düzenlemek için sağ üst köşedeki ‘Başlat’ düğmesine tıklamanız yeterlidir. Bu, yerel web sitenizi bilgisayarınızdan erişilebilir hale getirecektir.
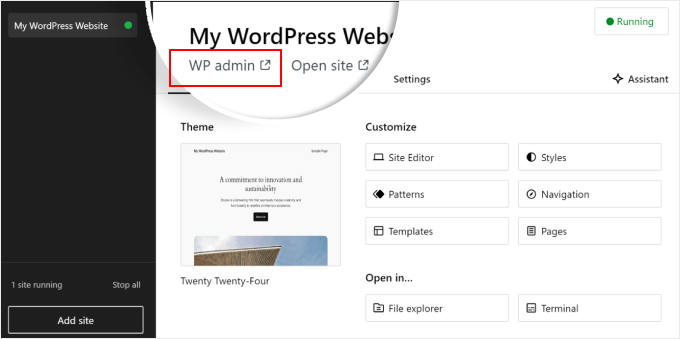
‘Başlat’ düğmesi ‘Çalışıyor’ olarak değiştiğinde, sayfanın sol üst tarafındaki ‘WP Admin’ bağlantısına tıklayabilirsiniz.
Bu sizi yerel WordPress yönetici sayfanıza getirecektir.
Ve kurulum için hemen hemen hepsi bu kadar. Yerel web sitenizi oluştururken gerekli olabilecek diğer ayarları inceleyelim.
‘Genel Bakış’ sekmesinde görebileceğiniz gibi, WordPress tam site editörü menüsüne doğrudan Studio kontrol panelinden erişebilirsiniz. Ayrıca WordPress web sitenizin klasörlerini ve dosyalarını açmak için ‘Dosya gezgini’ne tıklayabilir ve WP-CLI kullanarak web sitenizi yönetmek için ‘Terminal’e tıklayabilirsiniz.
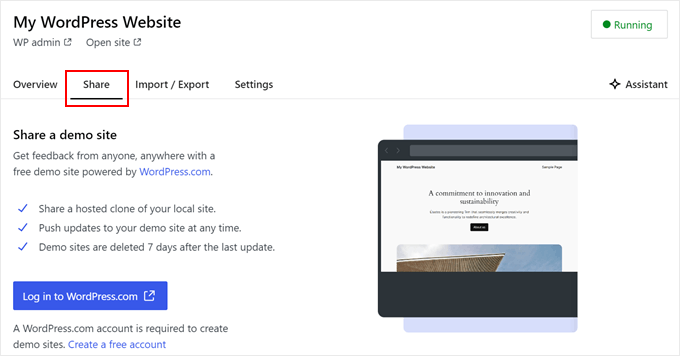
‘Paylaş’ sekmesine geçerseniz, WordPress.com hesabınızda oturum açabilir, yerel web sitenizi klonlayabilir ve WordPress.com sunucularına yükleyebilirsiniz. Bu, klonlanmış siteyi geçici olarak çevrimiçi hale getirecektir, bu da demo sitelerini müşterilerinizle veya ekip üyelerinizle paylaşmak için kullanışlıdır.
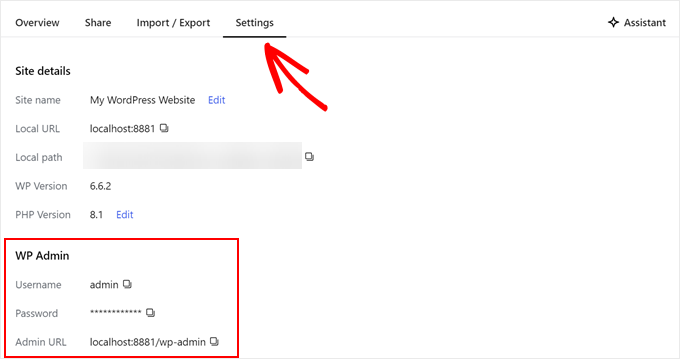
Bazen, Studio’yu kullanmak yerine doğrudan tarayıcınız üzerinden yerel web sitenize giriş yapmak isteyebilirsiniz. Bu durumda, wp-admin kimlik bilgilerinizi bilmeniz gerekir.
Bunları bulmak için ‘Ayarlar’ sekmesine geçebilir ve orada WordPress yönetici kullanıcı adınızı, şifrenizi ve giriş URL’ nizi bulabilirsiniz.
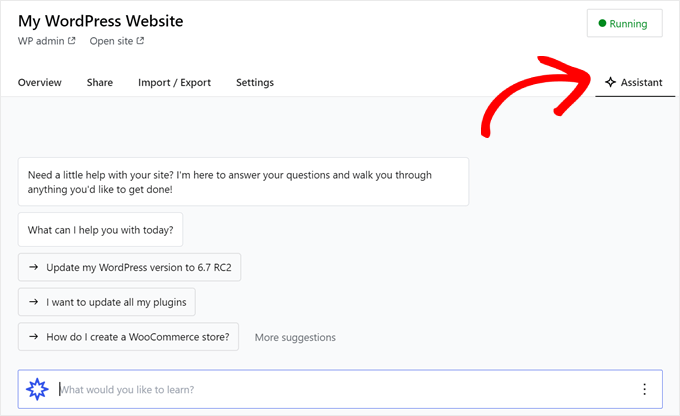
Studio’nun bir başka güzel özelliği de ‘Asistan’ düğmesine tıklayarak iletişim kurabileceğiniz yerleşik yapay zeka sohbet robotu.
Burada Studio’dan tüm eklentilerinizi aynı anda güncellemek, çekirdek WordPress sürümünüzü güncellemek veya özel bir blok için kod oluşturmak gibi görevler için yardım isteyebilirsiniz.
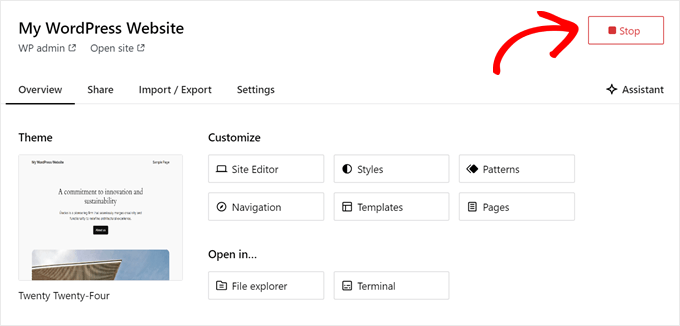
Yerel sitenizde çalışmayı bitirdiğinizde, sağ üst köşedeki ‘Çalışıyor’ düğmesinin üzerinde ‘Durdur’ yazana kadar bekleyin.
Ardından, web sitesini durdurmak için düğmeye tıklayın.
Studio’nun bir dezavantajı, WordPress ortamını kendi isteğinize göre yapılandıramamanızdır. Bu, sizin için önceden seçilmiş olan PHP sürümünü, web sunucusunu ve veritabanını kullanmanız gerektiği anlamına gelir.
Web sitenizi veya eklentinizi belirli sunucu yapılandırmalarıyla test etmeniz gerekiyorsa bu bir dezavantaj olabilir.
Yerel WordPress ortamınız üzerinde daha fazla kontrole ihtiyacınız varsa veya yerel kurulumunuzu belirli bir canlı sunucu yapılandırmasıyla eşleştirmeniz gerekiyorsa, Local WP kullanarak bir sonraki yönteme göz atabilirsiniz.
Yöntem 2: Yerel WP Kullanarak Windows’a WordPress Yükleyin (Daha Özelleştirilebilir)
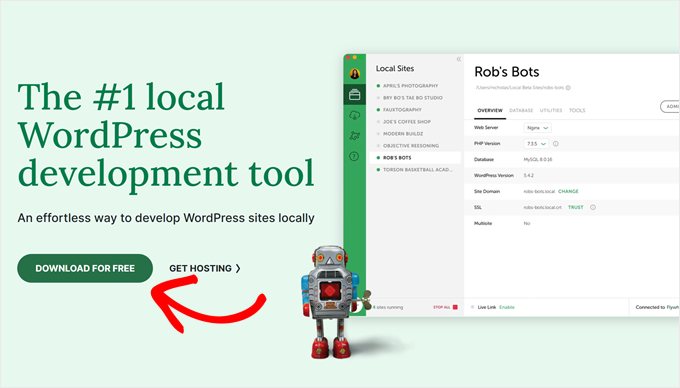
Öncelikle, Local WP yazılımını Windows bilgisayarınıza indirmeniz ve kurmanız gerekir. Bunun için Local WP web sitesine gidin ve ‘Ücretsiz İndir’ butonuna tıklayın.
Bundan sonra, platformunuzu seçmeniz gereken bir açılır pencere görünecektir. Devam edin ve açılır menüden ‘Windows’u seçin.
Ardından, yazılımı indirmek için adınız ve soyadınız, iş e-posta adresiniz ve telefon numaranız gibi bilgilerinizi girebilirsiniz.
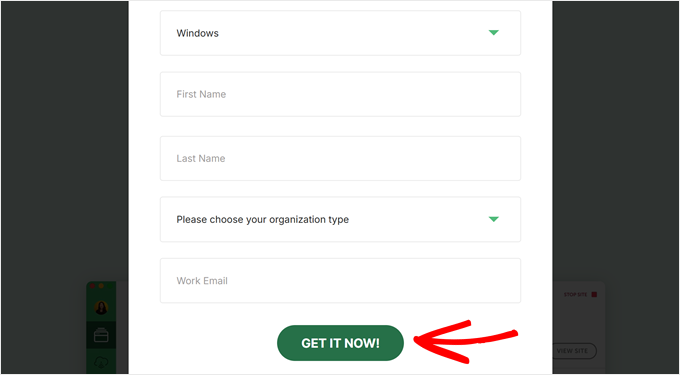
Ayrıntıları girdikten sonra ‘Şimdi Al’ düğmesine tıklamanız yeterlidir.
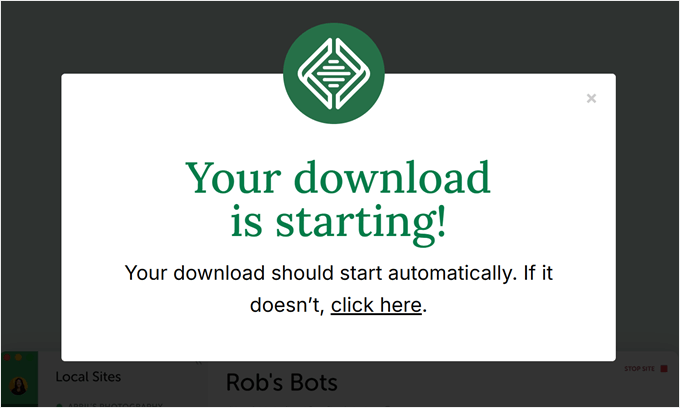
Bundan sonra, yazılım otomatik olarak bilgisayarınıza indirilecektir. Aksi takdirde, indirmeyi başlatmak için ‘buraya tıklayın’ bağlantısına tıklayabilirsiniz.
Dosya indirildikten sonra, devam edin ve kurulum sihirbazını başlatın.
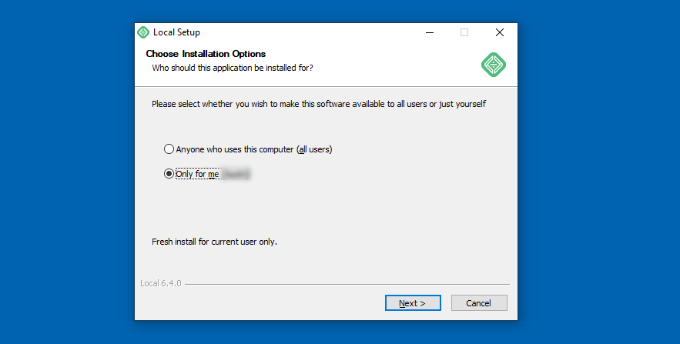
Şimdi, yazılımı tüm kullanıcılar için mi yoksa yalnızca kendiniz için mi yüklemek istediğinizi seçmeniz gerekecektir.
Bir seçenek belirledikten sonra ‘İleri’ düğmesine tıklayın.
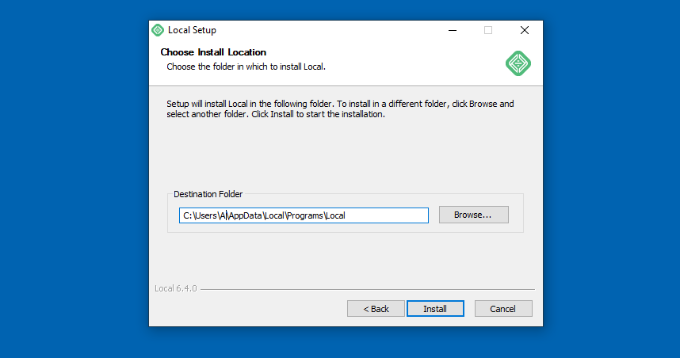
Bir sonraki adımda, yazılımın yükleneceği ‘Hedef Klasörü’ seçebilirsiniz.
Yolu ayarlamak için ‘Gözat’ düğmesine tıklamanız ve ardından ‘Yükle’ düğmesine tıklamanız yeterlidir.
Local WP yazılımı şimdi Windows bilgisayarınıza yüklenecektir.
İşlem tamamlandıktan sonra, ‘Yerel Çalıştır’ onay kutusunu işaretleyebilir ve kurulum sihirbazındaki ‘Son’ düğmesine tıklayabilirsiniz.
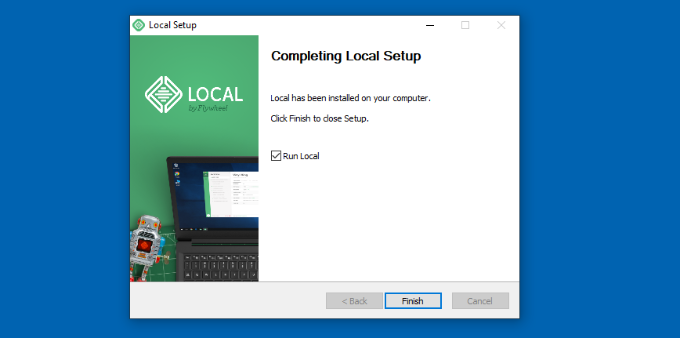
Yazılım şimdi Windows cihazınızda başlayacaktır.
Bir sonraki adım yeni bir yerel web sitesi eklemektir. Bunu yapmak için, alttaki artı ‘+’ düğmesine tıklamanız yeterlidir.
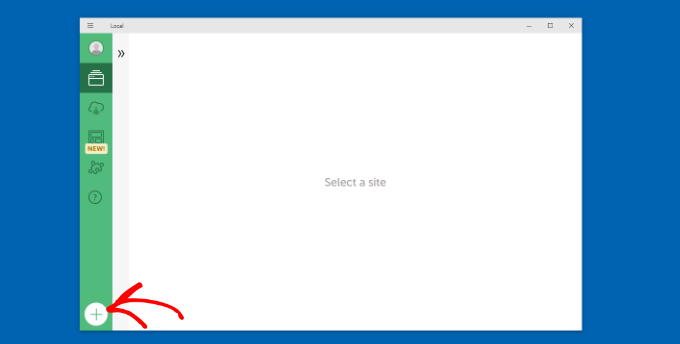
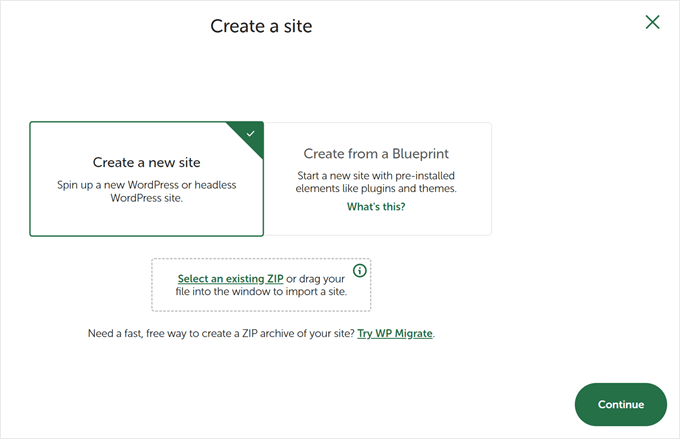
Bundan sonra, Yerel yazılımda bir site oluşturabilirsiniz.
‘Yeni bir site oluştur’ seçeneğini seçin ve ‘Devam Et’ düğmesine tıklayın. Siteyi bir plandan veya mevcut bir web sitesi dosyasından oluşturma seçenekleri de vardır, ancak gösterim amacıyla ilk seçeneği kullanacağız.
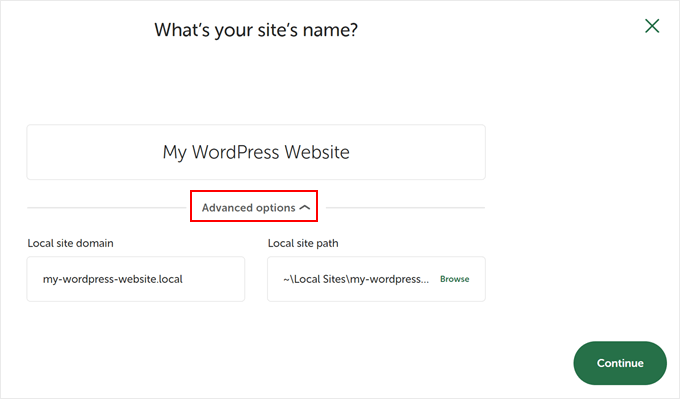
Ardından, yerel web siteniz için ‘WordPress Web Sitem’ gibi bir ad girebilirsiniz.
Yerel site alan adını ve yerel site yolunu girebileceğiniz gelişmiş seçenekler de vardır. Varsayılan olarak, etki alanı web sitenizin başlığını kullanacak ancak tire ile ayrılacaktır.
İşiniz bittiğinde, ‘Devam’ düğmesine tıklamanız yeterlidir.
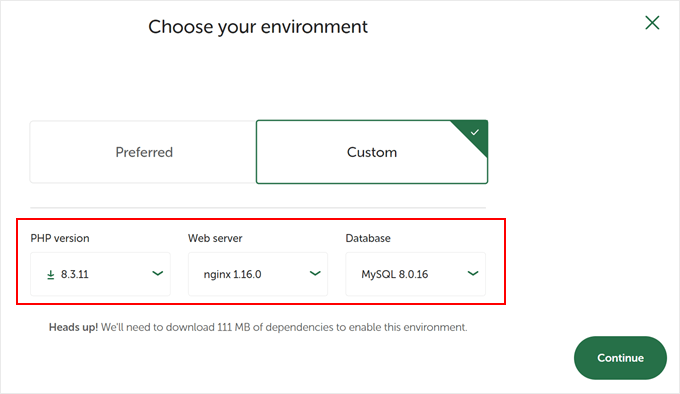
Bundan sonra, yerel web siteniz için bir ortam seçmeniz gerekecektir.
Yazılımın PHP sürümünü, web sunucusunu ve MySQL sürümünü otomatik olarak seçeceği ‘Tercih Edilen’ ortamı kullanabilirsiniz. Öte yandan, ‘Özel’ seçeneğini de seçebilir ve ortam ayrıntılarını girebilirsiniz.
Local WP en son PHP sürümlerini sunar. Web sunucusuna gelince, Nginx veya Apache arasında seçim yapabilirsiniz. Ayrıca veritabanları için MySQL veya MariaDB arasında seçim yapabilirsiniz.
Bazı PHP, web sunucusu ve veritabanı sürümlerinin düzgün çalışması için bazı bağımlılıkların indirilmesi gerektiğini unutmayın.
Ardından, yerel web siteniz için bir WordPress kullanıcı adı ve şifresi girebilirsiniz. Ayrıca, tüm e-posta bildirimlerini alacağınız bir WordPress e-posta adresi seçme seçeneği de vardır.
Bunun dışında, yazılımın bir WordPress çoklu site ağınız olup olmadığını soracağı gelişmiş bir seçenek vardır. Eğer yoksa, sadece ‘Hayır’a tıklayın.
Bu ayrıntıları girdikten sonra, ‘Site Ekle’ düğmesine tıklamanız yeterlidir.
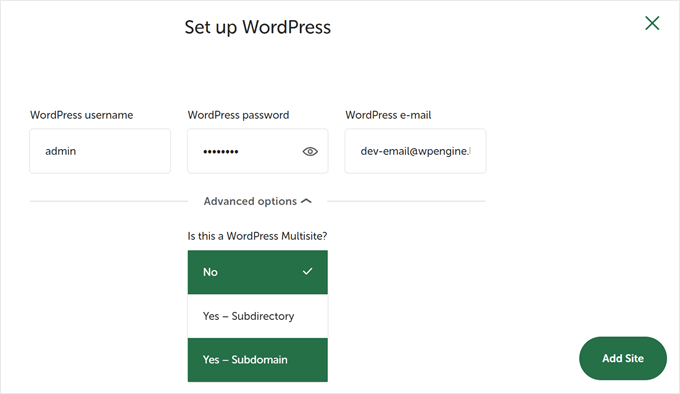
Yazılım şimdi WordPress’i yükleyecek ve web sitenizi kuracaktır.
Yerel web sitesini başlatmak için devam edin ve sağ üst köşedeki ‘Siteyi başlat’ düğmesine tıklayın.
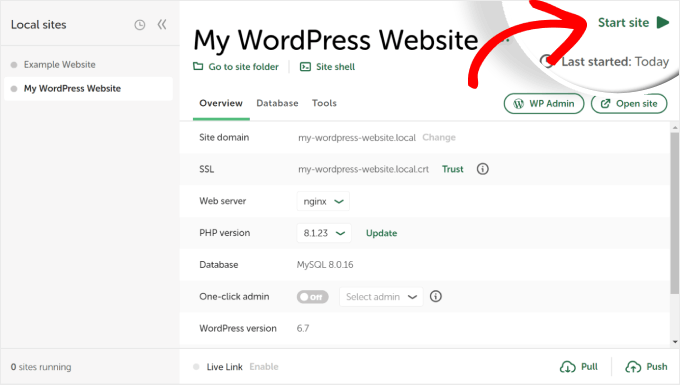
Ardından, ‘WP Admin’ düğmesine tıklayın ve WordPress yönetici giriş sayfasını göreceksiniz.
Yerel web sitesini kurarken daha önce girdiğiniz kullanıcı adı ve şifreyi girmeniz ve ardından ‘Oturum Aç’ düğmesine tıklamanız yeterlidir.
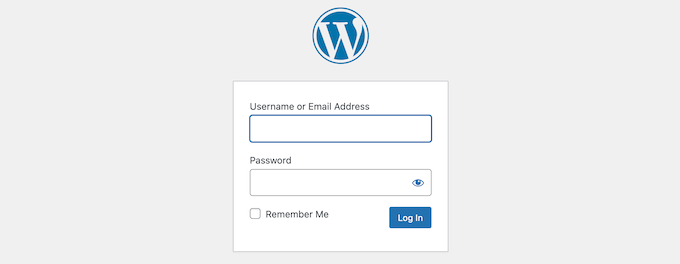
Artık Windows bilgisayarınızda yerel web sitenizi düzenleyebilirsiniz.
İşiniz bittiğinde, ‘Siteyi durdur’ düğmesine tıklayarak web sitesini Local WP yazılımından durdurmayı unutmayın.
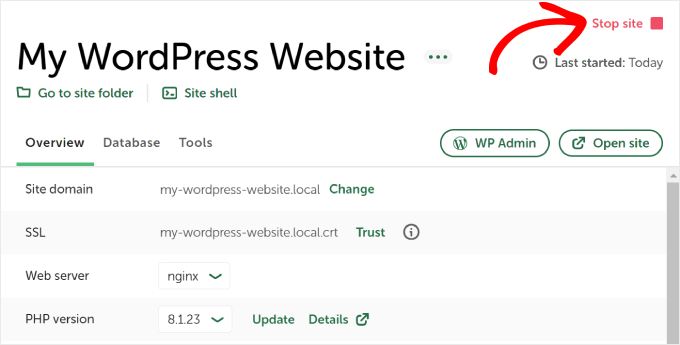
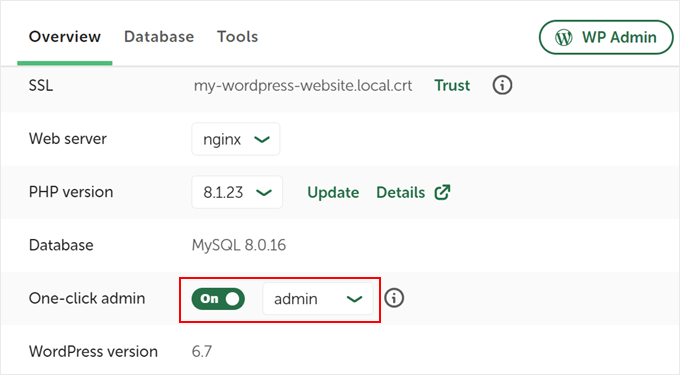
Profesyonel İpucu: Oturum açma işlemini atlamak istiyorsanız, Local WP’de tek tıklamayla yönetici oturum açma özelliğini etkinleştirebilirsiniz.
Bunu yapmak için Local WP kontrol paneline geri dönün ve ‘Tek tıkla yönetici’ düğmesini ‘Açık’ yazana kadar değiştirin. Ardından, açılır menüden bu tek tıklamayla oturum açma özelliğini kullanabilecek yönetici kullanıcıyı seçin.
Alternatif: Temaları, Eklentileri ve Daha Fazlasını Test Etmek için WordPress Playground’u Kullanın
WordPress Playground, WordPress ile doğrudan web tarayıcınızda denemeler yapmanızı sağlayan yenilikçi bir araçtır. Herhangi bir gerçek web sitesini etkilemeden yeni WordPress temalarını, eklentilerini ve özelliklerini deneyebileceğiniz sanal bir kum havuzudur.
WordPress Playground, yerel bir WordPress ortamından birkaç önemli yönden farklıdır.
İlk olarak, bilgisayarınıza kurulum gerektirmez ve kalıcı yerel kurulumların aksine her kullanımdan sonra sıfırlanır. Yerel kurulumlar tek bir bilgisayara bağlıyken, tarayıcıya sahip herhangi bir cihazdan erişebilirsiniz.
WordPress Playground hızlı testler ve öğrenme için ideal olsa da, Windows bilgisayarınızdaki yerel bir WordPress ortamı uzun vadeli geliştirme projeleri için daha fazla esneklik sunar.
Ayrıntılı bir kılavuz için tarayıcınızda WordPress Playground’u nasıl kullanacağınıza ilişkin kılavuzumuza göz atın.
Windows Bilgisayarıma WordPress Yükledim, Şimdi Ne Olacak?
Artık bilgisayarınızda WordPress olduğuna göre, işte yapabileceğiniz bazı şeyler:
- Sitenizi daha iyi kullanmak için temel WordPress ipuçlarını ve püf nokt alarını öğrenin.
- Sitenizin nasıl görünebileceğini görmek içinfarklı WordPress temalarını deneyin.
- Sitenize yeni özellikler eklemek için olmazsa olmaz WordPress eklentilerini yükleyin ve test edin.
- Yaygın WordPress hatalarını kendi başınıza nasıl düzelteceğinizi öğrenin.
- Sitenizin güzel görünmesini sağlamak için farklı sürükle ve bırak sayfa oluşturucuları deneyin.
- Sitenize erişimi kurtarmak için localhost’ta WordPress yönetici şifresini nasıl sıfırlayacağınızı öğrenin.
- Sitenizi yönetmeyi kolaylaştırmak içinotomatik iş akışları kur un.
- Sitenizi bilgisayar korsanlarına karşı güvende tutmak için WordPress güvenliği hakkında bilgi edinin.
- Yerel WordPress sitenizi herkesle paylaşmaya hazır olduğunuzdacanlı bir sunucuya taşıyın.
Umarız bu makale WordPress’i yerel olarak bir Windows bilgisayara nasıl yükleyeceğinizi öğrenmenize yardımcı olmuştur. WordPress ‘i Mac bilgisayara yerel olarak yükleme hakkındaki makalemizi ve WordPress hazırlık sitesi oluşturma hakkındaki nihai kılavuzumuzu da görmek isteyebilirsiniz.
If you liked this article, then please subscribe to our YouTube Channel for WordPress video tutorials. You can also find us on Twitter and Facebook.


Bidyut Kumar Mondal
Thanks a lot for such a wonderful post.
Ali
Just to say Thank you very much.
sreenu
thank you…thank you soooooooooooo much ..
Nissim
Thank you so much. this was sterling
adriana
OMG i made it through. lol. thank you for your time writing this, it helped me through the panic stage lol
mahendra
Who help of peoples, They are God
Kenneth Ekeh
Help please! I have followed the article and installed wamp, created the wp database but culd not be able to run complete configuration of wp. Its telling me “can’t select database”. Try Again. Please help me to fix this. Thanks.
WPBeginner Support
During the installation when it asks for your database details, please make sure that you are entering the same name for the database which you used when creating database in phpmyadmin. For username, use root and leave password blank.
Admin
Tom
Upon opening mysql workbench, choose your connection, then write the code without quotes “create database nameofyourdatabase;” this will be the name of your database and what you will use in the wordpress setup when it asks for the name of your 1)database(use nameofyourdatabase) 2)username 3)password 4)database host(im using “localhost”)
Hope this helps.
Tammi L. Coles
Just a quick note of thanks for this very simple-to-follow tutorial. It worked like a charm (including the Apache rewrite for permalinks follow-up).
ogunmakinwa dayohanks.
Your tutorials as been good for me so far, but please which stable wordpress can i download? can i download the latest version? i am just thinking that some plugins might not be available for the latest version.. so for now which version do you recommend for me? thanks
WPBeginner Support
We always recommend using the latest stable version of WordPress.
Admin
Mohamed Ishag
Hi there,
Would you please answer the question posted on 12/11/13 I still need help
as I am unable to run the WAMP Server on Windos 8. Please read question posted on 12/11/13.
Thank you in advance.
Regards,
Mohamed
Orestes
I was able to install WP, but I’d like to know how to manage different web logs within my local server. Thank you for the instructions and tutorials here.
WPBeginner Support
you can install different weblogs (blogs or websites) on the same server by installing wordpress in different sub-directories inside your
/wamp/wwwfolder. For example:C:\wamp\www\site-1 will open in http://localhost/site-1
C:\wamp\www\site-2 will open in http://localhost/site-2
Admin
GinoDC
After entering details for Site Title, Username, Password and Email I press Install WordPress and my computer hangs. Please help.
WPBeginner Support
This could happen for a number of reasons. Try to uninstall wampserver and then download and reinstall again. If the problem presists, then you can try XAMPP.
Admin
Mohamed Ishag
Hello,
I have installed WAMP on Windows 8 but I am having a problem creating a data base due to the following error (You don’t have permission to access /phpmyadmin/ on this server). I have edited the htpd.conf file as follows
Open file httpd.conf through wamp tray icon
Find:
# onlineoffline tag – don’t remove
Order Deny,Allow
Deny from all
Allow from 127.0.0.1
Change to:
# onlineoffline tag – don’t remove
Order Deny,Allow
Allow from all
Then saved but still get the same error, why!? Norton 360 is installed on the PC
and no other conflicting apps. I need some help to fix this issue. Any ideas? Thank you in advance.
Best Regards,
Mohamed
Mohamed Ishag
Dear Syed and the team,
Thank you very much for this site. I am new to WordPress and found your tutorials and explanation very good and straight forward. I feel that you are a busy man but still have time to dedicate this site to new WP beginners. God bless your parents.
Salam,
Mohamed
adam
Hello,
I have installed everything and am finally at my wordpress dashboard on my localhost machine. everytime i click on visit my site to view what I have changed the page simple directs to the WAMP server configuration screen that shows apache version, php version, loaded extensions, etc… It seems that something simple needs to be changed but I dont know…Can anyone please help? Thanks in advance…
WPBeginner Support
You have probably installed WordPress in www directory. You need to install it in a subdirectory like www/testsite1/
Admin
Nuno
Hey i have the same problem, so if i just copy all the files to a subdirectory it will work or do i have to reinstall it all over? Thanks.
Matthew
Thank you, than you, thank you. I am a technophobe and your clear instructions helped me all the way.
Arthur
Hi,
After installing WAMP in accordance with your instructions, I could not open phpmyadmin; explorer kept waiting for localhost. I’m not a pc techie so I desperately need instructions how to proceed furter in the same easy way as your manual above. I have a 64 bit W7 machine, and installed the 64 bit version of WAMP first, but since that did not work as described , I installed the 32 bit, but with the same result. Thanks for your help in advance ! (No Skype, port 80 OK, as far as I can see)
WPBeginner Support
Try restarting all services make sure that WAMPServer icon is green also make sure that Skype is not running in the background. Also look at this support thread for more possible solutions.
Admin
Arthur
Thanks a lot: I followed your recommended thread and I removed a double line in the Host file (‘127.0.0.1 Localhost’) that seemed too much and now I can get to a log-in page of phpMyAdmin, which is great, but I have not yet even entered an ID and password during initial installation of WAMP. Did I miss something ?
Thanks for your patience again…
WPBeginner Support
To log in to phpMyAdmin, enter username root and leave password blank.
Trudy Ritsema
Can I run more than 1 test site on WAMP? and any ideas of how I would go about this please?
I already I have localhost site running – and I don’t want to get rid of that yet as I am still developing it…
Thanks in advance.
WPBeginner Support
in your www directory create new directories for each website. That way you can run multiple sites on localhost.
Admin
viki
i can’t create new database, bcause it is showing ” * No Privileges” in red colour letters. please help me
WPBeginner Support
you are probably entering wrong credentials to connect to your mysql database.
Admin
nick mav
you should login using the following credentials:
username: root
password: [empty] –> that is, no password
Shawn Morrissey
Thanks Nick,
I had the same issue and couldn’t find this out anywhere I had looked previously…
SanketP
Hi. I am a new-bee to this world of eb designing. Wanted Joomla but that didnot go thru too well. WP instal was as good for me. Thank you. XOXOXO.
Everett
Hello. I want to be able to develop my wordpress site locally and not have to be connected to the web when I make changes and do save or update inside wordpress. Before I go through all the installation of WAMP and WP locally, can anyone tell me if I will have to have internet access to make updates to a wordpress running locally in WAMP? Sure I realize if I wanted a new Theme or Plugin, I would have to be online, but if I am just making adjustments to text and adding pictures that are already on my laptop, etc. will I have to have internet access to do so? I ask because I do a lot of travel where I am on an airplane and could be working on a new version of a website if I don’t have to be online. Also, I can’t afford a wireless account for my laptop, so I only have internet when I am at home with my own wifi or when I am somewhere that has a free wifi. Thanks.
WPBeginner Support
no you do not need an internet connection to work locally on your website.
Admin
Ian
I followed the instructions to the letter, installed WAMP and the required SP1 Visual C++ on a brand new laptop running Windows 8 64bit. The installation refuses to launch, brings up a screen asking if I’m sure I want to let this programme make changes to the computer, then does nothing when ‘Yes’ is clicked. What is going wrong?
WPBeginner Support
Does the wampserver icon appear in your windows taskbar? If it does, then you need to click it and launch wampserver.
Admin
Brynn
Please help. I installed WAMP but when I went to open phphMyAdmin, nothing happens. I tried uninstalling and reinstalling, but still getting the same problem. I’m not even getting any sort of popup block notification in my browser. Just nothing.
I wonder if this might have something to do with the WARNING window that popped up on the WAMP website before I downloaded it… It said something in French, and then something about needing to install C++ which I know nothing about, and which was not mentioned in this tutorial.
Do I need to install C++ and if so, do I need to learn how to use the programming language before I can finish this tutorial on installing WordPress? I am a designer, not a programmer, so I hope to god I don’t need to stop everything and go learn C++ before I can do a simple WordPress install.
WPBeginner Support
Brynn you can always check whether or not Microsoft Visual C++ is installed on your computer from Control Panel -> Programs and Features. Do you see wampserver page when you visit http://localhost? If you do, then you have already successfully installed WAMP.
John Victor
Can I hug you now or later?
Anudeep
Awesome tutorial
guru
I install wordpress to my localhost. But i dont know to use it to develop a site. I’m new to wordpress. Please anyone help me.
WPBeginner Support
Take a look at our beginner’s guide section. For theme development you may want to take a look at our WordPress theme cheat sheet for beginners.
Admin
Scott Cho
Got WAMP installed, but when I try to create a new databse by clicking on the phpMyAdmin button in WAMP the chrome browser window that opens up says:
Forbidden
You don’t have permission to access /phpmyadmin/ on this server.
Can anyone point me in the right direction as to what this is and how to fix it? I don’t know if this makes a difference but I have it installed on my secondary hard drive, not my C drive (the c drive just has my operating system).
Asad Riaz
Here is how you edit the htpd.conf file
Open file httpd.conf through wamp tray icon
Find:
# onlineoffline tag – don’t remove
Order Deny,Allow
Deny from all
Allow from 127.0.0.1
Change to:
# onlineoffline tag – don’t remove
Order Deny,Allow
Allow from all
Plus resolution to some other conflicts
Make sure no other program conflict wamp such as Xampp, phpEasy, IIS, Skype, Zonealarm, firewall/antivirus, NOD32, Eset, any web and/or Remote Desktop related program, such as Teamviewer …
IIS and Apache/Wamp are both web server and might conflict in some way, so you have to disable IIS in order for Wamp to work
Disable IIS in Vista/W7:
Control Panel, Uninstall Programs, Turn Widows Features On or Off, uncheck Internet Information Services
Disable IIS in XP:
Control Panel, Add/Remove Programs, Add/Remove Windows Components, uncheck Internet Information Services (IIS)
Restart computer, then restart Wamp
Also, in folder C:\WINDOWS\System32\drivers\etc, open file hosts and delete anything in this file and have only this line below and nothing else
127.0.0.1 localhost
If using Skype, go to Tools->Options->Advanced->Connection and uncheck the box “Use 80 and 443 as alternatives for incoming connections”. Restart Skype after WAMP. Now you will be able to use both programs at the same time w/o problems.
I hope it helps, found it on net
Asad Riaz
Howdy,
Well i have managed to install it using the article. Some info was missing in this article like
1. Once you click on phpMyAdmin, it asks for login details, so here they are:
username: root
pass: (leave it blank)
2. WAMP sometimes gets offline and it wont open the phpMyAdmin page, so you guys need to edit the htpd.conf file in C:wamp/bin/apache4.2/conf/htpd
Lets see now how much it helps me.
I m here for all the support that i can extend.
Thanks to the author of this page.
Cesar M.
thanks for the user info I was getting crazy, but I finally got in to phpmyadmin
Colin Teasdale
Hiya,
Problem solved – I had needed to install the Visual C# redistributable, and did that after installing Winamp. Uninstalled Winamp, rebooted and then re-installed – everything fine. That’ll be user error then ! ! !
Colin T.
Scott Cho
I’m getting the same error you just described below, where is this redistributable you speak of?
Colin Teasdale
Hi guys,
I’ve just downloaded and installed WAMP and have got to the “set up a database” stage. When I select ‘phpMyAdmin’ I get a ‘Firefox Problem Loading Page’ page with “Unable to connect – Firefox can’t establish a connection to the server at localhost”.
I’ve tried the fix suggested by Imran on June 17th, but this doesn’t seem to have fixed resolved the problem.
Any thoughts on how I fix this, please??
Peter
Hi Editorial Staff,
Do you have a tutorial that is the reverse process also using WAMP? I have a functioning website that I would like to duplicate on my home computer for experimenting and learning css, and php programming without risking my functional website.
Thanks.
EL
That is exactly what I need!
Denzil
Hi, a very useful article, thanks. Is it easy to migrate a test WP site on WAMP to a hosted site elsewhere? Do you have a tutorial article to help?
Thanks
Editorial Staff
Yes, it is fairly easy to do that. Tutorial will be coming tomorrow
Admin
Denzil
Great! How timely! Thanks guys, looking forward to it.
Kate BP
Absolutely cracking article – really helpful, thanks so much!
akash
After clicking on phpmyadmin,,,,,,,
i am getting redirected to directly php my admin webpage and not the database entry option which is shown above.
thereafter the details are not matching afterwards in database,username and password.please give me its solution as soon as psbl.
Amitoj Gautam
User Name: Root
Password: None (Leave this space empty)
Click on the Go button. You will be directed to the page you are looking for.
Dana
Hi! Once I’ve created a site on my WAMP server, could I then transfer it to an existing domain name? I’m trying to create a new site without shutting down the old one. Once the new one is finished, I would want to replace the old one, but use the same domain name. Thank you!
Editorial Staff
Yes you can do that. We have updated the article to add a link to the tutorial.
Admin
vahid
Thank you so much
chris martin
Hi, I am having trouble with links not working. Could you help me or give me some direction on how to fix that? On my site “chrisjamesmedia.com” click menu, then “blog” and i get “not found”. This also happens with links as well.
Also, do you have a tutorial on how to host multiple domains from this as well, or point me in the right direction.? I have looked up several things about virtual domain, localhost, and everytime I find something they want me to edit httpd conf, but what they have doesnt match mine.
Thank you so much!!!!
Tamsin
Hi,
Great article, very clearly explained.
Would you be able to tell me the best way to add a second WordPress site to Wamp? I have read a lot of conflicting information and would rather not make a massive mess of things!
Editorial Staff
Create a new folder inside your www folder, then repeat this process.
Admin
Tom Smith
Hi,
Thank you for providing this excellent tutorial! It’s going to be great to get use to using WP onn my PC before I install it on my host server and create my website.
I followed your instructions and installed WAMP and then WordPress and got all the screens you showed here… and with the tweaking you suggested, I was finally able to open WP – saw the Dashboard, etc. Then I closed it.
But now I can’t seem to open WP. I open WAMP and click on Localhost – and it just sits “waiting for response from localhost” – does not open anything. I’ve tried http://localhost/my database name – it will not open – I get “HTTP 500 Internal Server Error”. Just in case, I also followed your instructions on SKYPE and unchecked that Port 80 box.
What am I missing?
Editorial Staff
Did you shut down your computer? You have to launch WAMP Server every time you restart your computer.
Admin
Imran
When i try to Setting Up a Database for WordPress, it was saying like this : Forbidden
You don’t have permission to access /phpmyadmin/ on this server. what is the reason ? can you please guide me. thank you in advance….
Editorial Staff
That’s weird. Since you are the admin of your Wamp install, then you shouldn’t get this error.
Admin
Imran
Finally i got the solution…
I think it will be useful for others.
for phpmyadmin
Goto c : wamp/alias/phpmyadmin.conf file, open with notepad.
find
Options Indexes FollowSymLinks MultiViews
AllowOverride all
Order Deny,Allow
Deny from all
Allow from 127.0.0.1
replace with
Options Indexes FollowSymLinks MultiViews
AllowOverride all
Order Deny,Allow
Allow from all
thats it…
Imran
Thank you very much EDITORIAL STAFF, this is a nice post and very usefull.
Melanie
I had this same problem with the phpmyadmin and I found and made the changes cited here to the alias file, then restarted WAMP and I was able to create my database. However, now I’m getting the same Forbidden message when I try to install WordPress on my localhost, exact text below:
Forbidden
You don’t have permission to access / on this server.
I can get to the WP install screen from 127.0.0.1, but not localhost. I’m running Windows 8. Any ideas on how to get this to install? Thanks in advance for any help you might be able to give me.
Akshay
Hi.
I wanted to use this method to test out plugins before installing then on my live site. So in your tutorial, instead of copying in clean WordPress files, I copied in a full backup of my site made using BackupBuddy.
However from this point on I’m not sure what to modify in order for my site to function correctly offline. I edited my wp-config file to the new database details, and imported my database from my online phpmyadmin to the WAMP one. However it seems like there’s something I’m missing, as when I try to access localhost/site/wp-admin I am redirected to my online login page.
Do you have any suggestions?
Thanks very much for your help.
Akshay
Brandi
I’m in the same boat – did you ever find a solutions?
Christophe R.
Another (lazy) point for XAMPP : I know there are some differences in the config files, but I use both linux (at home) and Windows (Seven and 8) at work, so I appreciate having the same interface for I only have to learn once.
Andre
Great article and easy instructions for those who want to venture into WAMPP….however, for myself, I still prefer XAMPP and do run it on it’s own on a second drive without the installable version. Updating is a breeze, although I rarely need to.
I’ve used XAMPP for many years now for both WordPress and Joomla theme development, as well for a testing server. Never had issues and I do find it quite easy to use. I used to use the full version but I found that the Lite version works extremely well.
I noticed someone said AMPPS, but I’ve never tried that…perhaps in my spare time I will try it out.
Nicholas
Its click and install that’s how easy it is and just open to localhost/ampps i use it for all my scripts that this includes as downloads and install on the service. no worries on xamp and wamp that i found to limited in some ways.
Adrian
Thanks alot it was really helpful
Thomas
Hi everyone,
I’m a very beginner with WordPress and I have created a site with it and WAMP on my computer.
Now I want to put it online, but I don’t know how to do it.
Where does a tutorial exist for that?
The thing is that I want to replace the current site, which is hosted somewhere else, and so keeping the domain name.
Does anyone know where I can find this kind of information?
Thanks a lot!
Nicholas
WAMP in the older days was great! Now there is a far more better and less embarrassing way when it comes to configuring things with WAMP. WAMP is in the past and gone for me. I use AMPPS far more better no configurations, just install and a few dips of changes in the options section that’s it. Open your browser go to your localhost and install any cms or other scripting lang within your browser using ampps. You’ll be amazed! No more downloading then extracting in www folder and then reconfiguring. WordPress is just a click and install on ampps. No hassle! Shouldn’t you guys write something about AMPPS? This is a lot more better than WAMP! WAMP lags a lot of things like cgi and stuff those are extras, but on ampps everything is included. Ever since ampps I never looked back to wamp! Sorry!
Editorial Staff
Have been using WAMP for so long that didn’t even bother with another option. AMPPS sure looks good. Good to see that it is made by the folks from Softaculous. Will have to give it a try.
Thanks for the suggestion Nicholas.
Admin
Zimbrul
Why do you say you prefer WAMP over XAMPP?
Alexander Gounder
WAMP is much simpler and easier to use compared to XAMPP.
Editorial Staff
Would second that. WAMP is easier to use. Several years ago when we used XAMPP the upgrade process was complicated and it was buggy. We switched over to WAMP and it was awesome.
Admin
Parth S.
Hi, Thank you very much for this. It’s very informative and easy to follow. However I’d suggest you mention the skype thing a lil early around the localhost point, because, there ppl start to worry when they see a blank screen with skype on in their PC.
Great post though. Keep it up.
Mladen
Just to mention, that Team Viewer also causes problems with WAMP.
Christophe R.
I actually do prefer XAMPP and DTX-Control for I can overcome security policy : Installation without administration rights (zip file pour the web server) and full access to blocked ports (80, 443, 3306).