
Bir resmi her yüklediğinizde, WordPress otomatik olarak farklı boyutlarda birden fazla kopya oluşturur. Temalar ve eklentiler daha da fazlasını ekleyebilir.
Ancak bu varsayılan boyutlar her zaman ihtiyaçlarınıza uygun olmayabilir. Belki çok büyüktürler ve sitenizi yavaşlatırlar ya da çok küçüktürler ve etkilerini kaybederler.
WPBeginner’da, web sitenizin tasarımını geliştiren mükemmel boyutta görsellere sahip olmanın ne kadar önemli olduğunu biliyoruz. Bu yüzden panik yapmayın – bu sorunları çözmenize yardımcı olacağız.
Bu makalede, WordPress’te nasıl ek görsel boyutları oluşturacağınızı ve bunları web sitenizde nasıl kullanacağınızı göstereceğiz. Sonunda, ister küçük resimler, ister öne çıkan görseller veya benzersiz bir düzen için olsun, ihtiyaçlarınızı tam olarak karşılayacak özel görsel boyutlarına sahip olacaksınız. 🎨

WordPress’te Neden Ek Görsel Boyutları Oluşturmalısınız?
Genellikle popüler WordPress temaları ve eklentileri otomatik olarak ek resim boyutları oluşturur. Örneğin, temanız arşiv sayfalarınızda veya özel ana sayfalarınızda küçük resimler olarak kullanmak için farklı boyutlar oluşturabilir.
Ancak bazen bu görseller gereksinimlerinizi tam olarak karşılamayabilir. Örneğin, bir alt temada veya ızgara düzeninde farklı resim boyutları kullanmak isteyebilirsiniz.
Bunu yapmak için WordPress’te ek görsel boyutları oluşturmanız ve ardından gerektiğinde doğru görseli çağırmanız gerekir.
Bunu akılda tutarak, size WordPress’te nasıl ek resim boyutları oluşturacağınızı göstereceğiz. İşte bu makalede ele alacağımız tüm ipuçlarına hızlı bir genel bakış:
Hazır mısınız? Hadi başlayalım!
Temanız için Ek Görüntü Boyutları Kaydetme
Çoğu WordPress teması, yazı küçük resimleri olarak da bilinen öne çıkan görselleri destekler.
Ancak, özel bir WordPress teması oluşturuyorsanız, öne çıkan görseller için destek eklemeniz gerekir.
Çoğu WordPress uzmanı, temanızın functions.php dosyasına aşağıdaki özel kod parçacıklarını eklemenizi önerebilir.
1 | add_theme_support( 'post-thumbnails' ); |
Bununla birlikte, sitenizi yalnızca küçük bir hatadan dolayı bozma riskiniz olduğundan, yeni başlayanlar için pek uygun değildir. Bunun yerine, özel snippet’leri WPCode kullanarak eklemenizi öneririz.

WPCode, WordPress’e özel kod eklemeyi basitleştiren ve 2 milyondan fazla web sitesi sahibi tarafından kullanılan güçlü bir kod parçacığı eklentisidir. Kod parçacıklarını tema dosyalarınızdaymış gibi çalıştırarak özelleştirmeleri geleceğe dönük ve yeni başlayanlar için bile yönetimi kolay hale getirir.
✏️ Not: Marka ortaklarımızın çoğu web sitelerine özel kod parçacıkları eklemek için WPCode’a güveniyor. Ne kadar basit ama güçlü olduğunu ilk elden gördük, bu yüzden şiddetle tavsiye ediyoruz. Daha fazlasını öğrenmek ister misiniz? WPCode incelememizin tamamına göz atın!
İyi haber şu ki, WPCode ücretsiz sürümü özel kod parçacıklarınızı eklemenize izin veriyor. Öyleyse, eklentiyi kuralım ve etkinleştirelim. Yardıma ihtiyacınız varsa, bir WordPress eklentisinin nasıl kurulacağına ilişkin kılavuzumuzdaki adım adım talimatları görebilirsiniz.
Etkinleştirmenin ardından WordPress panonuzdan Code Snippet ” + Add Snippet seçeneğine gidebilirsiniz. Ardından, devam edin ve ‘Özel Kodunuzu Ekleyin (Yeni Snippet)’ düğmesine tıklayın.
Bir sonraki ekranda, özel kod parçacığınızı adlandıracaksınız. Örneğin, buna ‘Küçük Resim Gönderme Desteği’ adını verebilirsiniz.
Ardından, bu kodu kopyalayıp ‘Kod Önizleme’ alanına yapıştırabilirsiniz:
1 | add_theme_support( 'post-thumbnails' ); |
İşte editörde nasıl görünebileceği:
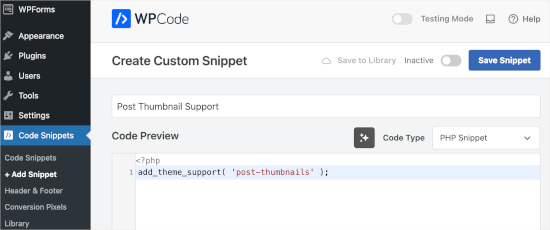
Bundan sonra, kod türünü ‘PHP Snippet’ olarak değiştirdiğinizden emin olalım.
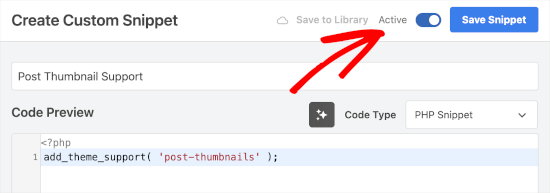
Daha sonra, geçişi ‘Etkin Değil’den ‘Etkin’e getirebilir ve ‘Snippet’i Kaydet’e tıklayabilirsiniz.
Gönderi küçük resimleri için özel kod parçacığı desteğini ekledikten sonra add_image_size() işlevini kullanarak ek resim boyutları kaydedebilirsiniz.
Bir kez daha, Code Snippet ” + Add Snippet‘e giderek WPCode özel kod parçacığı düzenleyicisini açalım. Bundan sonra, ‘Özel Kodunuzu Ekleyin (Yeni Snippet)’ düğmesini seçelim.
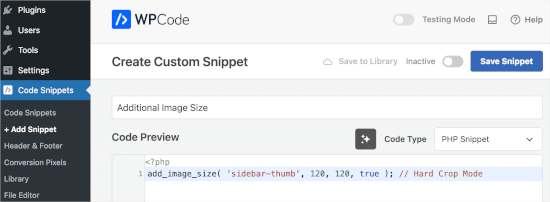
Sırada, bu kod parçacığını ‘Ek Görüntü Boyutları’ olarak adlandırabilirsiniz.
Ardından, kod düzenleyicide add_image_size işlevini aşağıdaki biçimde kullanacaksınız:
1 | add_image_size( 'name-of-size', width, height, crop mode ); |
İşte tam işlevin nasıl görünebileceğine dair birkaç örnek:
1 2 3 | add_image_size( 'sidebar-thumb', 120, 120, true ); // Hard Crop Modeadd_image_size( 'homepage-thumb', 220, 180 ); // Soft Crop Modeadd_image_size( 'singlepost-thumb', 590, 9999 ); // Unlimited Height Mode |
3 farklı WordPress resim boyutu belirledik. Her birinin sert kırpma, yumuşak kırpma ve sınırsız yükseklik gibi farklı modları vardır. İhtiyaçlarınıza bağlı olarak birini seçebilirsiniz.
İşte kod düzenleyicideki önizleme:
Kod türünü ‘PHP’ olarak değiştirmeyi, ‘Etkin Değil’den ‘Etkin’e geçmeyi ve ‘Kaydet’ düğmesine tıklamayı unutmayın.
Bunu akılda tutarak, her bir modu kendi WordPress blogunuzda veya web sitenizde nasıl kullanabileceğinize bakalım.
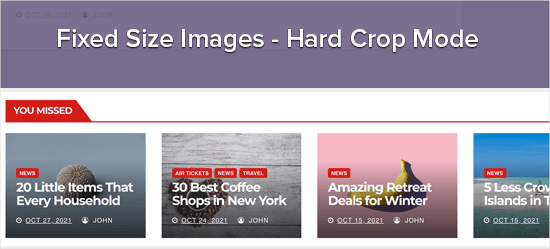
1. Sert Kırpma Modu
Yukarıdaki örnekte, yükseklikten sonra bir ‘true’ değeri kullandık. Bu, WordPress’e görüntüyü tam olarak tanımladığımız boyutta, yani bu durumda 120 piksele 120 piksel olacak şekilde kırpmasını söyler.
Bu işlev, boyutuna bağlı olarak görüntüyü otomatik olarak yanlardan veya üstten ve alttan kırpacaktır. Bu şekilde, tüm resimlerinizin orantılı olduğundan ve WordPress web sitenizde iyi göründüğünden emin olabilirsiniz.
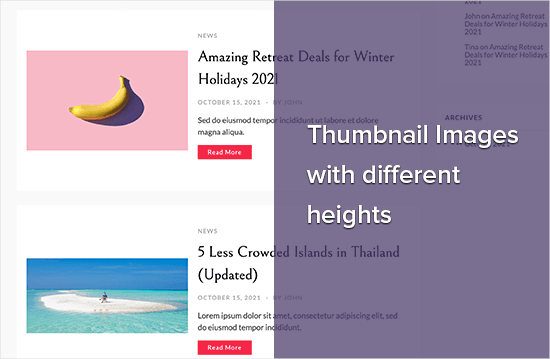
2. Yumuşak Kırpma Modu
Yumuşak kırpma örneğimizde görebileceğiniz gibi, yükseklikten sonra bir ‘true’ değeri eklemedik:
1 | add_image_size( 'homepage-thumb', 220, 180 ); |
Bunun nedeni, yumuşak kırpma modunun varsayılan olarak açık olmasıdır.
Yumuşak kırpma, görüntüyü bozmadan orantılı olarak yeniden boyutlandırır, bu nedenle tam olarak istediğiniz boyutları elde edemeyebilirsiniz. Yumuşak kırpma genellikle genişlik boyutlarıyla eşleşir, ancak yükseklik boyutları her görüntünün oranına göre farklı olabilir.
İşte bunun nasıl görünebileceğine dair bir örnek:
3. Sınırsız Yükseklik Modu
Bazen, web sitenizde genişliklerini sınırlayarak kullanmak istediğiniz uzun görselleriniz olabilir. Örneğin, işletmenizin web sitesi için bir infografik oluşturmuş olabilirsiniz. İnfografikler çok uzun olma eğilimindedir ve genellikle içerik genişliğinden daha geniştir.
Sınırsız yükseklik modu, yüksekliği sınırlamadan düzeninizi bozmayacak bir genişlik belirlemenize olanak tanır.

WordPress temanızda ek resim boyutlarını görüntüleme
Web sitenize daha fazla resim boyutu ekledikten sonra, bunları WordPress temanızda görüntülemenin zamanı geldi.
Farklı bir resim boyutu kullanmak istediğiniz tema dosyasını açmanız ve ardından aşağıdaki kodu yazı döngüsünün içine eklemeniz yeterlidir:
1 | <?php the_post_thumbnail( 'your-specified-image-size' ); ?> |
Görselin sitenizin geri kalanıyla mükemmel uyum sağlaması için biraz stil eklemek isteyebilirsiniz. Ancak temanızda ek görsel boyutları görüntülemek için ihtiyacınız olan tek şey bu.
Ek Görüntü Boyutlarını Yeniden Oluşturma
add_image_size() işlevi yalnızca yeni bir resim yüklediğinizde ek boyutlar oluşturur. Bu, add_image_size() işlevini oluşturmadan önce yüklediğiniz herhangi bir resmin yeni boyutlara sahip olmayacağı anlamına gelir.
Bu sorunu çözmek için WordPress web sitenizin küçük resimlerini Perfect Images kullanarak yeniden oluşturmalısınız. Bu eklenti ayrıca öne çıkan görsellerinizi ve retina görsellerinizi yeniden oluşturacak ve medya meta verilerinizi güncelleyecektir.
Öncelikle eklentiyi yüklemeniz ve etkinleştirmeniz gerekir. Yardıma ihtiyacınız varsa, lütfen bir WordPress eklentisinin nasıl kurulacağına ilişkin kılavuzumuza bakın.
Etkinleştirmenin ardından Medya “ Mükemmel Görüntüler bölümüne gidebilirsiniz.
Perfect Images şimdi WordPress medya kitaplığınızı tarayacaktır, bu nedenle bitmesi için birkaç dakika beklemeniz gerekebilir.

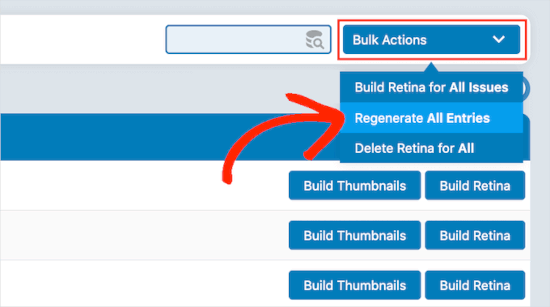
İşlem tamamlandığında, varsayılan olarak ‘Toplu Eylemler’i gösteren açılır menüyü açmak ve ardından ‘Tüm Girişleri Yeniden Oluştur’u seçmek isteyeceksiniz.
Perfect Images artık tüm küçük resimlerinizi yeniden oluşturacak.
Bu konu hakkında daha fazla bilgi için lütfen yeni görüntü boyutlarının nasıl yeniden oluşturulacağına ilişkin makalemize bakın.
Gönderi İçeriğiniz için Ek Görsel Boyutlarını Etkinleştirme
Bazı yeni görsel boyutları eklemiş olsanız da, bunları yalnızca WordPress temasında kullanabilir, yazı içeriğinde kullanamazsınız.
Bu yeni boyutları WordPress içerik düzenleyicisinde kullanılabilir hale getirmek için aşağıdaki kodu WPCode‘a kaydetmeniz gerekir:
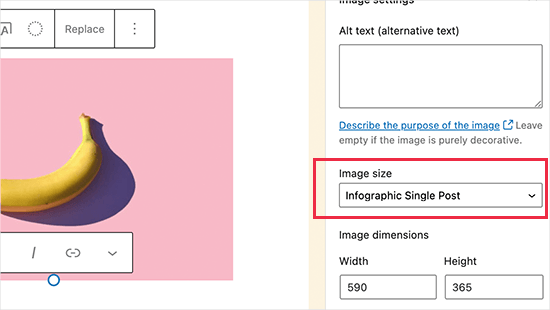
1 2 3 4 5 6 7 8 | function wpb_custom_image_sizes( $size_names ) { $new_sizes = array( 'homepage-thumb' => 'Homepage Thumbmail', 'singlepost-thumb' => 'Infographic Single Post' ); return array_merge( $size_names, $new_sizes );}add_filter( 'image_size_names_choose', 'wpb_custom_image_sizes' ); |
Paylaştığımız özel snippet kodunu eklemek için aynı işlemi tekrarlamanız yeterli. Kodu ekledikten sonra snippet’i etkinleştirmeyi ve kaydetmeyi unutmayın.
Artık WordPress’e bir görsel yüklediğinizde, ‘Görsel boyutu’ altında tüm özel boyutları göreceksiniz. Artık herhangi bir sayfa veya yazı üzerinde çalışırken görsel boyutunu değiştirebilirsiniz.
Bonus İpucu: WordPress’te Resim Yükleme Sorununu Giderme
Eğer bir resim yükleme sorunu yaşıyorsanız, bunun nedenini bilmek isteyebilirsiniz. WordPress’te bunun birkaç farklı nedeni olabilir.
İlk olarak, farklı tarayıcılar yüklemeleri kendi yöntemleriyle ele alır, bu nedenle bir tarayıcıda çalışan başka bir tarayıcıda çalışmayabilir.
Sitenizin önbelleği de sorun yaratıyor olabilir. Güncel değilse, yüklemeyi engelleyebilir, bu nedenle temizlemek yardımcı olabilir.
Bazen eklentiler ve temalar da sorun yaratabilir.
Bazı eklentiler siz farkında olmadan yükleme işlemini bozabilir. Bazı temalar iyi kodlanmamıştır ve resim yüklemeye çalıştığınızda çakışmalara neden olabilir.
Sorun giderme ipuçları için WordPress’te resim yükleme sorunlarının nasıl çözüleceğine ilişkin kılavuzumuzu okuyabilirsiniz.
Umarız bu makale WordPress’te ek görsel boyutlarının nasıl oluşturulacağını öğrenmenize yardımcı olmuştur. Ayrıca, görselleri yönetmek için en iyi WordPress eklentilerine ilişkin uzman seçimlerimizi veya büyük görselleri toplu olarak yeniden boyutlandırma kılavuzumuzu görmek isteyebilirsiniz.
If you liked this article, then please subscribe to our YouTube Channel for WordPress video tutorials. You can also find us on Twitter and Facebook.


")

Jiří Vaněk
Thanks for the tutorial, I’m trying to do the same thing using another tutorial but it didn’t work. This works perfectly.
axel
That was easy, thanx.
Something harder:
How do i get rid of old, unused thumbnail sizes?
(best without a plugin)
Kind regards
axel
WPBeginner Support
We cover how you can remove the unused image sizes in our article below:
https://www.wpbeginner.com/wp-tutorials/how-to-prevent-wordpress-from-generating-image-sizes/
We recommend plugins to simplify the process, if you’re worried about the number of plugins on your site, we would recommend taking a look at our article below:
https://wpbeginner.com/opinion/how-many-wordpress-plugins-should-you-install-on-your-site/
Admin
B Toro
Very simple and helpfull
WPBeginner Support
Glad our guide was helpful
Admin
JKLYN
Quite helpful tutorial. But how to set class for image??
Kim
Thanks WPBeginner, this worked a treat!
Thiago
Hi,
Great article! However, I still do not understand the usefulness of hard crop tool; I uploaded an image with 306×165, and after that I created two custom sizes: 256×148 (Soft Crop) and 256×148 (Hard Crop), however, as you can see in this print taken from the post: [http://prnt.sc/eromp3] both Options remain the same. I created a file in Photoshop containing 256×148 and I dragged the original image without resizing anything, and the result you can see in example 4 of the image above. So, my question is this: should image 2 not look like the image generated by Photoshop?
Follows below the code used on functions.php:
//Soft Crop used in example 2
if ( function_exists( ‘add_image_size’ ) ) {
add_image_size( ‘new-size8’, 256, 148 );
}
add_filter(‘image_size_names_choose’, ‘my_image_sizes8’);
function my_image_sizes8($sizes) {
$addsizes = array(
“new-size8” => __( “New Size8”)
);
$newsizes = array_merge($sizes, $addsizes);
return $newsizes;
}
////Hard Crop used in example 3
if ( function_exists( ‘add_image_size’ ) ) {
add_image_size( ‘new-size9’, 256, 148, true, array( ‘center’, ‘center’ ) ); //(cropped)
}
add_filter(‘image_size_names_choose’, ‘my_image_sizes9’);
function my_image_sizes9($sizes) {
$addsizes = array(
“new-size9” => __( “New Size9”)
);
$newsizes = array_merge($sizes, $addsizes);
return $newsizes;
}
Thanks in advance!
Kevin
This works great, but on thing that always bothers me is that if someone uploads an image that is smaller than one of your cropped sized then that image will not be created, which ruins the layout if you wanted equal height images
Matt Rock
Struggling with the same issue, Kevin (uploading smaller image does not create cropped size). I understand why this might make sense (system will not produce unnecessary images), but a low/poor resolution would look better than an ill-cropped one…
gonza
Thanks for the info
you help me so much!
Sakshi
I write this code can.
Actually i want to set the post thumbnail size for the banner image.Which i was uploading through featured image in the background please suggest me.
Aakash
Hi,
I m new in wordpress,and accept i have many problems,and the first is,i created lot of post in wordpress,suppose A B C D,and when i update this in my website they look like first is D and then c and then b and then a means when i upload first they are show in last.if any solution that first they look in series not DCBA like ABCD…plz help
Daniel Knoflicek
awsome… so helpfull for a lot of gallery plugins…
Lavinia Manzanarez
Excellent! I read the use of this function on the Codex of WordPress but sometimes I need a step by step thing, thank you!
WPBeginner Staff
Yes it is possible.
Farmer John
I too want to do the same as Ali Rohan wants to do. can you kindly elaborate pleas.. ‘coz i tried to implement the method explained by you but could not succeed. I can’t understand where I am doing wrong. How do I link the text of resolution to image file?
Ali Rohan
Thanks for nice article.
I wanna start a wallpapers website in wordpress so is it possible that when i upload one big wallpaper then it auto resized to many resolutions for users. For example when i upload 1920×1280 wallpaper then it must be resized to 1024×768, 800×600 etc resolution … so users can easily view and download desired size wallpaper ?
Aayush
Hi Dear. i need your urgent help. i have a problem with the images size. actually i am using a plugin WP Gallery Custom Links. i have uploaded lot of images in a post but every images has a different height and width so they are appearing with different different sizes. i want to set them with the same size which i want to set. please tell me any idea to solve this problem.
Here
I just needed to say thanks for saying this. You’re right on.|
Shoaib
Excellent explanation
Andrew
I’ve set this up and it’s working splendidly minus the suggestion MIKE LITTLE made above – the thumbnail is changed and it shows up that way in the backend in the media gallery – but on the frontend where my loop is – the image thumb is still what WP defaults to – i’ve even run REGEN THUMBS and it still doesn’t fix the issue – anyone else having this problem or know the fix???
WPBeginner Support
Look at your loop and use
<?php the_post_thumbnail('your-specified-image-size'); ?>instead ofthe_post_thumbnail()Admin
Tomasz
Nice tutorial!
Please check out the plugin which allows to manually crop the registered image sizes:
http://wordpress.org/plugins/manual-image-crop
WPBeginner Support
Thanks, looks like a nice plugin. We will look into it.
Admin
Marc C
Good tutorial – many thanks WPBEGINNER.
I too was having the problem of not being able to crop the new registered image sizes but the plugin posted by TOMASZ does the job nicely – thanks TOMASZ!
Robbe Clerckx
Still helpfull after all this time :). Thank you.
Danny
Thank you for this very clear and helpful tutorial. It saved me a lot of time since the WP documentation is very cryptic.
lydia karanja
I have a wordpress account but I did not know how to manage it but now I know all thanks to this tutorial, thank you very much for helping people understand more on how to create and manage their websites.
andy19at
@jezThomp Great if your images work
jezThomp
@andy19at Link…?
andy19at
@jezThomp A link? I didn’t post it cos it didn’t work.
jezThomp
@andy19at http://t.co/YvmiX9hR
mikelittle
You say: “The downside of hard cropping is that you cannot control which part of the image is displayed.” Not true.
When you have uploaded an image and before you insert into post, you can click on ‘edit image’ and from there change the thumbnail or the whole image, scale, rotate, or flip the image , and for the thumbnail select the exact portion of the image you want.
wpbeginner
@mikelittle Thanks for the correction Mike. Just edited the article
clelandillustration
I can’s seem to get the custom crop to work for new image sizes. The custom crop will work for the default “thumbnail” size version, but that crop won’t apply to new image sizes. It seems the crop is still uncontrollable for custom image sizes.
Brent Norris
good insight into the edit flow…
TdGon
Good article ..and photos to go along with it too…nice. I saw in a few places how to do this but they did not explain it as well as you do here. I am off to try it out.
Thanks a lot ! (0.o)
PaulDeWoutersd'Oplinter
excellent explanation for a confusing topic. and very useful plugin
mssbee
Great tutorial! Thanks for explaining the different crop options. It really helped me to understand how they work.
tjhakan
Nice tutorial. good job
defries
Nice round up of what can be done with just the default featured image feature. One extra tip: you can also set the width of your content area as a featured image and define that same width in Settings > Media. This way you can select a featured image to use in your theme and it will be automatically the maximum size of the content area.
Also great having those values in there for <a href=”http://codex.wordpress.org/Embeds”>oEmbed</a>.
Ordinary Randomness
Thanks for this tutorial, I was wondering why sometimes I had images that were not cropping to the size I had coded.