
Bir web sitesini yenilemek istediğimizde yaptığımız ilk şeylerden biri, o siteyi bir hazırlama veya yerel ortama klonlamaktır. Bu şekilde, canlı sürümü etkilemeden üzerinde çalıştığımız sitenin tam bir kopyasını oluşturabiliriz.
Çok az veya hiç teknik becerisi olmayan bir web sitesi sahibiyseniz, muhtemelen yaptığınız değişikliklerin beklenmedik hatalara yol açtığını görmekten bıkmışsınızdır. Test amacıyla WordPress sitenizi klonlamayı denemek istiyorsunuz, ancak sürecin çok zor olmasından korkuyorsunuz.
Aslında tam tersi. Duplicator eklentisi ile bir WordPress sitesini klonlamak çok kolay ve bu makalede size nasıl yapılacağını göstereceğiz.

WordPress Web Sitesi Klonlama Nedir ve Neden Kullanılır?
Bir WordPress web sitesini klonlamanın arkasındaki fikir, bir sitenin tam bir kopyasını oluşturmanız ve bunu başka bir siteye uygulamanızdır.
Bir web sitesini klonlamanız gerekmesinin birçok nedeni olabilir. Örneğin, bir siteyi yeni bir ana bilgisay ara veya yeni bir alan adına taşıyor olabilirsiniz. Bir web sitesini klonlayarak zamandan ve emekten tasarruf edebilir ve taşıma işlemini çok daha hızlı tamamlayabilirsiniz.
Bir başka örnek de kendi yerel sunucunuzda bir müşteri için web sitesi geliştirmektir. İş tamamlandığında, siteyi klonlayabilir ve müşterinin canlı sunucusuna taşıyabilirsiniz.
Ayrıca canlı bir WordPress sitesini klonlayabilir ve değişiklikleri canlı hale getirmeden önce test etmek için bir hazırlık sitesi kurabilirsiniz.
Bununla birlikte, birkaç kolay adımda bir WordPress sitesini nasıl klonlayabileceğinizi gösterelim. Eğitimde gezinmek için aşağıdaki hızlı bağlantıları kullanabilirsiniz:
- Step 1: Set Up the Duplicator WordPress Plugin for Easy Cloning
- Step 2: Create a Duplicator Package of Your WordPress Site
- Step 3: Upload Your WordPress Site Archive and Installer to a New Location
- Step 4: Create a New WordPress Database for Your Website
- Step 5: Run the WordPress Website Importer Script
- Step 6: Test Your Cloned Website and Delete Temporary Files
Adım 1: Kolay Klonlama için Duplicator WordPress Eklentisini Kurun
Bir WordPress web sitesini klonlamanın en iyi yolu Duplicator eklentisini kullanmaktır. Bu, kullanımı hala çok kolay olan güçlü bir WordPress klonlama ve çoğaltma ek lentisidir.
Eklenti, web sitenizdeki her şeyi tek bir dosyada yedekler ve bu dosyayı yeni konuma kolayca taşıyabilirsiniz.
Yapmanız gereken ilk şey, eklentiyi klonlamak istediğiniz web sitesinde etkinleştirmek ve yüklemektir. Daha fazla ayrıntı için, bir WordPress eklentisinin nasıl kurulacağına ilişkin adım adım kılavuzumuza bakın.
Not: Duplicator ‘ın zamanlanmış yedeklemeler, çoklu site geçişi ve daha fazlası gibi ek özelliklere sahip profesyonel bir sürümü vardır. Ancak, bir WordPress web sitesini klonlamak için ihtiyacınız olan her şeye sahip olduğu için bu kılavuz için ücretsiz sürümü kullanacağız.
Adım 2: WordPress Sitenizin Çoğaltıcı Paketini Oluşturun
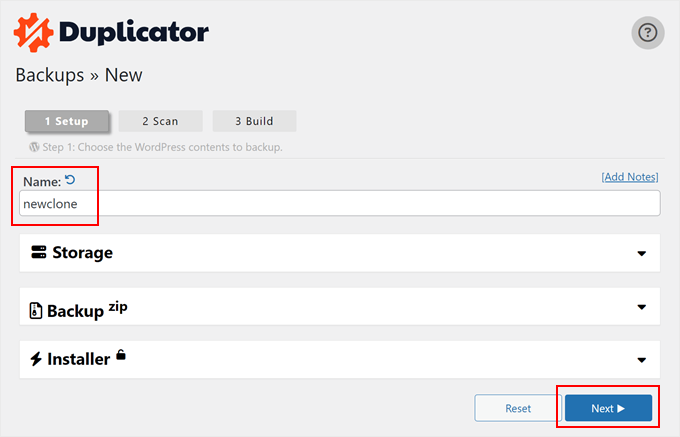
Etkinleştirmenin ardından, Duplicator ” Yedeklemeler bölümüne gidin ve ardından sayfanın üst kısmındaki ‘Yeni Oluştur’ düğmesine tıklayın.

Bundan sonra, kopya dosya için bir ad yazabileceğiniz bir ekrana yönlendirileceksiniz. Bu sadece sizin referansınız içindir, bu yüzden istediğiniz herhangi bir şeyi kullanabilirsiniz.
Ardından, ‘Devam Et’ düğmesine tıklayın.
Duplicator şimdi sitenizi tarayacaktır.
WordPress web sitenizin herhangi bir bölümünde bir sorun bulursa, sorunu nasıl çözeceğinize dair bilgiler içeren bir uyarı göreceksiniz. Aksi takdirde, sadece ‘İyi’ diyecektir.

Şimdi sayfayı aşağı kaydırın.
Ardından, yedekleme dosyasını oluşturmak için ‘Oluştur’a tıklayın.

Eklenti artık WordPress veritabanınızı, resimlerinizi, şablonlarınızı, eklentilerinizi ve diğer tüm dosyalarınızı tek bir indirilebilir pakette yedekleyecektir.
Web sitenizin boyutuna bağlı olarak, işlem birkaç dakika sürebilir.
Yedekleme işlemi tamamlandığında, sıra dosyalarınızı indirmeye gelir.
Hem yedeğinizi içeren arşiv dosyasını hem de arşivi açacak olan yükleyiciyi indirmeniz gerekir.

Bunu yapmak için, devam edin ve ‘Her İki Dosyayı da İndir’ düğmesine tıklayın.
Profesyonel İpucu: Teknik olarak, bu adımların geri kalanını atlayabilir ve sadece Duplicator ile yedekleme dosyanızı nasıl içe aktaracağınızı gösterdiğimiz WordPress site yedeğini geri yükleme eğitimimizi takip edebilirsiniz.
Bununla birlikte, klonlanmış siteyi boş bir ortamda geri yüklemek istiyorsanız bu adımların geri kalanını takip etmekten çekinmeyin.
Adım 3: WordPress Site Arşivinizi ve Yükleyicinizi Yeni Bir Konuma Yükleyin
Artık sitenizin ve yükleyici dosyasının tam bir yedeğine sahipsiniz, bir sonraki adım bunları yeni konuma yüklemektir.
Bu yeni konum, canlı bir WordPress blogu veya yerel sunucunuzdaki bir site olabilir. Site yerel bir sunucudaysa, yerel sunucunuzun kök klasöründe yeni bir klasör oluşturmanız gerekecektir. Bu, yerel sunucunuzun tüm web sitelerini depoladığı dosyadır.
Örneğin, MAMP kullanıyorsanız, ‘/Applications/MAMP/htdocs/’ klasörü olacaktır.
Alternatif olarak, eğer WAMP kullanıyorsanız, o zaman ‘C:\wamp\www\’ klasörü olacaktır.
Bundan sonra, klonlanmış web siteniz için oluşturduğunuz klasörü açmanız ve hem arşiv dosyasını hem de yükleyiciyi bu klasöre kopyalamanız gerekir.

Web sitenizi farklı bir WordPress barındırma platformuna klonlamak istiyorsanız, önce boş bir web sitesi oluşturabilir ve sağlayıcının dosya yöneticisini kullanarak dosyaları buna yükleyebilirsiniz.
Bluehost kullanıyorsanız, hosting hesabı kontrol panelinize giriş yapın ve ‘Web Siteleri’ sekmesine gidin. Bundan sonra, ‘Site Ekle’ye tıklayın.

Bir sonraki ekranda bazı site türü seçenekleri göreceksiniz.
Sadece ‘Diğer (boş ortam)’ seçeneğini seçin ve ‘Devam Et’ düğmesine tıklayın.

Ardından, web sitenizin başlığını girin.
Gerekirse bu adımı atlayabilir ve sadece ‘Devam Et’e tıklayabilirsiniz.

Bu aşamada web sitenizi bir alan adı ile bağlayabilirsiniz.
Veya henüz bir alan adınız yoksa bu arada geçici bir alan adı kullanabilirsiniz.
Devam etmek için ‘Devam’a tıklayın.

Boş web siteniz hazır olduğunda, ‘Web Siteleri’ sekmesine geri döneceksiniz.
Yeni oluşturduğunuz web sitenizde ‘Ayarlar’ düğmesine tıklayın.

Şimdi, ‘Hızlı Bağlantılar’ bölümüne ilerleyin.
Oraya vardığınızda, ‘Dosya Yöneticisi’ düğmesine tıklayın.

Bluehost şimdi sizi web sitenizin Dosya Yöneticisine getirecektir.
Devam edin ve dosyalarınızı yüklemek için ‘Yükle’ düğmesine tıklayın.

Şimdi, boş web sitesine yüklemek istediğiniz dosyaları seçin.
İşiniz bittiğinde, ‘Geri Dön…’ düğmesine tıklayın.

Şimdi arşiv ve yükleyici dosyalarınızı dosya yöneticisinde görmelisiniz.
Devam edin ve daha sonra kurulumun iyi gittiğinden emin olmak için bu dizindeki diğer dosyaları kaldırın.

Alternatif olarak, bir FTP istemcisi kullanarak yükleyiciyi ve arşivi kök dizine yükleyebilirsiniz.
Bunu daha önce yapmadıysanız, WordPress’e dosya yüklemek için FTP’nin nasıl kullanılacağına ilişkin başlangıç kılavuzumuza bakın.
Dosyaları nereye yüklerseniz yükleyin, klasörün yalnızca installer.php ve arşiv zip dosyalarınızı içerdiğinden emin olmanız gerekir.

Adım 4: Web Siteniz için Yeni Bir WordPress Veritabanı Oluşturun
Ardından, klonlanmış WordPress sürümünüzü açmak için yeni bir WordPress veritabanı oluşturmanız gerekir. Zaten bir veritabanı oluşturduysanız, bu adımı atlayabilirsiniz.
Yeni konumun canlı bir site mi yoksa yerel sunucunuzdaki bir site mi olduğuna bağlı olarak veritabanı oluşturmanın birkaç yolu vardır.
Canlı bir site kullanıyorsanız, WordPress barındırma hesabı kontrol panelinize giriş yapmanız yeterlidir.
Bluehost kullanıcıları için, daha önce olduğu gibi boş web sitenizin ‘Ayarlar’ sekmesine gitmeniz gerekir. Ardından, ‘Gelişmiş’ sekmesine geçin ve cPanel’in yanındaki ‘Yönet’e tıklayın.

cPanel‘in içinde, ‘Veritabanları’ bölümüne gidin.
Bundan sonra, ‘MySQL Veritabanları’nı seçin.

Bu sizi veritabanınız için bir ad yazabileceğiniz bir ekrana getirir.
Ardından, ‘Veritabanı Oluştur’ düğmesine tıklayın.

Ardından, MySQL veritabanına yeni bir kullanıcı eklemeniz gerekir.
Basitçe ‘MySQL Kullanıcıları’ bölümüne kaydırın. Ardından, yeni kullanıcı için bir kullanıcı adı ve şifre girin ve ‘Kullanıcı oluştur’ düğmesine tıklayın.

Bunu yaptıktan sonra, bir sonraki adım kullanıcıyı veritabanınıza eklemektir.
Basitçe ‘Veritabanına Kullanıcı Ekle’ bölümüne gidin ve ‘Kullanıcı’ açılır menüsünü açın. Burada, önceki adımda oluşturduğunuz veritabanı kullanıcısını seçin.
Bundan sonra, ‘Veritabanı’ açılır menüsünü açın ve daha önce oluşturduğunuz veritabanını seçin.

Bir sonraki adımda bu bilgilere ihtiyacınız olacağından, veritabanı adını, kullanıcı adını ve parolayı not ettiğinizden emin olun.
Bunu yaptıktan sonra, ‘Ekle’ düğmesine tıklayın.
XAMPP veya diğer araçları kullanan bir localhost kurulumu kullanıyorsanız, phpMyAdmin‘i başlatmak için web tarayıcınızda ‘http://localhost/phpmyadmin/’ veya ‘http://localhost:8080/phpmyadmin/’ adresini ziyaret etmeniz yeterlidir.
Bundan sonra, ‘Menü’ sekmesine tıklayın ve ardından ‘Veritabanı’ seçeneğini seçin.

Ardından, veritabanı için yeni bir ad girmeniz gerekir.
Ardından, sadece ‘Oluştur’ düğmesine tıklayın.

Bir sonraki adımda veritabanı adını kullanacaksınız. Çoğu localhost kurulumu için ana bilgisayarınız localhost ve kullanıcı adınız boş bir parola ile root olacaktır.
Adım 5: WordPress Web Sitesi İçe Aktarıcı Komut Dosyasını Çalıştırın
Artık tüm dosyalarınız yerinde olduğuna göre, Duplicator yükleyici betiğini çalıştırma zamanı geldi. Bu betik, arşiv dosyanızı birkaç tıklamayla açar.
İlk olarak, web tarayıcısına web sitenizin URL’sini yazın ve sonuna installer.php ekleyin. Bu, ‘https://example.com/installer.php’ gibi bir şeye benzeyecektir. ‘example.com’ yerine kendi alan adınızı veya sitenizin localhost adresini yazdığınızdan emin olun.
Ardından, Duplicator yükleyici komut dosyası ekranda görünecektir. İlk olarak, WordPress veritabanı bilgilerinizi girmeniz gerekir.
Bu, yukarıda kopyaladığınız veritabanı bilgileridir.
Tamamlandığında, ‘Doğrula’ düğmesine tıklayın.

Herhangi bir hata yoksa, en alttaki şartlar ve bildirimler onay kutusunu işaretleyin.
Bundan sonra, devam etmek için ‘İleri’ye tıklayın.

Ardından, kurulumu onaylamak için bir açılır pencere görünecektir.
Devam edin ve ‘Tamam’ düğmesine tıklayın.

Kurulum başarılı olursa, yeni WordPress sitenize hemen giriş yapabilirsiniz.
Bunu yapmak için, ‘Güvenli siteye giriş yaptıktan sonra yükleyici dosyalarını otomatik sil (önerilir!)’ seçeneğini işaretlediğinizden emin olun ve ‘Yönetici Girişi’ düğmesine tıklayın.

Bu kutunun işaretlenmesi, olası güvenlik sorunlarından kurtulmak ve kurulumu tamamlamak için yükleyici dosyalarını otomatik olarak kaldıracaktır.
Adım 6: Klonlanmış Web Sitenizi Test Edin ve Geçici Dosyaları Silin
Şimdi devam edebilir ve klonlanmış web sitenizi test edebilirsiniz.
Tüm verilerinizin orada olduğundan ve web sitesinin beklendiği gibi çalıştığından emin olmak için hem WordPress yönetici alanını hem de web sitenizin genel ön ucunu test etmenizi öneririz.
Herhangi bir WordPress hatası alırsanız, WordPress hatalarını gidermek için yeni başlayanlar kılavuzumuza göz atın.
Ayrıca yükleyici dosyalarınızın hala var olup olmadığını da kontrol etmeniz gerekecektir. İyi bir önlem için, Duplicator ” Araçlar ‘a gitmenizi ve ardından ‘Kurulum Dosyalarını Kaldır’ düğmesine tıklamanızı öneririz.

İşte bu kadar, bir WordPress sitesini başarıyla klonladınız.
WordPress Web Sitemi Klonladım, Sırada Ne Var?
WordPress web sitenizi başarıyla klonladıysanız, bundan sonra yapmak isteyebileceğiniz bazı şeyler şunlardır:
- Bu nihai geçiş kontrol listesini kullanarak web sitenizi doğru şekilde taşıyıp taşımadığınızı kontrol edin.
- Klonlanmış web sitenizin kalıcı bağlantı ayarlarını kontrol edin.
- Web sitenizi büyütmek için sahip olunması gereken WordPress eklentilerini yükleyin.
- Blog olmayan bir site çalıştırmayı planlıyorsanızblog özelliklerini devre dışı bırakın.
- Web sitenizi yayınlamadan önce bu web sitesi başlatma kontrol listesine bakın.
- Her şeyin çalışıp çalışmadığını görmek içinweb sitenizi önizleyin.
- Olası hataları hızlı bir şekilde çözmek içinWordPress hataayıklama modunu etkinleştirin.
- Web sunucunuzu sağlıklı tutmak için disk alanını nasıl boşaltacağınızı ve inode kullanımını nasıl azaltacağınızı öğrenin.
- Site performansınızın iyileştirilmesi gerekip gerekmediğini görmek için bir web sitesi hız testi yapın.
Umarız bu makale WordPress sitenizi nasıl kolayca klonlayacağınızı öğrenmenize yardımcı olmuştur. Birden fazla WordPress sitesinin tek bir panodan nasıl yönetileceğine ilişkin kılavuzumuza ve en iyi WordPress etkinlik günlüğü ve izleme eklentileri uzman seçimlerimize de göz atmak isteyebilirsiniz.
If you liked this article, then please subscribe to our YouTube Channel for WordPress video tutorials. You can also find us on Twitter and Facebook.
 in 2024")


Jiří Vaněk
The Duplicator is an absolutely fantastic plugin that I personally enjoy using for duplicating websites from development environment to server. The only issue I’ve encountered with it is that it creates a .htaccess file in the backup folder, where not all directives may be allowed. Fortunately, this behavior can be resolved in the settings, and .htaccess can be disabled. Otherwise, the plugin always works great and without any problems. Additionally, with a guide like yours, anyone can handle it really well. And as a bonus, it works quite well even in the free version.
Dennis Muthomi
This step-by-step guide was extremely helpful! I followed the tutorial to clone my existing WordPress site to a new server with a different host. Everything went smoothly except I ran into an SSL issue initially on the cloned site. However, after contacting my new host’s support team, they were able to resolve the SSL problem quickly. Thanks so much for providing such a clear and valuable walkthrough
WPBeginner Support
Glad our guide could help you
Admin
Dan
Hi, I have done this however upon completing the Install and clicking the admin button, it takes me back to the original domain page prior to a WordPress Install. I’ve double checked the process and I don’t think I’ve missed any steps?
It just appears that everything was wiped (just an original WP install) but the duplicate file hasn’t been installed?
WPBeginner Support
Your domain is pointing to your original host. You can either change your hosts file to see the cloned site or point your domain to the new host location. For moving your site to a new domain, we would recommend taking a look at our article below:
https://www.wpbeginner.com/wp-tutorials/how-to-properly-move-wordpress-to-a-new-domain-without-losing-seo/
Admin
Martin Page
I have followed your instructions and uploaded the 2 files to an otherwise empty file but when i go to the site/installer.php I get a 404 page.
My FileZilla screen loos exactly like your example.
Any suggestions?
Thanks
WPBeginner Support
You would want to visit the duplicator plugin’s FAQ page and they cover the different troubleshooting steps for that error.
Admin
Rene Young
Thanks. I did that and I have successfully completed creating the clone. I have a question about the step to install the database in the new location (Step 2 of 4 – Install Database): The screen shot shows a choice between “Basic” and “cPanel” but you don’t discuss this.
WPBeginner Support
In this tutorial, we went with Basic
Admin
Rene Young
I could not complete Step 2. I do get warnings in Duplicator, under Paths:
“If the root WordPress path is not writable by PHP on some systems this can cause issues.
If Duplicator does not have enough permissions then you will need to manually create the paths above.”
WPBeginner Support
You would want to either follow our guide below for updating your file permissions:
https://www.wpbeginner.com/beginners-guide/how-to-fix-file-and-folder-permissions-error-in-wordpress/
Or you can reach out to your hosting provider for assistance with the folder permissions.
Admin
Sue
I’m trying to clone a demo site I’m making for people to use as a template. Using Duplicator I’ve created the package, gone into File Manager of CPanel and navigated to the root directory for the subdomain I’m testing it on, and uploaded the zip file and installer file. There is nothing else in the folder.
When I follow the instructions and go to the website address with installer.php added to the end, I do not get the Duplicator import info. I get a Page Not Found….though it does have the header, footer and top menu of the site I’m cloning. What did I do wrong?
WPBeginner Support
If you are using the same domain then you are likely still looking at the old site and not the new one, if you reach out to your hosting provider, they can normally assist with setting up a temporary domain that you can use.
Admin
Tarık Hacıalioğulları
Thank you very much, this saved me so much time. It worked very good!!!
WPBeginner Support
You’re welcome
Admin
saad
Everything s clear thank you but what about login and password to WordPress dashboard can we duplicate ?
WPBeginner Support
It copies your users table so it would transfer your user and password over for you.
Admin
Kara
I’m having a bit of trouble with step 4. With my Hostgator account I don’t have access to my server panel but when I try to add the file via an FTP client, I’m under able to find the folder containing the installer.php. Am I missing something? Could the file name be different or could someone tell me where exactly to put the zip file?
WPBeginner Support
You would want to reach out to your hosting provider and they would be able to assist
Admin
ed
HI there, what if i have paid plugins and themes specific for 1 wordpress site
Will it still work ? Thanks alot, your tutorial so far is the easiest to follow
WPBeginner Support
You would want to reach out to the support for those tools for how they handle that.
Admin
Emma
What do you do when there is a size check notice? Limit is 500mb and my site is 1.32gb uncompressed. Not sure how to compress. It is recommending a 2 part install manually from c panel which is sadly beyond my tech abilities.
WPBeginner Support
You would want to reach out to your hosting provider’s support and they should be able to assist
Admin
Dominique
uploaded zip and installer script to root and i am getting this message when i enter domain.com/installer.php
403 Forbidden
Request forbidden by administrative rules.
What next?
WPBeginner Support
There are a few different options you can try, for a starting point, you would want to take a look at our article below:
https://www.wpbeginner.com/wp-tutorials/how-to-fix-the-403-forbidden-error-in-wordpress/
Admin
Loz Bigrave
Great article, worked like a charm.
WPBeginner Support
Thank you, glad our article was helpful
Admin
Derek
I’ve successfully copied across to a new URL and the cloned website seems to be working. However, when I go into wordpress it’s a reduced version with quite a few tabs missing such as: users/plugins/settings to name a few. How can I get a full version of wordpress the same as the site I copied from?
WPBeginner Support
You may want to ensure you are logged in as an admin user on your cloned site as the most likely reason for that issue.
Admin
Adi
How do you change the name of the website, the url and also the database when installing the cloned site using Duplicator?
WPBeginner Support
To do that, you would want to take a look at our article here:
https://www.wpbeginner.com/wp-tutorials/how-to-properly-move-wordpress-to-a-new-domain-without-losing-seo/
Admin
diana
Hi, I have a question , can a clone my site without erased the other one , i mean the original website ?
WPBeginner Support
Yes, cloning your site does not remove the original
Admin
Todd Murray
This is a great post. Just one clarification before I run the import…on STEP 4, these are the instructions:
No matter where you are copying the files, you need to make sure that the folder is completely empty and has no other files or folders inside it except installer.php file and your backup zip file.
If I already have a theme and started building a site before finding this article, do I need to delete everything from the destination? “folder completely empty” refers to which folder?
Thanks!
Todd
WPBeginner Support
If you want to duplicate a site from elsewhere then you would need to remove what is currently there for your site.
Admin
Christie Bellah
Been using this article for years. Thanks so much!
WPBeginner Support
You’re welcome, glad our guide has been so helpful
Admin
Alexandre
You were right, I didn’t put in the root folder :/
So I tried again, but in the end, I got an error 404 result.
I’ve fixed the wp_config (name, user, pw & host) and made the changes to the htaccess (copied the NEW .htaccess).
All files are deleted, besides the now unzipped folder which contain all the files. *what about the __MACOSX folder? I tried with and without, but get the same result.
Even after this, in Step 4, I still get the 2 warnings in the General Notices:
wp-config not found
wp-config.php not found.
I found the wp-config.php, but seem like I don’t have the wp-config. Are they the same?
Anything else missing?
Thank you
WPBeginner Support
The macosx you don’t need, the wp-config files should be the same. For moving from the subfolder if the original site is still available you would likely want to go through the steps in: https://www.wpbeginner.com/wp-tutorials/how-to-get-rid-of-wordpress-from-your-wordpress-site-url/
Admin
Alexandre
I end up on a “Index of” page showing the file in my sub folder. Anyone know why?
Thanks
WPBeginner Support
You likely installed your WordPress site in the subfolder rather than the root folder for your site.
Admin
Alexandre
Sorry, forgot to say. If I type in the full path on my web browser, I have a loading time, but end up on a white page.
Thanks
WPBeginner Support
If you are getting that white screen you may want to try the recommendations in our article here: https://www.wpbeginner.com/wp-tutorials/how-to-fix-the-wordpress-white-screen-of-death/
JanysF
Does anyone know why the Packages option under Duplicator » Packages isn’t showing for me? I only see under Duplicator: Tools, Settings, and Go Pro.
WPBeginner Support
You may want to try reinstalling the plugin and if that doesn’t work you would want to reach out to the plugin’s support and let them know about that not appearing properly
Admin
ouiouiphoto
Cloning works well with duplicator but having a clone site online seems not to be liked by jetpack
During my tests Jetpack have put himselt in failure on the original site even if jetpack was not active one the cloned site telling me the original was a copy of the clone
If google find your clone you have also some possible issues
WPBeginner Support
While there is a problem with simply cloning a site without any new content, the primary goal would normally be to use this when transferring your site from one location to another and then removing the old site or using the copied site as a template and adding new content to your new site.
Admin
Bidmead
For some inexplicable reason, when I save this useful page to Pocket, what actually arrives there is the old 11 May 2015 version, which discusses a completely different method based on a plugin called BackupBuddy which costs $52 for the 1-site version.
—
Chris
WPBeginner Support
We’ll certainly take a look if it is something on our end. You may want to check with Pocket if there is a cache that needs to be cleared on their end as well
Admin
Chris Bidmead
I’ve been in touch with Pocket. They suggest it might be a problem with their Parser, which checks the content and determines the best way to display it. They’ve managed to reproduce the bug and are investigating.
—
Chris
Gary Andrews
I wand to upgrade my production site to WP 5 and change themes. I thought it might be a good idea to clone my site on my local windows machine under Desktop Server.
I’ve been trying for 2 days to clone my site.
Let me just add that your tuto is perfectly straightforward as long as things go well. It doesn’t go into what might not work correctly.
Firstly Duplicator package creation times out (despite having filtered out the big files). Of course my hosting company doesn’t support Duplicator because it tries to change the time limit, can’t really blame the host company.
I also tried the Duparchive option which doesn’t time out and generates a .daf archive instead of a .zip.
On the Desktop Server local side I tried to run installer.php from my browser but got messages saying I needed to enable ziparchive and/or shell exec. I contacted Desktop Server support about that and have had no answer.
I thought I’d try to extract the data from the daf archive manually but the software that is needed to do this no longer seems to be available.
I imagine that the Duplicator Pro version would work better but I don’t have the budget (association website).
Oh woe is me, looks like I’ll have to do it all by hand.
WPBeginner Support
From the sound of it you sadly may need to manually import/export the data, the other option would be if you have a backup of your site that you could restore to your local installation.
Admin
Adam
Awesome article!!!
Followed your steps and it worked perfectly.
I did make one error though, I extracted the zip file and uploaded the files in ftp which did create errors. Much easier to simply upload the zip instead.
Thanks heaps!
WPBeginner Support
You would likely need to extract the zip once it is on your hosting provider but glad you found a solution for your error
Admin
Donna Lutheran
I copy sites all the time.
The plugins actually look more complicated than doing it manually.
Just download your files, back up your database, ftp to the new server, restore your database to your new database, edit the wp-config file to point to the new database, edit the url in your database to point to the new url.
I also download velvet blue to correct any url problems.
I had a site not pass our security scan that used the plugin. Also, the database back up was stored in the root of your site.
James Cook
I used a much simpler way. My WP installation is with Godaddy…so logged in the cPanel of the site I wanted to cloned…went to subdomains and created the domain for the site destination…then I went to applications and the top of cPanel and clicked the little check box next the primary site I wanted to clone…then hit the clone button…and voila…and exact copy of our site was created in less than 10 minutes…
Indusekar S K
Is there any plugin or other software that could clone a wordpress website to another wordpress on the live?
Mark C
The price for this is riduculous. Even the cheapest option is $80 PER YEAR! What an absolute rippoff!
Better off just going to Control Panel, zipping up your files and download them … then go to PHPMyAdmin and downloading a copy of your database. Then upload your zipped files to the new location…edit the config file, then import the database.
If that’s too hard for website retards … just install the free version of “Duplicate” (similar to Backup Buddy … but FREE).
Carlos A. B. S.
You’re right man, no need to spend a dime on such a a simple task…
Felisha
Either of you have a step by step guide? I am trying to copy my site to a subdomain to target a different city from the main site.
The only thing I understand so far is that I have to:
1. create a subdomain
2. create a new database
3. copy the public html folder of the main site over to the subdomain pubic html folder
After that, every tutorial I’ve seen on the internet gets too confusing
Jerri
What are you talking about? Duplicator is free. I mean, there’s a pro version, but I use the free version all the time to duplicate websites.
The only thing these instructions didn’t add is that you need to first create a new database and add a user to it on the new site before running the installer.
But it’s all easy and free.
Lipa
thx a lot !!! ;]
Mack
Can i copy someone’s site page to my site??
Allan Seabrook
Hi,
I really appreciate all the posts you share with us! Please keep them coming!
My question regarding this post is…
This technique using BackupBuddy works flawlessly.
However, I now have a problem:
When I type in the URL of my original site (where I took the backup), I get directed to the site I cloned from that backup. It’s as if my original site now has a redirect to the cloned site.
What on earth have I broken?
Any advice would be much appreciated!
Thanks,
Allan
Stephen
Check your DNS record. That would be one of the only ways this would happen.
Jonathan
Thanks! Worked perfect!
Mamun sarkar
Hi,
I would like to know how to clone any wordpress website have no hosting access information as well. I mean, suppose a buyer order your wpbeginner like website. Then, How to do it sir. Do you have any tutorials plz.
Hanna
not possible anymore to use backup buddy unless you want to pay. Is their a different method?
Nelson
Duplicator is perfect.
sandeep
i want to copy the theme of running website to another website…
Moses
Hi Sandeep,
Did you get solution to this. I also want to copy a theme to another website(subdomain)
Chris
I’ve used another service to clone WordPress sites and have discovered a problem with residual tables, and I was curious whether this was an issue with BackupBuddy as well.
In the scenario I recently encountered, I create WP Site A with table prefix wp1_.
Then I have to create a new environment to clone to, so I install WordPress at WP Site B with table prefix wp2_.
Now I use my [unnamed] tool to clone site A to site B, which appears good on the admin and public side but when I look in the database I have both wp1_ and wp2_ sets of tables, and all of the GUIDs in the functioning tables for the new cloned site have WP Site A’s URL, not WP Site B’s as I would have expected.
These have to be cleaned up manually. So I wonder, does BackupBuddy do the same thing? Is this to be expected?
WPBeginner Support
BackupBuddy’s sales/support team can probably answer this better.
Admin
Andrew Lopez
I’d be curious to know how to manually perform this task without a plugin or is a plugin recommended for backing up and migrating over to a new website?
Dave Navarro
BackupBuddy fails on large WordPress installs. I can’t get it to back up our site which between database all files is over 400GB in size.
I had to manually download all of the files, then re-upload them to the new site and use importbuddy with just the database. Even that fails if the raw database is too large (failed around 200MB in size).
Nitin
wonderful technique but there is use of another plugin
Gf
I recently moved a small simple blog with all-in-one wordpress migration and it worked great. But when I attempted a larger site on wp4.1 it failed. I think I would like back up buddy but the price is staggering. It would be my biggest wordpress expense, almost twice as much as my hosting!
Jean
I love using BackupBuddy for backups and migrations.
All you need is access to install the plugin and your set to move.
Great article!
johnraf
I used to have similar problems too, but after using
“long path tool” You can use to solve this problem.
yaser
How about if we want to clone a website that we have no backend access? Is there an easy way?
fletch
Do you have ftp access? Do you have access to the database? You would need those two things to backup a website if you don’t have access to wp-admin.