
Många WordPress-användare föredrar att arbeta med sina webbplatser på en lokal server på datorn. På så sätt kan du arbeta privat med din webbplats innan du gör ändringarna tillgängliga online.
Så småningom måste du flytta den till en live-server för att göra den tillgänglig för onlinebesökare. Denna övergång är avgörande för att säkerställa att din webbplats fungerar korrekt på live-webbplatsen.
Vi har arbetat med många lokala webbplatser, så vi var tvungna att lära oss det enklaste sättet att överföra innehåll till levande webbplatser.
I den här artikeln ger vi dig steg-för-steg-instruktioner om hur du flyttar WordPress från en lokal server till en live-webbplats.
")
Varför flytta WordPress från en lokal server till en Live site?
Att bygga din WordPress blogg på en lokal server är ett säkert sätt att testa ändringar på din website utan att påverka besökarna.
När you har slutfört finslipningen av din website är nästa steg att flytta från din lokala server till en live site.
Låt oss visa dig två sätt att flytta din site från en lokal server till en live site.
Den första metoden använder ett plugin för att flytta WordPress och rekommenderas för Beginnare.
I den andra metoden visar vi dig hur du manuellt flyttar WordPress från en lokal server till en live site.
Du kan välja den metod som fungerar bäst för dig:
Innan du flyttar din WordPress webbplats
Du måste ha några saker på plats för att migrera WordPress från en lokal server till en live-server.
Först antar vi att du har en WordPress-webbplats som körs på en lokal server (även kallad localhost) på din dator och att du har full tillgång till den.
Därefter måste du ha ett domain name och ett webbhotell.
Vi har hört otaliga historier från nybörjare som började med dåliga eller gratis webbhotell och ångrade sig. Enligt vår erfarenhet är valet av rätt webbhotell avgörande för att en webbplats ska bli framgångsrik.
För att göra ditt beslut enklare rekommenderar vi att du använder Bluehost. De är ett officiellt rekommenderat webbhotell för WordPress, och de ger WPBeginners användare en exklusiv rabatt + gratis domän och SSL.
I grund och botten kan du komma igång för så lite som $ 1.99 per månad.
Om du vill ha ett bra Bluehost-alternativ kan du titta på Hostinger. De erbjuder också en exklusiv rabatt till WPBeginners användare med ett gratis domain name.
Om du har råd att betala lite mer, kontrollera då SiteGround. De har också ett specialerbjudande för WPBeginners läsare.
Om du behöver hjälp med att skapa din website kan du följa vår Step-by-Step guide om hur du skapar en website.
Slutligen behöver du ett FTP-program och veta hur du använder FTP för att uppladda din lokala server till live-sajten.
Är du redo? Låt oss börja flytta din WordPress site.
Video Tutorial
Om du föredrar skriftliga instruktioner är det bara att fortsätta läsa.
Metod 1: Överför WordPress från den lokala servern till Live Site med hjälp av ett tillägg för migrering (rekommenderas)
Den här metoden är enklare och rekommenderas för Beginnare. Vi kommer att använda ett plugin för WordPress-migrering för att flytta WordPress från localhost till en live site.
Step 1: Installera och konfigurera tillägget Duplicator
Först måste du installera och aktivera pluginet Duplicator på din lokala site. För mer detaljer, se vår Step-by-Step guide om hur du installerar ett plugin för WordPress.
Pro tips: Det finns också en Pro-version av Duplicator som erbjuder säkra backups, molnlagring, enkel återställning av webbplatser och mer.
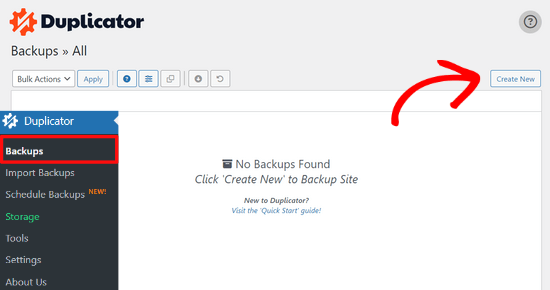
Vid aktivering måste du gå till sidan Duplicator ” Säkerhetskopior och klicka på knappen ” Skapa ny”.
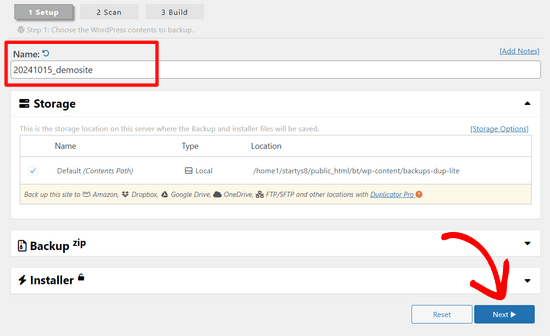
Då kommer du till en vy där du kan ge din backup ett namn.
Klicka sedan på knappen ”Next”.
Duplicator kommer nu att runna några tester för att se om allt är i order.
Om alla punkter är markerade med ”Bra” klickar du på knappen ”Bygg”.

Denna process kan ta några minuter, beroende på storleken på din webbplats. Du måste lämna den här fliken öppen tills den är klar.
När du är klar ser du nedladdningsalternativ för ”Installer”- och ”Archive”-paket. Du måste klicka på knappen ”Download Both Files” för att ladda ner båda filerna till din dator.

Filen ”Archive” är en komplett kopia av din WordPress site. Den innehåller alla WordPress core-filer samt dina images, uploads, themes, plugins och en backup av din WordPress database.
Filen ”Installer” är ett skript som kommer att automatisera hela migreringsprocessen genom att packa upp archive-filen som innehåller din website.
Step-by-Step 2: Skapa en Database för din Live WordPress website
Innan du kan runna installeraren eller uploada WordPress-webbplatsen från localhost till ditt webbhotell måste du skapa en MySQL-databas för din new live website.
Om du redan har skapat en MySQL-databas kan du hoppa över det här steget.
För att skapa en database måste you gå till cPanel dashboard på ditt webbhotell account. Leta sedan upp sektionen ”Databases” och klicka på ikonen ”MySQL Database Wizard”.

På nästa vy finns det ett fält för att skapa en new database.
Ange bara ett namn på din database och click på knappen ”Create Database”.

cPanel kommer nu att skapa en new database åt you.
Efter det måste du enter ett användarnamn och password för din nya användare och sedan click the ”Create User” button.

Nu måste du add to den användare som du just skapat till databasen.
Klicka först på checkboxen ”All Privileges”.

Sedan rullar du ner och klickar på knappen ”Make Changes” för att save your changes.
Din database är nu redo att användas med din site WordPress. Se till att du obs/observerar databasens namn, användarnamn och password. Du kommer att behöva denna information i nästa steg.
Steg 3: Ladda upp filer från den lokala servern till WordPress-webbplatsen i realtid
Nu måste du uploada archive- och installer-filerna från din lokala site till ditt webbhotell.
Anslut först till din Live site med hjälp av en FTP-klient. När du har anslutit, se till att rotkatalogen på din website är helt tom.
Normalt sett är root directory foldern /home/public_html/.
Vissa webbhotell för WordPress installerar WordPress automatiskt när du registrerar dig. Om du har WordPress-filer där måste du ta bort dem.
Efter det kan du uploada archive.zip och installer.php-filerna från Duplicator till din tomma root directory.

Steg 4: Run på migreringsskriptet
Följ efter att du har uppladdat migreringsfilerna, du måste besöka följande URL i din webbläsare:
http://example.com/installer.php
Glöm inte att ersätta ”example.com” med ditt eget domain name.
Detta kommer att starta migreringsguiden för Duplicator.
Installern kommer att runna några tester och initiera skriptet.

Under Setup section kommer du att bli ombedd att enter din MySQL server, databasnamn, användarnamn och password.
Din värd kommer troligen att vara en lokal värd. Därefter anger du uppgifterna för den databas som du skapade i det tidigare steget.
Klicka sedan på knappen ”Validate” för att kontrollera att de detaljer du har enter är korrekta.

Därefter klickar du på knappen ”Nästa” för att fortsätta.
Duplicator importerar nu din WordPress backup av databasen från archive till din new database.
Den kommer också att uppdatera webbadresser som pekar på den lokala webbplatsen och din nya live-webbplats.
You can now click on the ”Admin Login” button to enter the WordPress admin area of your live site.

När du loggar in på din live site kommer Duplicator automatiskt att städa upp installationsfilerna.
Nu är allt klart. Du har utan problem flyttat WordPress från den lokala servern till din live site.
Metod 2: Överför WordPress manuellt från den lokala servern till Live-webbplatsen
I den här metoden visar vi hur du manuellt flyttar WordPress från den lokala servern till din live site. Det är användbart om den första metoden inte fungerar eller om du föredrar att göra det manuellt.
Step-by-Step: Exportera lokal WordPress Database
Det första du behöver göra är att exportera din lokala WordPress database. Vi kommer att använda phpMyAdmin för att göra det.
Om du inte är bekant med det kan du läsa vår guide till hantering av WordPress Database med phpMyAdmin.
Gå till http://localhost/phpmyadmin/ och klicka på your WordPress database. Därefter klickar du på knappen ”Exportera” högst upp i menyn.

I alternativet ”Exportmetod:” kan du välja ”Snabb” eller ”Anpassad”. Custom ger dig fler alternativ för att exportera din databas.
Men vi rekommenderar att du väljer ”Quick” och sedan klickar på knappen ”Go” för att downloada din database.

Step 2: Uppladda WordPress-filer till Live Site
Nu måste vi flytta all your website-filer till live site.
För att komma igång öppnar du din FTP-klient och ansluter till ditt konto på webbhotellet.
När du är ansluten till din live-webbplats ska du se till att du laddar upp filerna i rätt katalog. Om du till exempel vill att webbplatsen ska hostas på ”dinsite.com” ska du ladda upp alla filer i din public_html-katalog.
Välj nu dina lokala WordPress-filer och uploada dem till din live server.

Step-by-Step 3: Skapa en MySQL Database på din Live site
Medan din FTP-klient uppladdar dina WordPress-filer kan du börja importera din database till live-servern.
De flesta WordPress-hostingleverantörer erbjuder cPanel för att hantera ditt hostingkonto, så vi kommer att visa dig hur du skapar en databas med hjälp av cPanel.
Först måste du logga in på din cPanel dashboard och click på ”MySQL Database Wizard” icon, som finns i ”Databases” section.

På nästa vy kan du skapa en new database.
Du måste ange ett namn för din databas och sedan klicka på ”Create Database”.

cPanel kommer nu automatiskt att skapa en new database åt you.
Därefter måste du ange ett användarnamn och lösenord för din nya användare och sedan klicka på ”Create User”.

Efter det måste du add to den användare du just skapat till databasen.
Kontrollera först checkboxen ”All Privileges”.

Sedan rullar du ner och klickar på ”Make Changes” för att save your changes.
Du har utan problem skapat en new database för din live WordPress site.
Step 4: Importera WordPress Database till Live Site
Nästa steg i processen är att importera din WordPress database.
Gå till din cPanel-instrumentpanel, bläddra ner till avsnittet ”Databaser” och klicka på ”phpMyAdmin”.

Detta tar dig till phpMyAdmin, där du vill klicka på databasen som du just skapade ovan. phpMyAdmin visar din nya databas utan tabeller.
Klicka sedan på tabben ”Import” högst upp i menyn. På sidan import klickar du på knappen ”Choose File” och väljer sedan database-filen från den lokala site som du saved i det första steget.

Därefter klickar du på knappen ”Go” längst ner på sidan. Din database kommer automatiskt att importeras till phpMyadmin.
Step 5: Ändra URL:en för webbplatsen
Nu måste du ändra webbplatsens URL i din database så att den ansluter till din live WordPress-webbplats.
I phpMyAdmin letar du efter wp_options-tabellen i din database som du just importerade ovan.
Om you changed your database prefix, then instead of wp_options, it might be {new_prefix}_options.
Klicka sedan på knappen ”Browse” bredvid wp_options. Eller klicka på länken i sidebaren för att öppna upp den page som innehåller en lista över fälten i tabellen wp_options.

Sedan, i options_name column, måste du leta efter alternativet siteurl.
Klicka sedan på ikonen ”Edit”.

Du får upp ett fönster där du kan edit:a fältet.
I inmatningsrutan option_value ser du webbadressen till din lokala installation, som kommer att vara något i stil med http://localhost/test.
Du måste infoga din nya site URL i detta fält, till exempel: https: //www.wpbeginner.com.
Sedan kan du save fältet genom att clicka på knappen ”Go”.

Därefter måste du följa samma steg som ovan för namnet på hemalternativet. Menyn wp_options kan vara några pages lång. Vanligtvis kommer home page-alternativet att finnas på den andra sidan.
Uppdatera sedan hem-URL:en så att den är densamma som URL:en för din live site.
Step-by-Step 6: Konfigurera din Live site
Nu när du har importerat databasen och uppladdat ditt content är det dags att konfigurera WordPress.
Just nu bör din site visa felmeddelandet”Error establishing a database connection”.
För att fixa detta ansluter du till din website med en FTP-klient och öppnar filen wp-config.php.
Du kommer att leta efter följande rader med kod:
// ** MySQL settings - You can get this info from your web host ** //
/** The name of the database for WordPress */
define( 'DB_NAME', 'database_name_here' );
/** MySQL database username */
define( 'DB_USER', 'username_here' );
/** MySQL database password */
define( 'DB_PASSWORD', 'password_here' );
/** MySQL hostname */
define( 'DB_HOST', 'localhost' );
Du måste ange namnet på databasen, användarnamnet och passwordet som du skapade tidigare.
Save sedan filen wp-config.php och uploada den tillbaka till ditt WordPress webbhotell server.
Nu, när you besöker your website, ska den vara live.
Efter det måste du logga in på din WordPress adminpanel och gå till Settings ” Allmänt. Sedan, utan att ändra något, rullar du längst ner och klickar på knappen ”Save Changes”.

Detta kommer att se till att din sites URL är korrekt på alla andra ställen där den behöver vara.
När du har gjort det, gå till Settings ” Permalinks, rulla sedan ner och klicka på ”Save Changes” för att säkerställa att alla länkar till post fungerar bra.

Step-by-Step 7: Fixa Images och trasiga Links genom Updating Paths
När du flyttar en WordPress-webbplats från en domän till en annan eller från en lokal server till en live site, kommer du att stöta på brutna links och saknade images.
Vi visar dig två sätt att uppdatera webbadresser. Du kan välja det som fungerar bäst för dig.
1. Uppdatera webbadresser med hjälp av Search & Replace Everything Plugin (rekommenderas)
Det säkraste sättet att åtgärda detta är att använda Search & Replace Everything. Det är ett kraftfullt WordPress-plugin som gör att du enkelt kan utföra massuppdateringar på din webbplats utan att skriva komplexa databasfrågor.
Först måste du installera och aktivera pluginet Search & Replace Everything.
Efter aktiveringen går du till sidan Verktyg ” WP Search & Replace.

Därefter måste du ange webbadressen till din lokala webbplats i fältet ”Sök efter” och webbadressen till din live-webbplats i fältet ”Ersätt med”.
Bläddra lite och klicka på ”Välj alla” under tabellerna. Detta säkerställer att insticksprogrammet letar efter den gamla webbadressen överallt i databasen.

Klicka nu på knappen ”Förhandsgranska Sök & Ersätt” för att fortsätta.
Pluginet söker i din databas efter alla förekomster av den gamla URL:en och förhandsgranskar sedan resultaten.

Om allt ser bra ut klickar du på ”Replace All” för att spara ändringarna.
Du kommer att se en varning om de ändringar du gör. Klicka på ”Ja” för att fortsätta.
Pluginet kommer nu att uppdatera databasen och ersätta lokala webbadresser med din nuvarande webbadress.
2. Uppdatera webbadresser manuellt (Avancerat)
Ett annat sätt att uppdatera webbadresserna är att använda följande SQL-fråga:
UPDATE wp_posts SET post_content = REPLACE(post_content, 'localhost/test/', 'www.yourlivesite.com/');
Gå bara till phpMyAdmin, klicka på din databas och klicka sedan på ”SQL” i toppmenyn och lägg till frågan ovan.
Se till att du ändrar URL:erna till din lokala webbplats och din live-webbplats och klicka på knappen ”Go”.

Nu är det klart. Nu har du utan problem flyttat WordPress från din lokala server till en live site.
Förhoppningsvis är din live-webbplats igång och fungerar smidigt. Om du upptäcker några fel kan du kolla in vår guide till vanliga WordPress-fel för att få hjälp med felsökning.
Vi hoppas att den här artikeln hjälpte dig att flytta WordPress från en lokal server till en live-webbplats. Du kanske också vill se vår guide om att flytta en live-webbplats till en lokal server eller titta på den ultimata checklistan för webbplatsmigrering för praktiska steg för WordPress-migrering.
If you liked this article, then please subscribe to our YouTube Channel for WordPress video tutorials. You can also find us on Twitter and Facebook.


")

Christian
In step 6, wpbeginner support said, need to update these lines in wp-config.php file for an answer of comment (In Nov 2, 2017 at 12:34 am). Here are lines.
define(’WP_HOME’,’http://example.com’);
define(’WP_SITEURL’,’http://example.com’);
My question is, After which line should i need to updates these lines in wp-config.php file?
Here is wp-config.php file without comments.
<?php
define('DB_NAME', 'db');
define('DB_USER', 'user');
define('DB_PASSWORD', 'pass');
define('DB_HOST', 'localhost');
define('DB_CHARSET', 'utf8');
define('DB_COLLATE', '');
define('AUTH_KEY', 'put your unique phrase here');
define('SECURE_AUTH_KEY', 'put your unique phrase here');
define('LOGGED_IN_KEY', 'put your unique phrase here');
define('NONCE_KEY', 'put your unique phrase here');
define('AUTH_SALT', 'put your unique phrase here');
define('SECURE_AUTH_SALT', 'put your unique phrase here');
define('LOGGED_IN_SALT', 'put your unique phrase here');
define('NONCE_SALT', 'put your unique phrase here');
$table_prefix = 'wp_';
define('WP_DEBUG', false);
if ( !defined('ABSPATH') )
define('ABSPATH', dirname(__FILE__) . '/');
require_once(ABSPATH . 'wp-settings.php');
WPBeginner Support
Hi Christian,
You can add them any where before the comment line that says:
/* That’s all, stop editing! Happy blogging. */
To be more precise, you can add these lines after:
define('WP_DEBUG', false)1-click Use in WordPress
Admin
Ian Billingham
Hi there.
Would somebody be able to tell me if this ’how to’ would overwrite an existing established website? I’m guessing it would.
WPBeginner Support
Hi Ian,
Yes, it will overwrite an existing established website.
Admin
Ravishankar
You are awesome!!! Thank you so much, this was super helpful!
Kate
Hi
Thanks for this informative post. I followed all the instructions carefully and when I tried to see if the site was live at step 6, it came up with the same page that it was had originally. It says ’Index of/’ as the heading and then has 2 options below (with details of date modified etc). The 2 options are cgi-bin which brings up a 403 error and wordpress which goes to a blank page. Any ideas on what I might have done wrong? I’m very new to this so might have got something confused!
Thanks
Ahmed
Thank you very much, this is very useful
Kritika
Nice and helpful. Thanks
Muhammad Azhar
Hi
i am trying to upload my localhost word press site to live.
I am stuck at where it said ”error database connection” i edit the wp-config file and now the only white screen appearing on my web site. I am confused what to do next? ”Next, you need to login to your WordPress admin panel and go to Settings » General. be.” I have to install word press at my hosting to perform this step. Please guide.
CK Cheung
Hi,
Many thanks for the instruction. I would like to ask is it possible that I just copy the exported database and upload to the FTP site?
Then I can keep the local host for the future upgrade and testing?
If yes, in future which file I should upload to the ftp and make it live??
Many thanks.
kathy
Hi, I wonder if you can help. I’ve got all the way to editing the config file and uploading i would now appear to be at a sticking point – any ideas on the below? Everything has gone fine to this point. I’ve amended the name, user and password as advised. Would really appreciate any pointers. Thanks
Server Error in ’/’ Application.
Runtime Error
Description: An application error occurred on the server. The current custom error settings for this application prevent the details of the application error from being viewed remotely (for security reasons). It could, however, be viewed by browsers running on the local server machine.
Amelia
Hi There. I just want to thank you for such an informative site you are running. I feel like you guys literally held my hand the whole way through, and every glitch I had, you had an article about how to fix it.
I’m happy to say my site is now up and running, while I still have to do a few finishing touches though. Just a great big thank you, I could not have done it without following your website step by step.
Nick
I am having issues with step 6, mainly the part where it says ”Next, you need to login to your WordPress admin panel and go to Settings » General. Without changing anything, scroll to the bottom and click the Save Changes button. This will ensure that the site URL is corrected anywhere else that it needs to be.
After that go to Settings » Permalink and click Save Changes to ensure that all post links are working fine”. I cannot go into the settings because I cannot login, I have gotten to the login page but it won’t let me login and I cannot create an account because the link is not connected. How would I get around this problem.
WPBeginner Support
Hi Nick,
You can update the URLs in wp-config.php file as well. Connect to your live website using an FTP client and then add these two lines:
define('WP_HOME','http://example.com'); define('WP_SITEURL','http://example.com');1-click Use in WordPress
Don’t forget to replace example.com with your own URL.
Admin
Nisa
Thank you very much its was very helpful, I was moving WP files from one server to another.
But I cannot compete the 6th step latter part, I can type the Admin username and password, so the site shows I am logged in as the admin from right hand side corner up, but I cannot access the admin panel
I get the error message : ”Sorry, you are not allowed to access this page.”
Judit
Hello,
I took ages to set up my website locally, and now I am ready to move it to a live site. However, when I go to I get an error message:
#1045 – Access denied for user ’xxx'(my username)@’localhost’ (using password: YES)
I’m pretty sure my username and password are correct and yet I cannot log in or change my password.
Please help – I’m afraid that I invested so much time into setting up WP and now I cannot move it to a live site because of this issue.
WPBeginner Support
Hi Judit,
You will need to edit the phpmyadmin’s configuration file:
c:\wamp\apps\phpmyadmin4.1.14\phpmyadmin.conf
Try root for username and leave password field blank. Set ’AllowNoPassword’ to true. Save your changes and restart WAMPSERVER
Admin
TH
Hi. I moved my site from my local host wamp to my hosting service.
I did all the steps 1-7 but am facing the following problems:
(I had deleted all my plugins to ensure no conflicts)
– when I login as admin, it shows me the login page instead of the homepage and the admin dashboard.
– header menu bar tabs are working OK except for the HOME tab. When I click on HOME it takes me to localhost. Other tabs take me to the right pages.
– Top bar menu tabs (Favorites, Notifications, Logout) are not working. When I click on Favorites it shows: domainname/login/?redirect_to=http%3A%2F%2domainname%2Fdashboard%2Fprojects%2F#favorites and still shows the login page.
– when I click on logout, it shows domainname/login/domainname/wp-login.php?action=logout&_wpnonce=942fbc8980
– when click on > domainname>dashboard it goes to : domainname/login/?redirect_to=http%3A%2F%2Fdomainname%2Fwp-admin%2F and still shows login page
1. What are the problems with the setup? How do I fix them?
2. Should I delete all the WP files and DB on the live server and try again?
Please help.
Thanks.
TH
WPBeginner Support
Hi,
You may want to follow the steps in our WordPress troubleshooting guide. It will help you figure out what’s causing the issue and how to fix it.
Admin
Tara Giltner
Hi,
I followed these directions, they were great. Thank you. My problem is that I still have an error establishing database. I realize it’s probably because the old website is still on the public_html files as well. Is it ok to delete them?
WPBeginner Support
Hi Tara,
Make sure you download the files as backup on your computer before deleting them.
Admin
Jheel
Kindly revert soon.
Jheel
i followed all the steps mentioned above. the website is blank. and i cant even log in my wordpress website i created offline. after doing all the steps when i try to see if the site is live. i get PAGE NOT FOUND & the page contains the home page without bimage & captions. Please tell me what am i suppose to do?
Klaas Cornelis
I Get the ”Forbidden: PHP engine is disable” error after completing this steps, I recon i’ve done something wrong. Anyone has an idea of where the fault can be located?
Jolie King
Hello,
I will like to ask if it possible to upload my wordpress website files by zipping all the folders & files, using the upload button in the cpanel to upload it, and then unzipping it after the upload.
Has anyone tried this? Are there any problems encountered after doing this??
Thanks.
Jim Thorne
Jolie, yes…I Zipped my entire WordPress folder and uploaded it using cPanel and then decompressed it into the public_html folder. It worked fantastic.
alan
wow. i better do it again since this look so difficutl
Amirreza
Very useful. Thanks!
Abneer
Hi,
I successfully moved my website from localhost to live site (with a few exceptions). But i had to work on my localhost also so i used update options method given on Codex . I am able to use my admin panel on localhost and only the frontpage. if i click on any other page on the website i get the wamp configuration page. How can i resolve this issue?
Please help me soon!
Thankyou!
Vince
I could really use anyones help desperately; I spent 2 weeks putting a site together and now I can’t get MAMP to work!!!
I had everything working, built the site then had a power outage. Hadn’t used my computer over the weekend and when I came back had the MySQL Error #2002 in the browser window. None of the other windows had content in them as well.
I’ve tried even going back in my Time Machine and still can’t get it to work. When I start MAMP the Apache Server starts but the MySQL Server doesn’t. I even tried things like restarting Apache and MySQL in Terminal and clearing the cache, but still nothing. And I’ve tried fiddling with the preferences in MAMP.
I’ve used MAMP before, a few years ago without any issues or problems. Loved it!!! Worked Great!!!
I’m using Sierra 10.12.6. I first installed MAMP 4.1.1 then when I started having problems I tried to upgrade to 4.2 to see if that help, but no. Had a few problems at first, but did get it to work.
I have another computer running El Capitan and the MySQL Server just doesn’t start on that either. I thought maybe it was the version of PHP that runs on MacOS, so I ran an upgrade and still nothing!
I’m really despise because the site has a scheduled live date, and the customer will freak if it’s not up and running, not to mention my employer!!! Any help would be greatly appreciated!!!
Cheers, Vince
WPBeginner Support
Hey Vince,
It is a common issue with MAMP and you’ll find various solutions online that have worked for other users. The most common solution is to delete the log files located in MAMP/db/mysql directory and then restarting MAMP.
Admin
Sarah
Hello my web page is still showing blank after enabling WP-DEBUG to true
Chamini
I did every step and now my site is in live.
But now I have another two issues,
1.all of my styles and images were not in the site
2.When I’m trying to go to other menus I can’t go to them.It shows 500 Internal Server Error.
Please help me to get out from here
Chris
Hi, did you fix this? I’m having the same problem.
I’ve deleted .htaccess and created a new one. I’ve changed permalink structure to %postname%, I’ve used the velvet blues AND SQL links update but still get this error. Not sure where else to go from here…
Maiyo
I recommend changing the WP_DEBUG option to true value in the wp_option doc to see what errors are occurring if you have a blank page or HTTP 500 error message
Jordan
I followed the steps exactly, but when I got to step 6 when I loaded the website, it worked, but all the information and templates and pages I designed were not there.
I was still able to access my localhost website and I tried to use WP Migrate to transfer all the information across, but that didn’t work. So I followed this guys instructions:
Now my localhost website does not work anymore…..
I guess I’m just going to have to redesign the entire website online now.
WPBeginner Support
Hi Jordan,
Please review your database settings. Go to phpMyAdmin to compare your live site database with your local server database.
Admin
Nou Kanvanny
Hello sir my appearance dnt see tool option, pleas help me
thank you
Craig
I recieve this error when trying to import my database:
Error
SQL query:
—
— Database: `wordpress_test`
—
CREATE DATABASE IF NOT EXISTS `wordpress_test` DEFAULT CHARACTER SET utf8 COLLATE utf8_general_ci;
MySQL said: Documentation
#1044 – Access denied for user ’craigpar4_root’@’%’ to database ’wordpress_test’
Can someone help me?
Thanks
Liv
This seems to have worked, but only on my local computer. The new WordPress website shows up at the proper domain on my computer. But when trying the same domain on my phone or a different computer, the old website still pops up.
Patricia LaCroix
Did you clear the cache on those other computers? Sometimes, that’s the issue.
Susan Keogh
I’m failing at Step 1! I type in the phpmyadmin address – and nothing is found. What am I doing wrong?
MrPET
Dear,
everything you said worked for me. Had some problem with admin back end page but after deleted .htaccess file and refresh, everything is just fine.
Jason
Dear WPBeginner,
I had followed all your steps correctly but now my wp-admin page is gone! it says 404!
Even tho the wp-admin folder exsisted.
Please help
WPBeginner Support
Hi Jason,
Try refreshing your WordPress permalinks structure. Since you can’t access admin area, you will need to do it via FTP. Connect to your website, and locate .htaccess file. Download it to your computer as backup, and then delete the file from your server. Visit the homepage of your website and WordPress will regenerate the .htaccess file for you. You can then try to login.
Admin
Jason
Yeah, you are too late 19 days to respond to my comment…
I had moved my site with pain… that means re-install and copy and pasting stuff from old one to the new one T-T
WPBeginner Support
Hi Jason,
Our apologies for the late reply. We try to respond to comments and questions in a timely manner but due to large number of comments we can sometimes miss legit questions.
Tiernan
Many thanks for the very helpful advice that has really simplified an otherwise tricky process
Kariena
Hi, very useful thanks.
Just a question, when adding content to a plugin on my localhost wp-admin, do I need to import my database again to my live site in order to update changes. (I mean do I need to import my database every time I make changes ?)
Laura
Hello, thanks for the post, it’s super helpful!!! Quick question – should I create my XML sitemap and submit it to Google / Webmaster tools while my site is still on my local server or should I upload it to the live server first?
WPBeginner Support
Hey Laura,
Your would need to upload your site to a live server first.
Admin
jenny
Thank you this is very usefull thank you again
Kim Sofo
I am having problems with this. I think its step 2. Can you please clarify where I should be uploading the wordpress files from? Are they installed as part of WAMP? So thats where I would find them? Or are they elsewhere? Thanks
Rohit Gogoi
Can you make a video on this please…Some steps are not clear. Like the second step. I didn’t got it. Please help me out.
WPBeginner Support
Hey Rohit,
We will try to add a video soon. Meanwhile, you will need an FTP client for the step 2. Once you are connected to your website, you will then upload local WordPress files from your computer to the live website.
Admin
Collins
Thanks a lot, the write up was helpful. However after exporting my database and importing it to my live server, i lost some database files. Is there any possible means or tools to retrieve them back? Help please
Rizki Suciana
Very useful.. thank you so much!
Ari
Thanks for the outstanding post. It really was comprehensive and allowed me to successfully transfer my site from local to server!
The only part I had to be ’externally resourceful’ on was the save settings when exporting my SQL database, to make sure it didn’t create a new one (as you correctly speculated, my ISP only allowed for one database).
Ritul
Is it safe to transfer website from localhost to live server??because I want to know whether I should start with live hostingOrLocal Server for making my blog??
Kirsty
Please helpppppp
When I changed my url from the .dev to .com it’s telling me 404 site not found and I can’t event get back to wordpress to fix it. :'(
WPBeginner Support
Please see our guide on how to fix 404 error in WordPress.
Admin
Tony Clarkson
Hello, I’m having trouble importing the localhost db content in to the new database, I’ve double checked the step-by-step and as far as I can see I’m doing the right thing but I’m getting this error when importing:
Error
SQL query:
—
— Database: `push_db`
—
— ——————————————————–
—
— Table structure for table `wp_commentmeta`
—
CREATE TABLE `wp_commentmeta` (
`meta_id` BIGINT( 20 ) UNSIGNED NOT NULL ,
`comment_id` BIGINT( 20 ) UNSIGNED NOT NULL DEFAULT ’0’,
`meta_key` VARCHAR( 255 ) COLLATE utf8mb4_unicode_520_ci DEFAULT NULL ,
`meta_value` LONGTEXT COLLATE utf8mb4_unicode_520_ci
) ENGINE = INNODB DEFAULT CHARSET = utf8mb4 COLLATE = utf8mb4_unicode_520_ci;
MySQL said: Documentation
#1273 – Unknown collation: ’utf8mb4_unicode_520_ci’
When I choose the custom option for exporting the local database, I’m assuming all the other settings remain as default, just change to ’Save output to a file’
What do you think it could be?
Tony
Tony Clarkson
I got past this bit, the version of MySQL on the local site was newer then the server, however, I’ve come to a halt again at step 6. When I browse the site I just get an Http Error 500. Not sure where to start…
Peter Singh
Hi Tony,
I had a similar problem with another site that I had to get live a while ago. I found that the root of the http 500 error was due to insufficient memory allowance in the php.ini file. I know you cant really get in and change that about on a webserver. I found a little trick by defining it within the wp-config/php file. Just stick this in at the top line.
define( ’wp_max_memory_limit’ ’256m’ )
and bob’s your uncle.
Dawn
I tried this and there was no change… Still either a 500 error or a blank page. :'(
WPBeginner Support
Hey Dawn,
Please try these WordPress troubleshooting steps to figure out what’s causing the issue.
Victor
Hey, Tony. How do you managed the problem with MySQL version? I’m getting the same error here and have no idea where to start. Could you clarify this for me?
Victor
Hello, I managed to bypass this issue, but now I’m with a different one.
All my pages, including WP admin (login, dashboard etc) are showing in plain HTLM. As if there no layout and styling. What could it be?
goutam majumder
Thanks so much for this detail steps. You saved my day.
God bless you
Che Devert
Such a wonderful write up. Thanks.
H Finn
This tutorial is excellent. As long as you follow the steps, and you have no problems on your own end – it works like a charm.
Thank you for this post.
Mohanraj
Hello Friends,
I have done one WordPress project in Local Server. I need to upload wp project in a Sub-Directory. Tell me the Procedures
Stephanie
Hi
I transfered a local website to my live server and followed all steps. I just updated all the URL found with localhost:888 by my final URL
All pages are fine except one where I lost one slider and one table on the page.
Anyone to help me please?
Alex Hammerschmied
I also appreciate this post very much!
It becomes handy everytime i need to walk threw a migration…
Thx for that! And keep on the good work!
Best,
Alex
WPBeginner Support
Hey Alex,
We are glad you find it helpful Don’t forget to join us on Twitter for more WordPress tips and tutorials.
Admin