
Många WordPress-användare föredrar att arbeta med sina webbplatser på en lokal server på datorn. På så sätt kan du arbeta privat med din webbplats innan du gör ändringarna tillgängliga online.
Så småningom måste du flytta den till en live-server för att göra den tillgänglig för onlinebesökare. Denna övergång är avgörande för att säkerställa att din webbplats fungerar korrekt på live-webbplatsen.
Vi har arbetat med många lokala webbplatser, så vi var tvungna att lära oss det enklaste sättet att överföra innehåll till levande webbplatser.
I den här artikeln ger vi dig steg-för-steg-instruktioner om hur du flyttar WordPress från en lokal server till en live-webbplats.
")
Varför flytta WordPress från en lokal server till en Live site?
Att bygga din WordPress blogg på en lokal server är ett säkert sätt att testa ändringar på din website utan att påverka besökarna.
När you har slutfört finslipningen av din website är nästa steg att flytta från din lokala server till en live site.
Låt oss visa dig två sätt att flytta din site från en lokal server till en live site.
Den första metoden använder ett plugin för att flytta WordPress och rekommenderas för Beginnare.
I den andra metoden visar vi dig hur du manuellt flyttar WordPress från en lokal server till en live site.
Du kan välja den metod som fungerar bäst för dig:
Innan du flyttar din WordPress webbplats
Du måste ha några saker på plats för att migrera WordPress från en lokal server till en live-server.
Först antar vi att du har en WordPress-webbplats som körs på en lokal server (även kallad localhost) på din dator och att du har full tillgång till den.
Därefter måste du ha ett domain name och ett webbhotell.
Vi har hört otaliga historier från nybörjare som började med dåliga eller gratis webbhotell och ångrade sig. Enligt vår erfarenhet är valet av rätt webbhotell avgörande för att en webbplats ska bli framgångsrik.
För att göra ditt beslut enklare rekommenderar vi att du använder Bluehost. De är ett officiellt rekommenderat webbhotell för WordPress, och de ger WPBeginners användare en exklusiv rabatt + gratis domän och SSL.
I grund och botten kan du komma igång för så lite som $ 1.99 per månad.
Om du vill ha ett bra Bluehost-alternativ kan du titta på Hostinger. De erbjuder också en exklusiv rabatt till WPBeginners användare med ett gratis domain name.
Om du har råd att betala lite mer, kontrollera då SiteGround. De har också ett specialerbjudande för WPBeginners läsare.
Om du behöver hjälp med att skapa din website kan du följa vår Step-by-Step guide om hur du skapar en website.
Slutligen behöver du ett FTP-program och veta hur du använder FTP för att uppladda din lokala server till live-sajten.
Är du redo? Låt oss börja flytta din WordPress site.
Video Tutorial
Om du föredrar skriftliga instruktioner är det bara att fortsätta läsa.
Metod 1: Överför WordPress från den lokala servern till Live Site med hjälp av ett tillägg för migrering (rekommenderas)
Den här metoden är enklare och rekommenderas för Beginnare. Vi kommer att använda ett plugin för WordPress-migrering för att flytta WordPress från localhost till en live site.
Step 1: Installera och konfigurera tillägget Duplicator
Först måste du installera och aktivera pluginet Duplicator på din lokala site. För mer detaljer, se vår Step-by-Step guide om hur du installerar ett plugin för WordPress.
Pro tips: Det finns också en Pro-version av Duplicator som erbjuder säkra backups, molnlagring, enkel återställning av webbplatser och mer.
Vid aktivering måste du gå till sidan Duplicator ” Säkerhetskopior och klicka på knappen ” Skapa ny”.
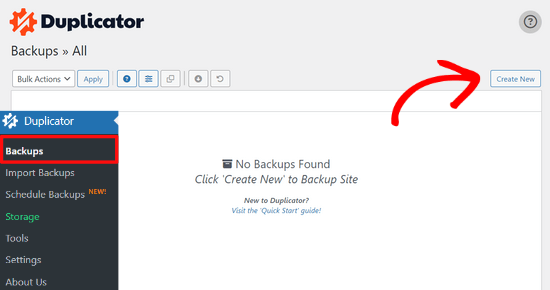
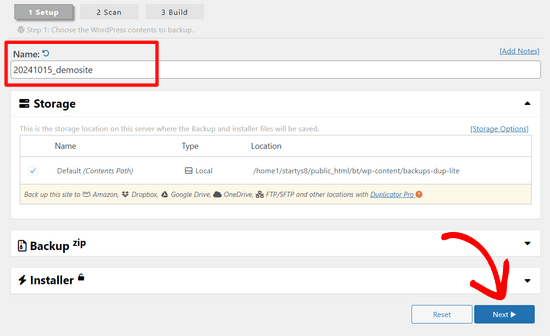
Då kommer du till en vy där du kan ge din backup ett namn.
Klicka sedan på knappen ”Next”.
Duplicator kommer nu att runna några tester för att se om allt är i order.
Om alla punkter är markerade med ”Bra” klickar du på knappen ”Bygg”.

Denna process kan ta några minuter, beroende på storleken på din webbplats. Du måste lämna den här fliken öppen tills den är klar.
När du är klar ser du nedladdningsalternativ för ”Installer”- och ”Archive”-paket. Du måste klicka på knappen ”Download Both Files” för att ladda ner båda filerna till din dator.

Filen ”Archive” är en komplett kopia av din WordPress site. Den innehåller alla WordPress core-filer samt dina images, uploads, themes, plugins och en backup av din WordPress database.
Filen ”Installer” är ett skript som kommer att automatisera hela migreringsprocessen genom att packa upp archive-filen som innehåller din website.
Step-by-Step 2: Skapa en Database för din Live WordPress website
Innan du kan runna installeraren eller uploada WordPress-webbplatsen från localhost till ditt webbhotell måste du skapa en MySQL-databas för din new live website.
Om du redan har skapat en MySQL-databas kan du hoppa över det här steget.
För att skapa en database måste you gå till cPanel dashboard på ditt webbhotell account. Leta sedan upp sektionen ”Databases” och klicka på ikonen ”MySQL Database Wizard”.

På nästa vy finns det ett fält för att skapa en new database.
Ange bara ett namn på din database och click på knappen ”Create Database”.

cPanel kommer nu att skapa en new database åt you.
Efter det måste du enter ett användarnamn och password för din nya användare och sedan click the ”Create User” button.

Nu måste du add to den användare som du just skapat till databasen.
Klicka först på checkboxen ”All Privileges”.

Sedan rullar du ner och klickar på knappen ”Make Changes” för att save your changes.
Din database är nu redo att användas med din site WordPress. Se till att du obs/observerar databasens namn, användarnamn och password. Du kommer att behöva denna information i nästa steg.
Steg 3: Ladda upp filer från den lokala servern till WordPress-webbplatsen i realtid
Nu måste du uploada archive- och installer-filerna från din lokala site till ditt webbhotell.
Anslut först till din Live site med hjälp av en FTP-klient. När du har anslutit, se till att rotkatalogen på din website är helt tom.
Normalt sett är root directory foldern /home/public_html/.
Vissa webbhotell för WordPress installerar WordPress automatiskt när du registrerar dig. Om du har WordPress-filer där måste du ta bort dem.
Efter det kan du uploada archive.zip och installer.php-filerna från Duplicator till din tomma root directory.

Steg 4: Run på migreringsskriptet
Följ efter att du har uppladdat migreringsfilerna, du måste besöka följande URL i din webbläsare:
http://example.com/installer.php
Glöm inte att ersätta ”example.com” med ditt eget domain name.
Detta kommer att starta migreringsguiden för Duplicator.
Installern kommer att runna några tester och initiera skriptet.

Under Setup section kommer du att bli ombedd att enter din MySQL server, databasnamn, användarnamn och password.
Din värd kommer troligen att vara en lokal värd. Därefter anger du uppgifterna för den databas som du skapade i det tidigare steget.
Klicka sedan på knappen ”Validate” för att kontrollera att de detaljer du har enter är korrekta.

Därefter klickar du på knappen ”Nästa” för att fortsätta.
Duplicator importerar nu din WordPress backup av databasen från archive till din new database.
Den kommer också att uppdatera webbadresser som pekar på den lokala webbplatsen och din nya live-webbplats.
You can now click on the ”Admin Login” button to enter the WordPress admin area of your live site.

När du loggar in på din live site kommer Duplicator automatiskt att städa upp installationsfilerna.
Nu är allt klart. Du har utan problem flyttat WordPress från den lokala servern till din live site.
Metod 2: Överför WordPress manuellt från den lokala servern till Live-webbplatsen
I den här metoden visar vi hur du manuellt flyttar WordPress från den lokala servern till din live site. Det är användbart om den första metoden inte fungerar eller om du föredrar att göra det manuellt.
Step-by-Step: Exportera lokal WordPress Database
Det första du behöver göra är att exportera din lokala WordPress database. Vi kommer att använda phpMyAdmin för att göra det.
Om du inte är bekant med det kan du läsa vår guide till hantering av WordPress Database med phpMyAdmin.
Gå till http://localhost/phpmyadmin/ och klicka på your WordPress database. Därefter klickar du på knappen ”Exportera” högst upp i menyn.

I alternativet ”Exportmetod:” kan du välja ”Snabb” eller ”Anpassad”. Custom ger dig fler alternativ för att exportera din databas.
Men vi rekommenderar att du väljer ”Quick” och sedan klickar på knappen ”Go” för att downloada din database.

Step 2: Uppladda WordPress-filer till Live Site
Nu måste vi flytta all your website-filer till live site.
För att komma igång öppnar du din FTP-klient och ansluter till ditt konto på webbhotellet.
När du är ansluten till din live-webbplats ska du se till att du laddar upp filerna i rätt katalog. Om du till exempel vill att webbplatsen ska hostas på ”dinsite.com” ska du ladda upp alla filer i din public_html-katalog.
Välj nu dina lokala WordPress-filer och uploada dem till din live server.

Step-by-Step 3: Skapa en MySQL Database på din Live site
Medan din FTP-klient uppladdar dina WordPress-filer kan du börja importera din database till live-servern.
De flesta WordPress-hostingleverantörer erbjuder cPanel för att hantera ditt hostingkonto, så vi kommer att visa dig hur du skapar en databas med hjälp av cPanel.
Först måste du logga in på din cPanel dashboard och click på ”MySQL Database Wizard” icon, som finns i ”Databases” section.

På nästa vy kan du skapa en new database.
Du måste ange ett namn för din databas och sedan klicka på ”Create Database”.

cPanel kommer nu automatiskt att skapa en new database åt you.
Därefter måste du ange ett användarnamn och lösenord för din nya användare och sedan klicka på ”Create User”.

Efter det måste du add to den användare du just skapat till databasen.
Kontrollera först checkboxen ”All Privileges”.

Sedan rullar du ner och klickar på ”Make Changes” för att save your changes.
Du har utan problem skapat en new database för din live WordPress site.
Step 4: Importera WordPress Database till Live Site
Nästa steg i processen är att importera din WordPress database.
Gå till din cPanel-instrumentpanel, bläddra ner till avsnittet ”Databaser” och klicka på ”phpMyAdmin”.

Detta tar dig till phpMyAdmin, där du vill klicka på databasen som du just skapade ovan. phpMyAdmin visar din nya databas utan tabeller.
Klicka sedan på tabben ”Import” högst upp i menyn. På sidan import klickar du på knappen ”Choose File” och väljer sedan database-filen från den lokala site som du saved i det första steget.

Därefter klickar du på knappen ”Go” längst ner på sidan. Din database kommer automatiskt att importeras till phpMyadmin.
Step 5: Ändra URL:en för webbplatsen
Nu måste du ändra webbplatsens URL i din database så att den ansluter till din live WordPress-webbplats.
I phpMyAdmin letar du efter wp_options-tabellen i din database som du just importerade ovan.
Om you changed your database prefix, then instead of wp_options, it might be {new_prefix}_options.
Klicka sedan på knappen ”Browse” bredvid wp_options. Eller klicka på länken i sidebaren för att öppna upp den page som innehåller en lista över fälten i tabellen wp_options.

Sedan, i options_name column, måste du leta efter alternativet siteurl.
Klicka sedan på ikonen ”Edit”.

Du får upp ett fönster där du kan edit:a fältet.
I inmatningsrutan option_value ser du webbadressen till din lokala installation, som kommer att vara något i stil med http://localhost/test.
Du måste infoga din nya site URL i detta fält, till exempel: https: //www.wpbeginner.com.
Sedan kan du save fältet genom att clicka på knappen ”Go”.

Därefter måste du följa samma steg som ovan för namnet på hemalternativet. Menyn wp_options kan vara några pages lång. Vanligtvis kommer home page-alternativet att finnas på den andra sidan.
Uppdatera sedan hem-URL:en så att den är densamma som URL:en för din live site.
Step-by-Step 6: Konfigurera din Live site
Nu när du har importerat databasen och uppladdat ditt content är det dags att konfigurera WordPress.
Just nu bör din site visa felmeddelandet”Error establishing a database connection”.
För att fixa detta ansluter du till din website med en FTP-klient och öppnar filen wp-config.php.
Du kommer att leta efter följande rader med kod:
1 2 3 4 5 6 7 8 9 | // ** MySQL settings - You can get this info from your web host ** ///** The name of the database for WordPress */define( 'DB_NAME', 'database_name_here' );/** MySQL database username */define( 'DB_USER', 'username_here' );/** MySQL database password */define( 'DB_PASSWORD', 'password_here' );/** MySQL hostname */define( 'DB_HOST', 'localhost' ); |
Du måste ange namnet på databasen, användarnamnet och passwordet som du skapade tidigare.
Save sedan filen wp-config.php och uploada den tillbaka till ditt WordPress webbhotell server.
Nu, när you besöker your website, ska den vara live.
Efter det måste du logga in på din WordPress adminpanel och gå till Settings ” Allmänt. Sedan, utan att ändra något, rullar du längst ner och klickar på knappen ”Save Changes”.

Detta kommer att se till att din sites URL är korrekt på alla andra ställen där den behöver vara.
När du har gjort det, gå till Settings ” Permalinks, rulla sedan ner och klicka på ”Save Changes” för att säkerställa att alla länkar till post fungerar bra.

Step-by-Step 7: Fixa Images och trasiga Links genom Updating Paths
När du flyttar en WordPress-webbplats från en domän till en annan eller från en lokal server till en live site, kommer du att stöta på brutna links och saknade images.
Vi visar dig två sätt att uppdatera webbadresser. Du kan välja det som fungerar bäst för dig.
1. Uppdatera webbadresser med hjälp av Search & Replace Everything Plugin (rekommenderas)
Det säkraste sättet att åtgärda detta är att använda Search & Replace Everything. Det är ett kraftfullt WordPress-plugin som gör att du enkelt kan utföra massuppdateringar på din webbplats utan att skriva komplexa databasfrågor.
Först måste du installera och aktivera pluginet Search & Replace Everything.
Efter aktiveringen går du till sidan Verktyg ” WP Search & Replace.

Därefter måste du ange webbadressen till din lokala webbplats i fältet ”Sök efter” och webbadressen till din live-webbplats i fältet ”Ersätt med”.
Bläddra lite och klicka på ”Välj alla” under tabellerna. Detta säkerställer att insticksprogrammet letar efter den gamla webbadressen överallt i databasen.

Klicka nu på knappen ”Förhandsgranska Sök & Ersätt” för att fortsätta.
Pluginet söker i din databas efter alla förekomster av den gamla URL:en och förhandsgranskar sedan resultaten.

Om allt ser bra ut klickar du på ”Replace All” för att spara ändringarna.
Du kommer att se en varning om de ändringar du gör. Klicka på ”Ja” för att fortsätta.
Pluginet kommer nu att uppdatera databasen och ersätta lokala webbadresser med din nuvarande webbadress.
2. Uppdatera webbadresser manuellt (Avancerat)
Ett annat sätt att uppdatera webbadresserna är att använda följande SQL-fråga:
1 | UPDATE wp_posts SET post_content = REPLACE(post_content, 'localhost/test/', 'www.yourlivesite.com/'); |
Gå bara till phpMyAdmin, klicka på din databas och klicka sedan på ”SQL” i toppmenyn och lägg till frågan ovan.
Se till att du ändrar URL:erna till din lokala webbplats och din live-webbplats och klicka på knappen ”Go”.

Nu är det klart. Nu har du utan problem flyttat WordPress från din lokala server till en live site.
Förhoppningsvis är din live-webbplats igång och fungerar smidigt. Om du upptäcker några fel kan du kolla in vår guide till vanliga WordPress-fel för att få hjälp med felsökning.
Vi hoppas att den här artikeln hjälpte dig att flytta WordPress från en lokal server till en live-webbplats. Du kanske också vill se vår guide om att flytta en live-webbplats till en lokal server eller titta på den ultimata checklistan för webbplatsmigrering för praktiska steg för WordPress-migrering.
If you liked this article, then please subscribe to our YouTube Channel for WordPress video tutorials. You can also find us on Twitter and Facebook.


")
 in 2024")
Mark
Hi!
I’ve done until step 6 and was able to get the Error Database Connection and I was thrilled! when i changed the parameters the error changed to Error 500. And now I’m stuck.
My local MAMP DB is named ”localdatabase” and the new one that I created in the live site have a prefix that I cannot edit so now my new database name in the live site is ”web_localdatabase”
Question:
1. Should the my local database name be the same with the one in the live site?
2. If not, is there any other changes I need to do aside from the changes in Step 6?
Thanks!!!!!!!
Cindy
Hi there,
I thought I followed your steps to the letter. I accessed localhost through WAMP. cPanel is through StableHost. FTP using FileZilla. After the migration I looked at my site and saw that half of my most recent post was missing. It had never been published; it was the first post I created in localhost. (I recently moved from wp.com to wp.org. Had less than 20 posts at time of transfer. All of them migrated from localhost to live with no errors.) I had no ’failed transfers’ during the FTP upload. No errors that I noticed.
After seeing the incomplete blog post, I tried to access localhost to view the original content using WAMP. That project name can no longer be displayed. I cannot access my blog content on localhost using the name I assigned prior to the migration. The folder is still present in www.
I must have done something right since part of a post that was never on my live site did make it there. Can you tell me what happened to my localhost? I don’t have anything in sub folders…it’s all pretty straight forward and I tried to keep it simple.
Troubleshooting:
Ran SQL query per your Step 7, message is: #1146 – Table ’sxxxxx_wp574.wp_posts’ doesn’t exist. wp_574 is the database name I created in Step 3. Query was localhost name and website domain.
Restarted computer.
WAMP ’Restart all services’ option.
Right now I’m completely confused! I not only do not know what to do next but am fearful of trying a Google suggestion for fear of really screwing things up. Can you help me? Any insight into the incomplete migration would be good to know too but I’m more freaked out about localhost at the moment. Thanks so much. You’re instructions are very easy to follow and understandable.
Kind Regards, cindy
Lea Jacta Est
Hello!
I have issues updating my links (step 7). It seems to be an URL match problem. Using Velvet Blues, I’m typing my old URL in the required field and I do the same for the new URL but there’s an error message showing every time I try.
Just to check :
– my old URL = my localhost URL which is in the general settings and which shows in the address bar when I go to my homepage
– my new URL : my brand new domain name which ends by .com
… right ?
Does the error comes from somewhere else or am I doing it this wrong ?
Thanks a lot for your help.
Jeff Bradbury
I currently have my live site at. I want to download it to MAMP (Mac) and begin the process of redesigning locally and then I want to put it back fresh.
1) When I’m ready to upload the new site, do I put it over top of the current folder? Do I create a new folder (or subdomain) and stick it in that directory and then move the domain/DNS to the new site?
2) I have a bunch of pretty links on the live site that I wish to download and begin working on … I think i’m correct in thinking that Pretty links just take the form of whatever the domain currently is.
3) Is this the best process if you want to constantly be working locally and updating your site on a daily/weekly basis? This appears to be a great method if you want a One and Done method of updating a site. If there is another way or method of working locally and then uploading the changes …. or even syncing a live/local site, I would love some help and advice. THANK YOU!
WPBeginner Support
1. Depends on what files you have changed and what changes you made that are stored in the database. We assume that you will be working on your theme and would probably make few changes that will be stored in database. In that case, you can just overwrite your theme files and update your database from a backup.
2. If by pretty links you mean the permalink settings, then we think that those will not be affected.
3. If you are planning on continuously working on your site, then this strategy would work but it is not the best solution. You need a solution that allows you to automatically sync your development site to your live site. For example, take a look at our tutorial on how to create a staging environment for your WordPress site. Subscribe to WPBeginner, we will soon cover this topic in an upcoming article with detailed instructions.
Admin
Felipe Stabile
THANK YOU GUYS!
Things went smooth after some problems and thinking, but it was because my host is a little different, and i´ve got problems uploading my files to the FTP using Filezilla. Serious docs got a failure message, but i solve that by doing the following:
If someone here is using smarterasp, you´d be better not using Filezilla, use the integrated (HostingControlPanel/MyWebsites//FileManager).
With your database clean, You have to zip your files from HTDOCS/wordpress, and then upload this zip file.
In the integrated File Manager you have the option for unzip. wait a little bit, until all folders and docs appear.
Then follow the tutorial above and you´ll be ok.
Mohit
Hey wpbeginner,
Thanks a lot for this tutorial. Its the best one I have came across.
Followed this step by step and got the expected results.
Keep up the good work !
Cheers!
Abhay
Many-many thanks bro. it worked very well.
Biniam
Thanks a million!!!
jay capulong
hi all is ok, but the others picture is not showing,
what do you mean localhost/test? (local site)
thanks
M3N
Hi. Thanks for this great tutorial.
One question though…
Following steps you described doesn’t cause problem with serialized data. I saw some tutorials recommended to use a script or other thing to avoid the problem with serialized data when changing file paths manually.
Any idea or suggestion ?
Mark
Hi, I don’t know if anyone suffered from a redirect to their local host when they ran wp-admin. I did but I found a post over at stackoverflow that sorted me out. Basically I had to update the filepaths in the WP-Options table.
Good luck.
MT
Mujtaba Zia
*** This is the best ever tutorial of my life ***
I know about html/css but never worked on wordpress, this tutorial helps me lot and have my site live by following every step and wordings of it. Thank you so so much!
Now very eager to learn more through this website.
Kathy
I’m encountering some serious problems when transferring to live server. Locally I have 2 sites using the same theme. Both running off separate databases and sites, both work perfectly locally. One site is uploaded and running fine and i’m in the process of uploading the second, here’s where it goes wrong. I’ve exported and created the database, working perfectly all images appear correct. I uploaded all the files and amended the config then ran in to problems. I appear to have no content loading and only half a theme along with the incorrect logo of the site. I tried to login in to amend all links but i am returning an ’internal server error’ the sever encountered internal error or misconfiguration and was unable to complete your request.
I have rolled the site back to it’s previous look but i am at a complete loss as to next steps, can anyone help? I can not understand how we are working perfectly locally and then an epic fail on live.
Kathy
p.s. I have screenshots if that helps.
DaveJorg
Heads up that sometimes after the migration is complete only the home page works.
If this is the case visit Dashboard > settings > pemalinks and click save changes. I believe it updates the mod_rewrite and should fix the issue. It did for me.
RW
Please remove my email from the comments thread. I’ve tried to unsubscribe each time and it’s not working.
Carlo
Thanks for this guide. I’m a more than a beginner in this field. How can I proceed if I have a database already installed on my hosting. Do I have to delete it and make new one, cancel the tables or simply empty them? Thanks in advance for your help
WPBeginner Support
You can create a totally new database.
Admin
Nathan
I moved everything and it went smooth until I tried logging in to WP it keeps saying password incorrect. I even tried changing details in phpMyAdmin. Could the problem be that I ran your query before logging in to WP?
Nathan
I fixed the problem, i just signed in to WP and re-saved permalinks and whole site was update. Thanks for the great tutorial.
Angela
Unfortunately, I wasn’t able to move my site from localhost to online. I got to the login page and it wouldn’t accept my login information. Any idea what the problem could be? I don’t want to give up on it so I may try again.
Omar Zeidan
Hi Angela,
Well, you might forgot to import the DB files to your live server, did you ?
If nothing worked with you then try the following,
Access your DB admin panel, find the wp_users and manually add one there.
Hope this helps.
Pranesh
Excellent guide. Everything went fine. Thanks a lot !!
Ziga
Hello, i followed all steps, and at step #4, i choose .gzip file to import, and got the following error:
#1064 – You have an error in your SQL syntax; check the manual that corresponds to your MySQL server version for the right syntax to use near ’?’ at line 2
Any help?
Justin
Everything works except my other pages…. Can’t figure it out
Matt
Similar issue for me. Have added it to a subfolder on another one of my domains, but when I navigate to it, I’m shown the Themes 404 page. When I try to go directly to any of the other pages, I get my hosts 404 page. Any ideas anyone?
Ryan
I’ve gone through all the steps, and my site ends up not looking at all like it did. It appears most of the CSS didn’t transfer over. I was using the Divi theme.
Here is what it looks like:
Any tips?
Amefon
HELLO
i got this error while trying to import my database onto the site
Error
SQL query:
—
— Database: `lcmi`
—
CREATE DATABASE IF NOT EXISTS `lcmi` DEFAULT CHARACTER SET latin1 COLLATE latin1_swedish_ci;
MySQL said: Documentation
#1044 – Access denied for user ’lazarbwn’@’localhost’ to database ’lcmi’
how do i solve this?
WPBeginner Support
Check your MySQL username, MySQL host, Database, and MySQL Password.
Admin
Amefon
i do not understand. Am I to change the MySQL details or what.
Mike Casile
Have not done this yet, but local site is looking good. I do have 2 questions (which may really be too big and may require follow-on articles).
1. If I go thru this and it comes out nice on the live site … but I want to continue doing new development locally, is there a similar process for incremental changes?
2. How will this be impacted if I use multiSite (which I’m NOT doing right now).
Thanks,
Roman
It depends on what your changes are affecting – if you have changed some css or php code in theme, you will need tu push changed files on server using FTP. If you change some wordpress settings, you only need to go through steps of copying your database.
Ameira
Thank you for this tutorial – after 2 weeks of trying everything under the sun finally found out what was missing. I have been able to access my website but images are missing and the layout is all over the place. I followed step 7 and it did improve the improve slightly but still quite a mess – any ideas on what else I can do?
Soo
Easy to understand and follow.
The best tutorial about”How to Move WordPress From Local Server to Live Site”.
Thank you
zavera
Hi WPBEGINNER SUPPORT, i have created custom wordpress site with some pages and used all the steps you mentioned here and all worked correctly but my pages urls are still localhost how to change these urls for pages?
WPBeginner Support
If you can access the admin area then go to settings -> General and change your WordPress URL and Site URL. Or look at the step 5 to do that through phpmyadmin.
Admin
Daniel Afriyie Gyimah
ples we need the information in a downloadable PDF format
Andres
Hello ! I tried using this method and I get the following error:
lessphp fatal error: load error: failed to find /Applications/MAMP/htdocs/breg/wp-content/themes/theme43776/bootstrap/less/bootstrap.lesslessphp fatal error: load error: failed to find /Applications/MAMP/htdocs/breg/wp-content/themes/theme43776/style.less
Warning: Cannot modify header information – headers already sent by (output started at /home/weliketo5/public_html/breg/wp-content/themes/CherryFramework/includes/less-compile.php:155) in /home/weliketo5/public_html/breg/wp-includes/pluggable.php on line 1207
Could anybody help me out?
Alfredo Garcia
While doing step #4: Import WordPress Database on Live Site, I get the following SQL error:
Error
MySQL said: Documentation
#1064 – You have an error in your SQL syntax; check the manual that corresponds to your MySQL server version for the right syntax to use near ’?’ at line 105
Can you tell me what is wrong and how I can fix this?
WPBeginner Support
The backup file you are trying to import could be corrupt. Export a fresh copy and then try again. If this does not work, then ask your web hosting provider to update your MySQL version.
Admin
Alfredo Garcia
Thank you. I’ll try it tonight.
Ngabe R
I was missing step 5. Thanks a lot. Very helpful!
Adam
Do I need to install WordPress on my server before beginning this process, or do I just follow the steps as listed?
WPBeginner Support
No, please see step 2. You will upload WordPress files from your local server to the live server.
Admin
Adam
Thanks, I’ve got it all working now! This was a really, really helpful tutorial!
Rod
Thanks, very helpful ! Once I worked out the correct server name on the host et all went well.
Yonatan
Great article and really helpful.
Tnx!
Momodu Oladapo Abraham
it worked thanks, however there arre still some links connecting to the local server address most experienced on the posts and blogs…what do i do ..please help…every other thing has worked fine except the posts. Thanks
Natharza
Hey
Everything worked out but the post links are not working. I do run the sql query still links were broken with the error ”No input file specified.”
Please help
Michael
Thanks for this article. It saves me from stress of redesign online
Sarah
Thanks for a great tutorial, followed every steps and nothing went wrong !
THUMBS UP +++
Fongoh Tayong
Man, you are the bomb.
It worked for me like charm.
More power to you to write more tutorials on this. I am newbee to wordpress.
Thanks again.
Louise
Hi,
With step 2, if you dont have a public_html directory where else can you upload the file under? as per Milos question. I have gone into file manager and to httpdocs file and uploaded it there.
Thanks
Max
Thank you for a really simple, easy to follow tutorial on how to migrate a database. I notice that you didnt’ state to update the DB_HOST name, but otherwise this was great.
Stefano
Hi! First of all thnx for the detailed guide.
I followed all the steps without problem. Anyways, the theme and all the plugins i had installed on localhost are missing causing the page looking completely different. What can i do to import all previous plug-in and settings? Thank you in advance for toyr reply
WPBeginner Support
You can upload them from your computer using an FTP client.
Admin
Junn
Hi thank you for this tutorial, It works for me! However, I cant find the pages I created locally and settings are not right. It did let me install a new wordpress.
What went wrong?
Monique
hello. thanks for this tutorial. but i have a problem at step 6. All first 5 steps are done. but when i reload my site after changing URL in database. there is no such message as ”Error Establishing Database Connection error” and my site is still opening in local host. please help what i should do now
Alex
How to create MySql db on my actual site. My provider can help me?
WPBeginner Support
Yes they can help you.
Admin
Miloš
Hi, it is me again. Now I have a problem with step seven. I put that code with my own web page
in my sql but 2 of five pages still don’t work. I propably didn’t understand your instructions very well. What do you mean by ”but don’t forget to change it with your own local site and live site URLs. ”?
Nadeem
Hi
could you please check your menu under the appearance and then click one by one those menu which is not working properly. hopefully you’ll find the errors.
Nady
Nikhil
Hi,
Thanks for the help…
All the steps are working perfect….
But When I am trying to login or Click on Any link….
It show me following msg….
My Website :
Internal Server Error
The server encountered an internal error or misconfiguration and was unable to complete your request.
Please contact the server administrator at webmaster@ to inform them of the time this error occurred, and the actions you performed just before this error.
More information about this error may be available in the server error log.
Additionally, a 500 Internal Server Error error was encountered while trying to use an ErrorDocument to handle the request.
What’s the solution of this error…
Dwayne Smith
Hi NIKHIL I am having the same problem did you manage to figure out what the problem was. If so could you please let me know your solution
Cheers
Dwayne
Mustapha
Very helpful post
thank you
Milos
I have a problem with step 6 since that I don’t know how to edit wp-config.php. The thing is that when I click right mouse and open view/edit there are no options for entering database name, user and password.
Also in step 3 I uploaded my WP files in htdocs file because that’s the only folder that I see. I use FileZilla.
I would appreciate very much if you could answer me on my email.
Miloš B.
Andrej
Milose… When you open wp-config.php file, you need to open it as a notepad document, and find at the beggining of the text database name, user and password, edit text manually and then save again.
Matt
I ran into an sql error 1064 when importing using a compressed export. Finally got it working by exporting as an uncompressed .sql