Efter att ha byggt WordPress-webbplatser i flera år har vi lärt oss hur viktigt det är att ha en lokal WordPress-installation på din dator.
Med WordPress på din personliga maskin kan du experimentera med nya funktioner utan att riskera din live-webbplats, dyka djupt in i WordPress-utveckling och till och med bygga hela webbplatser innan de går live. Det är som att ha en privat sandlåda för alla dina WordPress-projekt.
Om du använder Windows finns det många sätt att installera WordPress lokalt. Men vi har begränsat det till de två enklaste metoderna. I den här przewodniken visar vi dig hur du enkelt installerar WordPress på en Windows-dator, oavsett vilken version du använder.
Varför ska du installera WordPress på Windows?
Om du är Windows-användare har du flera fördelar med att installera WordPress lokalt på din dator.
En lokal WordPress-installation skapar en testmiljö som inte påverkar din live-webbplats. Denna installation, som ofta kallas en lokal server eller localhost, är din personliga lekplats för WordPress.
WordPress-utvecklare använder regelbundet lokala installationer för sitt arbete. Instinktivt kan de använda den för att experimentera med nya plugins eller teman eller testa webbplatsen innan de uppdaterar till Gutenberg-blockredigeraren.
Men det är inte bara för proffsen. Om du är ny på WordPress är en lokal installation perfekt för att lära sig. Du kan utforska funktioner, testa teman och plugins och experimentera fritt utan att oroa dig för att förstöra en live-webbplats.
Det är viktigt att notera att när du installerar WordPress lokalt på Windows är det bara du som kan se webbplatsen. Om du vill skapa en offentlig webbplats behöver du ett domännamn och ett webbhotell.
Nu kan du tekniskt sett installera WordPress på Windows med XAMPP, och vi har skrivit en poradnik om det tidigare.
Med detta sagt har vi hittat två ännu enklare sätt än XAMPP för att konfigurera en lokal WordPress-miljö, vilket gör dem perfekta för nybörjare eller användare som snabbt behöver skapa en lokal webbplats. Du kan klicka på länken nedan för att hoppa vidare till den metod du är intresserad av:
Metod 1: Installera WordPress på Windows med hjälp av Studio (snabbt och enkelt)
För den första metoden kommer vi att använda Studio. Det är en lokal WordPress-programvara som tillverkas av Automattic, det företag som hanterar och driver WordPress.com, som är en webbplatsbyggare baserad på WordPress-programvaran.
Vi kommer att prata om den här metoden först eftersom den är mycket snabbare och enklare att följa, vilket gör den perfekt för nybörjare.
Först måste du öppna webbplatsen Studio by WordPress.com. Klicka sedan på knappen ”Ladda ner för Windows”.
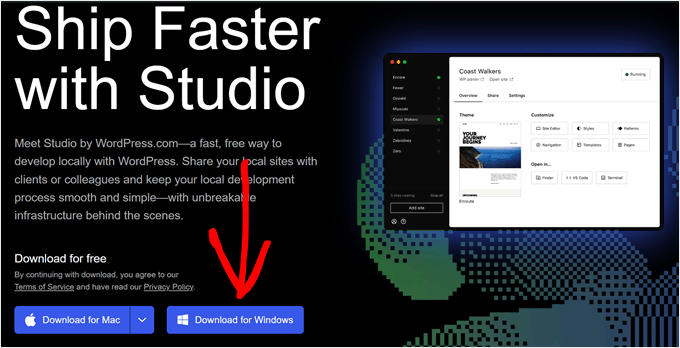
När du har gjort det är det bara att öppna den nedladdade filen för att starta installationen.
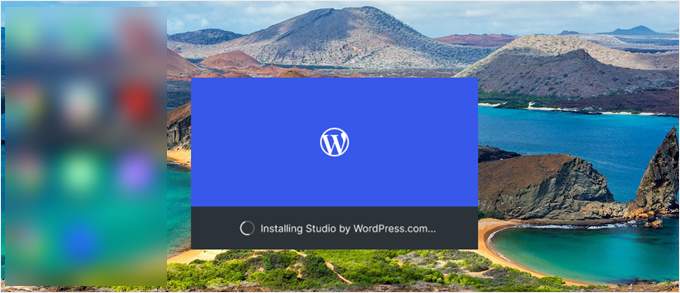
Nu visas ett popup-fönster som visar att programmet håller på att installeras.
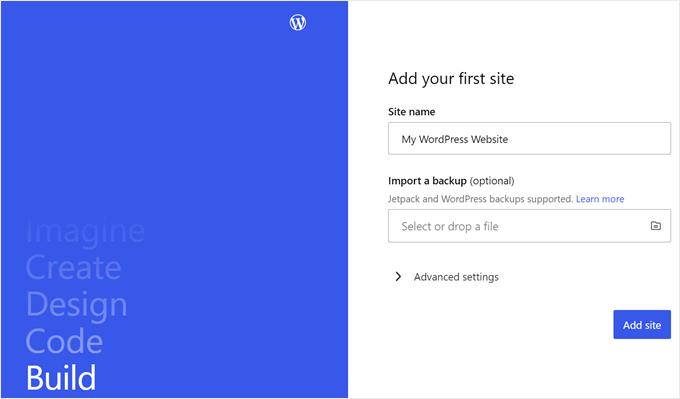
När det är gjort kan du lägga till din första webbplats.
För att göra detta anger du bara namnet på din nya lokala WordPress-webbplats och klickar på ”Lägg till webbplats”. Du kan namnge webbplatsen hur du vill så länge det hjälper dig att enkelt identifiera den.
Du bör nu se kokpiten för din lokala WordPress-webbplats.
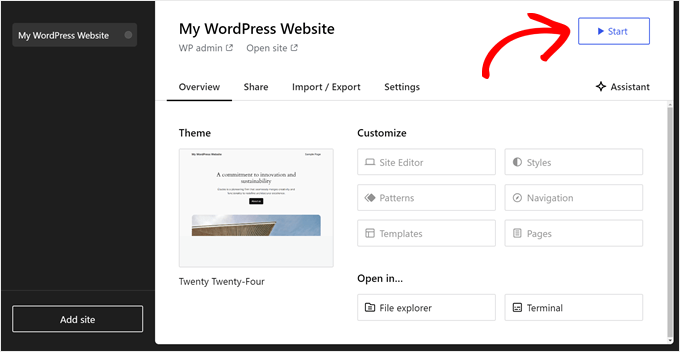
För att komma åt din kokpit i WordPress och redigera din webbplats klickar du bara på knappen ”Start” längst upp till höger. Då blir din lokala webbplats tillgänglig för dig på din dator.
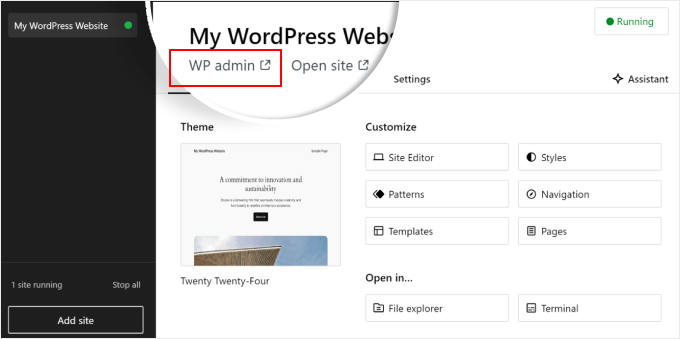
När knappen ”Start” ändras till ”Running” kan du klicka på länken ”WP Admin” längst upp till vänster på sidan.
Du kommer då till din lokala WordPress-adminsida.
Och det är i stort sett allt för installationen. Låt oss utforska de andra inställningarna som kan vara nödvändiga när du bygger din lokala webbplats.
Som du kan se på kartan ”Översikt” kan du omedelbart komma åt WordPress redigeringsmeny för hela webbplatsen direkt från Studio kokpit. Du kan också klicka på ”File explorer” för att öppna mappar och filer på din WordPress-webbplats och klicka på ”Terminal” för att hantera din webbplats med WP-CLI.
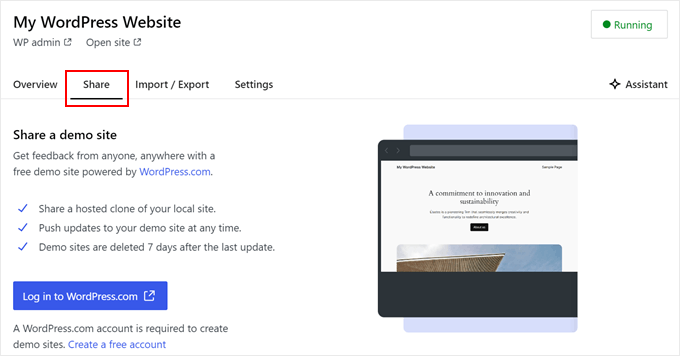
Om du går till kartan ”Dela” kan du logga in på ditt WordPress.com-konto, klona din lokala webbplats och ladda upp den till WordPress.com:s servrar. Detta kommer tillfälligt att göra den klonade webbplatsen online, vilket är användbart för att dela demo-webbplatser med dina kunder eller teammedlemmar.
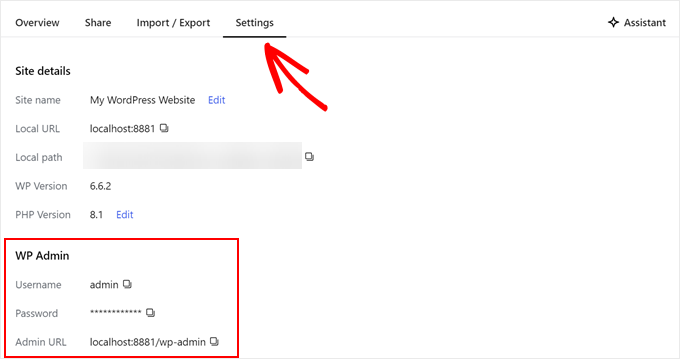
Ibland kanske du vill logga in på din lokala webbplats direkt via din webbläsare istället för att använda Studio. I så fall måste du känna till dina wp-adminierzytelniające.
För att hitta dem kan du gå till kartan ”Inställningar” och där hitta ditt användarnamn, lösenord och inloggningsadress för WordPress-admin.
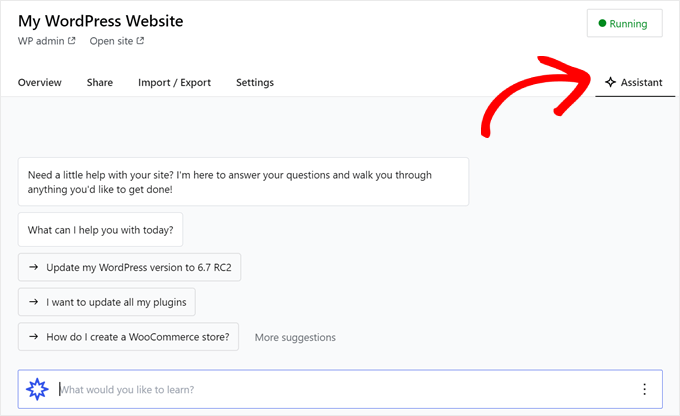
En annan snygg funktion i Studio är den inbyggda AI-chatboten, som du kan kommunicera med genom att klicka på ”Assistant”-knappen.
Här kan du be Studio om hjälp med uppgifter som att uppdatera alla dina plugins på en gång , uppdatera din version av WordPress rdzeń eller skapa kod för ett anpassat block.
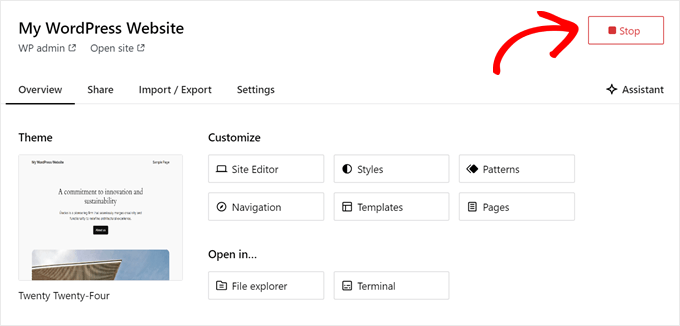
När du har arbetat klart på din lokala webbplats håller du bara muspekaren över ”Running”-knappen i det övre högra hörnet tills det står ”Stop”.
Klicka sedan på knappen för att stoppa webbplatsen.
En nackdel med Studio är att du inte kan konfigurera WordPress-miljön efter eget tycke och smak. Det innebär att du måste använda den PHP-version, den serwer WWW och den databas som har valts åt dig i förväg.
Detta kan vara en nackdel om du behöver testa din webbplats eller ditt plugin med specifika serverkonfigurationer.
Om du behöver mer kontroll över din lokala WordPress-miljö eller behöver matcha din lokala installation med en specifik live-serverkonfiguration, kan du kolla in nästa metod med hjälp av Local WP.
Metod 2: Installera WordPress på Windows med hjälp av Local WP (mer anpassningsbar)
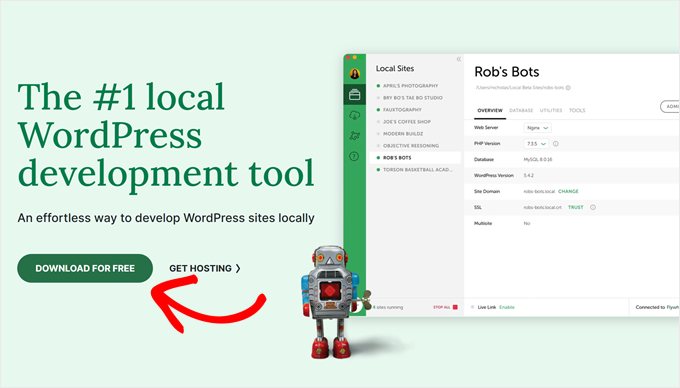
Först måste du ladda ner och installera Local WP-programvaran på din Windows-dator. Gå bara till språkversionens website och clicka på knappen ”Download for Free”.
Därefter kommer ett popup-fönster att visas där du måste välja din plattform. Gå vidare och välj ”Windows” från rullgardinsmenyn.
Därefter kan du ange dina uppgifter som för- och efternamn, e-postadress och telefonnummer för att ladda ner programvaran.
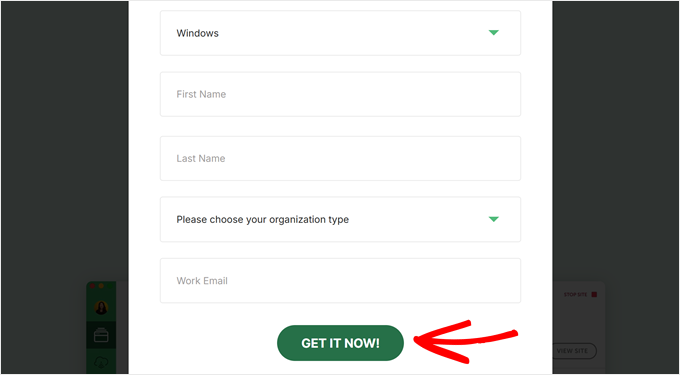
När du har enter detaljerna klickar du helt enkelt på knappen ”Get it Now”.
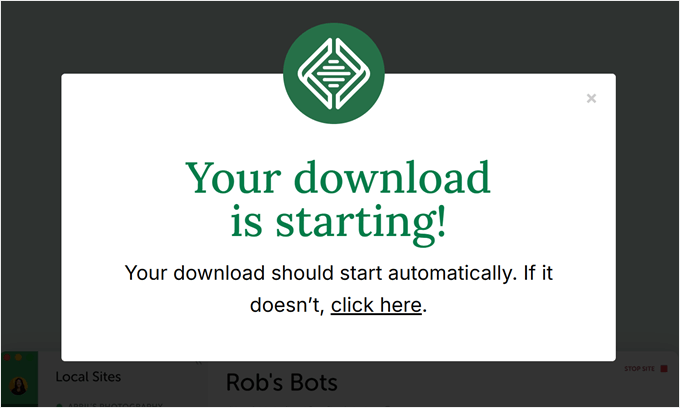
Därefter kommer programvaran automatiskt att laddas ner till din dator. Annars kan du klicka på länken ”klicka här” för att starta nedladdningen.
När filen har laddats ner går du vidare och startar installationsguiden.
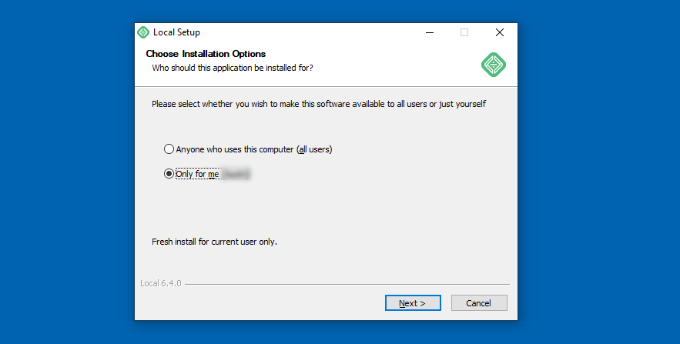
Nu måste du välja om du vill installera programvaran för alla användare eller bara för dig.
När du har valt ett alternativ klickar du på knappen ”Nästa”.
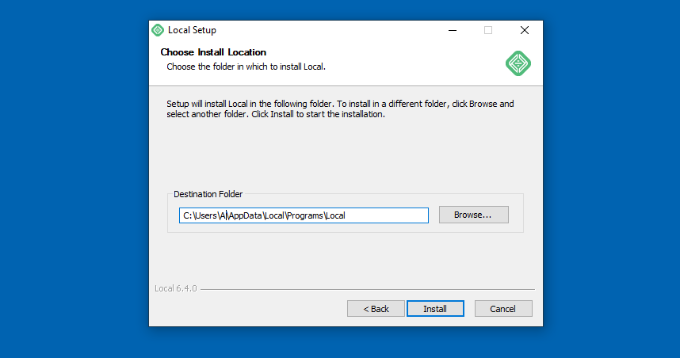
I nästa steg kan du selecta ”Destination Folder” där programvaran ska installeras.
Klicka bara på knappen ”Browse” för att ange sökvägen och klicka sedan på knappen ”Install”.
Språkversionen av Local WP installeras nu på din Windows dator.
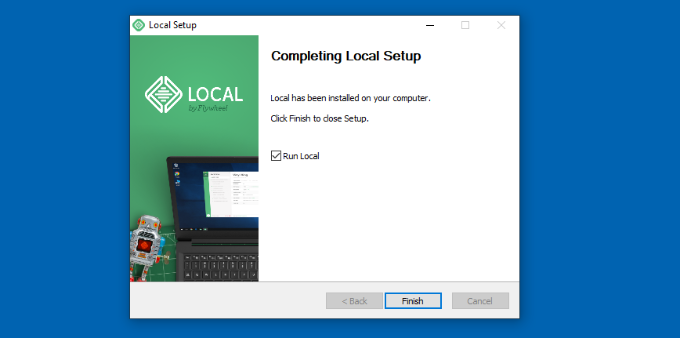
När det är gjort kan du markera kryssrutan ”Run Local” och klicka på knappen ”Finish” i installationsguiden.
Programvaran kommer nu att starta på din Windows device.
Nästa steg är att lägga till en ny lokal webbplats. För att göra det klickar du bara på plusknappen ”+” längst ner.
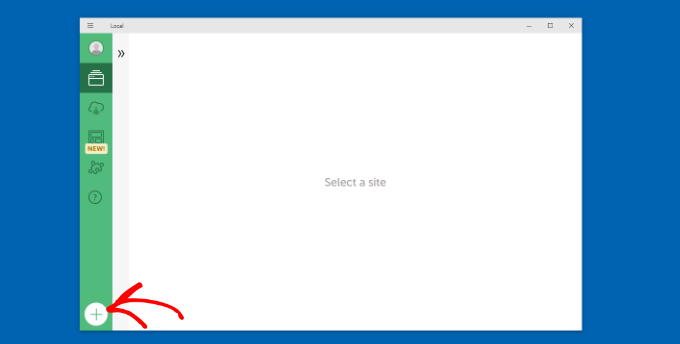
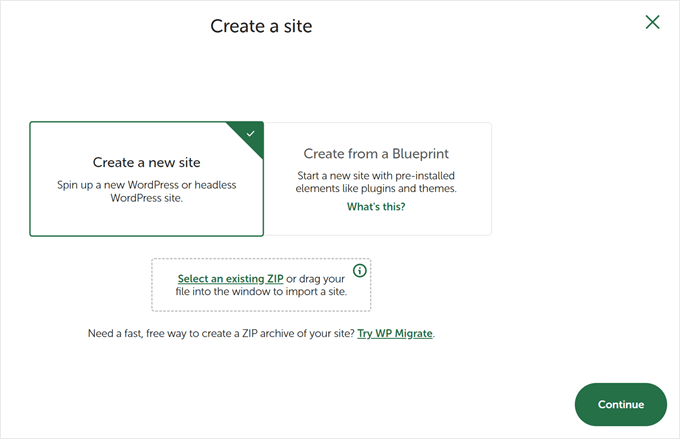
Därefter kan du skapa en site i programvaran Språkversion.
Välj alternativet ”Skapa en ny webbplats” och klicka på knappen ”Fortsätt”. Det finns också alternativ för att skapa webbplatsen från en ritning eller en befintlig webbplatsfil, men vi väljer det första alternativet för demonstrationens skull.
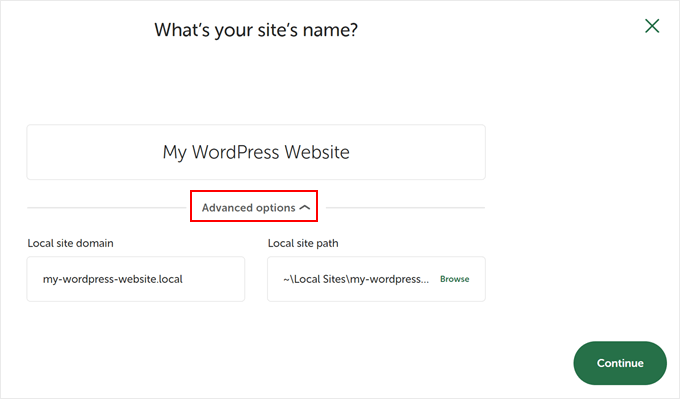
Därefter kan du ange ett namn för din lokala webbplats, t.ex. ”My WordPress Website”.
Det finns också avancerade alternativ där du kan ange den lokala webbplatsens domän och sökvägen till den lokala webbplatsen. Som standard kommer domänen att använda din webbplatstitel, men separerad med bindestreck.
När du är klar klickar du bara på knappen ”Fortsätt”.
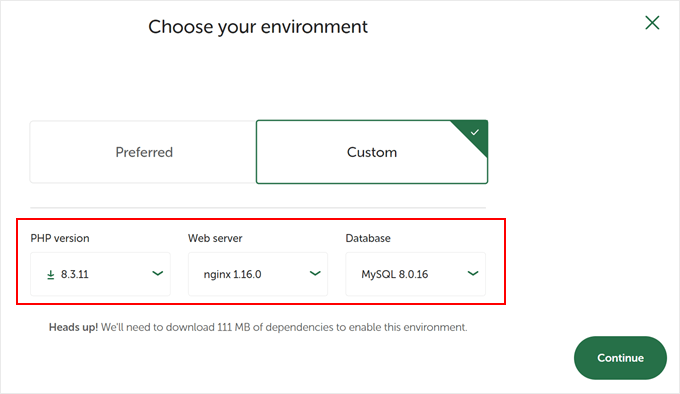
Därefter måste du välja en miljö för din lokala website.
Du kan använda ”Preferred”-miljön där programmet automatiskt väljer PHP-version, servern WWW och MySQL-version. Å andra sidan kan du också välja ”Custom” och ange miljödetaljerna.
Local WP erbjuder de senaste PHP-versionerna. När det gäller servern WWW kan du välja mellan Nginx eller Apache. Du kan också välja mellan MySQL eller MariaDB för databaserna.
Observera att vissa PHP-, serwer WWW- och databasversioner kräver nedladdning av vissa beroenden för att de ska fungera korrekt.
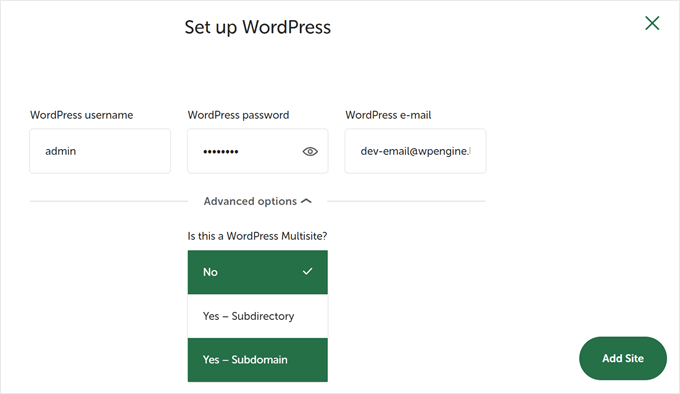
Därefter kan du ange ett WordPress-användarnamn och lösenord för din lokala webbplats. Dessutom finns det möjlighet att välja en WordPress-e-postadress där du kommer att få alla e-postmeddelanden.
Utöver det finns det ett avancerat alternativ där programvaran frågar om du har ett WordPress-multisite-nätverk. Om inte, klicka bara på ”Nej”.
När du har enter dessa details klickar du på knappen ”Add Site”.
Programvaran installerar nu WordPress och skapar din website.
För att starta den lokala webbplatsen klickar du på knappen ”Starta webbplats” längst upp i högra hörnet.
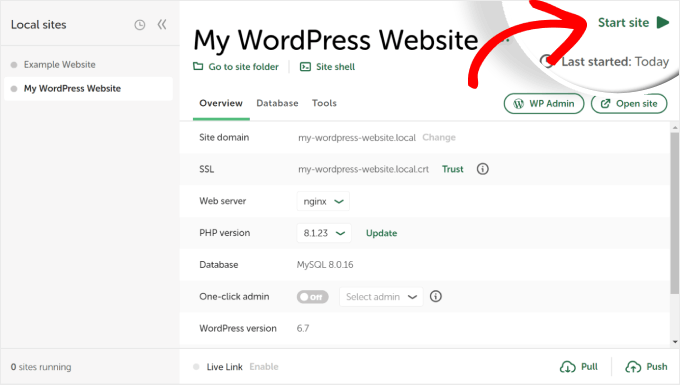
Klicka sedan på knappen ”WP Admin” så kommer du till inloggningssidan för WordPress-admin.
Ange bara det användarnamn och lösenord som du angav tidigare när du konfigurerade den lokala webbplatsen och klicka sedan på knappen ”Logga in”.
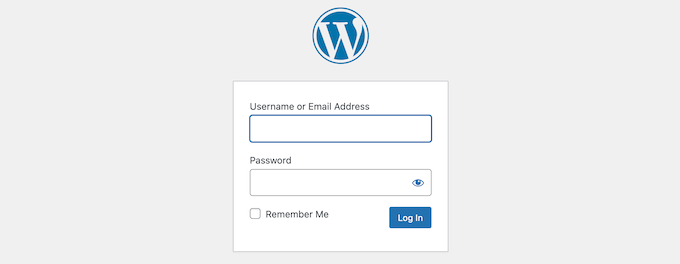
You can now edit your local website on your Windows computer.
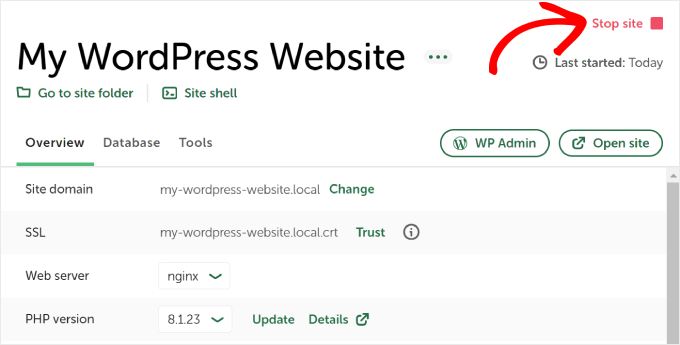
När du är klar, glöm inte att stoppa webbplatsen från WP-programvaran genom att clicka på knappen ”Stop site”.
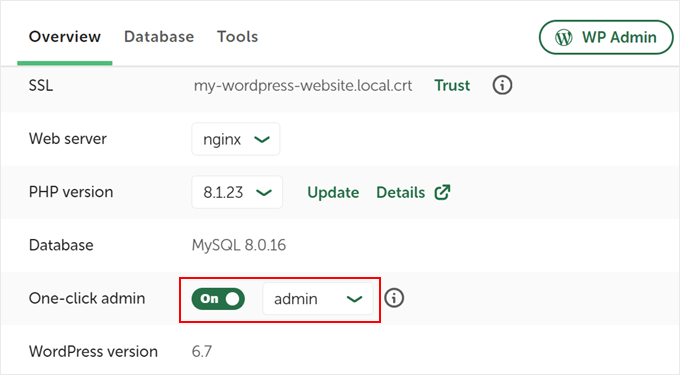
Proffstips: Om du vill hoppa över inloggningsprocessen kan du aktivera en admininloggning med ett klick i Local WP.
För att göra detta går du bara tillbaka till Local WP:s kokpit och växlar knappen ”One-click admin” tills det står ”On”. I rullgardinsmenyn väljer du sedan den administratoranvändare som kan använda denna inloggningsfunktion med ett klick.
Alternativ: Använd WordPress Playground för att testa teman, plugins och mycket mer
WordPress Playground är ett innovativt verktyg som låter dig experimentera med WordPress direkt i din webbläsare. Det är en virtuell sandlåda där du kan prova nya WordPress-teman, plugins och funktioner utan att påverka någon verklig webbplats.
WordPress Playground skiljer sig från en lokal WordPress-miljö på flera viktiga sätt.
För det första kräver den ingen installation på din dator och återställs efter varje användning, till skillnad från trwala lokala installationer. Du kan komma åt den från alla enheter med en webbläsare, medan lokala installationer är knutna till en dator.
Medan WordPress Playground är perfekt för snabba tester och lärande, erbjuder en lokal WordPress-miljö på din Windows-dator mer flexibilitet för långsiktiga utvecklingsprojekt.
För en detaljerad genomgång, kolla in vår przewodnik om hur du använder WordPress Playground i din webbläsare.
Jag har installerat WordPress på min Windows-dator, vad händer nu?
Nu när du har WordPress på din dator finns det några saker du kan göra:
- Lär dig grundläggande tips och tricks för WordPress så att du kan använda din webbplats bättre.
- Prova olika WordPress-teman för att se hur din webbplats kan se ut.
- Installera och testa nödvändiga WordPress-plugins för att lägga till nya funktioner på din webbplats.
- Lär dig hur du själv kan poprawka vanliga WordPress-fel.
- Prova olika drag-och-släpp-sidbyggare för att få din webbplats att se snygg ut.
- Lär dig hur du återställer WordPress-adminlösenordet på localhost för att få tillgång till din webbplats.
- Skapa automatiserade arbetsflöden för att göra det enklare att hantera webbplatsen.
- Lär dig mer om WordPress-säkerhet för att skydda din webbplats från hackare.
- Flytta din lokala WordPress-webbplats till en live-server när du är redo att dela den med alla.
Vi hoppas att den här artikeln hjälpte dig att lära dig hur du installerar WordPress lokalt på en Windows-dator. Du kanske också vill läsa vår artikel om hur du installerar WordPress lokalt på en Mac-dator och vår ultimata przewodnik för att skapa en staging-webbplats för WordPress.
If you liked this article, then please subscribe to our YouTube Channel for WordPress video tutorials. You can also find us on Twitter and Facebook.


mike
installed wamp Apache/2.4.9 (Win32) PHP/5.5.12, downloaded wordpress, configured wp-config nothing, absolutely nothing happens.
Any thoughts?
Villi
Hey. So everything worked great and i have been playing around practicing. Now i am going to make another website but keep the practice website also, but i need them to be completely independent from each other since i dont want my ”messing around” to affect the new one Should i install wordpress again and follow the same instructions (extract the wordpress folder to C:\wamp\www etc.) and make another database ?
In short, should i follow exactly the same process as before, except i would not need to download wamp again obviously.
Thank you
WPBeginner Support
Yes, you need to follow the same instructions.
Admin
Wayne
Great article. I have managed to get everything up and running. But have not got stuck when I try to upload a Theme I have purchased. I have a personal live site using WordPress. But wanted to build one offline for my workplace, hence I am using phpAdmin. Any ideas please how I can work on purchased themes on a localhost?
WPBeginner Support
Installing a purchased theme is no different on a localhost site than on a live site. Simply go to Appearance > Themes on your localhost site. Click on the Add New button and then click on the Upload button. Click on the choose file button to locate the Theme Zip file from your computer and then upload it.
Admin
Manoj
Hi
I had installed everything as per the guide here and my site was working fine. Today, however, i tried to loginto localhost and it gives an error. It says this webpage is not available. ERR_CONNECTION_REFUSED
Kindly help
naveenraj
hi sir,
The icon says in orange colour and i getting blank pages when i go for localhost/phpmyadmin/ page, Please help t resolve this.
WPBeginner Support
Please see WAMP documentation and support forums.
Admin
bella
”Go to C:\wamp\www and paste wordpress folder there.”
I can’t seem to find anywhere that accepts my wordpress folder. Does anybody have more detailed description to do this step for me? Thank you very much for all you sharing people
Ayesha
Hi,
Once you go to wordpress.org and install wp, you will have a wordpress zip folder, extract its contents and it would create a wordpress folder, open this folder and copy the folder named wordpress. Now goto your wampserver folder and then open www folder that lies insides wampserver folder, paste the folder wordpress over there i.e. inside www folder.
You just have to copy your wordpress folder and paste it in the www folder of wampserver.
Hope that helps!
Kush Singh
Really it’s very helpful site for installing wordpress.
Nice work guys keep it up…
Satish Shihani
Superb….. I really like this
On my first attempt only, i done all installation without any error
Thank you so much for this tutorial
Amir
Smooth and fun, worked like a charm. I had only one problem which was resolved by shutting down a certain Microsoft product…
Thank you.
Paul
Great tutorial glad I found it as I am just learning how to use wamp and my local server to build wordpress sites. I would also like to copy a live wordpress site to my local server so I could modify a theme, then reload it to the remote server and was wondering if there was a tutorial on how to do that? I have found and read the tutorial on uploading a site from my local server to the remote one but nothing on copying a live site to the local server and getting it to work. Is this possible and if so, do you have a tutorial on how to achieve it successfully? Thanks in advance.
Kvaibahv01
Hey there,
I had created a WordPress blog earlier this month and my WAMP server was uninstalled due to some reasons….I reinstalled it>did all the same steps> named the ’wordpress’ folder to ’site’> opened localhost/site/wp-admin which says :
Welcome to WordPress. Before getting started,………………………….before proceeding.
Database name
Database username
Database password
Database host
Table prefix (if you want to run more than one WordPress in a single database)
We’re going…………We got it.
In all …………… all ready…
I clicked ’Let’s go’ button which opened ’Setup config.File’ entered my DB name ’site’> ’username’ and ’password’ I edited on ’wp-config-sample.php’ and changed username to blank and same with password too> Click next and now it shows me an error ”Can’t select database”:
We ………………. database.
Are you sure it exists?
Does the user have permission to use the site database?
On some systems the name of your database is prefixed with your username, so it would be like username_site. Could that be the problem?
If you don’t know how to set up a database you should contact your host. If all else fails you may find help at the WordPress Support Forums.
Please help!
WPBeginner Support
Visit localhost/phpmyadmin to confirm that the database name you entered is correct.
Admin
Geraldine
Hello. I hope you can help me with this. After I created the test site, how can I share this to my friend via online?
Rhian Williams
thank you so much for this I have been battling with localhost software all day and this worked first time for me
moneytechnicals
Ive installed WAMP in windows 7 32 bit. And want to use wordpress. But its not showing to create configuration file. Its showing an error like this-
Warning:
require(C:wampwwwwordpress-trunk/wp-blog-header.php): failed to open
stream: No such file or directory in
C:wampwwwwordpress-trunkindex.php on line 18
Please help me to get out of this. Thank you in advance.
Campbell Sinclair
Hello and to anyone who googles this error and is stuck like I was on this,
You likely downloaded the zip installer and extracted them, maybe cancelled it some point because the extraction / transfer of the folder inside was slow. I’m not sure what happened, not the point either.
This error occurs when not all the files are present. Try and hunt down wp-blog-header in your WordPress folder directory with a simple search. The index page (one that is first loaded by a browser when it opens a directory) is only asking for this file but it simply won’t be there with it in the directory. Index.php is asking for wp-blog-header and everyone else said I’m not the file you’re looking for.
I downloaded the version prior and it was complete because I had the installation page as expected. This is the quickest and certain fix. If you do this, you will should be able to upgrade to the latest once you have installed as well.
WPBeginner Staff
Yes you can.
ArtaGene
Since I didn’t see any specs listed, not sure my old computer will have enough memory…can I install on a portable drive (connects with USB) and use that way ?
WPBeginner Staff
Seems like WAMP didn’t install correctly on your computer. Try installing again or try XAMP.
jerry
I get this error right at the end of the installation.
httpd.exe – system error
The program can’t start because MSVCR110.dll is missing from your computer. Try reinstalling the program to fix this
problem
nikhil
i have install wamp server but when i am going to phpMyAdmin it is showing error like this:-
Forbidden
You don’t have permission to access /phpmyadmin/ on this server.
Roshan Bagdiya
error
#1045 – Access denied for user ’root’@’localhost’ (using password: NO)
while accesing phpmyadmin
how to resolve it
WPBeginner Staff
Please make sure that the Wamp server icon in your taskbar turns Green before you click on phpMyAdmin. You can also try manually accessing phpMyAdmin by typing this URL in your browser’s address bar http://localhost/phpmyadmin/
Diviya
Followed your procedure step wise. Now when I try to setup database for WordPress, when I click on phpMyadmin I get error ’HTTP Error 404. The requested resource is not found’
Syed Balkhi
Done – thanks for the suggestion.
Carrie
FYI, the ”Skype” error also happens with a similar program called Team Viewer. A similar simple fix, going in to the program and changing the checkbox regarding ports 80 and 443. I agree with others, if nothing else you should put a link to the troubleshooting info in the article right after the WAMP installation. I got frustrated that I kept getting an error, and decided to look through the comments until I found a solution.
Anand Upadhyay
Suggested edit. Please replace
C:wampwww
with
C:wampwww
Aditya Pranav
Done all thing , but when I click on phpMyadmin the an error page will open in browser and that is :-
HTTP Error 404.0 – Not Found
The resource you are looking for has been removed, had its name changed, or is temporarily unavailable.
Derick
Howe about adding a tutorial that continues from this one on how to add multiple websites to be worked on offline like the above one.
Vijay
Thanks so much for this. It worked for me.
My only complaint is that the skype error should have been right after the WAMP installation part. I spent a lot of time figuring out how to get the WAMP icon to go green instead of orange. Ultimately found out that IIS 8.5 was using port 80 and that I had to stop WWW publishing services from Services.msc and restart the Apache on WAMP to get it to work.
M♥ηyαηє Ramołło™
Great tutorial
Jim
Great tutorial. Big thanks. Only you should post the info on Skype port before in the beginning, as I did everything by myself and changed the port number in wamp folder. Then here I found out that there was easier way doing it on Skype
lobsterhands
Great tutorials. Thank you for being so clear and concise.
Lis
Fab article! I’m all installed and working. However, any additional pages I am creating over and above the home page don’t work. I am creating the page in WordPress, but when following the ’View’ link, I get a 404. Any idea?
pramod
Downloaded everything. when i write on web http://localhost/mysite/ but display error
The requested URL /mysite/ was not found on this server.
Monica
Very helpful thanks.
St. Buzo of C.O.B. ®
Bingo..!! this was so helpful.!! Phase one done i have installed..!!
anbu
dear sir,
this blog is very usefull to me..as per your instruction i create a website locally. but when i try to open the same site from different machine in tha same lan i can’t.please guide me.
i tried via this following method in another computer
1.http://192.168.1.88/(sitename).
2.http://localhost/(sitename)
the site is not opening
anbu
dear sir,
this blog is very usefull to me..as per your instruction i create a website locally. but when i try to open the same site from different machine in tha same lan i can’t.please guide me.
i tried via this following method in another computer
1.http://192.168.1.88/(sitename).
2.http://localhost/(sitename)
Lyle Denman
http://forum.wampserver.com/read.php?2,121118
This should answer many of your questions. Know that you will also have to update your database’s options (from localhost/phpmyadmin/). wp_options > siteurl and wp_options > home should be changed from http://localhost/database_name to http://your_local_ip_address/database_name (for example http://192.168.0.11/coolsite/).
Make sure you open c:/wamp/bin/apache/apache2.4.9/conf/httpd.conf
In that file, after the line reading: # onlineoffline tag – don’t remove, add the following 2 lines:
Require all granted
Require ip 192.168.0 (or whatever the first 3 groupings of your local ipv4 address is)
Then, in the same file, find the line reading: #Include conf/extra/httpd-vhosts.conf and remove the # from the beginning of that line.
Then, open the file c:/wamp/bin/apache/apache2.4.9/conf/extra/httpd-vhosts.conf and comment out the code that is there (just to keep defaults around) and past the following:
ServerName localhost
DocumentRoot c:/wamp/www
AllowOverride All
Save those files, restart all WAMP services and enjoy your LAN development.
Lina
This post was VERY helpful!! Thank you very much!
WPBeginner Staff
First you need to uninstall wampserver completely from your computer. Then download a fresh copy and try to reinstall. If this does not work out, then we will recommend you to use XAMPP which is an alternate software with nearly the same software (Apache, php, mysql).
Jokerman
I tried EasyPhP too but that didn’t work either. Have just installed Xampp and that appears to be working. Thanks very much for the advice.
Jokerman
I have downloaded and attempted an install. It didn’t work as I was missing a dll file. Have downloaded the necessary software from MS and this time the install appeared to have gone well…no error messages and the Wampserver icon has appeared on my desktop as requested. However when I click on the Wampserver icon it asks: Do you want to the following program from an unknown publisher to make changes to your computer? (Program name: wampmanager.exe) Clicking on Yes causes that window to close then nothing happens. Do you have any clues as to what to try next please? Thank you
cmills
The latest version of wamp uses PHP 5.5.12 which isn’t compatible with WordPress!
WPBeginner Staff
That’r probably because your site is served at 127.0.01 which is a local loop address while the other ip address is your lan address. They are two different things.
To enable sharing you need to add this line to your httpd.conf file Listen 192.168.1.4:80 make sure your computer is using static ip and it is set to use the ip address you enter in apache configuration file.
You will also need to make sure that WordPress saves your IP address as your sites URL not localhost. To achieve this you would need to install wordpress from 192.168.1.4/mysite instead of localhost/mysite
Naresh
Thank you very much.
archetypechris
Hello, and thank you for the amazing guide! I have a small
problem. Everything worked find when I followed the guide and my site loads up
fine, but when I try to connect to it from another computer in my house with
address: 192.168.1.4/mysite, it says I don’t have permission to view the page.
Does anyone know how to fix this? Thank
you!
WPBeginner Staff
You can use the Duplicator plugin or BackupBuddy for site transfers.
Anji
It is my first time creating a website in WP and his post was easy and it worked like a charm! Thank you so much!
WPBeginner Staff
George,
The WordPress you install on your local computer is only available on that computer.
There are specialized software that allow you to install Wampserver on a USB stick which you can then carry with you to work.
George
Thanks for the speedy reply,
Today I installed Wamp on my work laptop and using phpadmin exported my sql database from my home computer and imported it to my work laptop.
I tried mirroring the process above on my work laptop and named the database the same thing. I was able to get into my site on my work laptop but is seems my plugins and theme haven’t transferred. Am I missing a step? Must I transfer another folder?
I was planning on working on a local server doing this transfer sequence between work and home and was wondering if it can even be done (I heard about url linking problems) A short check list or play by play of what I must do would be very helpful.
Thank you,
-George
rustomQ
excellent guide!!!!!! got everything up and running the first time!!! thank you oh so much!!!!
George
This Work wonderfully! I’ve been word pressing for a couple of days and have made some progress over the weekend.
One Problem:
How can I take what I have on my home computer and work on it on my work computer in the office? Can I upload this to wordpress and work on it from anywhere? (I am fine with having a http://www.website.wordpress.com url while I am developing) What are my options to working and showing my development work after following the process above.
I am a complete newbie but willing to learn, a quick tutorial on that process and options would be greatly appreciated. Great work so far and thank you for all the resources you guys provide.
Thomas
*facepalm* There is a link just above to resolve the problem. Sorry about that! Thanks again for this great tutorial!