Om du ofta lägger till skärmdumpar på din webbplats i dina WordPress-inlägg eller sidor, kan du automatisera processen och spara tid på att ta skärmdumpar manuellt.
På WPBeginner skapar och inkluderar vi regelbundet skärmdumpar i våra artiklar för att przewodnikera våra läsare på ett effektivt sätt. Med över 16 års erfarenhet av att bygga, redigera och automatisera skärmdumpar har vi utvecklat en stark förståelse för de bästa metoderna för att skapa tydliga bilder.
Denna erfarenhet har lärt oss hur viktigt det är med väl utformade skärmdumpar för att förbättra läsarens förståelse och engagemang för vårt innehåll.
I den här artikeln visar vi dig hur du enkelt kan skapa automatiserade screenshots av websites i WordPress.
Varför skapa automatiserade screenshots av websites i WordPress?
Om du har en WordPress-webbplats kanske du vill skapa och lägga till automatiserade skärmdumpar till dina inlägg för att ge potentiella läsare ett snabbt sätt att se vad ditt innehåll handlar om.
Detta kan öka engagemanget och även bidra till att förbättra webbplatsens sökmotorsoptimering, eftersom search engines vanligtvis använder images och screenshots för att förstå och indexera your content.
På samma sätt kan du använda automatiserade screenshots av webbplatsen för att skapa en visuell backup av din site innan du uppdaterar ett theme eller gör andra ändringar. Detta kan hjälpa dig att jämföra och se skillnaden mellan din websites nya och gamla stilar.
Automatiserade screenshots kan också jämföra olika tjänster eller webbplatser, guida din läsare genom en Step-by-Step tutorial och track webbplatsens framsteg över tid.
Med detta sagt, låt oss ta en titt på hur du enkelt kan skapa automatiserade screenshots av websites i WordPress:
Metod 1: Skapa automatiska screenshots av websites i WordPress med hjälp av ett plugin
Den här metoden är enklare och rekommenderas därför för Beginnare och användare som inte vill hantera kod.
Först måste du installera och aktivera tillägget Browser Screenshots. För mer detaljer, se vår Step-by-Step guide om hur du installerar ett WordPress plugin.
Efter aktivering fungerar pluginet direkt ur boxen och det finns inga inställningar att konfigurera.
Nu är det bara att besöka en page eller post där du vill add to en automatiserad website screenshot från WordPress admin sidebar.
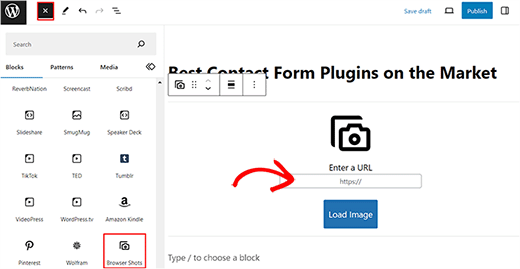
Här klickar du på knappen “Add Block” (+) högst upp till vänster på vyn för att öppna menyn för block. Lägg sedan till blocket “Browser Shots” i editorn.
När du har gjort det, add to URL för den website som du vill förvärva en automatiserad screenshot för och klicka på knappen “Load Image”.
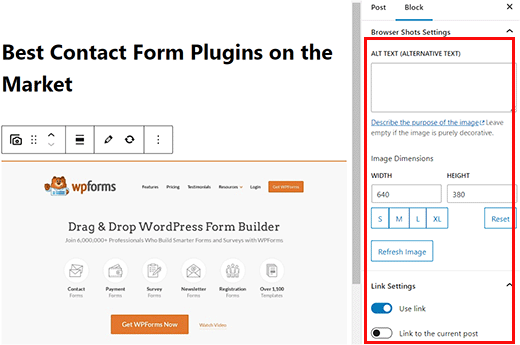
Pluginet lägger nu automatiskt till en screenshot för den website som du valt. Du kan nu add to en alt-text för imagen och ändra dess bredd och höjd från block panelen till höger.
Toggle the ‘Use link’ switch in the panel allows you to add a link to the screenshot that directs you to the website.
You can also toggle the “Link to the current post” switch if you want to add the post link to the screenshot.
Slutligen klickar du på knappen “Update” eller “Publicera” för att lagra dina settings.
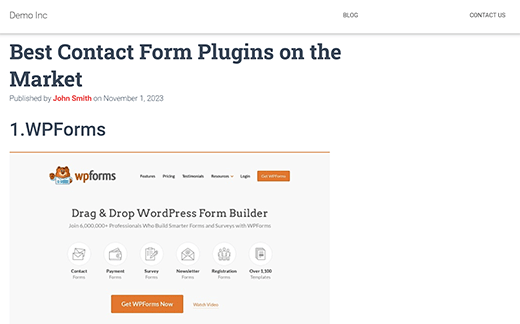
Du kan nu besöka din WordPress site för att view den automatiserade screenshoten.
Note : Pluginet Browser Shots använder WordPress.com:s mshots API för att generera screenshots i farten. Dessa images lagras ej i ditt mediabibliotek i WordPress. De serveras direkt från WordPress.com-servrar. Se vår guide om skillnaden mellan WordPress.com och WordPress.org.
Metod 2: Skapa automatiska screenshots genom att lägga till kod i WordPress
Denna metod kräver att du addar kod till dina WordPress-filer. För att skapa automatiserade screenshots måste you add custom code till functions.php-filen i your theme.
Kom dock ihåg att minsta error i koden kan knäcka din site och göra den otillgänglig.
Det är därför vi rekommenderar att du använder WPCode. Det är det bästa WordPress code snippets plugin på marknaden som gör det supersäkert och enkelt att lägga till custom code.
Först måste du installera och aktivera pluginet WPCode. För detaljerade instruktioner, vänligen se vår Step-by-Step guide om hur man installerar ett WordPress plugin.
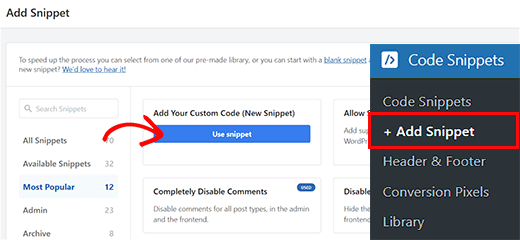
Efter aktivering, besök Code Snippets ” + Add Snippet page från WordPress dashboard.
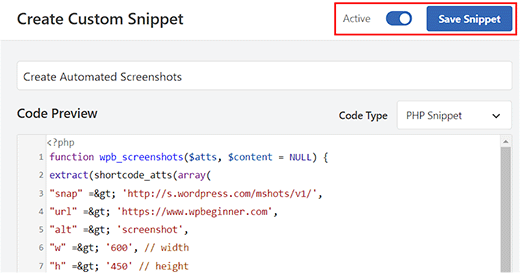
När du är där klickar du på knappen “Use Snippet” under alternativet “Add Your Custom Code (New Snippet)”.
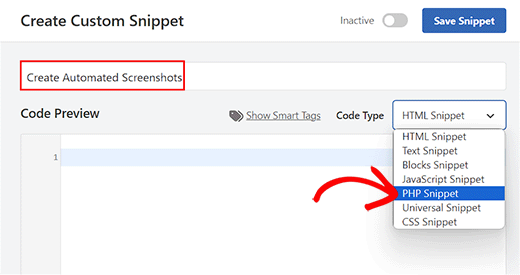
You will now be taken to the “Create Custom Snippet” page, where you can start by typing a name for your snippet. Namnet kan vara vad som helst som hjälper dig att identifiera koden.
Därefter väljer du “PHP Snippet” som code type från dropdown-menyn till höger.
Följ detta genom att copy and paste in följande kod i boxen “Code Preview”:
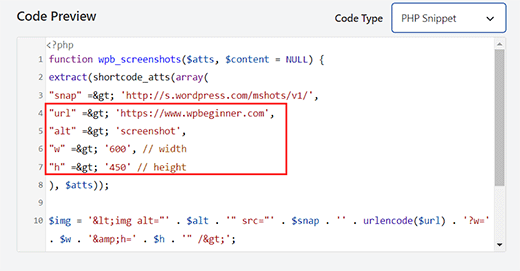
1 2 3 4 5 6 7 8 9 10 11 12 13 14 | function wpb_screenshots($atts, $content = NULL) {extract(shortcode_atts(array("snap" => 'http://s.wordpress.com/mshots/v1/',"url" => 'https://www.wpbeginner.com',"alt" => 'screenshot',"w" => '600', // width"h" => '450' // height), $atts)); $img = '<img alt="' . $alt . '" src="' . $snap . '' . urlencode($url) . '?w=' . $w . '&h=' . $h . '" />'; return $img;}add_shortcode("screen", "wpb_screenshots"); |
I likhet med det plugin vi nämnde tidigare använder den här koden också WordPress.com Mshots API för att generera screenshots i farten.
Nu kan du add to URL:en för den website vars automatiska screenshots du vill ta bredvid "url" =$gt; raden i koden.
You can also add your preferred width and height for the screenshots next to the "w" => and the ” h “=> lines in the code.
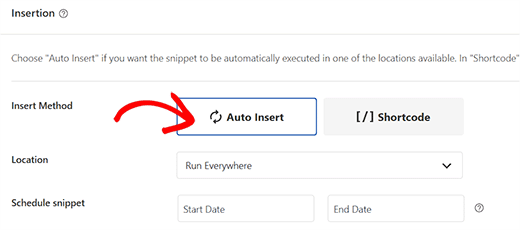
Därefter rullar du ner till section “Insertion” och väljer läget “Auto Insert”.
Koden kommer nu att aktiveras automatiskt vid aktivering.
Slutligen rullar du tillbaka högst upp på sidan och togglar omkopplaren “Inaktiverad” till “Aktiv”.
Klicka sedan på knappen “Save Snippet” för att store dina settings och aktivera snippet.
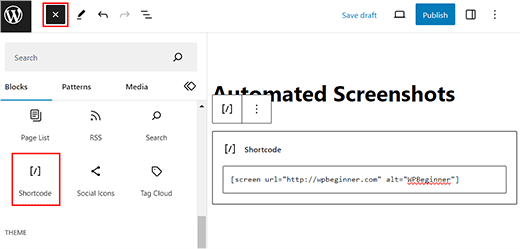
Nu, för att visa en screenshot av en website i din WordPress posts och pages, måste du enter shortcode så här:
1 | [screen url="http://wpbeginner.com" alt="WPBeginner"] |
You can replace the URL and Alt fields with your own values.
Öppna först sidan/posten i block editor från WordPress dashboard och klicka på knappen “Add Block” (+).
Härifrån lägger du till blocket “Krótki kod” på sidan/inlägget. Lägg sedan till krótki koden ovan och ersätt den med dina egna värden.
Slutligen klickar du på knappen “Update” eller “Publicera” för att lagra dina settings.
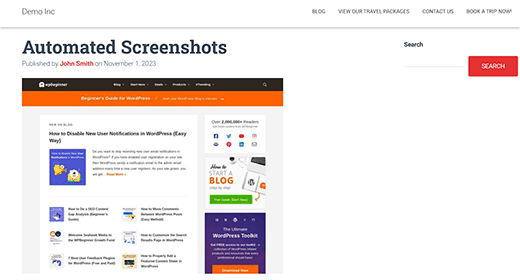
Besök nu din WordPress site för att view den automatiska screenshoten i action.
Bonus: Ta screenshots manuellt för din website
Om du inte vill använda automatiserade skärmdumpar kan du ta skärmdumpar manuellt med olika verktyg som Droplr.
Detta ger dig mer frihet att välja ett specifikt area för en image jämfört med automatiserade screenshots. Dessutom kan du edit dessa images i Adobe Photoshop och add andra element som gillar pilar eller röda boxar till dem.
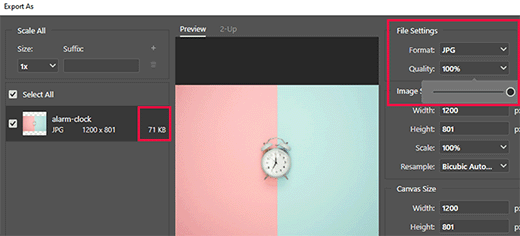
Den här funktionen är inte tillgänglig för automatiserade screenshots där tillägg eller kod automatiskt hämtar bilden åt you.
För att ta en skärmdump med Droplr måste du först installera appen på din dator. När du har gjort det klickar du på Droplr-ikonen i aktivitetsfältet i Windows eller Mac och väljer alternativet “Skärmdump”.
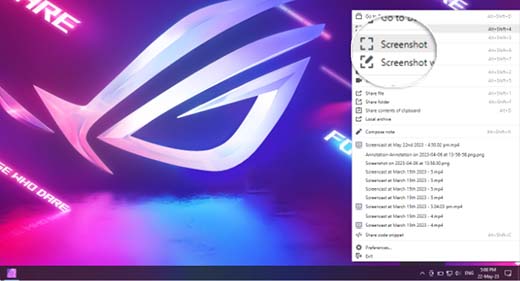
Därefter kan du välja det area där du vill ta screenshot.
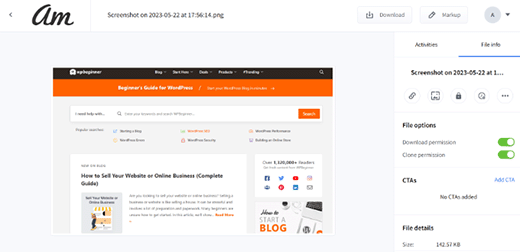
Droplr kommer sedan att öppna den imagen i en webbläsare där du kan downloada den eller dela länken med andra. För mer information, se vår tutorial om hur du tar en screenshot i WordPress.
Vi hoppas att den här artikeln hjälpte dig att lära dig hur du skapar automatiserade webbplats-skärmdumpar i WordPress. Du kanske också vill se vår przewodnik för nybörjare om bild-SEO och våra expertval för de bästa verktygen för att skapa bättre bilder för dina blogginlägg.
If you liked this article, then please subscribe to our YouTube Channel for WordPress video tutorials. You can also find us on Twitter and Facebook.


Samuel Kaffy
Pls, how can I make the screenshots downloadable as an image file?
WPBeginner Support
You would need to reach out to the plugin’s support for adding that functionality
Admin
Nigel Billam
I’ve used this plugin but it stops on the third use of the short code and reports ‘too many requests’ – i was hoping to display 45 URLs. Do you have any suggestions to avoid this?
WPBeginner Support
You would want to reach out to the plugin’s support if you haven’t already for what options they have available for avoiding that issue.
Admin
Cory Goodwin
Does this browser shot plugin check for updates to the site, or do you have to manually redo to get the latest look of the target website? Thanks:)
WPBeginner Support
You would want to reach out to the plugin’s support for the current refresh rate
Admin
Karin
Your code is just what I was looking for. The only thing is that I want the url not prefilled in the code but generated from a custom field ‘wpcf_websitelink’.
How can I add the code to get the content from the field.
So this line
“url” => ‘https://www.wpbeginner.com’,
should have something to get the content of the field wpcf_websitelink in stead of the wpbeginner.com link
WPBeginner Support
If you are using a plugin to create that custom field then you would want to reach out to the support for that plugin for how to access that information and replace the url value with what they tell you.
Admin
Tien Le
Thank you so much <3
Now i can make more image from capture screen image
Steve Renow
This is a wonderfully simple plugin to use. Great job! Is there any way to crop the images? Some sites show with the cookie warning t the top or bottom and it would be good to be able to crop that off.
Daniel
Where do the screenshot get saved too?
WPBeginner Support
These images are not stored in your WordPress media library. They are served directly from WordPress.com servers.
Admin
Bernd
Is it possible to get screenshots with https ?
Dumitru Brinzan
Helpful tutorial and information, but it feels a little incomplete.
If it contained info on how to save the images to the library then it would be perfect
Annapurna
Did you get how to do this?
Damith
It is possible to save screenshot in media library and make that as featured image. Thanks.
Obeng blankson
Great info. I will surely test the plugin on my website to actually have a feel of it.
Ankit Agarwal
With any of these methods, what will be the side effect on the speed of the website? As a plugin, there will be some addition to load time. If the images are not stored on the media library, there will again be some addition to website load times.
So from the methods given, which one is recommended considering website load speed?