A contact form is essential for any website, blog, or online store.
We use contact forms across WPBeginner and all our partner websites, in order to collect feedback and suggestions, leads, and even specific requirements for our WordPress Pro Services.
However, WordPress doesn’t come with a built-in contact form tool, so you’ll need to use a contact form plugin instead. To help you out, in this review we’re taking a closer look at Ninja Forms. This plugin comes with a code-free editor, professionally-designed templates, spam protection, field validation features, and much more.
So, is Ninja Forms the right contact form plugin for you? In this Ninja Forms review, we’ll examine its features, support, and pricing, to help you make that decision for yourself.
Ninja Forms Review: Why Use It in WordPress?
Ninja Forms is a popular contact form plugin for WordPress. It has a user-friendly drag and drop editor, plus ready-made templates so you can create all kinds of forms, fast.
No matter what plan you sign up for, you can create as many forms as you want and accept an unlimited number of submissions.
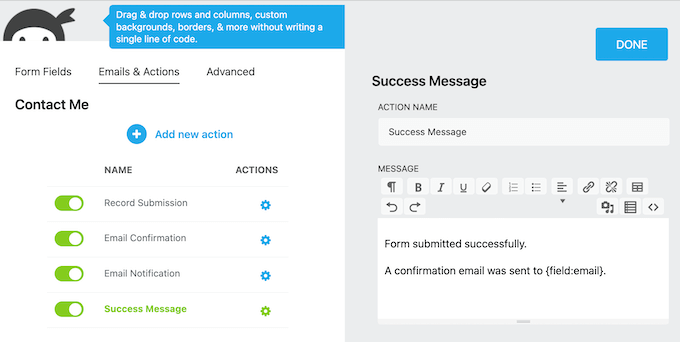
You can also control exactly what happens when a user completes a form. For example, you might redirect them to a custom thank you page, display a ‘success’ message, send them a welcome email, or perform some other action.
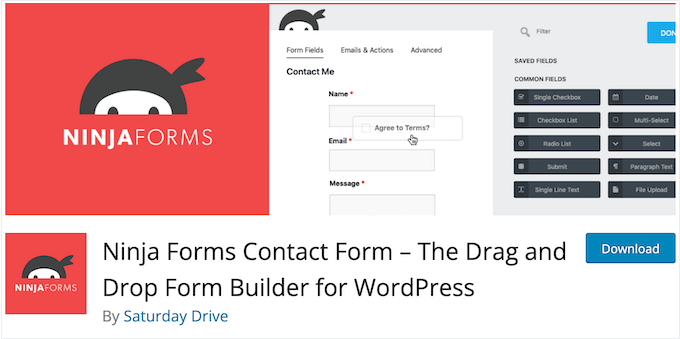
Unlike some other popular form plugins, Ninja Forms follows a freemium model.
This means you can download the core Ninja Forms plugin from the official WordPress repository.
However, you can access more features via paid add-ons. For example, Ninja Forms has add-ons that allow you to accept credit card payments in WordPress, and integrate with popular customer relationship management apps.
If you want to use these premium add-ons, then you’ll need to buy a Ninja Forms license.
Ninja Forms Review: Is It the Right Contact Form Plugin for You?
Most websites have a contact form, but you’ll typically need to create other types of form, too. For example, you might give attendees a way to RSVP to your event or request a quote from your business website.
With that in mind, you’ll need a secure, flexible form builder. In this Ninja Forms review, we’ll see whether it’s the right WordPress plugin for you.
1. Professionally-Designed Form Templates
Form templates can save you a ton of time, and help you create high-converting forms with just a few clicks.
The free Ninja Forms plugin comes with a selection of templates for all the most common forms. For example, it has templates that can help you collect client feedback, email addresses, and registrations for upcoming virtual events.
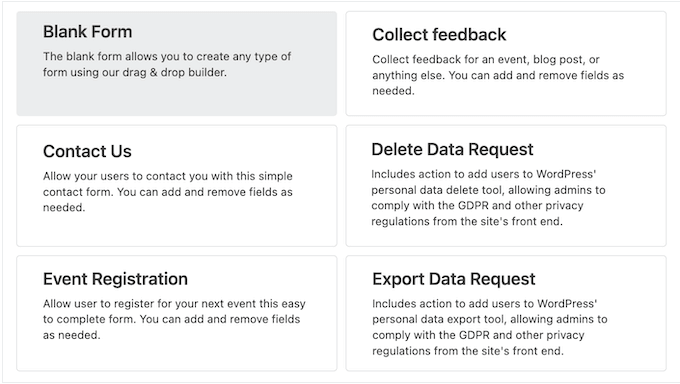
You can unlock additional templates by installing add-ons. For example, the User Management add-on comes with user registration, login, and updating profile templates.
2. Drag and Drop Editor
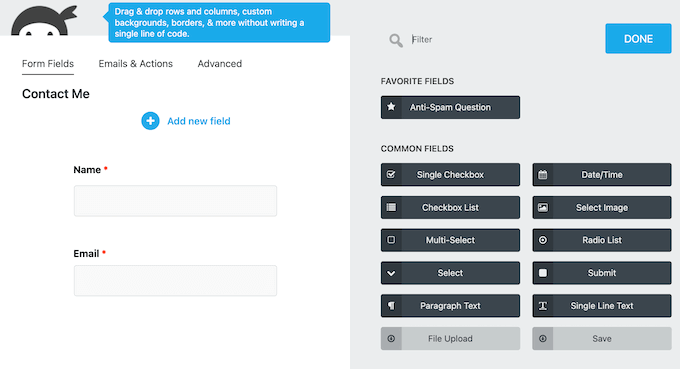
Ninja Forms has a drag and drop form editor so you can create all kinds of forms without writing a single line of code.
No matter what template you choose, you can customize the built-in fields using the settings in the right-hand menu.
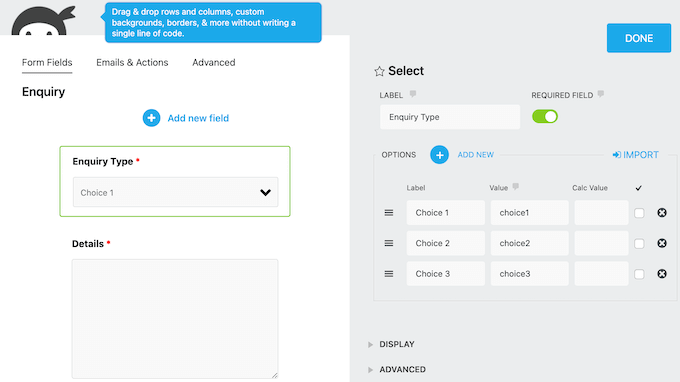
You can also add a wide range of ready-made form fields.
When you find a field you want to use, simply drag it onto the form layout. You can then configure that field using the settings in the right-hand menu.
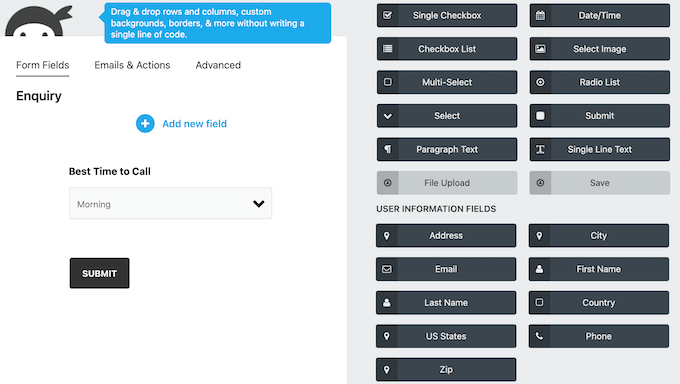
You can also change where each field appears in the form using drag and drop. Simply keep repeating these steps until you’re happy with how the form is set up.
3. Add Your Form to Any Page or Post
When you’re happy with the form, you can add it to any page, post, or widget-ready area across your online store or website.
The easiest option is to use the Ninja Forms block inside the WordPress content editor.
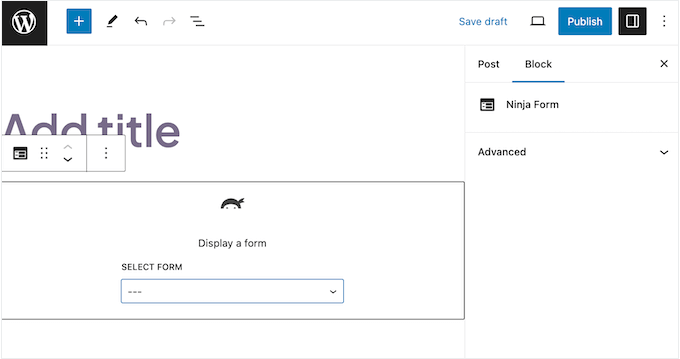
This allows you to control exactly where the form appears within the page or post. Alternatively, you can use a shortcode that Ninja Forms creates automatically.
4. Mobile Responsive By Default
According to our internet usage statistics, mobile internet traffic accounts for almost 55% of total web traffic. If your forms aren’t mobile responsive then you’re missing out on lots of submissions, conversions, and signups.
The good news is that Ninja Forms is mobile responsive by default. This means all your forms will look great and work perfectly, no matter what device the visitor is using.
5. Built-in Spam Protection
Form spam is usually automated by bots, so even smaller websites, blogs, and online marketplaces can become targets.
These spambots crawl websites and look for non-secure forms, so they can send you spammy links. They may even try to break into your login forms using brute force attacks.
To help keep your site safe, Ninja Forms supports Google reCAPTCHA v2 and comes with a honeypot feature. When enabled, this honeypot adds a field that’s only visible to bots. If this field contains a value when the form is submitted, then Ninja Forms will ignore that submission.
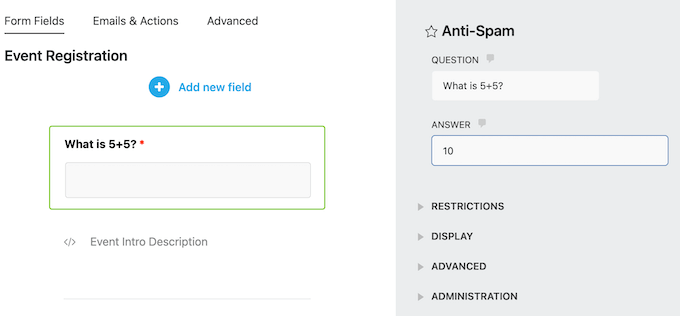
In addition, Ninja Forms has an Anti-Spam field that can ask the visitor a question, to verify that they’re a real person and not a bot.
6. Unique Field Validation
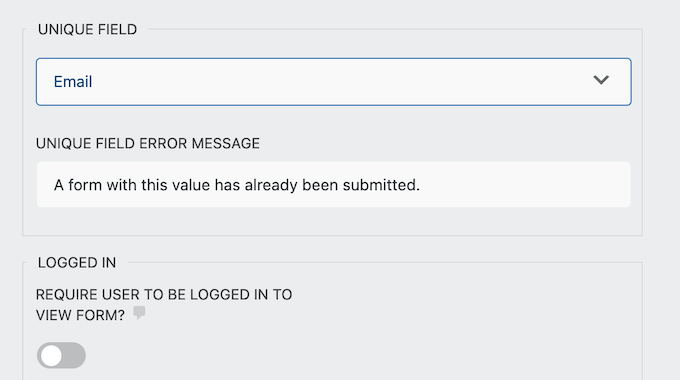
Ninja Forms has several features that can help protect your site against contact form spam and similar fake submissions, including unique field validation.
When enabled, this feature only accepts the same value once. For example, if someone registers for your email newsletter using the address john@example.com, then no-one else can register using this email address.
7. GDPR Compliant
Many website owners use forms to collect personal information. However, this means you’ll need to follow important security and privacy laws such as GDPR.
If you break these regulations, then you may face a fine or even jail time. Thankfully, Ninja Forms has various settings to help protect your audience’s privacy. To start, you can anonymize any field that collects personally identifiable information.
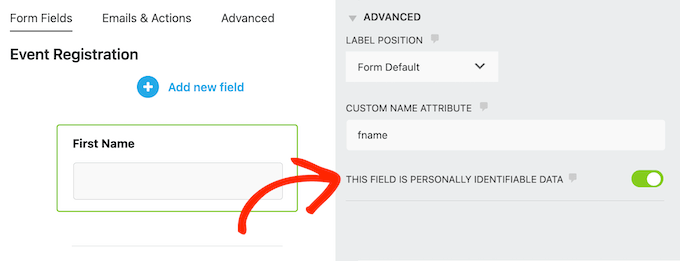
This is particularly useful if you’re collecting anonymous feedback to uncover what users are really thinking.
Ninja Forms also has a Delete Data Request template that can help you comply with GDPR’s Right to Be Forgotten. Simply add this form to any page or post, and users can ask you to delete all their personally identifiable information.
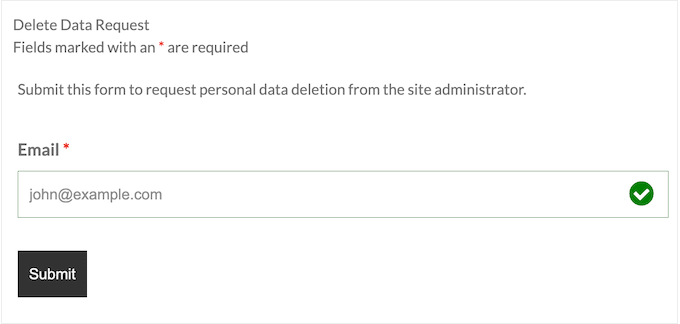
Similarly, there’s a Delete Data Request action that you can add to any form.
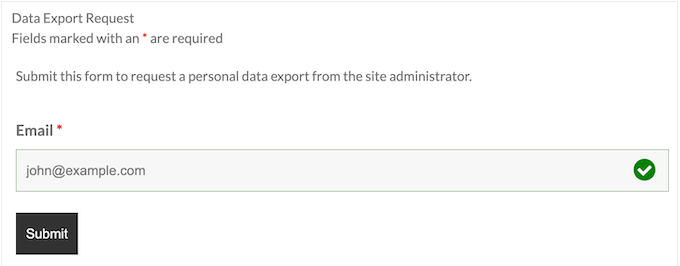
Beyond that, Ninja Forms has an Export Data Request template and a Export Data Request action, so users can get a copy of their data.
8. Repeater Fields
Sometimes, users may need to duplicate a particular set of fields. For example, if you’re organizing an event or conference then visitors may want to register multiple attendees at the same time.
Rather than submitting a form for each attendee, Ninja Forms allows you to create an ‘Add another guest’ or similar button. Visitors can then click this button to add another set of Name and Email Address fields.
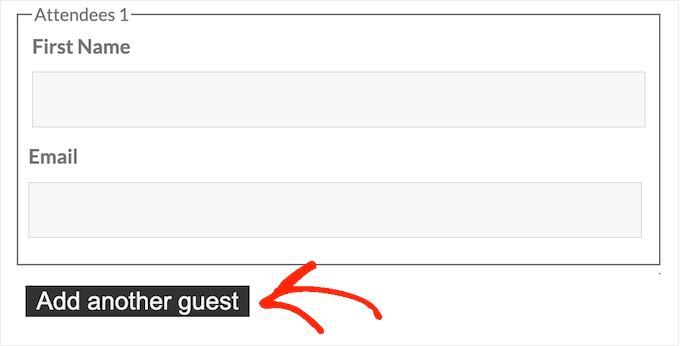
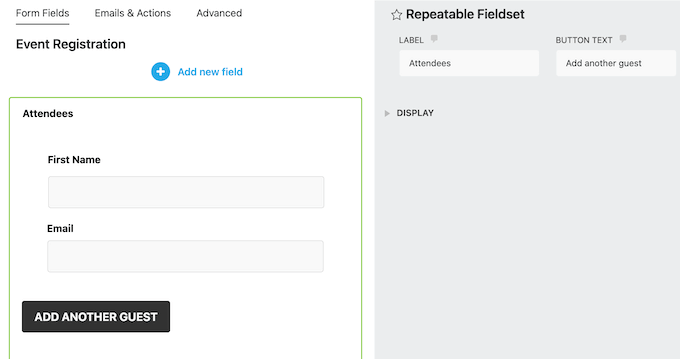
To create this effect, you simply need to add a Repeatable Fieldset to your form.
Then, just add the fields you want to duplicate.
9. Create Online Calculators and Quizzes
With Ninja Forms, you can build powerful custom calculators so visitors can calculate things directly on your online store, website, or blog.
By helping visitors get the information they need, calculators can keep people on your site for longer. For example, if you have a fitness blog, then you might create a BMI calculator so visitors can check whether they’re a healthy weight without visiting a separate website.
With Ninja Forms, you can perform calculations on any field that can accept a numeric input including checkboxes, radio lists, and image choice fields. You can then display the result in your form using merge tags.
Another option is using this feature to create quizzes. Simply add each answer as an option, and assign a numeric value to each option. You can then calculate the user’s points and display their score directly in the form.
10. Custom Success Messages
When a visitor submits the form, you’ll typically show them a success message. This is a great opportunity to share additional information with the visitor. For example, if they submit a question to your help desk, then you might show your average response times.
You can also personalize the success message by adding merge tags.
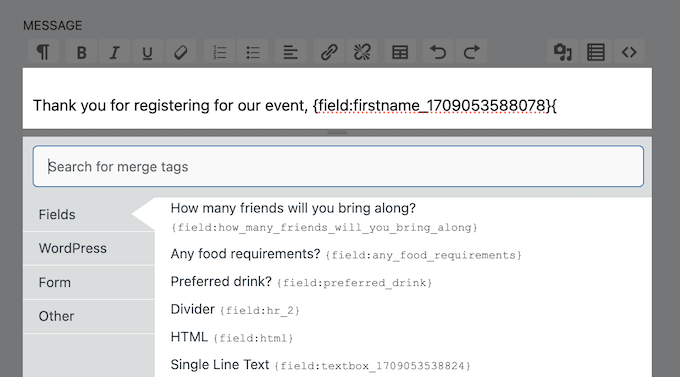
This dynamic content can improve the visitor experience, and make your customers and leads feel more valued.
11. Automated Email Notifications
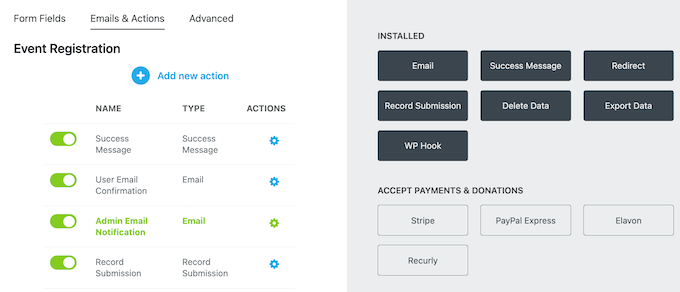
To help you respond to form submissions more quickly, Ninja Forms comes with a ready-made email that it’ll send to your WordPress admin email.
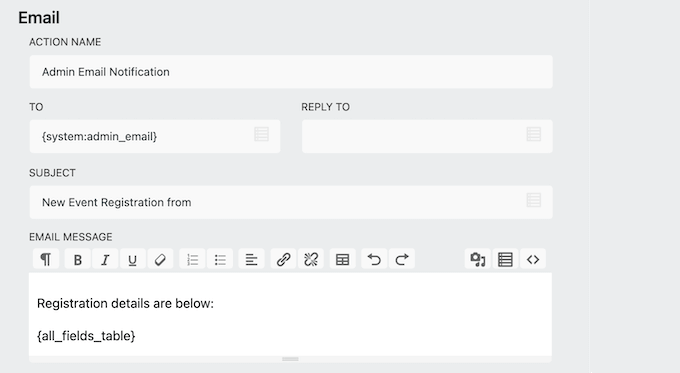
This email is fully customizable, so you can add your own messaging and include additional information. You can even send the message to other email addresses.
Beyond that, you can create other emails that Ninja Forms will send automatically. For example, if you’re using Ninja Forms to sell digital downloads or products online, then you may want to create an order confirmation email.
Pro Tip: You’ll want to make sure these emails arrive safely in the user’s inbox, and not in the spam folder. With that said, we recommend using an SMTP service provider and a plugin such as WP Mail SMTP.
12. Favorite Fields
Ninja Forms comes with a range of ready-made fields that you can customize to suit your needs. For example, you might add a default value, make the field mandatory, or change its label.
To save time, you can save these customizations by favoriting the field. You can then re-use the field and its exact configuration across your entire WordPress blog or website.
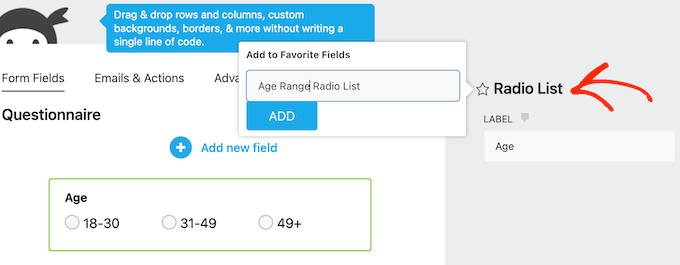
After favoriting a field, you can access it at any point from the ‘Add a new field’ menu.
This can save you a ton of time and effort, compared to recreating the same field manually each time. For example, you might reuse the same First Name, Last Name, and Email Address fields in all your forms.
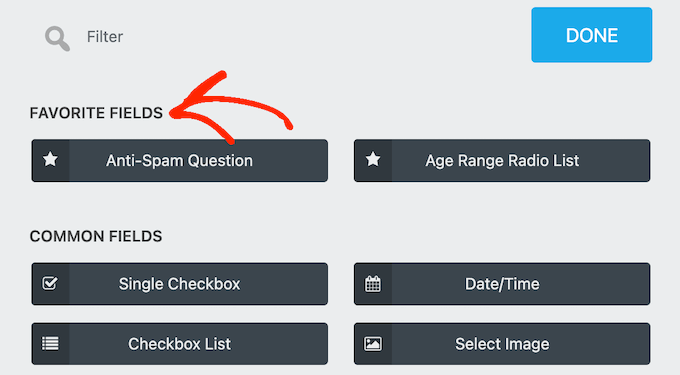
Even better, you can export and import any of your favorited fields.
This allows you to re-use the same fields across any WordPress website that has Ninja Forms installed. This is perfect if you own multiple sites, or manage a portfolio of client sites.
13. Import/Export Forms
Sometimes you may want to use the same form across multiple websites. For example, if you run several blogs in an affiliate marketing network, then you may want to reuse the same contact form. With Ninja Forms, you can easily export any form.
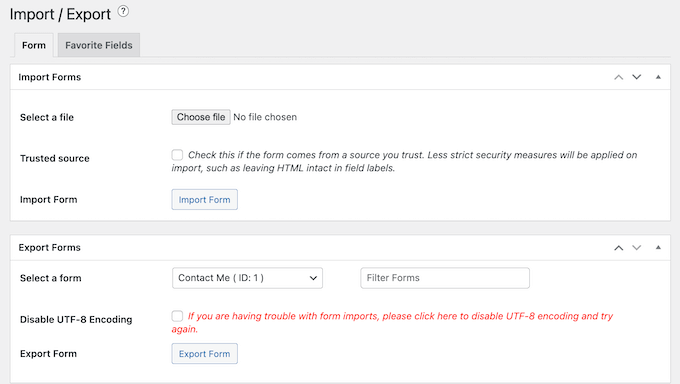
You can then import the form into any website that has Ninja Forms installed. This can save you a ton of time and effort compared to recreating the same form manually.
This is especially true if you’re a WordPress development agency, or manage multiple client websites. You can create a library of common forms, such as contact forms and user registration forms, and then simply import them into every client website.
14. Style Your Forms
The Ninja Forms Layout & Styles add-on provides some extra ways to style your forms, without having to write custom code.
With this add-on, you can easily create multi-column layouts, change the background color, add borders, and more. You can also make these changes directly in the Ninja Forms editor so you can easily try different styles to see what looks the best.
15. Support for Multi-Page Forms
Lengthy forms can be daunting and often increase form abandonment rates. With that in mind, smart website owners split their longer forms across multiple pages.
Ninja Forms has a Multi Step Forms add-on that allows you to create multi-page forms. Simply click the ‘+’ button to create a new page and then organize your field across those pages using drag and drop.
16. Save Progress
Sometimes you may need to collect lots of information from the user. However, users are more likely to abandon long forms.
With that said, the Save Progress add-on can help reduce form abandonment rates, by allowing users to save their place. After installing this add-on, you can add a Save button to any form.
When the visitor returns to the form, they’ll see a Load Saved Progress option that they can use to load their submission. For more on this topic, please see our guide on how to add save and continue functionality in WordPress forms.
17. Accept File Uploads
Maybe you’re hiring and want to collect resumes, or perhaps you’re running a photo contest and want participants to submit their favorite images. No matter what kind of form you’re creating, you can accept submissions using the File Uploads add-on.
This add-on automatically saves the submitted files to your server, and can even rename them automatically using merge tags. In this way, you can add useful information such as the date and time when the file was submitted.
You can also set restrictions such as only allowing certain file types, and adding a maximum file size. This means you can make sure you’re getting the content you want from visitors.
For more on this topic, please see our guide on how to create a file upload form.
18. Accept User Registrations
With the User Management add-on, you can add user registration and login forms to your site. These forms allows users to create and edit their own profiles on your WordPress website.
This add-on also comes with a Register User form template where each action is already mapped to the corresponding form field. This means you only need to set the user role that you want to assign to each new member.
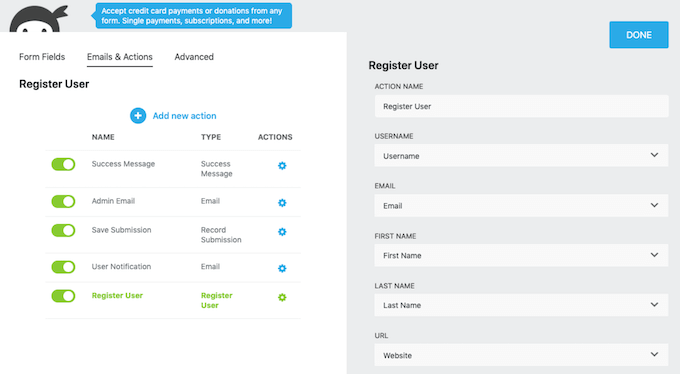
This add-on also comes with a Login Form template and an Update Profile template. With that said, you can quickly and easily allow user registration, or even turn WordPress into a membership website.
19. Design Smart Forms With Conditional Logic
To get as many conversions as possible, you’ll want to keep your forms short and only ask relevant questions. That said, this Ninja Forms review won’t be complete without mentioning the Conditional Logic add-on.
This feature shows the visitor different options based on the information they’ve already entered. For example, if you’re creating a form with a payment option, then Ninja Forms can hide the credit card fields if the visitor chooses not to send a donation.
You can also change the values in fields or calculations. For example, you can update the pricing if the customer enters a coupon code or buys an item in bulk.
20. Conditional Post-Form Actions
You may want to perform different actions or show unique messages based on how the user completes a form.
With Ninja Forms you can send different emails, display various onscreen messages, or redirect to multiple URLs using conditional logic. For example, you might create different custom ‘thank you’ pages using a drag and drop WordPress page builder such as SeedProd.
You can even subscribe visitors to different email newsletters based on the options they select in your registration form.
Do you use multi-page forms? Then you can use conditional logic to automatically skip entire pages, if they’re no longer relevant based on the user’s answers. This can make your forms much shorter, which will improve your form completion rates.
21. Collect Online Payments
If you want to sell products online, then there are plenty of eCommerce platforms you can use, such as Easy Digital Downloads. However, sometimes you may simply want to sell a few items or accept donations on a non-profit website.
If you don’t need a complete eCommerce platform, then you can create simple payment forms using Ninja Forms’ various payment add-ons. The plugin offers dedicated add-ons for PayPal, Stripe, Authorize.net, and Elavon.
Depending on the payment gateway you choose, you can also add a ‘buy now pay later‘ option to your site, or accept payment using Google Pay, Apple Pay, Venmo, and other popular services.
22. Supports Email Service Providers
Ninja Forms has add-ons for all the best email service providers including ActiveCampaign, Mailchimp, and AWeber. This makes it easy to grow your email list, and add email subscription forms to your WordPress website.
23. Integrates with CRM Software
Do you use a CRM? When someone submits a form, you’ll typically want to capture that information in your customer relationship management app.
The good news is that Gravity Forms has dedicated add-ons for Zoho and Salesforce, so you can automatically log form data with your CRM.
24. Community and Professional Support
With its drag and drop editor and ready-made templates, Ninja Forms is designed with ease of use in mind. However, sometimes you may still need to ask for WordPress support.
If you prefer to find answers yourself, then Ninja Forms has detailed online documentation that you can access 24/7.
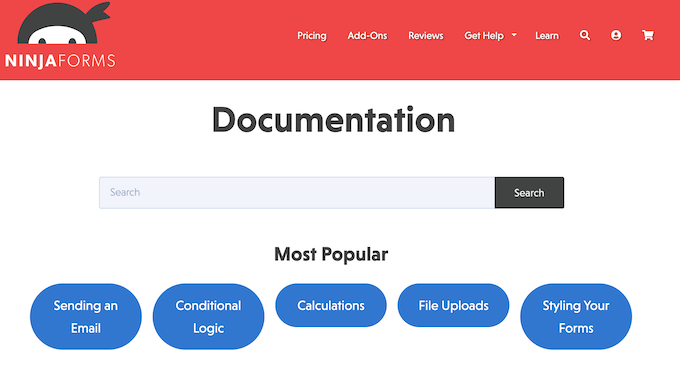
They also offer professional support for all users, including anyone who is using the free Ninja Forms plugin. However, if you upgrade to premium then you’ll get priority support and can expect a faster response.
Ninja Forms Review: Pricing and Plans
You can download the core Ninja Forms plugin for free from the official WordPress repository, and then use it on as many websites as you like. With that in mind, Ninja Forms is a good option if you own multiple business websites, blogs, or online stores.
However, if you want to use more advanced features then you’ll need to buy a premium license.

There are 3 paid plans to choose from:
- I’m Growing. For $99 per year, this plan allows you to create unlimited forms and accept unlimited submissions. You’ll also get access to the File Uploads, Conditional Logic, Layout & Styles, and Multi Step Forms add-ons. In addition, this plan integrates with many top email services providers including ConvertKit and Constant Contact.
- I’m Expanding. For $199 annually, you can accept payments with Stripe, Authorize.net, and Elavon. With that said, this is a great option if you want to sell digital products, services, or physical products online. The ‘I’m Expanding’ plan also integrates with HubSpot, Salesforce, and Zoho, so we recommend it to anyone who uses these popular platforms.
- I’m All-In. For $499 per year, you can use Ninja Forms on an unlimited number of websites. This makes it a great option if you’re a WordPress developer, agency, or you manage many different websites. You’ll also get access to any new Ninja Forms add-ons, and can even use extensions before they launch to the general public.
Ninja Forms Review: Is It the Right Contact Form Plugin for You?
After looking at the features, support options, pricing, and add-ons, we’re confident that Ninja Forms is a great form builder.
As a freemium product, you can use the base plugin for free. This makes Ninja Forms a great option for side businesses, startups, and hobby bloggers.
If you want a premium plugin, then the ‘I’m Growing’ plan comes with several powerful add-ons including Conditional Logic and Multi Step Forms. These add-ons are perfect for creating longer forms that don’t overwhelm your audience. You can even skip entire pages, based on the information the user has already submitted.
If you want to accept payments with Stripe, Authorize.net and other popular gateways, then ‘I’m Expanding’ may be a good option. This plan also allows you to install Ninja Forms on up to 20 websites, so it’s perfect if you own multiple WordPress sites.
Do you run a WordPress development agency, or manage multiple sites? With the ‘I’m All In’ plan, you can install Ninja Forms on as many websites as you want.
We hope this Ninja Forms review helped you decide if it’s the right contact form plugin for you. You can also check out our guide on how to increase your blog traffic, or see our expert pick of the best live chat software.
If you liked this article, then please subscribe to our YouTube Channel for WordPress video tutorials. You can also find us on Twitter and Facebook.


Ninja Forms User Reviews
Please share your Ninja Forms review to help others in the community.