Já vimos nutricionistas talentosos lutarem por meses para alavancar seus negócios, apesar de terem todas as certificações e conhecimentos certos. O problema geralmente não são suas habilidades. É transformar o interesse online em clientes pagantes de verdade.
Conversamos com muitos donos de negócios no espaço de saúde e bem-estar que se sentem estagnados. Eles estão presentes no Instagram, postando dicas de refeições, compartilhando conquistas, mas os clientes simplesmente não chegam com consistência.
A verdade é que depender apenas das redes sociais é como construir seu negócio em terra alugada.
O maior divisor de águas? Ter seu próprio site profissional. Ele lhe dá controle total e ajuda a estabelecer credibilidade instantânea com potenciais clientes.
A boa notícia é que criar um site profissional de nutrição é mais fácil do que você imagina. O WordPress torna isso simples, mesmo que você nunca tenha construído um site antes.
Neste guia, vou guiá-lo por cada etapa para lançar o site do seu negócio de nutrição online, para que você possa começar a atrair mais clientes imediatamente. 📈
Por que Criar um Site para o Seu Negócio de Nutrição?
Se você é um nutricionista ou dietista, ter um site WordPress para o seu negócio é uma jogada inteligente por muitos motivos.
Não se trata apenas de ter uma presença online. Em vez disso, trata-se de facilitar para que potenciais clientes o encontrem, confiem em você e entrem em contato.
Um site permite que você mostre seus serviços, qualificações e histórias de sucesso de forma profissional. Você tem controle total sobre sua marca pessoal e pode destacar sua expertise.
Sem um site, você corre o risco de perder clientes para concorrentes que são mais fáceis de encontrar online.
Um site não só pode aumentar sua credibilidade, mas também permite que você se conecte com pessoas além da sua área local. Você pode alcançar um público maior e até oferecer coaching online ou vender planos de nutrição.
Além disso, você pode atualizar o conteúdo facilmente, mantendo seus clientes informados com dicas e conselhos úteis.
Como Criar um Site para Negócios de Nutrição Online
Primeiro, você precisará escolher um construtor de sites para o seu site. Em nossa experiência, o WordPress é a melhor plataforma para essa tarefa.
O WordPress é a plataforma perfeita para negócios de nutrição. Ele oferece uma interface fácil de usar, infinitas opções de personalização e a capacidade de escalar conforme você cresce, o que é uma ótima opção mesmo se você for novo na criação de sites.
Além disso, o WordPress permite que você instale ferramentas feitas para sites de nutrição. Por exemplo, você pode usar plugins para adicionar modelos de planos de refeição, plataformas de cursos online para programas de nutrição e formulários de consulta para clientes.
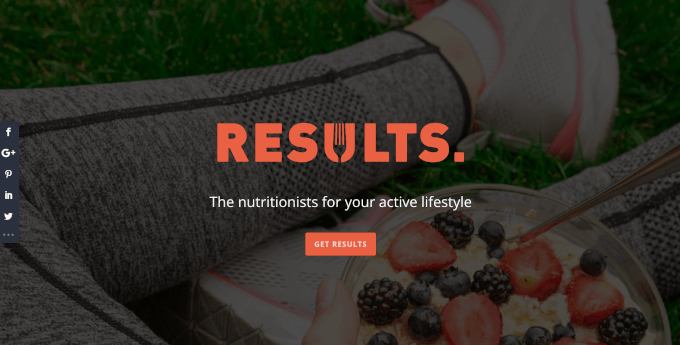
Existem também excelentes plugins de receitas, se você quiser criar conteúdo em torno de refeições saudáveis e suas receitas.
Antes de começarmos, é importante notar que existem 2 tipos de software WordPress, então você vai querer ter certeza de escolher o certo para o seu negócio.
WordPress.com é uma plataforma de blog hospedada. Por outro lado, WordPress.org é WordPress auto-hospedado. Ele lhe dá controle total, e é o que você precisará para criar seu site de nutrição.
Para uma comparação detalhada, você pode conferir nosso guia sobre WordPress.com vs. WordPress.org.
Embora construir seu site seja um passo fundamental, você pode enfrentar alguns desafios ao longo do caminho. Mas não se preocupe, vamos guiá-lo em cada etapa. Aqui estão as etapas que abordaremos nas seguintes seções:
- Etapa 1. Planeje seu Site de Negócios de Nutrição
- Etapa 2. Configure Hospedagem, Domínio e WordPress
- Etapa 3. Crie seu Site de Negócios de Nutrição
- Etapa 4. Encontre e Use o Tema Perfeito para Site de Nutrição
- Etapa 5. Personalize a Página Inicial para Refletir sua Marca
- Etapa 6. Adicione uma Página de Serviços para Promover seus Serviços de Consulta de Nutrição Online
- Etapa 7. Ofereça Cursos Online Apenas para Assinantes
- Etapa 8. Configure um Blog de Nutrição para Demonstrar Expertise e Atrair Clientes
- Etapa 9. Construa Confiança com Depoimentos e Qualificações
- Etapa 10. Permita que os Clientes Entrem em Contato com Você
- Etapa 11. Ajuste o Menu de Navegação
- Dicas Extras: Como Crescer seu Novo Site de Negócios de Nutrição
- Perguntas Frequentes: Como Iniciar um Site de Negócios de Nutrição Online
Pronto? Vamos começar!
Etapa 1. Planeje seu Site de Negócios de Nutrição
Antes de mergulhar nos detalhes técnicos, é importante planejar seu site. Geralmente, você precisa detalhar 3 pontos-chave: o público-alvo, o objetivo do site e a experiência do usuário.
🧐 Identificando seu Público-Alvo
Pense em quem você está tentando alcançar – sejam pessoas procurando planos de refeição, coaching de nutrição, receitas saudáveis ou tudo isso.
Entender seu público-alvo é crucial porque molda tudo, desde o design do seu site até o conteúdo que você cria.
Para ajudar no seu processo de brainstorming, você pode se fazer estas perguntas:
- Quais são os principais objetivos dos seus usuários? Eles buscam conselhos de saúde, gerenciam uma condição de saúde ou melhoram seu desempenho?
- Quem você está visando? São profissionais ocupados, pais, atletas ou pessoas com necessidades dietéticas específicas?
- Quais desafios eles enfrentam? Eles procuram opções de refeições, dicas para perda de peso ou nutrição para desempenho?
- Qual tom funciona melhor? Seu site deve ser amigável e casual ou mais profissional e voltado para especialistas?
Ao responder a essas perguntas, você começará a formar uma imagem mais clara do seu público-alvo – frequentemente chamado de ‘persona do cliente’. Essa persona ajuda você a entender suas necessidades, objetivos e preferências, o que guiará sua estratégia de site e conteúdo.
Para mais detalhes, você pode conferir nosso guia completo sobre como escolher um público-alvo.
🎯 Definindo o Objetivo Principal do Seu Site de Nutrição
Em seguida, você deve considerar o objetivo principal do seu site. Você pretende educar os visitantes sobre vida saudável, gerenciar uma loja online relacionada à nutrição, oferecer consultas ou fornecer todos esses serviços em um só lugar?
No entanto, observe que seu site deve refletir o que você oferece e atender às necessidades do seu público.
Considere estas opções com base no seu objetivo:
- Se você oferece consultas, pode incluir formulários de agendamento ou integrar um calendário para que os clientes possam agendar facilmente um horário com você.
- Se o seu objetivo é educar, então adicionar posts de blog, guias ou até mesmo cursos online para compartilhar informações valiosas com seu público é o caminho a seguir.
- Se você está vendendo produtos, precisará garantir que tenha uma seção de loja clara e fácil de navegar, onde os visitantes possam pesquisar e comprar.
Um propósito claro ajudará seu site a se manter focado, facilitando o atendimento ao seu público e o alcance de seus objetivos de negócios.
⭐ Pensando na Experiência do Usuário
Quando os visitantes acessarem seu site, o que eles precisarão? Como você pode tornar a jornada deles fácil e agradável?
Aqui estão algumas coisas a considerar para uma experiência de usuário tranquila:
- Organize seu site claramente. Você pode usar categorias como 'Planos de Refeição', 'Consultas' e 'Receitas' para que os visitantes possam encontrar facilmente o que procuram.
- Use chamadas para ação (CTAs) claras. Você pode incluir botões ou links com instruções claras, como 'Agendar uma Consulta' ou 'Ver Planos de Refeição', para ajudar os visitantes a dar o próximo passo.
- Mantenha a navegação simples. Você vai querer garantir que seu menu seja fácil de usar e leve os visitantes diretamente às informações de que precisam.
Agora, você pode dedicar seu tempo para planejar esses elementos fundamentais. Em última análise, isso o preparará para o sucesso e garantirá que seu site se torne um recurso útil e envolvente para seu público.
Para mais dicas e truques, consulte nosso guia sobre como melhorar a experiência do usuário.
Assim que seu site estiver cuidadosamente planejado, você estará pronto para o próximo passo.
Etapa 2. Configure Hospedagem, Domínio e WordPress
Configurar um site WordPress para o seu negócio de nutrição pode ser simples e direto. Você começará obtendo um nome de domínio e um serviço de hospedagem na web.
Um nome de domínio é como o endereço da sua rua online. É o que os clientes digitam em seus navegadores para encontrá-lo, como smoothiecentral.com ou fitfoodhub.com.
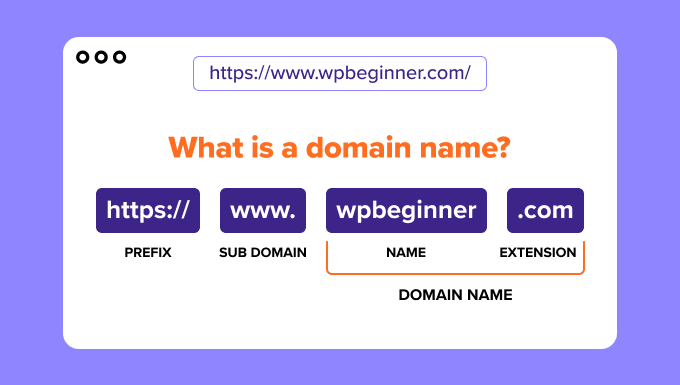
Por outro lado, a hospedagem na web é onde seu site "vive" na internet. Selecionamos algumas das melhores opções de hospedagem WordPress para facilitar isso para o seu site de nutrição.
Embora o WordPress seja gratuito, a hospedagem e os nomes de domínio são as áreas onde você pode gastar algum dinheiro. Normalmente, domínios custam cerca de US$ 14,99 por ano, e a hospedagem começa em cerca de US$ 7,99 por mês, o que pode aumentar juntamente com outras despesas comerciais.
A vantagem é: Bluehost oferece aos nossos leitores um nome de domínio gratuito e um grande desconto em hospedagem web. Eles são uma empresa líder em hospedagem e são oficialmente recomendados pelo WordPress.org.
Além disso, eles incluem um certificado SSL gratuito, que é crucial para lidar com segurança com informações de clientes online.

Para começar, basta clicar no botão abaixo para aproveitar a oferta, a partir de apenas US$ 2,99 por mês!
Em seguida, você precisará visitar o site da Bluehost e clicar no botão amarelo ‘Get Started Now’.
Na página de preços, o plano ‘Starter’ ou ‘Business’ deve atendê-lo bem, pois esses planos cobrem todos os fundamentos do seu site. Ou, você pode escolher o plano ‘eCommerce Essentials’, que inclui a instalação automática do WooCommerce e outros recursos de eCommerce.
Após selecionar um plano, basta clicar em ‘Choose Plan’.

Em seguida, você vai querer escolher um nome de domínio que seja fácil de lembrar e relacionado ao seu negócio.
Se o nome preferido não estiver disponível, considere incluir sua localização ou um foco de serviço específico como "saúde" ou "bem-estar".
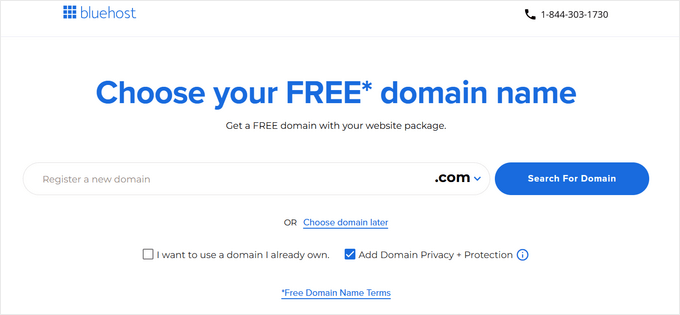
Após escolher seu domínio, você pode continuar para a página de checkout e fornecer os detalhes da sua conta, como seu nome e endereço de e-mail.
Finalmente, prossiga e insira suas informações de pagamento para concluir a configuração.

Assim que terminar, você deverá receber um e-mail de boas-vindas do Bluehost com instruções sobre como fazer login no seu painel de controle, onde você pode gerenciar seu site e instalar o WordPress.
E com isso, você está pronto para começar a construir o site da sua empresa de nutrição.
Etapa 3. Crie seu Site de Negócios de Nutrição
O Bluehost facilita a criação de um site de empresa de nutrição com instalação automática do WordPress. Ao se inscrever através do nosso link, o WordPress é instalado automaticamente no domínio escolhido.
Se você quiser criar um site WordPress adicional, você precisará navegar até a aba 'Sites' no seu painel do Bluehost.
Em seguida, basta clicar no botão 'Adicionar Site' para começar.
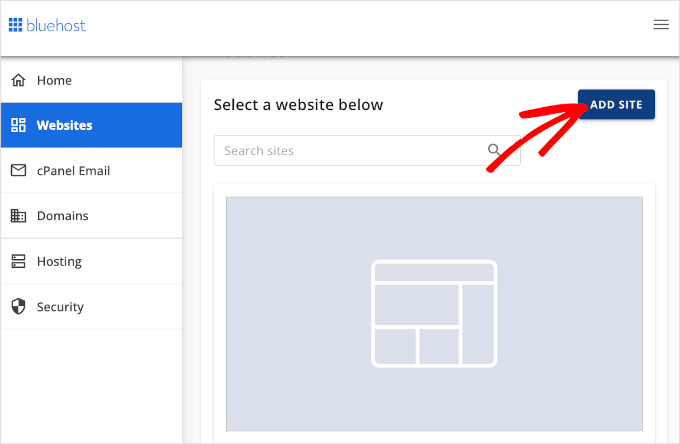
O assistente da Bluehost irá guiá-lo pelo processo de configuração, que inclui personalizar o título do seu site, escolher o nome do seu domínio e configurar o site.
Após concluir o assistente de configuração do WordPress do Bluehost, basta clicar em 'Concluir Configuração'.
Você será então direcionado para a área de administração do site.
Você também pode visitar seu painel do WordPress a qualquer momento digitando seusite.com/wp-admin/ em seu navegador. Apenas não se esqueça de substituir 'seusite.com' pelo nome do seu domínio.
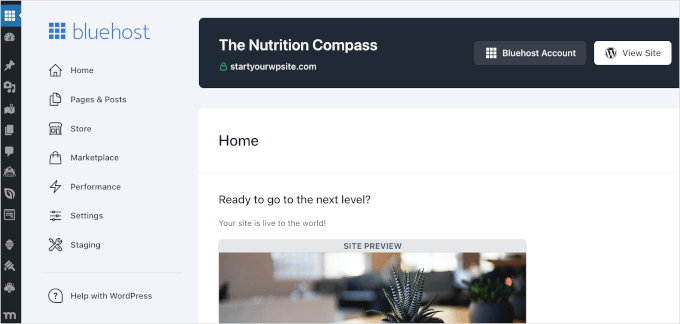
Para mais detalhes, você pode conferir nosso guia sobre instalar o WordPress com os principais provedores de hospedagem, incluindo SiteGround, Hostinger e HostGator.
Etapa 4. Encontre e Use o Tema Perfeito para Site de Nutrição
Agora que seu site está configurado, é hora de deixá-lo incrível com o tema perfeito. Um tema do WordPress é como uma "pele" que controla a aparência geral do seu site.
Um tema bem escolhido pode realmente destacar seu negócio de nutrição e criar uma boa experiência para o usuário.
Você pode começar explorando o diretório de temas do WordPress. Ele é repleto de temas gratuitos que são fáceis de instalar diretamente do seu painel do WordPress.
Simplesmente navegue até 'Aparência' e depois 'Temas' para começar a navegar. Procure por temas limpos e modernos. Você também pode usar o recurso de filtro para encontrar temas especificamente projetados para saúde e bem-estar.
Se você não sabe por onde começar, sinta-se à vontade para conferir nossas escolhas especializadas dos melhores temas WordPress para blogs de receitas.
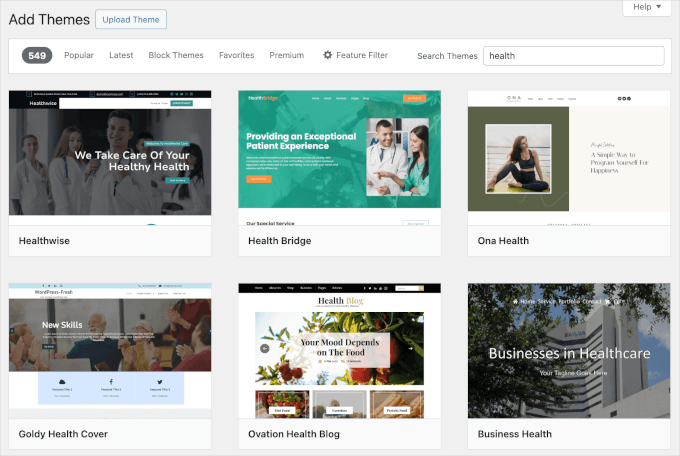
Alternativamente, nossa lista dos melhores temas WordPress para medicina e saúde pode ser um bom começo se o seu negócio estiver relacionado a bem-estar, serviços de saúde ou coaching de nutrição.
Se você tem um visual específico em mente e um orçamento para investir, talvez queira conferir mercados de temas premium como ThemeIsle ou Elegant Themes.
Essas plataformas oferecem uma grande variedade de temas lindamente elaborados com recursos avançados que podem ajudar a destacar seu site. Um tema premium geralmente vem com suporte e atualizações, proporcionando tranquilidade.
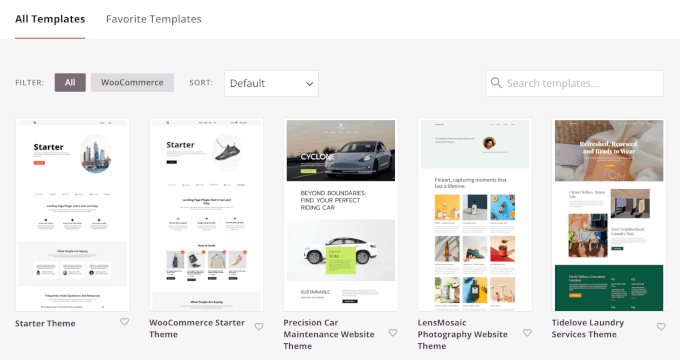
Outra ótima opção é usar SeedProd, o melhor construtor de páginas e temas com arrastar e soltar que permite personalizar todos os aspectos do seu site.
Além de oferecer temas iniciais personalizáveis, o SeedProd permite que você crie designs personalizados sem escrever nenhum código.
Depois de encontrar um tema que você adora, instalá-lo é simples:
- Se você estiver usando um tema do diretório do WordPress, basta clicar em ‘Ativar’ após instalá-lo. Para instruções detalhadas passo a passo, você pode consultar nosso guia para iniciantes sobre como instalar um tema do WordPress.
- Para temas premium, você normalmente fará o upload do arquivo do tema na área ‘Temas’ do seu painel e, em seguida, o ativará.
- Com o SeedProd, você pode brincar com seu construtor de arrastar e soltar para aplicar suas alterações de design sem esforço. Para detalhes, veja nossa análise completa do SeedProd.
Escolher o tema certo é uma parte emocionante da construção do seu site, então você pode levar seu tempo explorando suas opções para encontrar aquele que melhor representa sua visão.
Um tema bem projetado não apenas aumentará a aparência do seu site, mas também melhorará a experiência do usuário. Ele incentiva os visitantes a permanecerem e aprenderem mais sobre sua expertise em nutrição.
Etapa 5. Personalize a Página Inicial para Refletir sua Marca
Sua página inicial é a vitrine digital do seu negócio de nutrição, por isso é importante torná-la acolhedora e informativa. Personalizar este hub central garantirá que os visitantes entendam instantaneamente o que sua marca representa e o que você oferece.
Nesta etapa, você primeiro definirá qual de suas páginas é a sua página inicial.
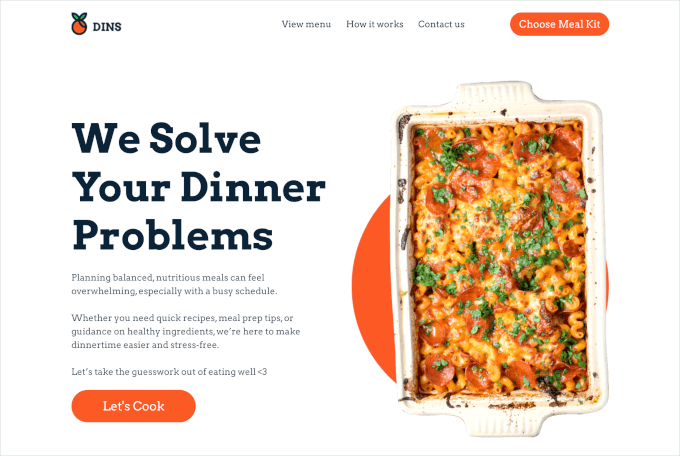
Agora, o WordPress oferece 2 tipos de conteúdo padrão: posts e páginas.
Normalmente, os posts são usados para criar artigos e blogs. Portanto, idealmente, você desejará que sua página de posts seja sua página de blog do WordPress.
Para fazer isso, vamos navegar para Configurações » Leitura no seu painel do WordPress.
Para 'Sua página inicial exibe', você precisará habilitar 'Uma página estática (selecione abaixo)' para configurar suas páginas inicial e de posts.
Depois disso, basta abrir o menu suspenso ao lado de 'Página inicial' e 'Página de posts'. Em seguida, você desejará escolher a opção relevante para cada menu suspenso.
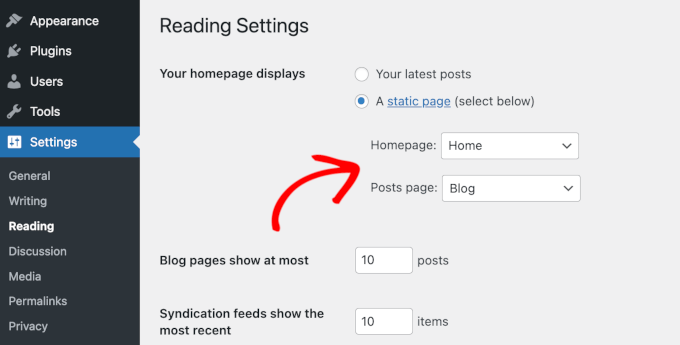
Existem mais configurações de configuração aqui. Por exemplo, você pode definir quantos posts de blog e feeds RSS (Really Simple Syndication ou Rich Site Summary) mostrar em uma página.
Se você rolar para baixo no painel, poderá escolher mostrar a versão completa ou apenas o resumo de cada post.
Em seguida, você também desejará deixar a caixa 'Visibilidade para mecanismos de busca' desmarcada. Isso permite que mecanismos de busca como o Google rastreiem e indexem seu site, o que significa que seu site será listado no Google.
No entanto, você pode marcar a caixa ‘Visibilidade nos mecanismos de busca’ para impedir que os mecanismos de busca indexem seu site enquanto você o constrói. Você sempre pode retornar a esta página para desmarcar quando estiver pronto.

É isso – você configurou e personalizou a página inicial do seu site!
Não se esqueça de clicar no botão ‘Salvar Alterações’ para armazenar suas novas configurações.
Agora você pode começar a personalizar sua página inicial através do editor de blocos do WordPress ou da interface do construtor SeedProd. Isso dependerá muito de qual tema você usa.
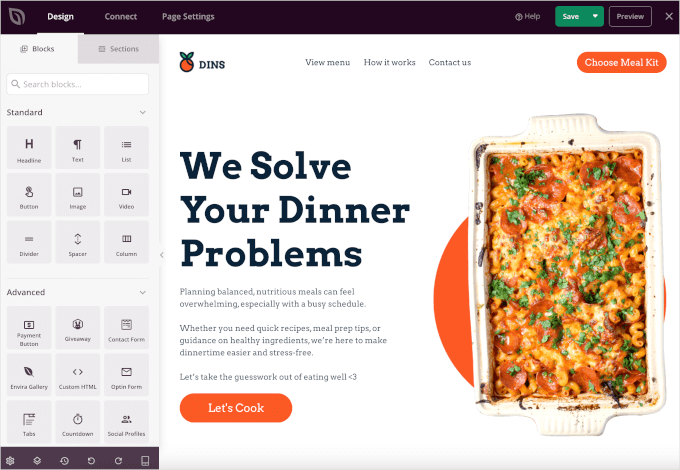
Para mais informações, você pode consultar nosso guia detalhado sobre como criar uma página inicial personalizada.
🧑💻 Dica de especialista: Se você estiver usando o modelo de página ou tema inicial do SeedProd, projetar sua página inicial será muito fácil. Com sua funcionalidade de arrastar e soltar, você pode criar sem esforço um layout que corresponda à personalidade e visão da sua marca. Você pode até criar um site inteiro com IA em apenas alguns cliques.

Não se esqueça de incluir detalhes essenciais como links de mídia social para se conectar com seu público.
Uma chamada clara para ação que incentiva os visitantes a dar o próximo passo também é importante.
Aqui estão algumas ideias de metas que precisam de botões de chamada para ação poderosos:
- Navegar pelos seus serviços
Assim que estiver satisfeito com o design, prossiga e publique-o. Em seguida, você vai querer ver como ele fica em diferentes dispositivos, garantindo que seu site seja responsivo e visualmente atraente em desktops e dispositivos móveis.
Etapa 6. Adicione uma Página de Serviços para Promover seus Serviços de Consulta de Nutrição Online
Adicionar uma página de serviços ou preços ajuda os visitantes a entender o que você oferece, como eles podem trabalhar com você e os custos envolvidos. Na sua página de serviços, você deve explicar claramente as opções de consulta que você oferece, sejam sessões individuais ou consultas em grupo.
Quanto mais informações você fornecer, mais fácil será para os clientes tomarem decisões.
Para criar uma página de serviço, você pode começar criando uma nova página em seu site WordPress. Simplesmente navegue até Páginas » Adicionar Nova Página e, em seguida, no editor de conteúdo, você pode escrever o título e a descrição da página.
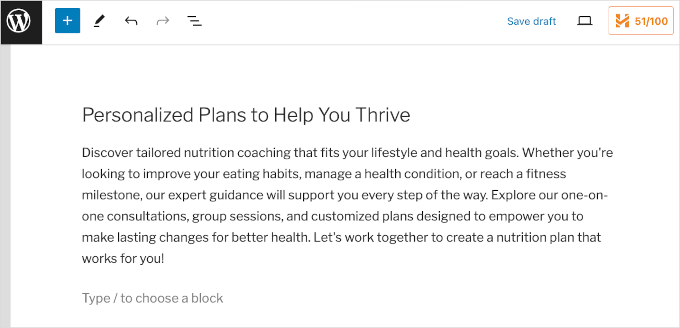
Concluído, você adicionará uma tabela de preços. Para mais informações, consulte nosso guia sobre como adicionar tabelas de preços bonitas no WordPress.
Você também deve considerar usar um plugin como MemberPress, um dos melhores plugins de membros para WordPress.
Ele permite que você crie facilmente uma área exclusiva para membros em seu site. Dessa forma, você pode oferecer conteúdo exclusivo, vender planos de refeição, gerenciar uma comunidade de coaching paga ou qualquer outra coisa que possa ajudar a apoiar as jornadas de saúde de seus membros.
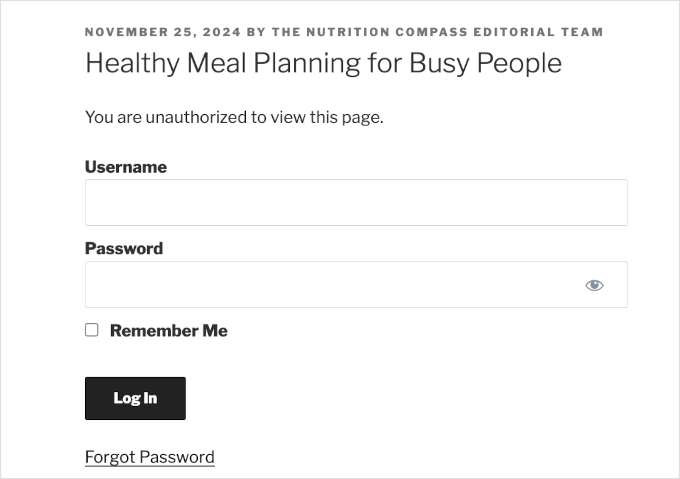
Ao oferecer este conteúdo atrás de um paywall, você está oferecendo ainda mais valor e facilitando o gerenciamento de assinaturas e pagamentos.
Para mais informações, você vai querer conferir nosso guia definitivo sobre como criar um site de membros do WordPress.
Etapa 7. Ofereça Cursos Online Apenas para Assinantes
Também recomendamos oferecer cursos online para agregar ainda mais valor aos seus clientes e aumentar a receita do seu site de nutrição.
Por exemplo, você pode criar um curso exclusivo sobre “Planejamento de Refeições Saudáveis para Pessoas Ocupadas” ou “Entendendo Macronutrientes: Um Guia para Iniciantes”.
Outra ideia pode ser “Nutrição para Perda de Peso” ou um curso mais especializado como “Gerenciando Diabetes com Dieta”.
Esses cursos podem ajudar seus assinantes a aprender mais sobre nutrição e dar a eles as ferramentas necessárias para fazer escolhas mais saudáveis.
Com o complemento MemberPress CoachKit, você pode facilmente criar e gerenciar esses cursos.
Ele também permite que você crie sessões de coaching individuais, para que você possa dar aos seus clientes atenção pessoal e conselhos personalizados. Tudo isso torna simples para seus assinantes aprenderem no seu próprio ritmo.
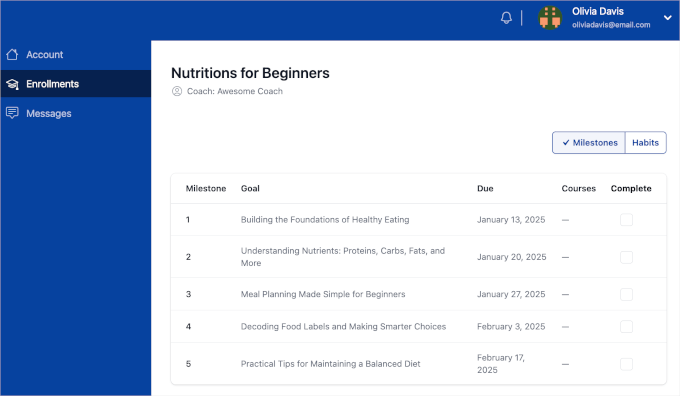
Além disso, com o complemento Courses , você pode criar cursos online completos que guiam os assinantes no aprendizado sobre sua própria nutrição.
Para instruções detalhadas, você pode ler nosso guia sobre como criar e vender cursos online com WordPress.
Etapa 8. Configure um Blog de Nutrição para Demonstrar Expertise e Atrair Clientes
Um blog de nutrição é um ótimo lugar para compartilhar dicas e receitas. Mas, além disso, é sua arma secreta para melhorar o SEO e gerar mais tráfego.
Quando feito corretamente, um blog também pode construir confiança, aumentar seu público e mostrar sua expertise. Além disso, é uma ótima maneira de se conectar com pessoas que compartilham sua paixão por uma vida saudável.
Agora, ter ideias novas pode parecer complicado, mas você sempre pode começar com as perguntas que seus clientes fazem com mais frequência. Em seguida, para cada pergunta que você pesquisar, você vai querer verificar a seção 'As pessoas também perguntam' nos resultados de pesquisa do Google.
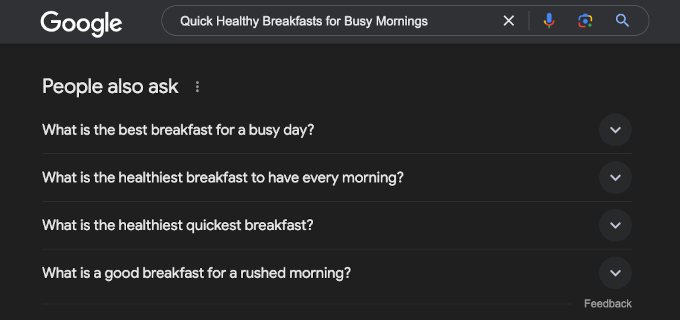
Por exemplo, você pode querer escrever sobre "Cafés da Manhã Saudáveis Rápidos para Manhãs Corridas" ou "Como Ler Rótulos de Alimentos Como um Profissional". Tópicos sazonais como "Trocas de Refeições Festivas para um Você Mais Saudável" também são ótimas ideias.
Para impulsionar seu SEO, recomendamos fazer uma pesquisa simples de palavras-chave para encontrar as frases exatas que as pessoas estão procurando online.
Uma ótima ferramenta para isso é a LowFruits, uma ferramenta de pesquisa de palavras-chave poderosa e amigável para iniciantes. Esta ferramenta pode ajudá-lo a encontrar palavras-chave de nicho e de baixa concorrência para as quais você pode ranquear. Dessa forma, você pode começar a gerar tráfego orgânico para o seu site mais rapidamente.
Para mais informações, você pode ler nosso guia sobre como fazer pesquisa de palavras-chave para o seu blog WordPress.
Existem mais dicas e truques para fazer isso. Para aprendê-los todos, você pode conferir nosso guia sobre como gerar rapidamente ideias de posts para blog. Em seguida, recomendamos manter uma lista contínua de ideias para que você nunca fique sem ideias para seu próximo post.
Uma vez que você tenha ideias para posts de blog, o próximo passo é desenvolver essas ideias em textos bem escritos. Se você não tem certeza por onde começar, aqui está uma estrutura simples:
- Capture a atenção com uma introdução relacionável.
- Compartilhe dicas úteis ou passos acionáveis.
- Conclua com um ponto principal ou uma chamada para ação.
Para um guia detalhado, basta conferir nosso tutorial sobre como criar esboços de posts de blog e como escrever ótimos posts de blog que se destacam.
Se você também está compartilhando receitas nutritivas em seu blog de culinária, recomendamos o uso do WP Tasty. Ele permite que você crie receitas atraentes e fáceis de ler que se destacarão em seu blog.
Para mais informações sobre o plugin de blog de culinária, veja nossa análise detalhada do WP Tasty.
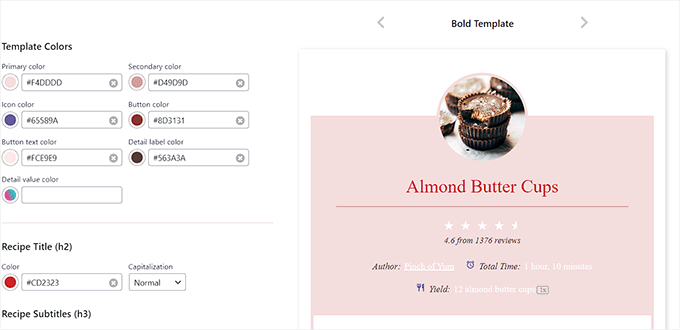
Você pode até adicionar rótulos profissionais de informações nutricionais usando o Nutrifox, um dos melhores criadores de rótulos para WordPress.
É uma ótima ferramenta que facilita a exibição do valor nutricional das suas refeições. Por exemplo, adicionar um rótulo a uma receita pode ajudar diabéticos a rastrear sua ingestão de açúcar e fazer escolhas informadas. Veja nossa análise completa do Nutrifox para mais detalhes.
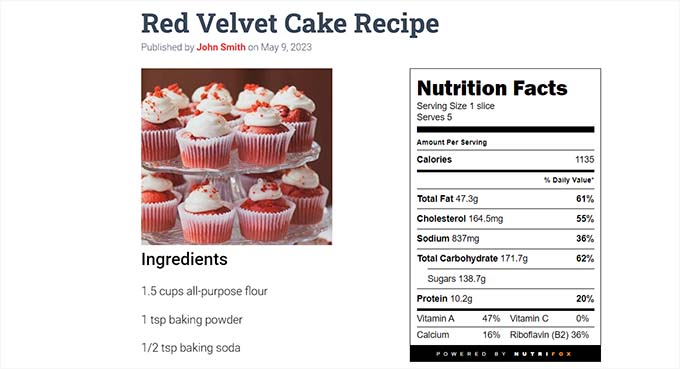
Para ajudar você a começar, você pode consultar nosso guia sobre como exibir rótulos de informações nutricionais no WordPress.
Etapa 9. Construa Confiança com Depoimentos e Qualificações
Depoimentos de clientes desempenham um papel fundamental na construção de confiança com seu público. Depoimentos fortes agem como prova social, ajudando a construir confiança com os visitantes e aumentando suas chances de convertê-los em clientes.
Se você deseja criar uma página bonita e totalmente personalizável com uma seção de depoimentos, recomendamos SeedProd.
SeedProd é um dos melhores construtores de páginas com arrastar e soltar para WordPress, confiável por mais de 1 milhão de sites. Ele oferece 90 blocos pré-fabricados e mais de 350 modelos, facilitando o design de páginas personalizadas e a adição de depoimentos rotativos ao seu site.
Para começar, basta instalar e ativar o plugin. Se precisar de ajuda, você pode consultar nosso guia sobre como instalar um plugin do WordPress.
💡 Observação: Existe uma versão gratuita do SeedProd, mas usaremos a versão Pro para este guia. SeedProd Pro tem um bloco de Depoimentos pronto e pode funcionar com o serviço de e-mail marketing de sua escolha.
Após a ativação, você deve ir para SeedProd » Configurações e inserir sua chave de licença do SeedProd. Você a encontrará em sua conta no site do SeedProd.
Uma vez inserida, basta clicar em ‘Verificar Chave’ para confirmar.
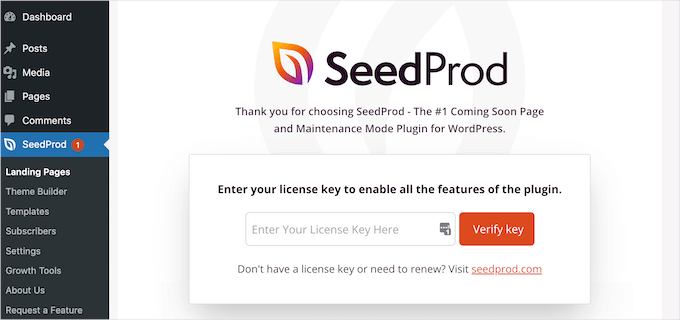
Em seguida, você pode ir para SeedProd » Páginas e clicar no botão ‘Adicionar Nova Página de Destino’ para criar um novo layout de página.
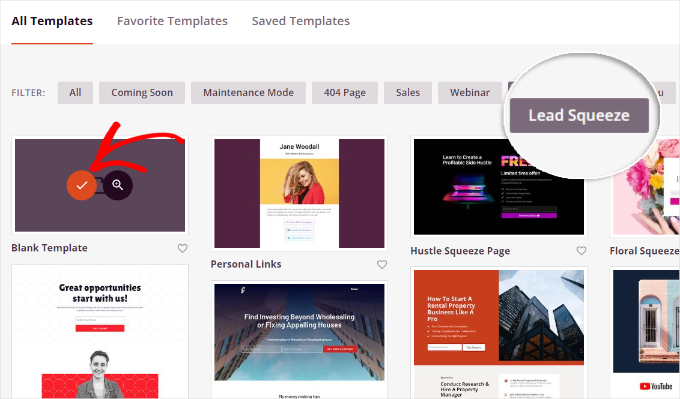
Quando vir a página de modelos, passe o mouse sobre o que você gosta e clique na marca de seleção para selecioná-lo. Mas você sempre pode escolher o modelo em branco se preferir começar do zero.
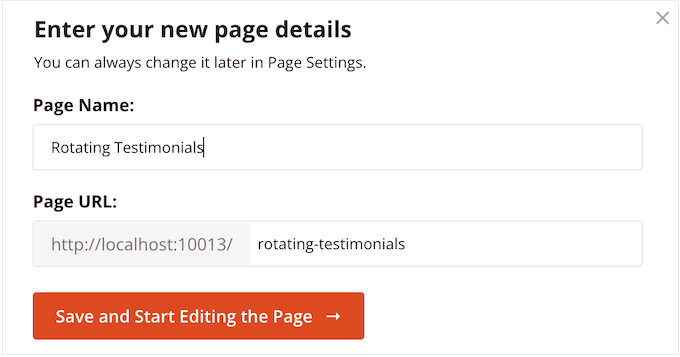
Depois disso, você pode dar um nome à página e uma URL personalizada.
Clique em ‘Salvar e Começar a Editar a Página’ para entrar no editor de arrastar e soltar do SeedProd.
Para adicionar uma seção de depoimentos, basta arrastar o bloco Depoimentos do menu do lado esquerdo para sua página.
Se você quiser que a seção de depoimentos gire, então você precisará adicionar mais depoimentos. Basta clicar em ‘Adicionar Depoimento’ e repetir o processo de personalização para cada um.
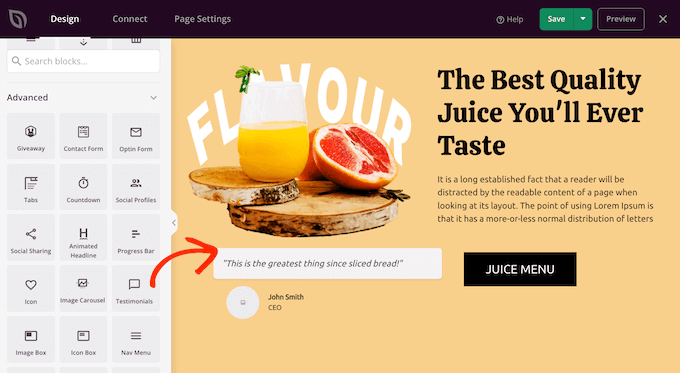
Depois de adicionar alguns depoimentos, você pode fazê-los girar automaticamente.
Para fazer isso, você precisará clicar em ‘Configurações do Carrossel’ para alterar o esquema de cores, a velocidade do slider e se os depoimentos devem rolar automaticamente.
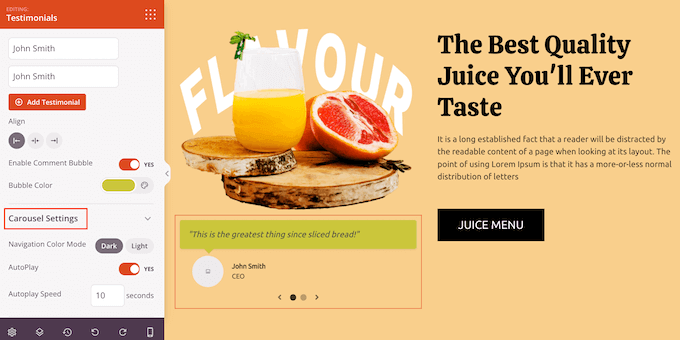
Para mais detalhes, você pode consultar nosso guia sobre como adicionar depoimentos rotativos no WordPress.
Da mesma forma, exibir suas qualificações, como um diploma em nutrição, ajuda a estabelecer credibilidade e confiança. Quando clientes em potencial veem que você tem o treinamento e a experiência adequados, é mais provável que confiem em seus conselhos e serviços.
Portanto, é importante adicionar essas credenciais ao seu site. Alguns bons locais para adicioná-las são na sua página 'Sobre', em uma seção dedicada a 'Credenciais' ou até mesmo ao lado de seus depoimentos.
A boa notícia é que você pode facilmente criar uma seção na página para destacar suas qualificações.

Para um guia passo a passo, confira a seção sobre como editar uma página em nosso guia definitivo sobre como editar um site WordPress.
Etapa 10. Permita que os Clientes Entrem em Contato com Você
Um formulário de contato online é essencial para qualquer site de negócios de nutrição. É uma ferramenta simples, porém poderosa, que permite que clientes e potenciais clientes entrem em contato com dúvidas, feedback ou solicitações de serviço sem complicações.
Ao incorporar um formulário em seu site, você também garante que as comunicações com os clientes sejam otimizadas e armazenadas em um só lugar, em vez de espalhadas por vários e-mails.
Para configurar um formulário de contato perfeito, recomendamos o uso do WPForms, que é um dos construtores de formulários mais fáceis para iniciantes e versáteis disponíveis. O plugin torna o processo rápido e direto, para que você possa se concentrar mais em interagir com seus clientes.
Usamos o WPForms em nossos próprios sites e você pode saber mais sobre ele em nossa análise completa do WPForms.
Para começar, vamos instalar o WPForms do seu painel do WordPress e ativá-lo. Se precisar de ajuda, você pode consultar nosso guia sobre como instalar um plugin do WordPress.
💡 Observação: Existe também uma versão gratuita do WPForms com um modelo simples de formulário de contato. No entanto, a atualização para o WPForms Pro desbloqueará recursos mais avançados, como integrações de marketing por e-mail, a capacidade de criar formulários conversacionais e acesso a todos os add-ons.
O WPForms vem com um construtor de arrastar e soltar fácil para iniciantes.
Para criar seu formulário, você pode começar escolhendo entre mais de 2000 modelos prontos para coletar as informações exatas que você precisa.
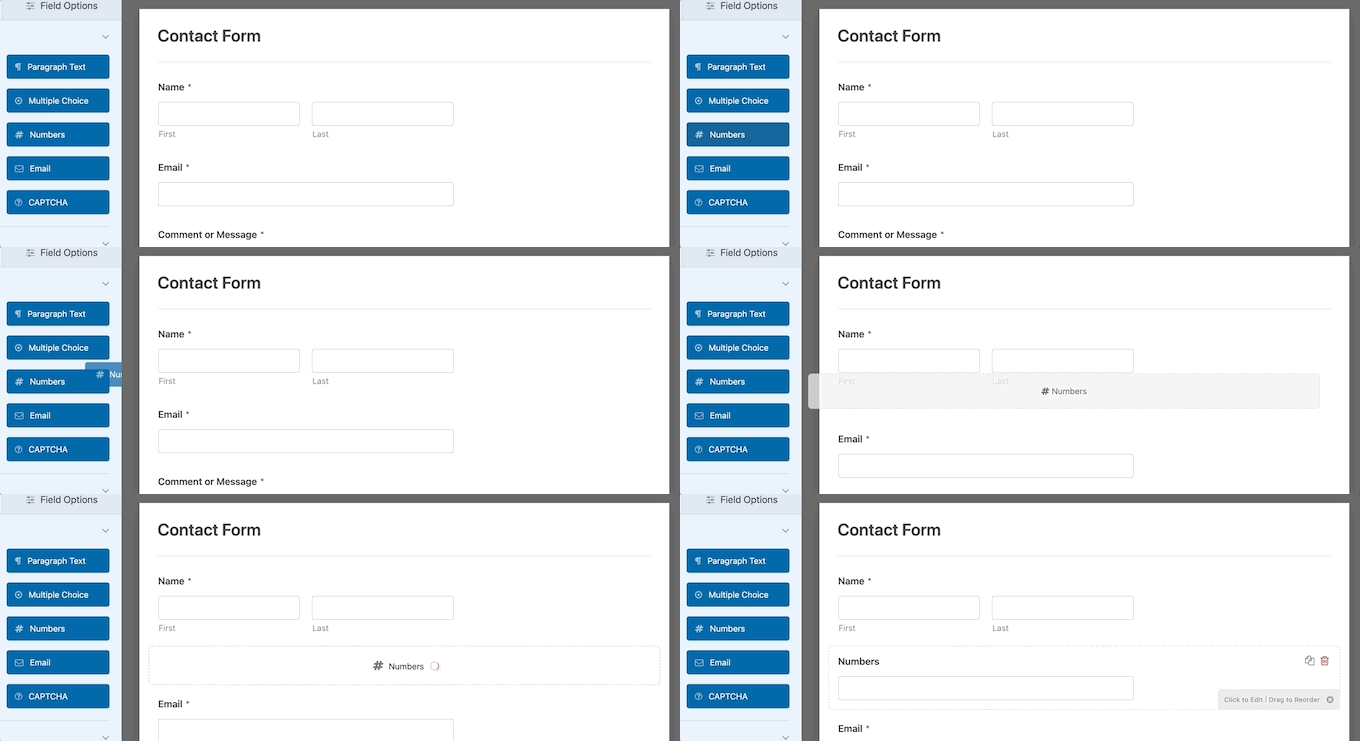
Ou, se você não tem certeza por onde começar, o WPForms também oferece um construtor de formulários com IA que pode gerar um formulário personalizado para você em segundos. Basta descrever o que você precisa, e ele constrói o formulário automaticamente.
Você pode então personalizar os campos do formulário para coletar as informações que precisa, como nomes, endereços de e-mail e talvez um espaço para mensagens ou perguntas específicas.
Por favor, observe que você quer garantir que está coletando informações suficientes para fornecer respostas significativas, mas mantenha o formulário curto e direto para reduzir o abandono de formulários.
Por último, certifique-se de configurar notificações para ser alertado sempre que alguém preencher o formulário. Dessa forma, você pode responder prontamente e mostrar aos seus clientes que você valoriza a comunicação deles.
Para mais informações, você pode conferir nosso guia sobre como criar um formulário de contato no WordPress.
Fornecer um número de telefone comercial é outra ótima maneira de permitir que potenciais clientes entrem em contato com você de forma fácil e direta. Ele também separa chamadas profissionais e pessoais, mantendo você organizado.
Com serviços de telefonia modernos como o Nextiva, você pode gerenciar chamadas, correios de voz e até mensagens de texto de uma única plataforma.
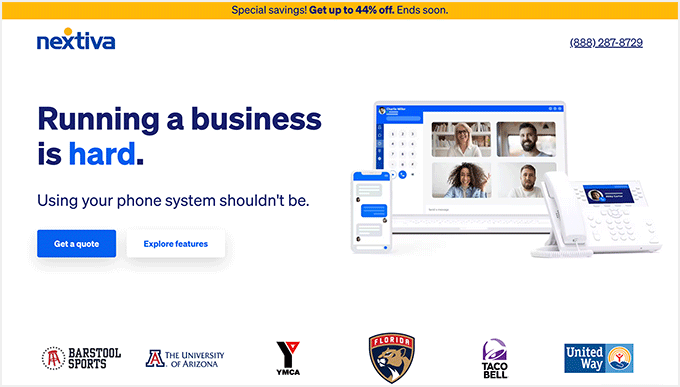
Usamos a Nextiva na WPBeginner para nosso serviço de telefonia empresarial e, em nossa experiência, é o melhor sistema de telefonia virtual para empresas em termos de recursos e preço. Se você quiser mais informações, sinta-se à vontade para ler nossa extensa análise da Nextiva.
Etapa 11. Ajuste o Menu de Navegação
Depois de adicionar conteúdo ao seu site de nutrição, você vai querer configurar um menu de navegação claro para ajudar os visitantes a navegar facilmente por suas páginas e posts.
Não importa qual tema você esteja usando, o WordPress torna simples a criação de menus e submenus para o seu site. Um menu bem organizado ajuda os visitantes a encontrar as informações que procuram, sejam elas seus serviços, posts de blog ou detalhes de contato.
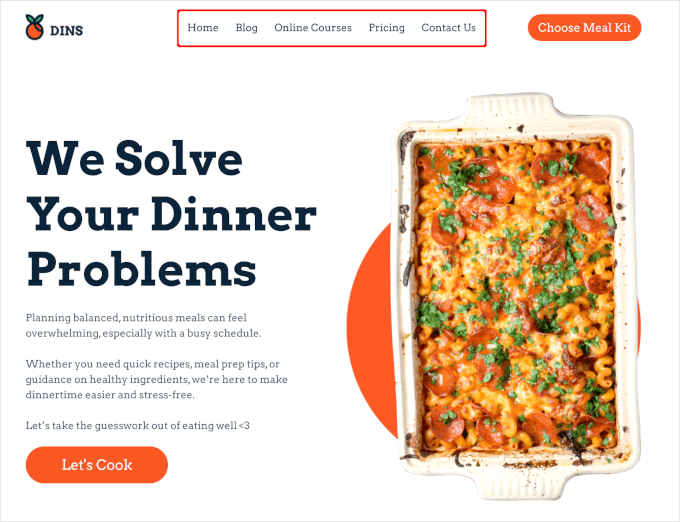
Para manter seu site fácil de navegar, você vai querer organizar os itens do seu menu em ordem lógica.
Para um guia completo, você pode conferir nosso guia para iniciantes sobre como adicionar um menu de navegação no WordPress.
Dicas Extras: Como Crescer seu Novo Site de Negócios de Nutrição
Iniciar seu site de negócios de nutrição é apenas o primeiro passo. Expandir exige esforço consistente, estratégias inteligentes e as ferramentas certas. Com a abordagem correta, você pode alcançar um público maior e construir sua marca.
Aqui estão algumas dicas para ajudá-lo a expandir seu alcance e crescer seu negócio:
- Monitore e Melhore a Velocidade do Site: Um site rápido mantém os visitantes felizes e ajuda no SEO. Use ferramentas como o Google PageSpeed Insights para acompanhar o desempenho e a velocidade do seu site e fazer melhorias. Um site mais rápido pode levar a um melhor engajamento e mais conversões.
- Otimize Seu Site para SEO: Para fazer isso, você precisará do AIOSEO, que é o melhor plugin de SEO para WordPress do mercado. Ele pode ajudar seu site a ter uma classificação melhor nos motores de busca, tornando mais fácil para potenciais clientes encontrá-lo.
- Aproveite o Marketing por E-mail: Construir uma lista de e-mails é fundamental para se manter conectado com seu público e transformar leads em clientes fiéis. Envie newsletters por e-mail, atualizações e conteúdo útil para manter seus assinantes engajados e voltando para mais.
- Use uma Ferramenta de Geração de Leads: Se você oferece serviços de consultoria online, então deve experimentar usar OptinMonster. É a melhor ferramenta para capturar informações de visitantes e transformar tráfego do site em clientes pagantes.
Perguntas Frequentes: Como Iniciar um Site de Negócios de Nutrição Online
Você aprendeu como iniciar seu negócio de nutrição online, mas pode ainda ter algumas dúvidas. Para te ajudar, reunimos respostas para algumas das perguntas mais frequentes.
Como iniciar um serviço de consultoria de nutrição online?
Para iniciar um serviço de consultoria de nutrição online, você pode configurar um site simples em WordPress que destaque seus serviços, qualificações e experiência. Você também pode usar ferramentas para videochamadas, adicionar um sistema de agendamento online e configurar opções de pagamento para que os clientes possam agendar e pagar facilmente.
Quanto devo cobrar por um plano nutricional?
O preço de um plano nutricional pode variar com base na sua experiência e no que está incluído no plano. A maioria dos planos varia de US$ 50 a US$ 300 ou mais. Mas você pode verificar quanto outros nutricionistas estão cobrando e encontrar uma taxa que corresponda ao seu valor.
Como me divulgar como nutricionista?
Você pode começar construindo sua presença online com mídias sociais, compartilhando conteúdo útil e escrevendo um blog ou newsletter por e-mail. Para divulgar seu nome, também é uma boa ideia fazer parcerias com outros profissionais de saúde, participar de fóruns de saúde e se envolver em comunidades locais.
Como iniciar um blog de nutrição?
Para criar um blog de nutrição, você precisará escolher um nicho pelo qual seja apaixonado e que conheça bem, depois escolher uma plataforma de blog. O próximo passo é começar a escrever posts úteis para o blog e interagir com seus leitores por meio de comentários e mídias sociais.
Apenas certifique-se de que seus posts sejam otimizados para mecanismos de busca para obter melhores resultados.
Como posso começar a trabalhar como freelancer de nutrição?
Você pode tentar se inscrever em sites de freelancers como Upwork ou Fiverr e criar um perfil que destaque suas habilidades e experiência.
No entanto, ter seu próprio site pode facilitar as coisas. Você pode exibir seus serviços e oferecer aos clientes uma maneira fácil de entrar em contato com você, tudo em um só lugar. Isso também ajuda a evitar taxas de plataforma.
É só isso! Esperamos que este artigo tenha ajudado você a iniciar o site do seu negócio de nutrição online. Em seguida, você pode conferir nosso guia sobre como adicionar um fórum no WordPress e nossas escolhas de especialistas dos melhores plugins LMS do WordPress comparados.
Se você gostou deste artigo, por favor, inscreva-se em nosso Canal do YouTube para tutoriais em vídeo do WordPress. Você também pode nos encontrar no Twitter e no Facebook.


Tem alguma pergunta ou sugestão? Por favor, deixe um comentário para iniciar a discussão.