Ever noticed how uncertain readers can be about clicking links? Link previews solve this by giving your visitors a sneak peek at what’s waiting for them on the other side 💡
We’ve seen this technique a lot in content-heavy sites like wikis, where visual link previews help readers navigate through interconnected articles more efficiently.
When readers can see what’s inside a link before clicking, they’re more likely to explore related content that interests them. Plus, it helps them avoid clicking links that aren’t relevant to their needs.
Many WordPress users ask us how to add beautiful link previews without touching code. After testing various solutions, we’ve found a simple, no-code method that works great for beginners.

When to Add a Live Preview of Links on Your WordPress Site 🤔
On a typical WordPress website, links don’t show what’s inside them. This can frustrate visitors when they click a link and find it’s not what they expected. That’s where live link previews come in handy.
Live link previews usually look like tooltips. This WordPress design element pops up when someone moves their mouse over a link, showing a sneak peek of the content.
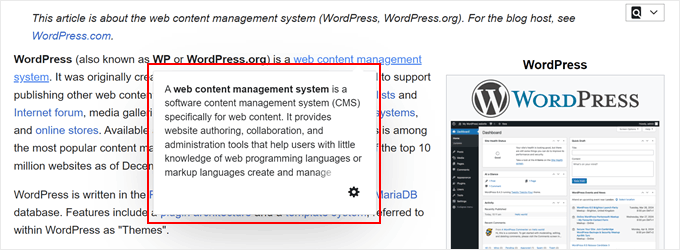
For online stores, that means you can have your links display product pictures or short details to boost sales.
If you run a WordPress blog, you can show post preview images or short text to make readers want to see more. And for external links, these tooltip previews help people decide if they want to leave your site.
However, be careful when using live previews. Too many can confuse visitors. It’s best to use them only for important links where they’ll help the most.
With that in mind, let’s look at an easy way to add live link previews to your WordPress site. This method will work whether you’re using the Gutenberg block editor, the classic editor, or even a theme builder. You can use the quick links below to navigate through this tutorial:
Step 1: Install Bright Link Previews Plugin
The easiest way to add a tooltip preview to a link in WordPress is with the Bright Link Previews plugin. When activated, this WordPress link preview plugin will automatically add a live preview of your internal and external links in your posts and pages.
First, go ahead and install the plugin in your admin area. For step-by-step instructions, you can read our beginner’s guide on how to install a WordPress plugin.
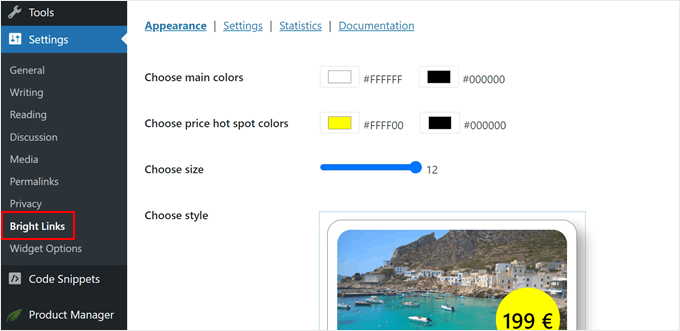
Once done, go to Settings » Bright Links. This is where you will be able to configure the plugin’s settings.
Step 2: Customize the Design of the Link’s Tooltip Preview
First, let’s set up the live preview’s design in the Appearance tab.
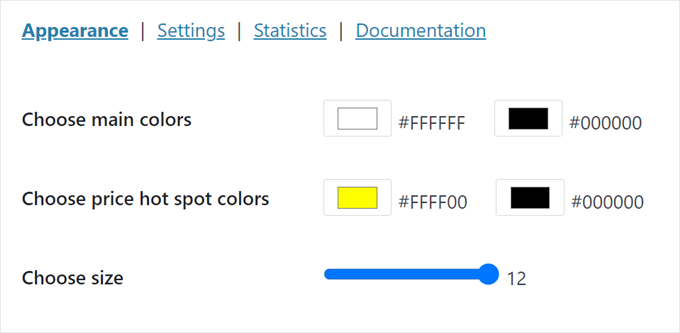
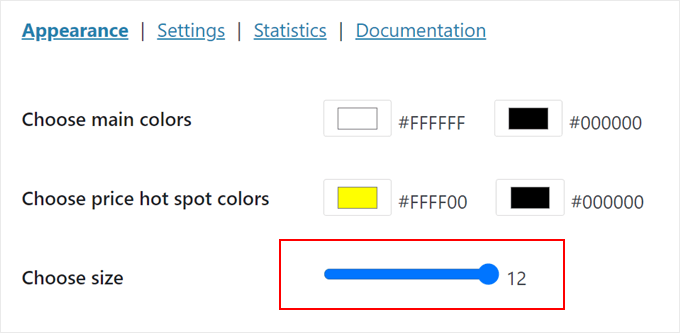
At the top, you can choose the background color (left side) and the text color (right side).
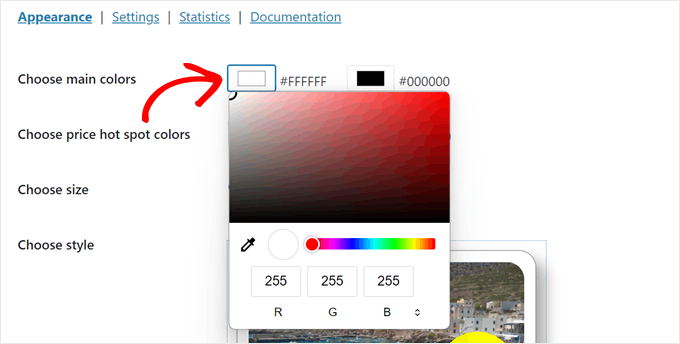
Just click on the color box, and a color picker tool will appear.
You can also choose the price hotspot colors, which will appear automatically for eCommerce links from WooCommerce, Amazon, and Shopify sites.
Just like with the tooltip, simply choose the hotspot’s background color on the left and the text color on the right side.
Below that is ‘Choose size,’ where you can make the tooltip smaller or larger by dragging the dot in the resizer bar.
The larger it is, the easier it is for users to read your link information. That said, the tooltip’s size could also affect your user experience, so make sure to find the right size for your website design.
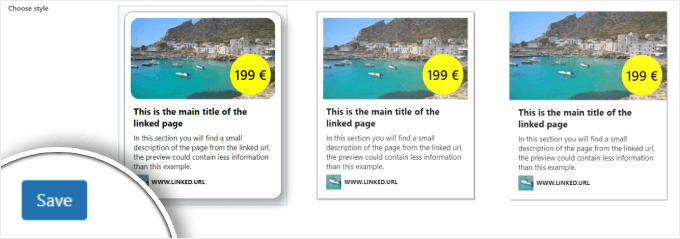
Scrolling down, you can change the style of the tooltip itself. There are 3 default options, and you can always switch them later.
Once you’re happy with how the tooltip looks, just click ‘Save’ at the bottom.
Step 3: Configure the Link’s Live Preview Settings
Now, switch to the ‘Settings’ tab.
This is where you can configure how live previews for links behave.
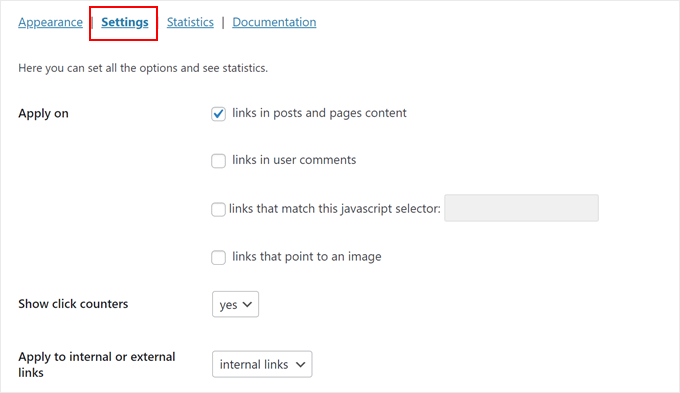
Bright Links Preview lets you apply the tooltip previews in your posts, pages, and user comments, as well as links that match a JavaScript selector or an image.
We decided to add them just for our posts and pages because adding them everywhere could disrupt our user experience.
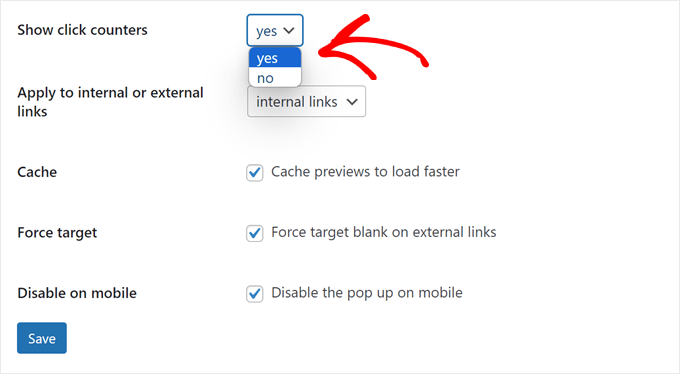
Another thing you could configure is whether to show click counters. Changing this setting from ‘no’ to ‘yes’ means the tooltip will tell visitors how many users have clicked on the link they’re hovering on.
This can be useful for internal links as it can inspire a sense of FOMO and encourage visitors to explore your website further.
That said, we don’t recommend enabling this feature if you want to add live previews for external links as well. It may backfire and cause people to leave your site.
Speaking of, you can choose whether to add the live previews on internal links, external links, or both.
The choice depends on what type of website you’re running, but we generally suggest going with just internal links to increase your pageviews and reduce your bounce rate.
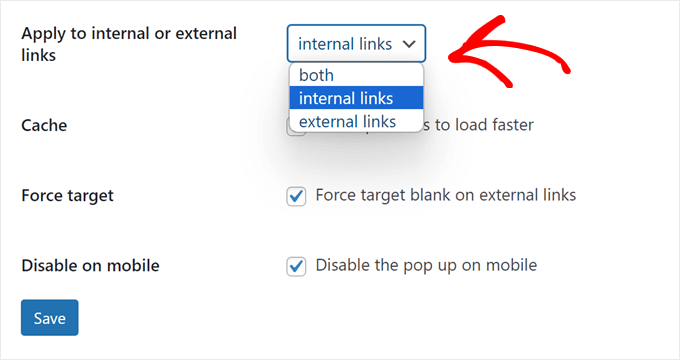
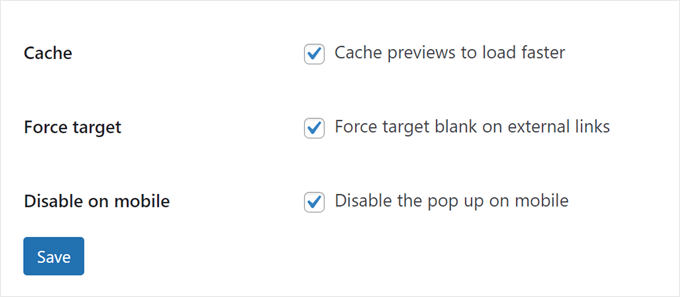
Next, you could choose to cache the previews to speed up your WordPress site’s performance.
If you add live previews to your external links, you could also force those links to have the target blank attribute so that those links open in a new tab. We suggest enabling this feature so that users don’t accidentally leave your website.
Finally, you could choose to disable the tooltip on mobile, as tooltips could make for a poor user experience on smaller screens. We recommend testing this feature out and seeing what works best for your website.
You could check out our guide on how to view your WordPress website on mobile via desktop for more information.
When you’re happy with the live preview’s settings, click ‘Save.’
Step 4: See Your Link Tooltip Preview in Action
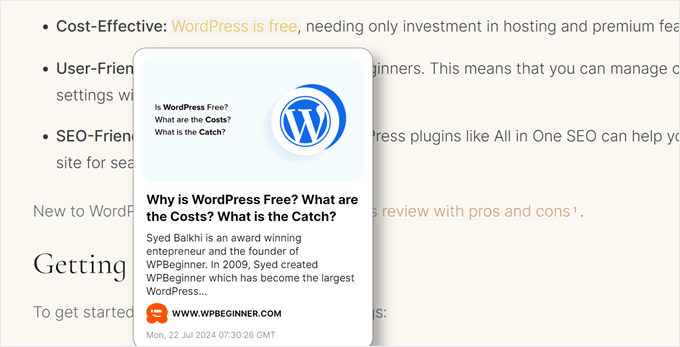
At this stage, you can go ahead and preview your website to see what the tooltip looks like.
Here’s what ours looks like without the click counter:
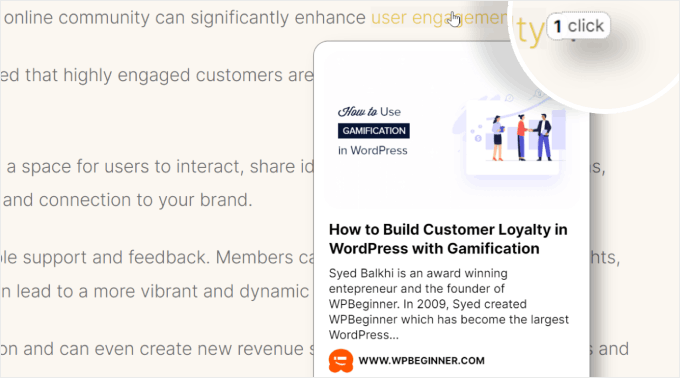
If you choose to add a click counter, then there will be a little note that shows the number of clicks the link has received so far.
That choice will look like this:
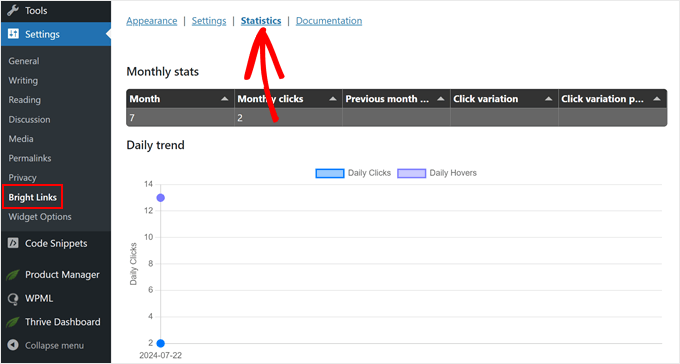
The great thing about Bright Links Preview is that it has a free analytics feature to show you how many users have clicked or even hovered on your links.
This can be helpful for seeing which posts most users are interested in or deciding which new posts to highlight.
To see these numbers, just go to Settings » Bright Links from your WordPress admin and switch to the ‘Statistics’ tab.
Bonus Tip: Clean Up Your WordPress Link Previews With Schema Markup
Bright Links Preview works by automatically pulling metadata from your pages and posts to create a live preview of your links. In other words, the quality of your link previews depends on how well you’ve set up your metadata.
You can add metadata to your articles by using All in One SEO (AIOSEO), a powerful WordPress SEO plugin. It has a schema feature that allows you to easily add structured data to your content.
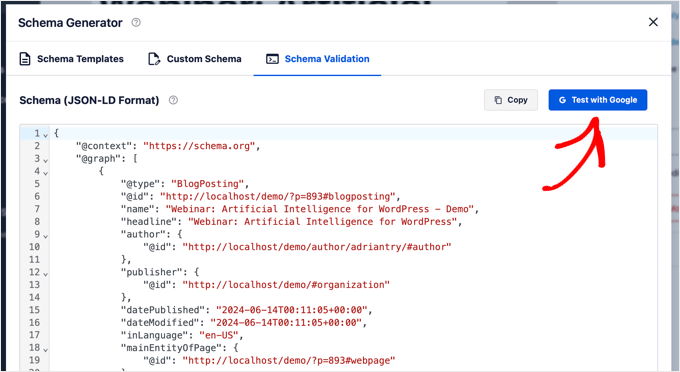
Besides helping Bright Links Preview create better previews, it can also give search engines more context about your content, potentially improving your WordPress SEO performance.
If you want to add schema markup to your content, you can read these articles:
- How to Add Schema Markup in WordPress
- How to Properly Add SEO-Friendly ‘How to’ Schema in WordPress
- How to Add Facebook Open Graph Meta Data in WordPress
Discover More WordPress Design Features
Want to make your WordPress site design even more interesting? Check out these helpful guides:
- Use simple and elegant footnotes in your blog posts to add extra information
- Show breadcrumb navigation links to help visitors understand where they are on your site
- Create a scrolling news ticker to share important updates with your visitors
- Use a countdown timer widget to build excitement for special events
- Add a reading progress bar to your posts to keep readers engaged
- Create custom shape dividers to make your website design more interesting
We hope this article has helped you learn how to show live previews of your links in WordPress. You may also want to check out our list of the best drag-and-drop page builders in WordPress and our guide on how to edit a WordPress website.
If you liked this article, then please subscribe to our YouTube Channel for WordPress video tutorials. You can also find us on Twitter and Facebook.


Dennis Muthomi
Thank you for instructions for setting up the Bright Link Previews plugin. It seems like a great solution to improve user engagement on my blog.
I found the section on customizing the design of the tooltip preview especially helpful. It’s crucial to ensure that these previews enhance rather than detract from the user experience.
This is a fantastic resource that I’ll definitely be implementing on my site. Thanks again for sharing your expertise!
Colin
Thanks for the article, that plugin has ceased operation and is no longer downloadable, if you had a new suggestion that works I’d greatly appreciate it. The RT Media paid version isn’t up to scratch and there’s not a lot to be found via Google.
WPBeginner Support
Thank you for letting us know, we will be sure to look into updating this article
Admin
Marcus Quiroga
Hi,
Is there an update of this function nowadays? I’m trying it on external links at. Does someone could help me with that?
thank you
WPBeginner Staff
Thanks for correcting us, we have updated the article.
Tim Roberts
How do you get this to on work on specifc links.
WPBeginner Staff
Unfortunately plugin does not have a way to show preview for selective links you can only choose from all, internal, or external links.
Bruce Brown
Select the “class” option, then put the class on the links you want to display.
Per Søderlind
Hi, I’m the plugin author.
You can get this to work on specific links by adding class=”wp-live-preview” to the link, and in the settings page set ‘Live Preview Links’ to ‘class=”wp-live-preview’. See the demo links on my site.