Do you need to send emails from a WordPress installation on localhost?
Running WordPress from localhost on your own computer is convenient when developing or testing a new site, plugin, or theme. However, setting up WordPress email on localhost is tricky because your site is offline, so email is not enabled by default.
In this article, we’ll show you how to receive WordPress emails from localhost.

Why Run WordPress on Localhost?
Before you make major changes to your WordPress website, it’s a good idea to first test those changes on a different site that’s not visible to your users.
A staging site is a clone of your live website that is used for testing changes before making them live. Staging sites help you catch errors so you don’t end up breaking your live website.
A lot of users install their WordPress staging sites locally on their Windows or Mac computers. Once the site has been tested, they simply upload those changes from localhost to the live server.
However, setting up email on a localhost WordPress install can be tricky, and you may see the error message ‘Could not instantiate mail function’ when WordPress tries to send an email. That’s because email is not enabled on the WAMP and MAMP server stacks by default.
With that being said, let’s take a look at how to receive WordPress emails from localhost.
How to Receive WordPress Emails from Localhost
The first thing you need to do is install and activate the WP Mail SMTP plugin on the WordPress installation on your local server. For more details, see our step by step guide on how to install a WordPress plugin.
WP Mail SMTP will take over the default email-sending function in WordPress so that your emails are routed through an SMTP provider instead. This means you’ll receive email notifications from your staging site even if it’s not live on the internet.
For more information about using the WP Mail SMTP plugin, you can check out our WP Mail SMTP review.
Setting Up WP Mail SMTP
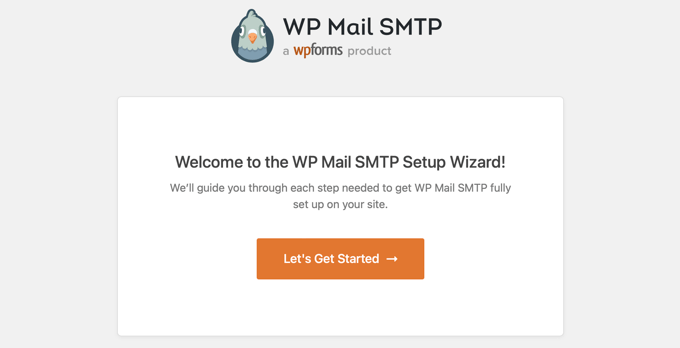
Once the plugin is activated, the WP Mail SMTP Setup Wizard will start automatically.
The first thing you need to do is choose an SMTP service provider.
You can see our guide on the best SMTP service providers with high email deliverability for help choosing a provider. If you’re unsure, Sendinblue is a good choice for most WordPress sites.
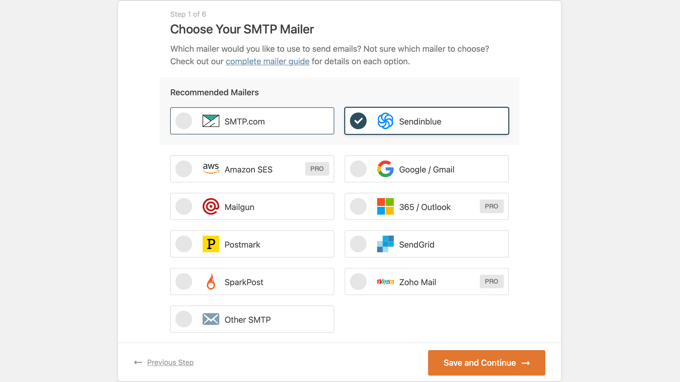
Continue following the WP Mail SMTP wizard step by step. If you need help, then you can follow our guides on how to set up WP Mail SMTP with Sendinblue, Gmail, Microsoft Outlook, or Amazon SES.
Note: If you wish to use Amazon SES, Microsoft Outlook, or Soho Mail as your SMTP mailer service, then you will need to purchase a WP Mail SMTP Pro license.
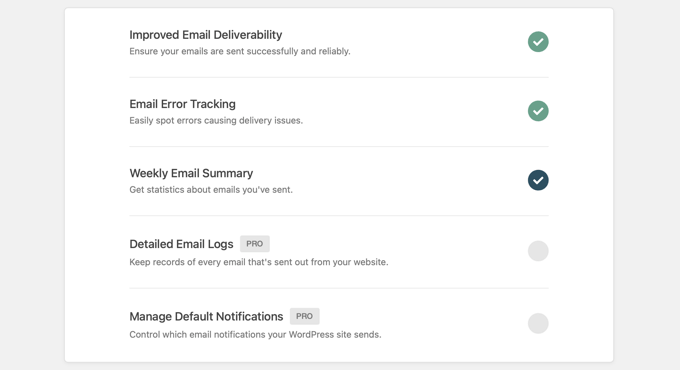
During the setup, email deliverability and error tracking will be enabled automatically. Users of the Pro version can also turn on email logging and manage default notifications.
Sending a Test Email
Once you have finished setting up WP Mail SMTP, you can send a test email to make sure that the plugin is configured correctly.
To do that, you need to head over to WP Mail SMTP » Tools in your admin menu, where you’ll see the ‘Email Test’ page. By default, the test email will be sent to your site’s admin email address, but you can change this by typing a different email address into the ‘Send To’ field.
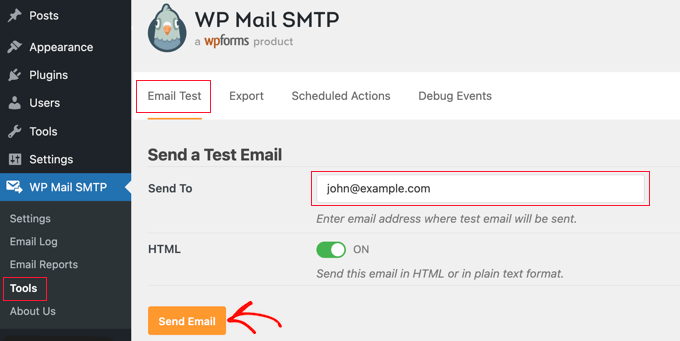
We recommend you keep the ‘HTML’ setting in the ‘On’ position and then simply click the ‘Send Email’ button. WordPress will try to send a test email to the address you entered.
If there are problems with your email configuration, then you’ll see a message describing the problem, along with some steps you can take to resolve it.
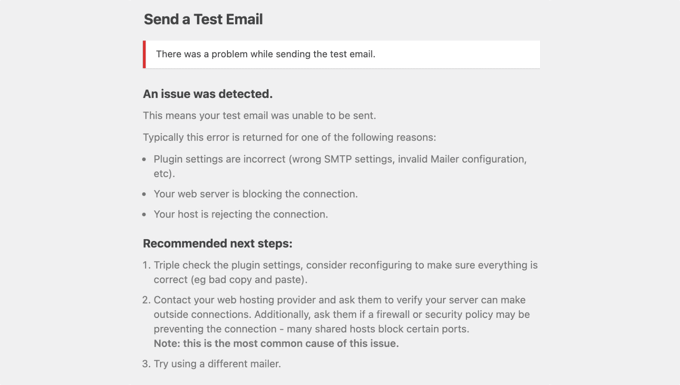
After following the steps to fix the issues, you should send another test email to confirm that your WordPress email is now working.
If your WP SMTP Mail configuration is correct, then you should find an email in your inbox.
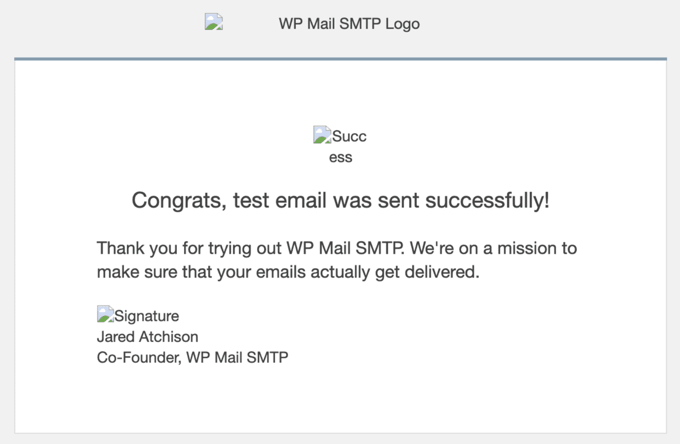
You will notice that the test email has broken images, and this is completely normal when sending emails from localhost. That’s because the images are normally loaded from the internet, but your localhost website is not online.
Even if the test email was successful, WP Mail SMTP may have detected a problem with your DMARC, DKIM, or SPF records that can result in deliverability problems. You’ll see links to step by step guides that will help you configure your DNS records correctly.
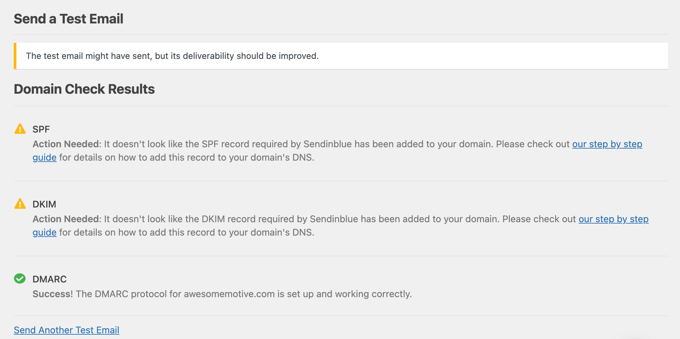
You can learn more from the guide on how to send a test email from WordPress.
Once you’ve finished fixing the issues, you should send another test email to make sure that everything is working properly now.
Disabling WordPress Email Notifications – Pro Users
Now, you’ll start receiving WordPress emails from localhost. This will include notification emails about plugin updates, theme updates, and core updates. You’ll also receive emails about site admin changes, password resets, new user registrations, and more.
You may feel like you’re receiving too many emails. Or you might like to disable certain email notifications while you’re developing and testing your website.
WP SMTP Mail Pro users can control which emails are sent by localhost. You need to head to WP Mail SMTP » Settings. Once there, you should click the ‘Email Controls’ tab at the top of the page. Here, you can disable any emails you don’t want to receive.
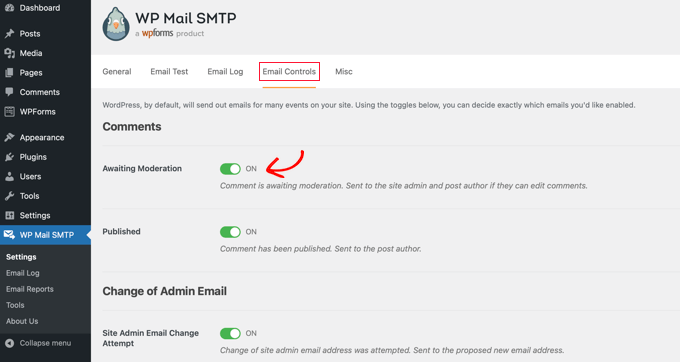
For example, if you don’t want to receive emails about comments awaiting moderation, then you would simply toggle the setting to the off position.
We hope this tutorial helped you learn how to receive WordPress emails from localhost. You may also want to learn how to get a free email domain or check out our list of common WordPress errors and how to fix them.
If you liked this article, then please subscribe to our YouTube Channel for WordPress video tutorials. You can also find us on Twitter and Facebook.


Geoff
This post is WAY out of date. You now need to set up an API and OAuth on Google. The WP Forms website has full details, but allow 15-20 minutes to do so.
WPBeginner Support
The post was last updated in 2014, thank you for letting us know we should look into updating this post
Admin
Gerard Chartier
I have just tried this out and it does still work but you have to set “Allow less secure apps: ON” in your Google account, which is not recommended.
WPBeginner Support
Thank you for sharing that this still works and how to get it to work.
Prashant Sontale
I installed the plugin but I cant see the options such as those iin Mailer and also cant view the option of SMTP Host, Port, Authentication, Username, Password, etc. In mailer I haveoptions such as PHP, Google, Maligun, Sendgrid, Other SMTP. If I click on Google, they ask Client ID and Client Secret.
What to do?
Carla
That is to send… smtp… not to recieve the email on wordpress… POP3
swarna
my email is not working
Barka Piy Ndahi
Thanks for the tutorial.
I have xampp and i tried above. It showed test message sent, though below i saw: 2017-10-20 13:06:18 SMTP Error: Could not connect to SMTP host.
And i didnt see in my yahoo box.
Please can you help me make this to work.
Thank you.
Ashan Rupasinghe
That’s Worked. Thanks.
sudhakar
Hi i did the same but i have did not get any email for contact form and product enquiry form think that in localhost mail system does not works or there is an idea means please help me
Vivekraj
Hi new user registration mail contact us mail are working but woocommerce order mail and all not sending to the customers.
mukesh
i m mukesh
this is too good
surati
not work so work for me thnq…
Maksym
Works very good! Thank you
Steve
You have to go into your Google account and turn on the feature “Sign In & Security > Connected Apps & Sites > Allow Less Secure Apps > ON”.
Warren
Hi Steve
What’s the navigation to get to the sign in and security > connected apps etc? Loads of tabs on the top once in settings, each with multitude of options.
Thanks,
Shashank Chattopadhyaya
From your Google account:
[Settings -> Accounts and Import -> Other Google Account settings -> Sign-in & security -> Connected apps & sites -> Allow less secure apps (turn ON)]
Sharon
Same here. Otherwise gmail would authenticate because of the “Less secured application”
saurabh
awesome..blowsome.. worked!!
make sure your gmail has access to third party apps to send email.nothing else is needed than this video. good work . loved it.
Pam Marshall
Just what I needed to do my testing.
Roger Moore
I worked well after I enable access to less secure apps in my gmail account. Thanks
Chetan Buddh
array (size=18)
‘authenticate’ => string ‘SMTP Error: Could not authenticate.’ (length=35)
‘connect_host’ => string ‘SMTP Error: Could not connect to SMTP host.’ (length=43)
‘data_not_accepted’ => string ‘SMTP Error: data not accepted.’ (length=30)
’empty_message’ => string ‘Message body empty’ (length=18)
‘encoding’ => string ‘Unknown encoding: ‘ (length=18)
‘execute’ => string ‘Could not execute: ‘ (length=19)
‘file_access’ => string ‘Could not access file: ‘ (length=23)
‘file_open’ => string ‘File Error: Could not open file: ‘ (length=33)
‘from_failed’ => string ‘The following From address failed: ‘ (length=35)
‘instantiate’ => string ‘Could not instantiate mail function.’ (length=36)
‘invalid_address’ => string ‘Invalid address’ (length=15)
‘mailer_not_supported’ => string ‘ mailer is not supported.’ (length=25)
‘provide_address’ => string ‘You must provide at least one recipient email address.’ (length=54)
‘recipients_failed’ => string ‘SMTP Error: The following recipients failed: ‘ (length=45)
‘signing’ => string ‘Signing Error: ‘ (length=15)
‘smtp_connect_failed’ => string ‘SMTP connect() failed.’ (length=22)
‘smtp_error’ => string ‘SMTP server error: ‘ (length=19)
‘variable_set’ => string ‘Cannot set or reset variable: ‘ (length=30)
this error come what can i do now?
i can’t understand.
plz help me guyz.
Dan Canetti
Hi,
Looks as though it’s failed to Authenticate. Try ensuring your Email and Password are entered correctly.
Gabriel Hernández
Thanks! Works!=)
I will save this great website.
Daniel
Works! Thamks for the manual. Google asks to ‘Enable access for less secure apps’ in Gmail, but for testing purposes I see no problem..
deepika
It shows ‘Test message sent’ but I didn’t get any mail.
CarolineElisa
Thanks for this suggestion, but I can only get it to work if I ‘Enable access for less secure apps’ in Gmail, which Google does not recommend. Any other tips?
Marty
Tried this, no luck Any other suggestion? Thanks!
Marty
Hi! Thank you for a great article. I’m trying it all out, but still get an error when sending the test email: SMTP -> ERROR: Failed to connect to server: Operation timed out (60). So I did as suggested, added extension=php_openssl.dll. But nothing seems to work Anyone have another idea? Thanks!
Jesse Brownstein
After sending the test email, the browser loads infinitely without any indication of success/failure. How can I fix?
jam
Thanks very much for sharing your knowledge
Joker
This suggestion should work, But if you got error saying “Failed to connect to server: Unable to find the socket transport “ssl” ” ,
Then Please do the following
1. Edit your php.ini from your installed php folder
2. Search for extension=php_openssl.dll
3. The initial will look like this ;extension=php_openssl.dll
Remove the ‘;’ and it will look like this extension=php_openssl.dll
If you can’t find the extension=php_openssl.dll, add this line extension=php_openssl.dll.
4.Then restart your Xampp or LAMP or APACHE server (depends upon which of these you’re using).
Syed
Nice article. Helped me. Works for me. Thanks.
Komalchand
I used your setting for localhost but it din’t works where it works for my test server. so ur suggestion will be helpful for me. Thanks
Easy
sory if my question sounds sily bt which inbox am I to check?. am on a local machine without an internet service. or do I need internet to receive the mail?
WPBeginner Support
yes you will need an internet connection to receive email.
Admin
Bhargav
I didnt get email. Please help me.
WPBeginner Support
Make sure that you have correctly entered Gmail SMTP settings.
Admin
Cristian Nebunu
This is actually really helpfull. I needed to test some custom features and now i know how.
adolf witzeling
Very helpful. Thanks for sharing.