Having built various websites for years, we realize many website owners don’t know that WordPress doesn’t include custom fields in its search results by default. This can be a major roadblock for visitors trying to find specific information.
If you use custom fields on your site, then including them in your search results can remove a huge obstacle for your visitors and help them find what they’re looking for.
In this article, we’ll show you how to make custom fields searchable in WordPress. SearchWP is our go-to plugin for this, it makes the whole process super simple.

What Are Custom Fields & Why Make Them Searchable?
WordPress automatically adds metadata such as the title, author, date, and time to your content. However, you can store additional information about a page or post using custom meta boxes or custom fields.
A lot of must-have WordPress plugins and themes also use multiple custom fields to store important information. For example, All in One SEO uses custom fields to store SEO data.
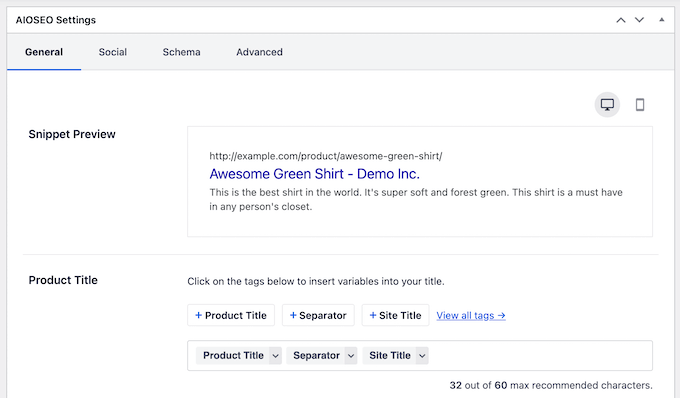
If you are using WooCommerce, then some of your custom product attributes may also be classed as custom fields.
You can also create custom fields with plugins like Advanced Custom Fields, which allows for even more control over how your fields behave.
The problem is that the default search in WordPress ignores these custom fields and only looks for matches in the title and content. By making your custom fields searchable, you can help visitors find pages, posts, products, and other important content.
That said, let’s look at how you can make custom fields searchable in WordPress. You can use the quick links below to navigate through this tutorial:
Step 1: Install and Set Up SearchWP
The easiest way to include custom fields in your search bar is by using the SearchWP plugin. It’s the best WordPress search plugin and allows you to show more helpful and relevant search results by creating a custom search algorithm.

With SearchWP, you can search content that WordPress ignores by default, including custom post types, PDF files, WooCommerce products, categories, and custom fields. This allows you to improve the WordPress search for your users.
You can see our complete SearchWP review for more details.
The first thing you need to do is install and activate the plugin. For more details, see our step-by-step guide on how to install a WordPress plugin.
Upon activation, go to SearchWP » Settings and then click on the ‘General’ tab.
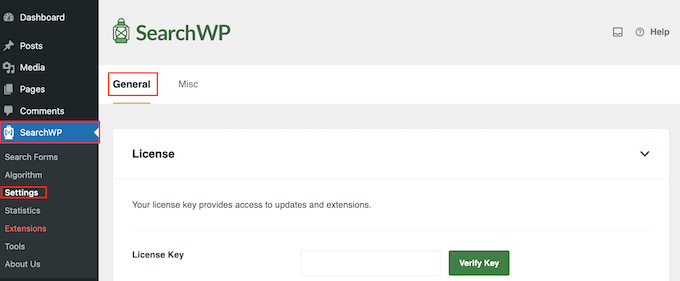
Here, you need to enter your license in the ‘License Key’ box. You can find this information in your account on the SearchWP site. Once you are done, make sure to click the ‘Verify Key’ button.
Step 2: Create a Custom Search Algorithm
After activating the plugin, you can fine-tune how SearchWP indexes, searches, and displays your content. You can think of this as creating a custom Google search engine algorithm that’s just for your WordPress blog or website.
To start, head over to SearchWP » Algorithm.
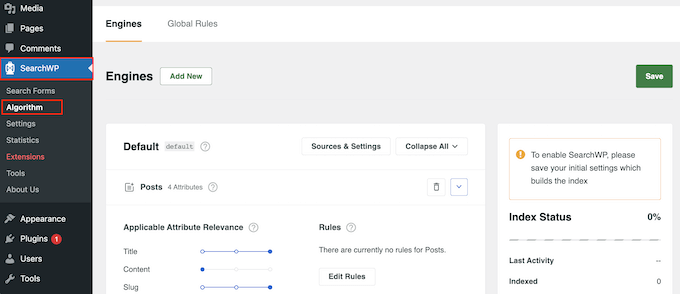
Here, you’ll see a section for the different content types that SearchWP searches by default, such as pages, posts, and media files.
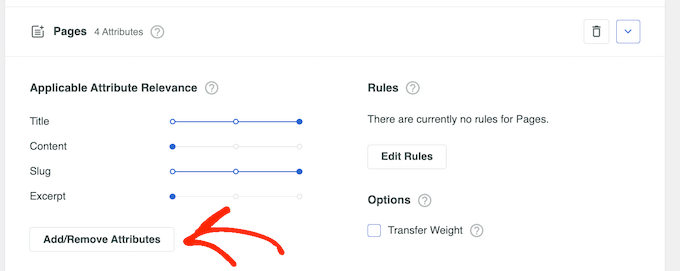
To get started, simply scroll to the content where you want to start searching custom fields. In our images, we’re searching the custom fields attached to Posts, but the steps will be exactly the same for all content types.
In your chosen section, find the ‘Add/Remove Attributes’ button and give it a click.
In the popup that appears, click to open the ‘Custom Fields’ dropdown menu.
To add all custom fields in WordPress to the search algorithm, simply select ‘Any Meta Key.’
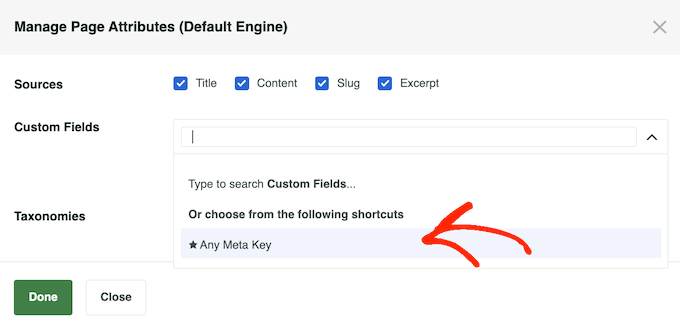
If you want to search specific custom fields only, then start typing their names and then select the right option when it appears. Once you’ve chosen the custom fields that SearchWP should include, click on ‘Done.’
After that, you’ll see a new ‘Custom Fields’ option in this section.
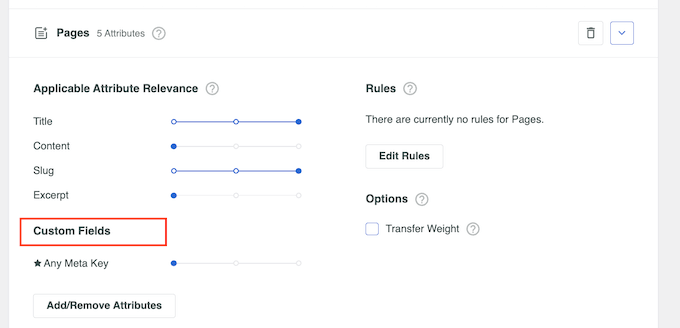
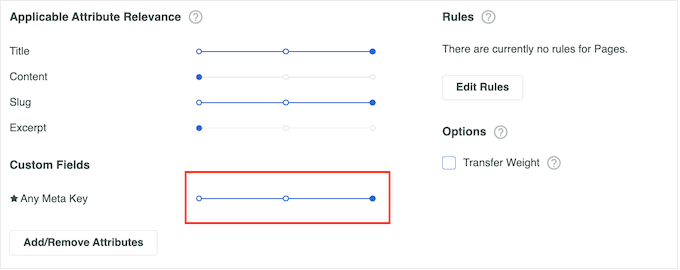
Each custom field has its own Application Attribute Relevance slider, which allows you to control how SearchWP ranks the content on your online marketplace, blog, or website.
For example, if you move a slider to the right, then the custom field will carry more weight. This means it’ll have a bigger impact on where the content appears in the search results.
When you are happy with how the search algorithm is set up, scroll to the top of the screen and click the ‘Save’ button.
SearchWP will now rebuild the index automatically.
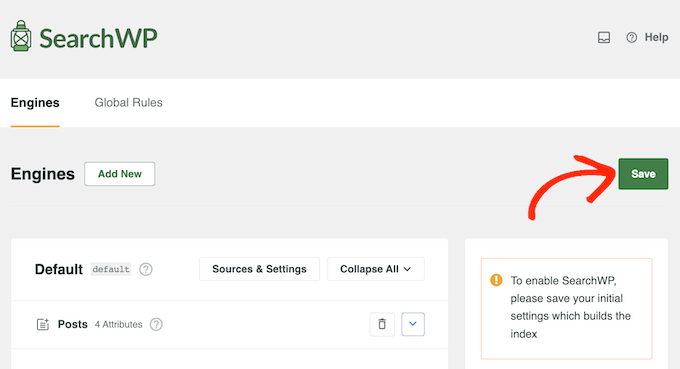
Depending on the speed of your Internet connection and your WordPress hosting provider, this may take a few minutes.
As soon as you see ‘Index Status 100%,’ you’ll know that SearchWP has indexed your PDF metadata, custom fields metadata, images, files, and any other types of metadata that you’ve chosen to include in your website’s search.
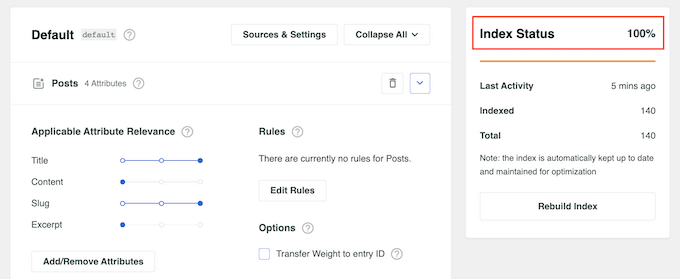
WordPress will now start showing relevant custom fields on its search results page.
Step 3: Create and Embed a Custom Search Form (Optional)
Technically, you only need to follow steps 1 and 2 to make custom fields searchable. However, if you want to take things further, then we suggest creating a custom search form for your WordPress website.
With a custom search form, you can tailor your WordPress search experience to your users’ needs. For example, maybe they prefer having some handy filters to narrow down their search so that they can find what they’re looking for faster.

If you want to learn more, you can read our step-by-step guide on how to create a custom search form in WordPress.
Or, check out our article on how to let users search by category in WordPress to allow visitors to filter their searches using a category dropdown menu.
If you work with custom post types, then we suggest taking a look at our guide on how to create an advanced search form for custom post types.
Learn More Ways to Improve WordPress Search with SearchWP
Making custom fields searchable is a great start. But there are more ways to improve the built-in WordPress search with SearchWP. This will make it even easier for visitors to find what they’re looking for.
To do that, go to SearchWP » Settings and scroll to the ‘General Settings’ section.
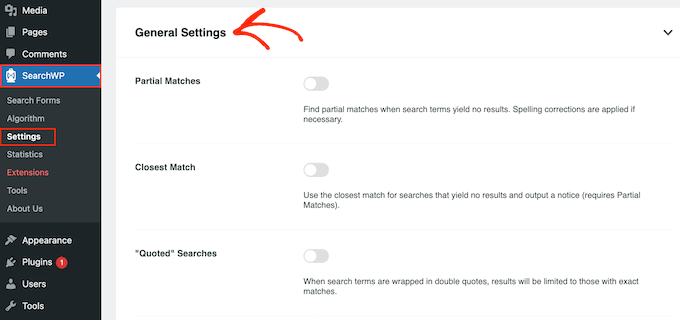
Here, you can activate any of the following settings:
- Partial matches. With this setting enabled, SearchWP will display results that aren’t an exact match for the visitor’s search query. You can learn more about it in our tutorial on how to add fuzzy search in WordPress.
- Closest match. After enabling partial matches, you can also show the closest matches when a search has no results.
- “Quoted” searches. This allows visitors to search for exact phrases using quotes.
- Highlight terms. Automatically highlights the search terms to help visitors find what they’re looking for.
To help you fine-tune your website’s search, it’s a good idea to monitor how visitors are using the search feature.
This allows you to see what’s working and what’s not working on your WordPress blog, so you can constantly improve your site’s search and help visitors find what they are looking for.
To see the search history and most popular search terms, simply select ‘Statistics’ in the left-hand menu.
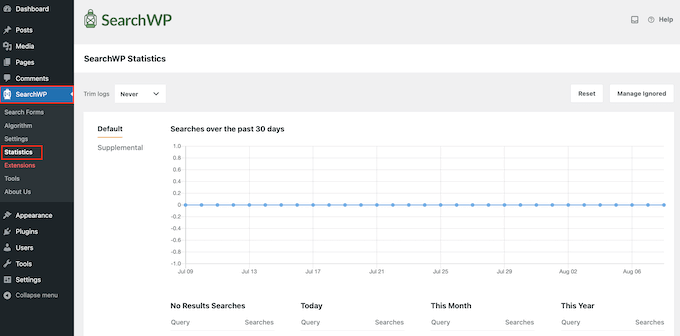
SearchWP will show detailed information from the past 30 days, the last year, or the entire history of your site. This data can even help you generate blog post ideas by showing the topics that visitors are most interested in.
We hope this article helped you learn how to make WordPress custom fields searchable You may also want to look at our guide on how to exclude specific pages, authors, and more from WordPress search and our expert picks of the most popular WordPress themes.
If you liked this article, then please subscribe to our YouTube Channel for WordPress video tutorials. You can also find us on Twitter and Facebook.


Nikita
Very informative post. Thanks for sharing post !
WPBeginner Support
Glad our guide was helpful
Admin
Usama Sajjad
Thanks, you are such a great team.
WPBeginner Support
Glad you enjoy our content
Admin