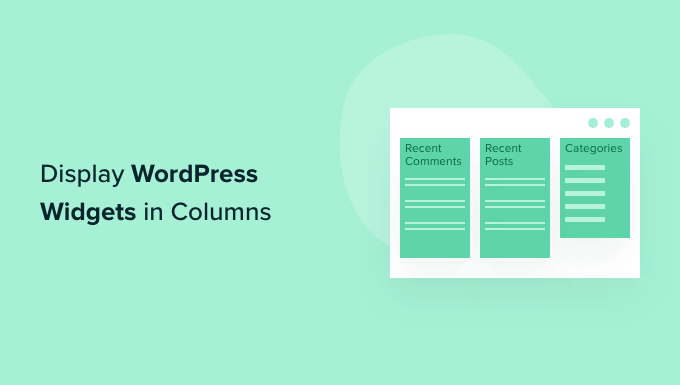
Widgets allow you to add dynamic content to areas you can’t edit using the standard WordPress content editor. People often add widgets to the sidebar, but you can show them in other areas in multiple columns.
This approach allows you to organize and present content more effectively, making your website visually appealing and easier to navigate.
At WPBeginner, we have used our website footer to improve the user experience and drive engagement. By thoughtfully arranging multiple widgets in columns, we can showcase our brands, provide easy access to free tools, give links to important resources, and encourage further exploration of our website.
In this article, we will show you how to easily display WordPress widgets in columns.
Why Display WordPress Widgets in Columns?
Widgets are a great way to add image galleries, social media feeds, calendars, random quotes, popular posts, and other dynamic content to your WordPress website.
However, if you add lots of widgets, then it can start to look confusing and cluttered.
If this happens, then we recommend organizing your widgets into columns. This allows you to show lots of content in a structured way. You can even add subheadings to the columns to help visitors find what they are looking for faster.
With that in mind, let’s see how you can display widgets in columns. Simply use the quick links below to jump straight to the method you want to use:
Method 1: Check Your WordPress Theme for a Widget-Ready Footer
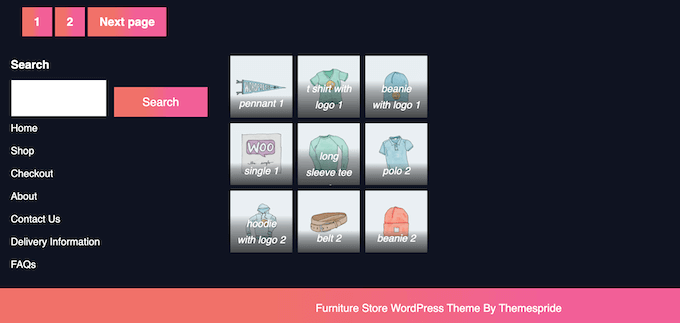
Some WordPress themes have multiple widget-ready areas in the footer. In this case, each area will appear as a separate column.
This is perfect if you want to list information or links in your website’s footer. For example, you might show your contact information, a list of all the products on your WooCommerce store, or your website’s most important links.
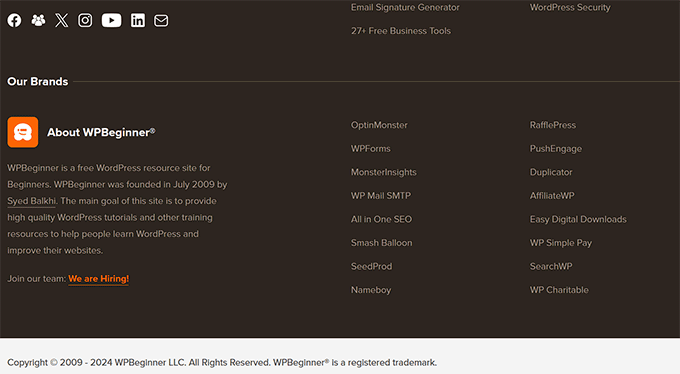
For more ideas, please see our checklist of things to add to the WordPress footer area.
To check if your theme has multiple widget-ready areas in the footer, go to Appearance » Widgets in the WordPress dashboard.
Here, look for any areas labeled ‘Footer’ or similar.
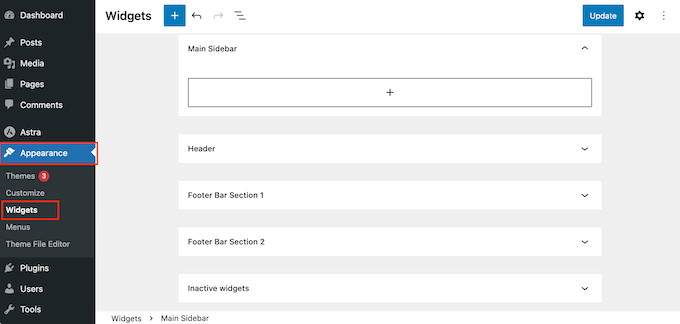
The theme above has two widget-ready areas, so we can use them to display widgets in columns.
Simply click to expand any of these areas and start adding the widgets that you want to display. For more detailed instructions, please see our guide on how to add and use widgets in WordPress.
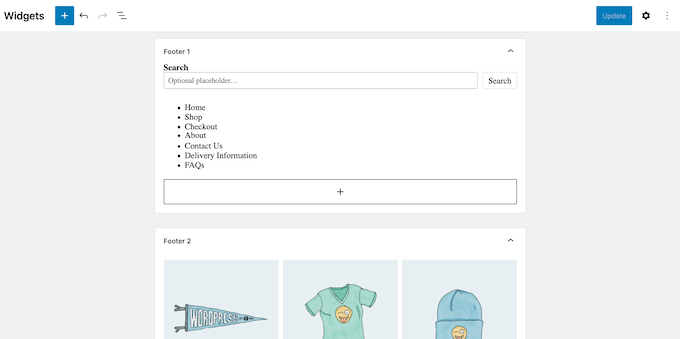
With that done, click to expand the next widget-ready footer area, and then add the widgets you want to show in that column.
Simply repeat these steps for each footer area.
When you’ve finished adding widgets, don’t forget to click on the ‘Update’ button to save your changes. You can now visit your WordPress website and scroll to the footer to see your widgets organized into columns.
Method 2: Use the Page and Post Editor (Works With All Themes)
Another option is to use the default WordPress block editor to add columns to your pages and posts. This allows you to control exactly where widgets appear on your site, including inside the post content.
It’s also a good option if you want to show unique widgets on every page.
However, you will need to add the widgets to each page and post manually. That said, this method can take a long time, especially if you want to show the same widgets on every page.
To use this method, open the page or post where you want to add widgets in columns. Then, click on the ‘+’ button and type in ‘Columns.’
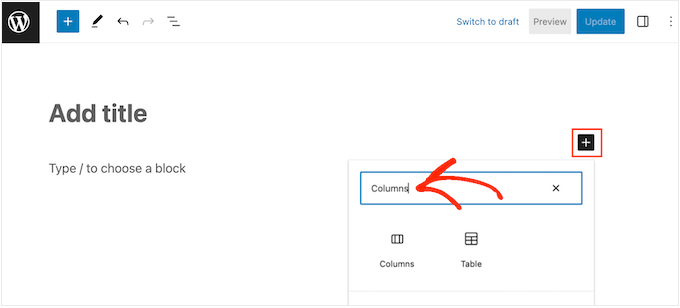
When the right block appears, drag and drop it onto your layout.
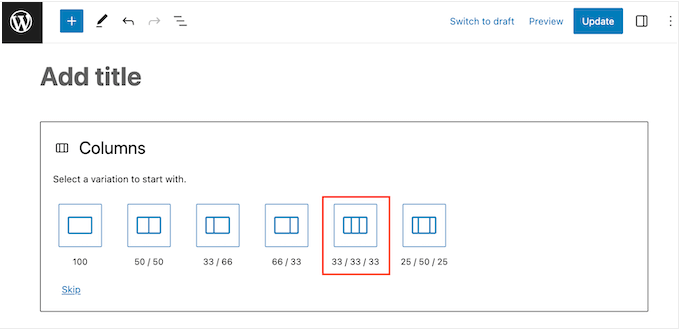
You can now choose the number of columns you want to display and how much space each column should occupy.
For example, in the following image, we are creating three columns that each take up 33% of the available space.
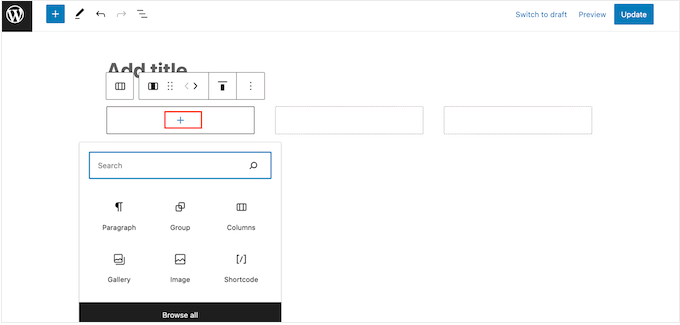
With that done, click on the ‘+’ icon in the first column.
In the popup that appears, select the widget that you want to add to this column.
You can customize the widget using the settings in the right-hand menu. For example, you might change the background color, add links, or change the font size.
You can also use blocks to create subheadings, lists, and other content. This can add some extra structure and context to your widgets.
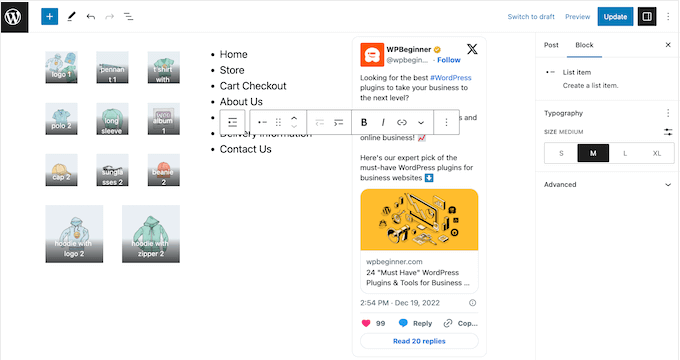
Simply repeat these steps to add more widgets to the columns.
When you are happy with how the columns are set up, either click on ‘Update’ or ‘Publish’ to make the columns and widgets live.
Method 3: Create a Custom WordPress Theme (Fully Customizable)
While it’s possible to organize and display widgets in multiple columns using the built-in WordPress tools, sometimes you may need more control over the layout.
You might also want to add columns to beautiful landing pages or sales pages that have a completely custom design.
In that case, we recommend using SeedProd.
SeedProd is the best WordPress page builder plugin on the market and allows you to design your theme without writing a single line of code. This means you can add as many columns and widgets as you want to any area of your website.

SeedProd also has a growing library of professional template site kits that you can add to your site with a single click.
First, you need to install and activate the SeedProd plugin. For more details, see our step-by-step guide on how to install a WordPress plugin.
Note: There’s a free version of SeedProd that allows you to create custom pages, including maintenance and coming soon pages, no matter what your budget. However, in this guide, we will be using the premium plugin as it comes with the theme builder. Just be aware that you’ll need the SeedProd Pro or higher plan to use the theme builder.
Upon activation, head over to SeedProd » Settings and enter your license key.
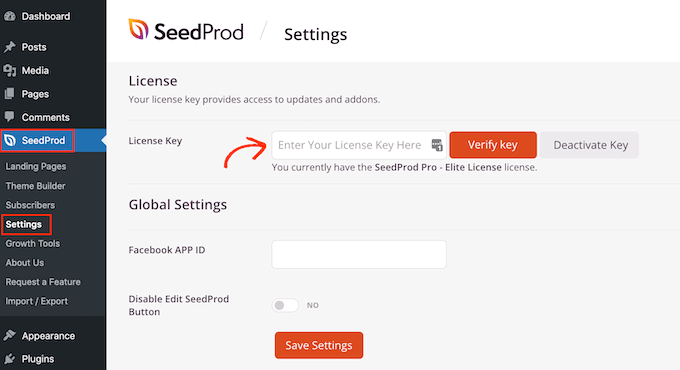
You can find this information in your account on the SeedProd website. After that, click the ‘Verify Key’ button.
With that done, head over to the SeedProd » Theme Builder page and click on the ‘Theme Template Kits’ button.
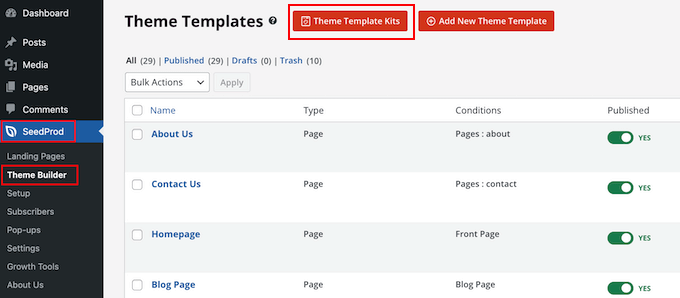
You’ll now see SeedProd’s website kit library.
To take a closer look at any template, simply hover your mouse over it and then click on the magnifying glass icon when it appears.
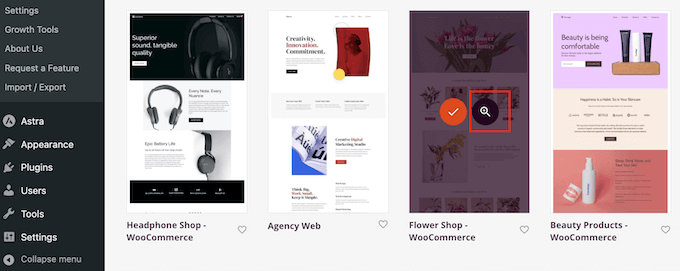
This opens the template kit in a new tab.
Since it’s a complete website kit, you can see more pages and designs by clicking on the different links, buttons, and menu items.
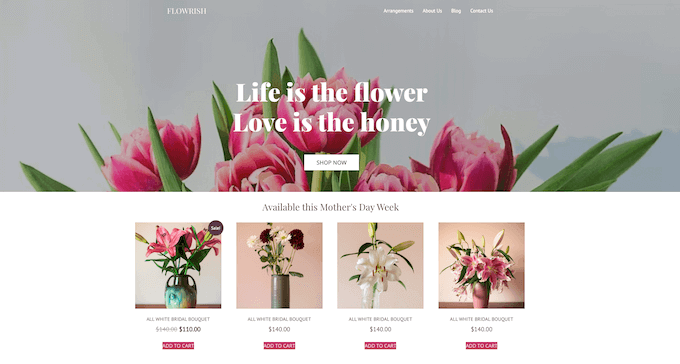
SeedProd has template kits for different industries and niches like restaurant websites, travel blogs, marketing consultancies, and more.
When you find a template kit you want to use, simply hover over it and then click on the checkmark icon when it appears.
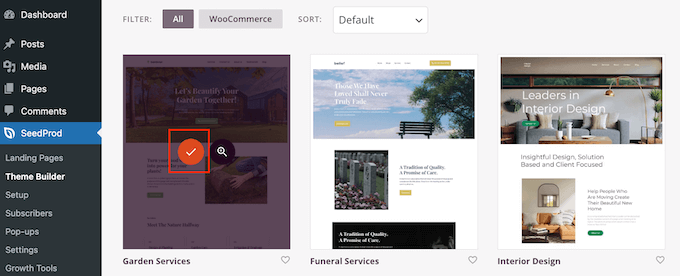
SeedProd will now add all the different templates to the WordPress dashboard.
To take a closer look, go to SeedProd » Theme Builder. You may see slightly different options depending on the kit you are using.
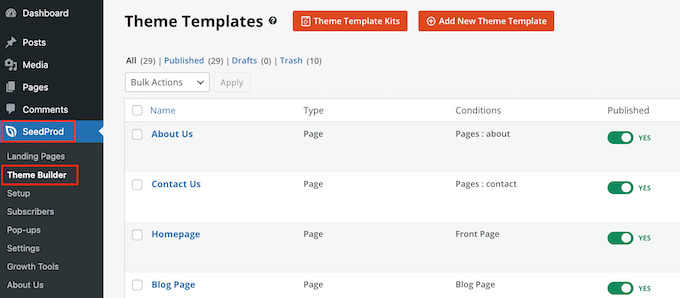
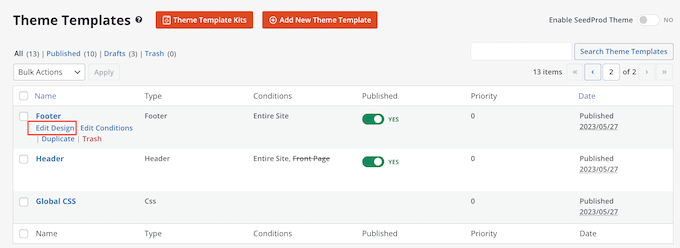
Simply hover over the template where you want to add the widget columns, and then click on the ‘Edit Design’ link.
For example, if you wanted to display widget columns in the footer area, then you would need to edit the Footer template.
This loads the SeedProd editor with the template to the right of the screen.
On the left-hand side, you’ll see a menu with different options.
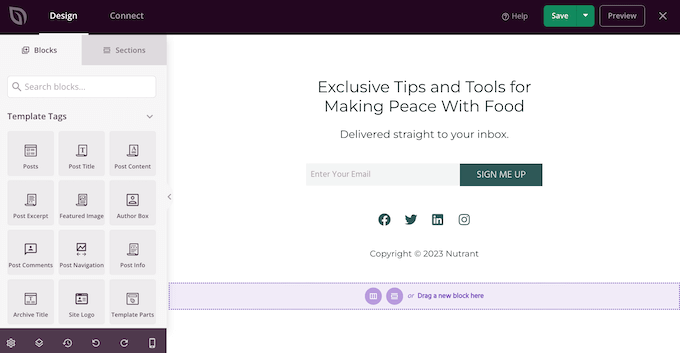
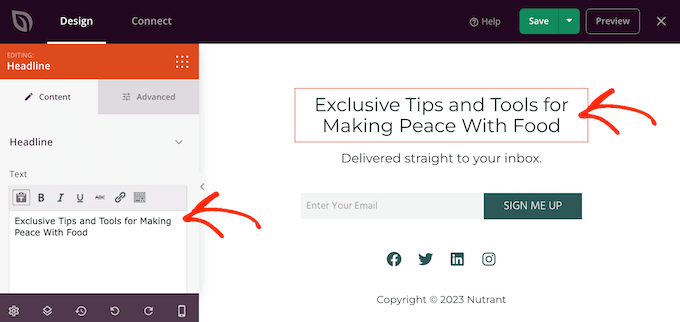
Most kits already come with built-in blocks. To customize a block, just click to select it in the page preview and then make any changes in the left-hand menu.
For example, if you wanted to replace some placeholder, then you’d need to select the Text or Headline block and then type into the small text editor.
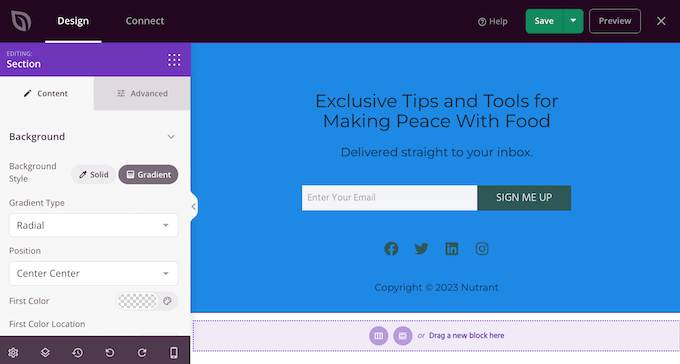
You can also completely change how the kit looks using the settings in the left-hand menu, including changing the color scheme, font choice, link color, buttons, and more.
Most of these settings are fairly self-explanatory, so it is worth selecting different blocks in your layout and then looking through the settings.
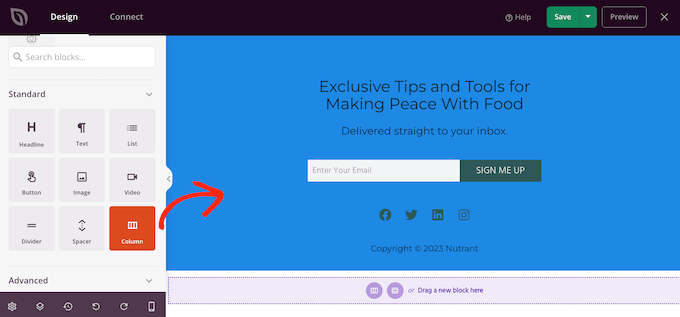
To create your columns, scroll to the ‘Standard’ section in the left-hand menu.
Here, find the ‘Column’ block and drag and drop it onto the area where you want to arrange widgets into columns.
You can now choose how many columns you want to create and the amount of space each column should take up.
To do this, simply click on the layout that you want to use.
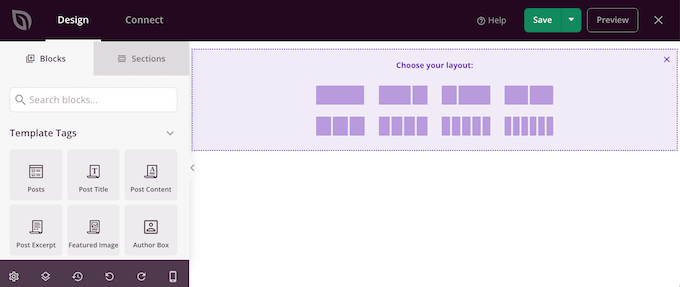
You can now start adding widgets to your columns.
In the left-hand menu, find each widget and then drag it onto the column where you want to show that widget.
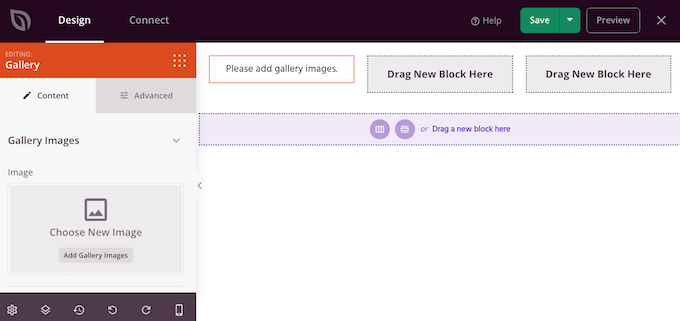
After adding a widget, click to select it in the live preview.
You can then use the settings in the left-hand menu to customize that widget. To see even more customization settings, click on the ‘Advanced’ tab.
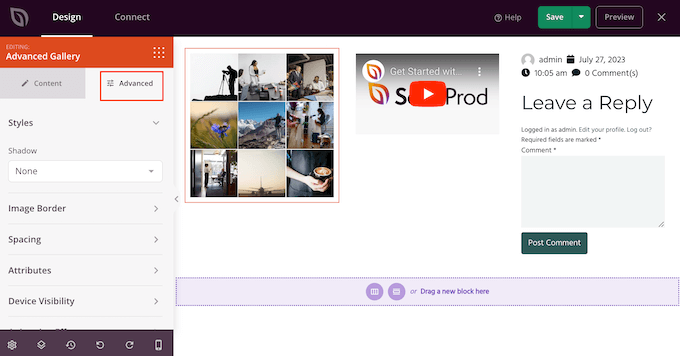
Here, you can add CSS animations, change the spacing, add a border, and more.
Simply repeat these steps to add more widgets to your columns. When you are happy with how the page looks, click on the ‘Save’ button to store your changes.
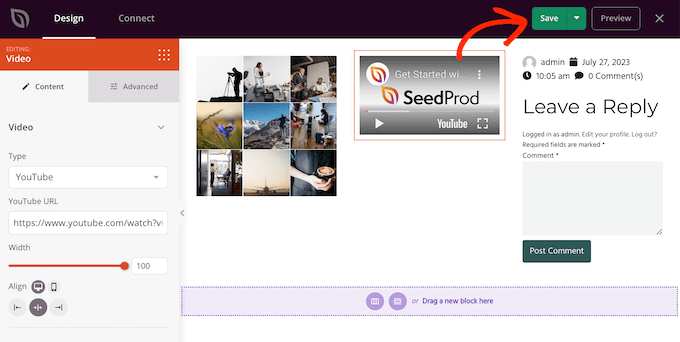
You can now continue editing the rest of your WordPress theme. For more details, see our complete guide on how to create a custom WordPress theme for beginners.
When you are happy with how the templates are set up, it’s time to make the kit live.
In the WordPress dashboard, go to SeedProd » Theme Builder and click on the ‘Enable SeedProd Theme’ toggle so that it shows ‘Yes.’

You can now visit your WordPress blog or website to see the new custom theme in action.
Method 4: Use the Full-Site Editor (Block-Based Themes Only)
If you are using a block-enabled WordPress theme, then you can add columns to any area of your website using the full-site editor.
You can even edit areas that you can’t change using the standard WordPress content editor. For example, you can add widgets and columns to your site’s 404 page template.
To get started, head over to Appearance » Editor in the WordPress dashboard.
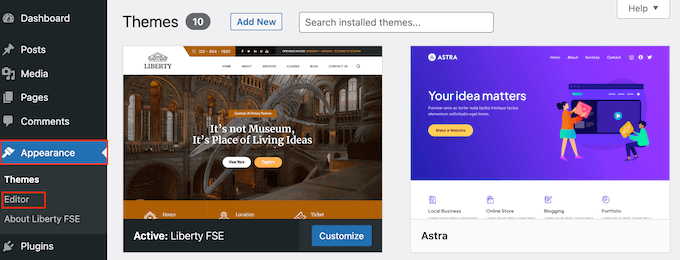
By default, the full site editor shows your theme’s home template, but you can add columns and widgets to any area.
To see all the available options, just select either ‘Templates’ or ‘Template Parts’.
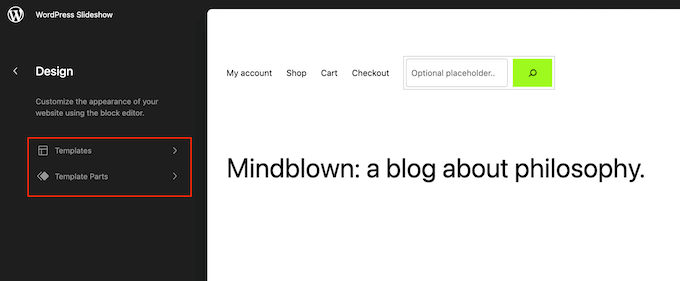
You can now click on the template or template part that you want to edit.
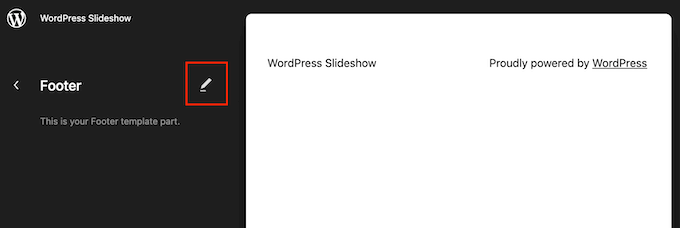
WordPress will now show a preview of the design. To go ahead and edit this template, click on the small pencil icon.
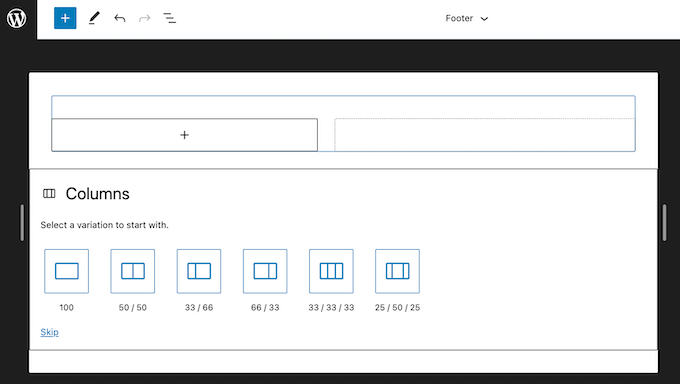
With that done, click on the blue ‘+’ icon and type in ‘Columns.’
When the right block shows up, drag and drop it onto your page design.

You can now choose the layout that you want to use.
For example, in our images, we are using the 33/33/33 layout, which creates three columns that each take up 33% of the available width.
With that done, click on the blue ‘+’ icon and then find the first widget you want to use.
You can then simply drag and drop this widget onto the column where you want to show it.
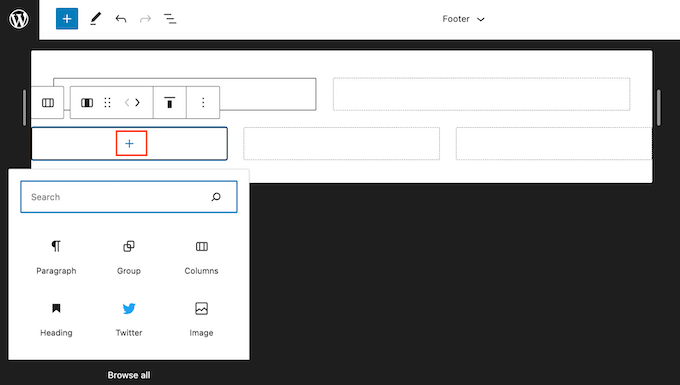
If you need to, then you can fine-tune each block using the settings in the right-hand menu.
Simply repeat these steps to add more widgets to your columns.
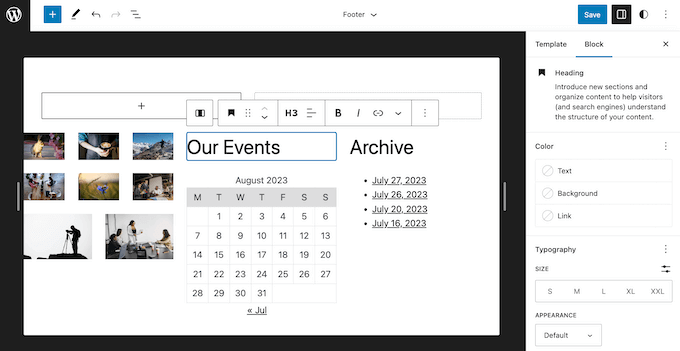
When you are happy with the changes, go ahead and click on ‘Save’ to make them live. Now, if you visit your WordPress website, you’ll see the new widgets and columns in action.
Bonus: Display WordPress Photos in Columns
If you have a photography site, then you may also want to show all your photographs in neat columns and rows.
To do this, you can use Envira Gallery, which is the best WordPress gallery plugin on the market. It allows you to create an attractive gallery where all the images are organized in rows and columns to look visually appealing.
Plus, it offers other features like lightbox popups, watermarks, alt-image text, and more.
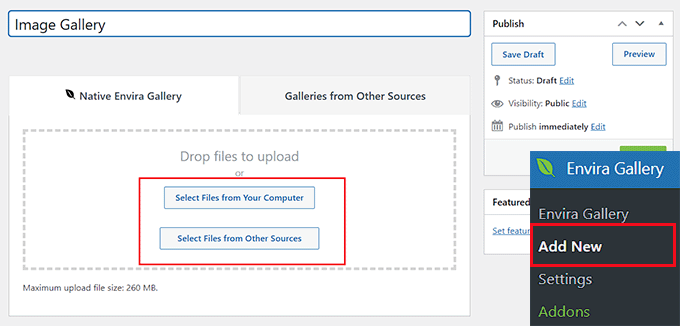
Upon plugin activation, simply visit the Envira Gallery » Add New page and click the ‘Select files from other sources’ button to upload all your images from the media library.
Once you do that, scroll down to the ‘Currently in your Gallery’ section and switch to the ‘Configuration’ tab.
Here, you can choose different layouts and the number of columns for your gallery images according to your liking.
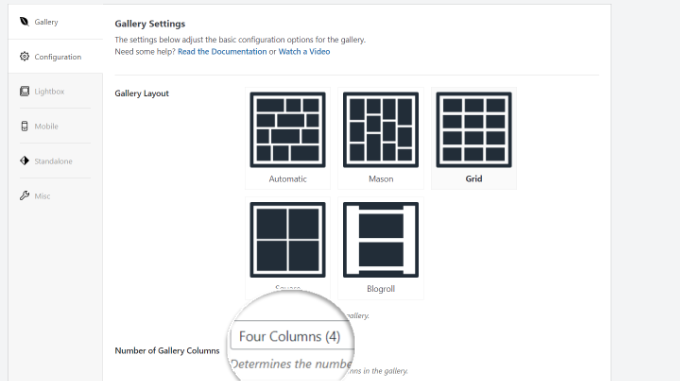
Once you are done, click the ‘Publish’ button at the top to store your settings. Next, you must open the post where you want to add your images in rows and columns and click the ‘Add Block’ (+) button.
This will open the block menu. Now, simply drag and drop the Envira Gallery block and then choose the image gallery you created from the dropdown menu within the block.
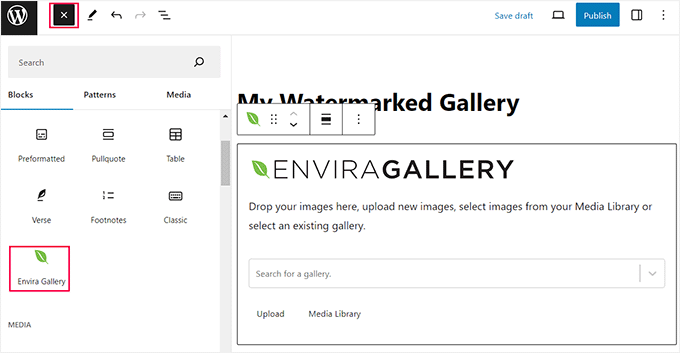
Finally, click the ‘Update’ or ‘Publish’ button to store your settings. You can now visit your WordPress site to view the images in rows and columns.
For more information, please see our tutorial on how to display WordPress photos in columns and rows.
We hope this article helped you learn how to display WordPress widgets in columns. You may also want to see our guide on how to display your top commenters in the WordPress sidebar or our expert picks of the best Gutenberg friendly themes for WordPress.
If you liked this article, then please subscribe to our YouTube Channel for WordPress video tutorials. You can also find us on Twitter and Facebook.


Atiqullah Sadeqi
Hi,
I need a widget to be able accept other widgets inside it self. Like creating a row and inside of the row we should put other widgets. it can be done?
WPBeginner Support
It would depend on your specific widgets but it sounds like you want to use a text widget.
Admin
Nauman Khan
The recommended plugin has not been updated in 5 years, any good alternative?
WPBeginner Support
Not at the moment, we will certainly keep a look out for alternatives.
Admin
andrew
wordpress now warns the following: “This plugin hasn’t been updated in over 2 years. It may no longer be maintained or supported and may have compatibility issues when used with more recent versions of WordPress.”
any alternatives?
Raymond
Hi… This plugin is really awesome. However…I wonder if there’s a way to make this plugin responsive because if I shrink my browser to Iphone size, the columns wont rearrange to fit the small screen
WPBeginner Staff
That’s up to you and how you feel that it would work for your site’s layout.
Robert Andrews
So can they be placed at the bottom of a post column, or do they have to stay in a sidebar?