You’ve just organized an amazing event calendar on Facebook, but your WordPress site visitors are missing out. Frustrating, right?
Thankfully, integrating your Facebook Events directly into your WordPress site is easier than you think. And it’s the key to keeping your audience engaged without doubling your workload.
In this guide, we will show you how to seamlessly embed your Facebook Events calendar into your WordPress site.
Why Add a Facebook Events Calendar on Your Website?
A calendar makes it easy for people to learn about your upcoming events, webinars, virtual retreats, online sermons, coaching calls, and more.
Facebook has a built-in events calendar that you can use to promote both in-person and online events to your social media followers. However, people won’t see this schedule if they only visit your WordPress website.
With that in mind, it’s a good idea to add a Facebook calendar to WordPress so that more people can see your upcoming events. These people may even visit your Facebook page and mark themselves as interested in the event or start following you on Facebook.
You can add events to your website using a WordPress calendar plugin. However, adding each event manually can take a lot of time.
If you already use the Facebook events calendar, then it’s much easier to add a social media feed to your WordPress website.
This feed will then automatically pull events from Facebook, saving you a ton of time and effort. It also means visitors will always see your latest events, keeping your website fresh and interesting.
With that being said, let’s see how you can add a Facebook event calendar in WordPress. You can use these quick links to navigate through the steps:
Step 1: Add a Facebook Event Plugin in WordPress
The easiest way to embed a Facebook event calendar in WordPress is by using the Custom Facebook Feed Pro plugin.
Smash Balloon is the best social media feed plugin on the market. It lets you easily display your Facebook page reviews, albums, videos, and more on your WordPress website.
Note: Even though there is a free version of Smash Balloon, we will be using the Pro version as it allows you to embed Facebook events, not just status posts.
First, you need to install and activate the Custom Facebook Feed Pro plugin. For more details, see our step-by-step guide on how to install a WordPress plugin.
Upon activation, head over to Facebook Feed » Settings and enter your license key into the ‘License Key’ field.
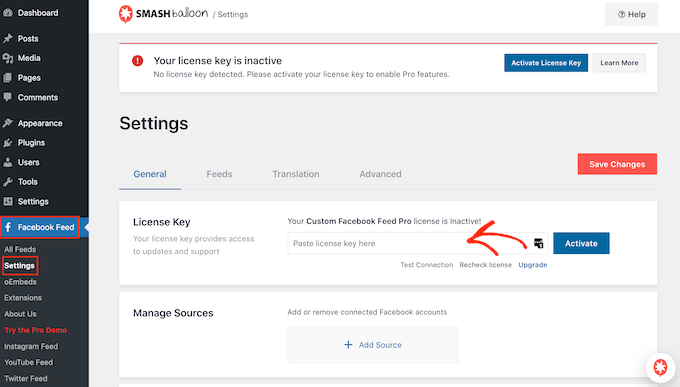
You will find this information in your account on the Smash Balloon website.
After entering the key, simply click on ‘Activate.’
Step 2: Connect Facebook to WordPress and Create an Events Access Token
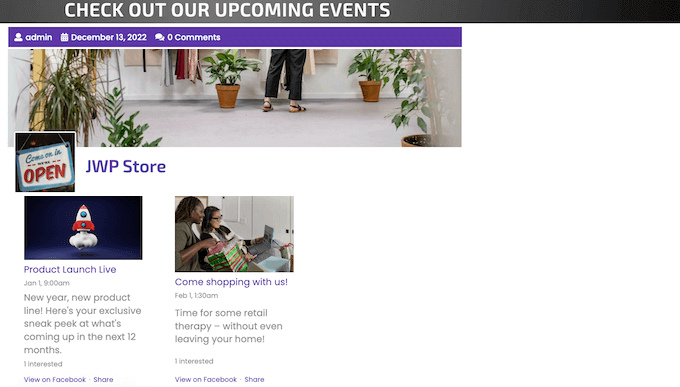
Smash Balloon Custom Facebook Feed allows you to embed events from your Facebook page. You can even display the events in a lightbox popup so that visitors can scroll through your entire schedule.
The first step is connecting your Facebook page to WordPress, so go to Facebook Feed » All Feeds and then click on the ‘Add New’ button.
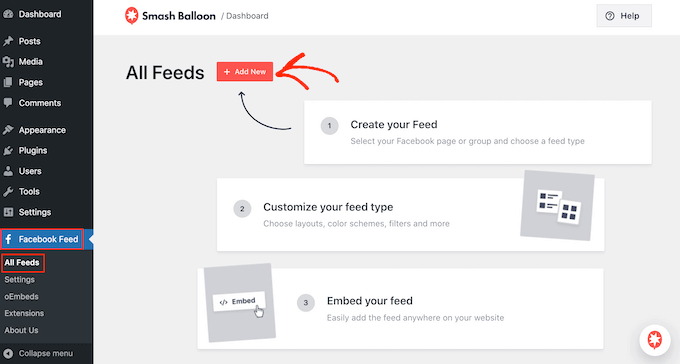
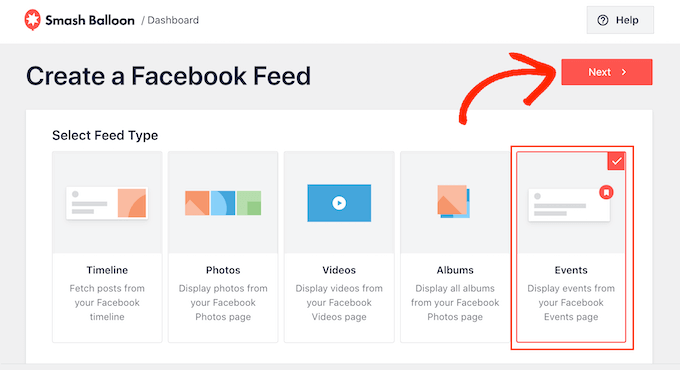
On the next screen, you can see that Smash Balloon lets you embed Facebook videos in WordPress, show statuses, community posts, and more.
To add a Facebook event calendar in WordPress, select ‘Events’ and then click on ‘Next.’
Now, you need to select the Facebook page where you will get the event calendar from.
To do that, click on the ‘Add New’ button.
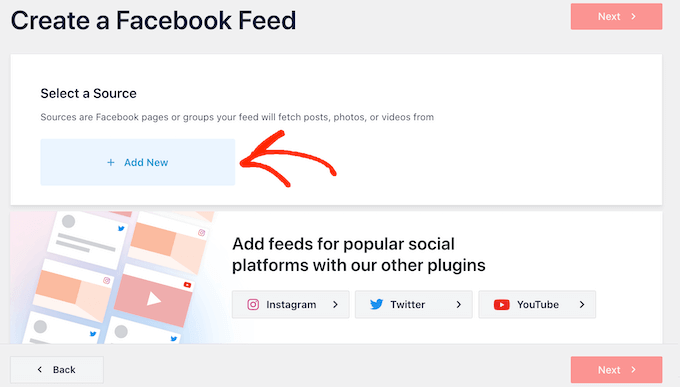
Due to how Facebook is set up, you will see a popup asking you to create an app and then enter a Page ID and Event Access Token. Let’s do this now.
In a new tab, go to the Facebook Developers page.
In the toolbar, click on ‘Log In’ and then enter the username and password for your personal Facebook account.
If this is your first time signing in to the Facebook Developer site, then click on ‘Get Started’ and then follow the onscreen instructions to create a free account.
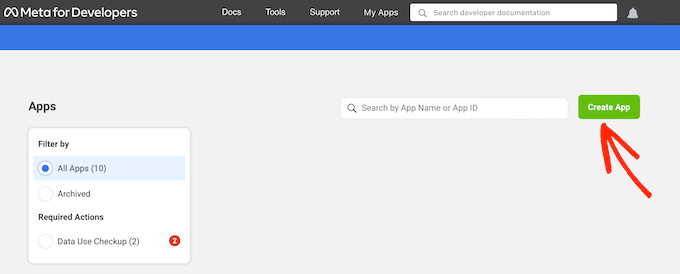
Once you are logged into the Facebook Developers dashboard, go ahead and click on the ‘Create App’ button.
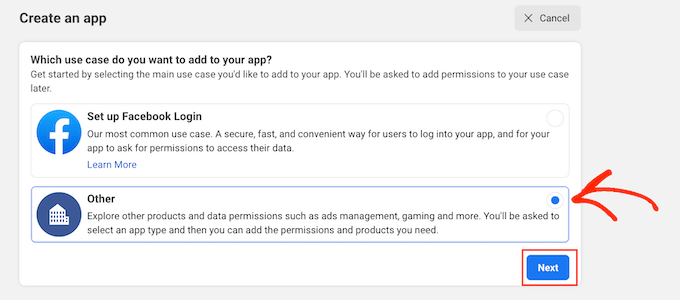
On the next screen, you will need to select your app’s main use case.
‘Set up Facebook login’ is useful if you want to add social logins to WordPress. However, since you are adding an events calendar to WordPress, you will need to select ‘Other’ and then click on the ‘Next’ button.
Now, you will see all the different apps that you can create for your Facebook page.
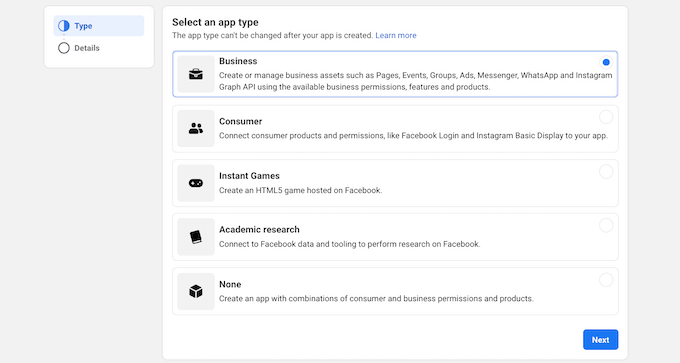
To embed Facebook events, you will need to select ‘Business’ and then click on ‘Next.’
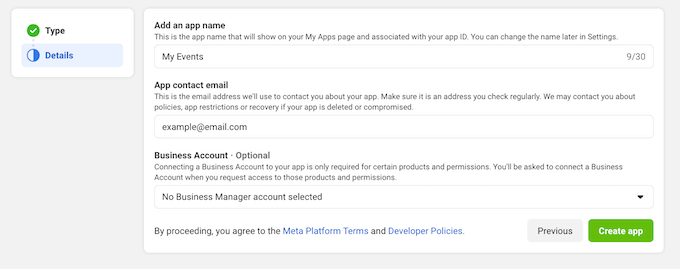
On the next screen, give your app a name. This is just for your reference, so you can use anything you want.
Here, you can also type in your email address and add an optional Business Account. When you are happy with the information you have entered, just click on ‘Create app.’
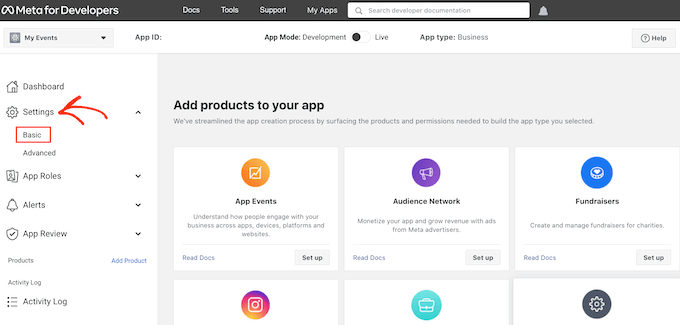
After a few moments, you will see the dashboard for your new Facebook app.
In the left-hand menu, click on ‘Settings’ and then select ‘Basic.’
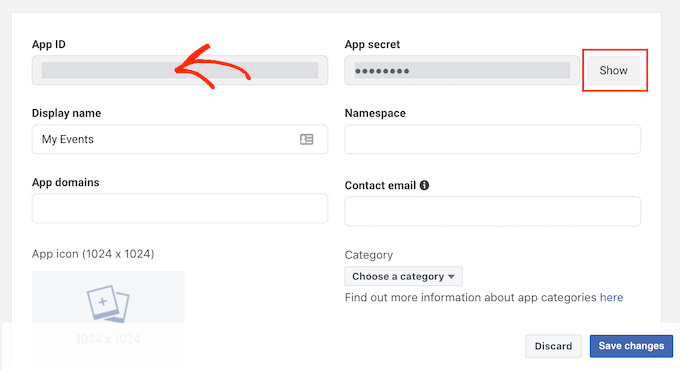
The dashboard shows the App ID by default.
To see the App Secret, click on the ‘Show’ button.
In a new tab, head over to the official Smash Balloon documentation.
Now, find step 3 and copy the App ID and App Secret into the fields.

In another new tab, head over to the Facebook Graph API Explorer.
In the ‘Meta App’ dropdown, select the Facebook app we created earlier and then click on ‘Add a Permission.’
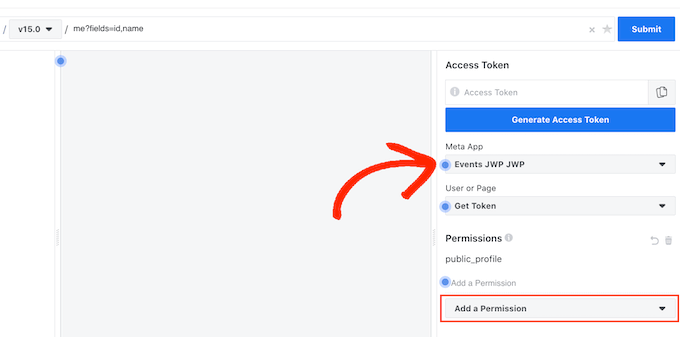
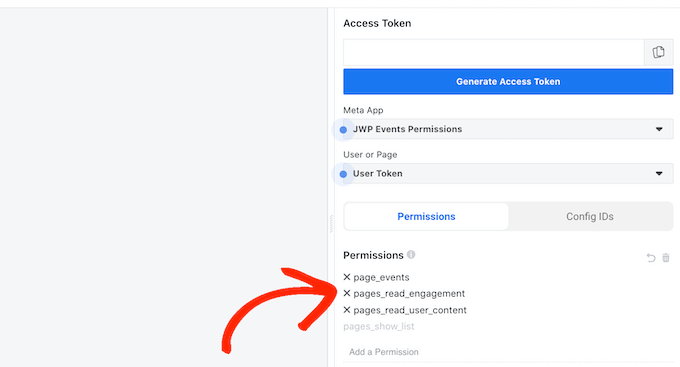
In the dropdown menu that appears, you need to click on ‘Events Groups Pages.’ Then, select all of the following permissions: page_events, pages_read_engagement, pages_read_user_content.
After adding these permissions, click on ‘Generate Access Token.’
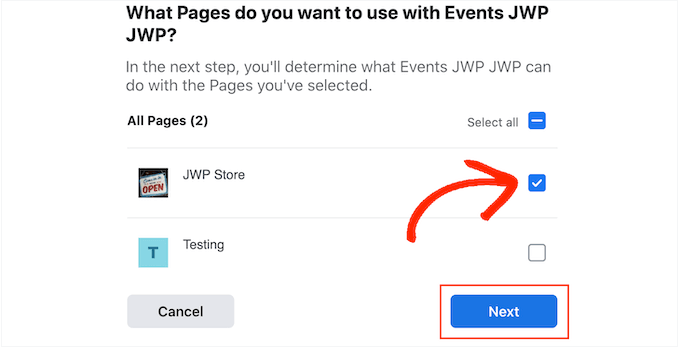
In the popup that appears, check the box next to the Facebook page where you want to get events from.
Then, click on the ‘Next’ button.
Now, Facebook will show all the information that Smash Balloon will have access to and the actions it can perform.
To restrict Smash Balloon’s access to your Facebook page, simply click to disable any of the switches. Just be aware that this may affect the events that you can embed on your WordPress blog or website, so we recommend leaving all the switches enabled.
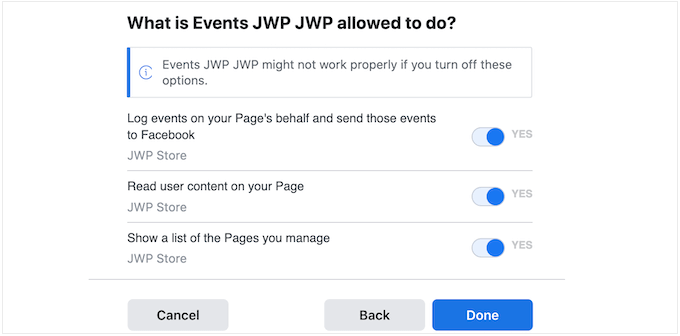
When you are happy with how the permissions are set up, click on ‘Done.’
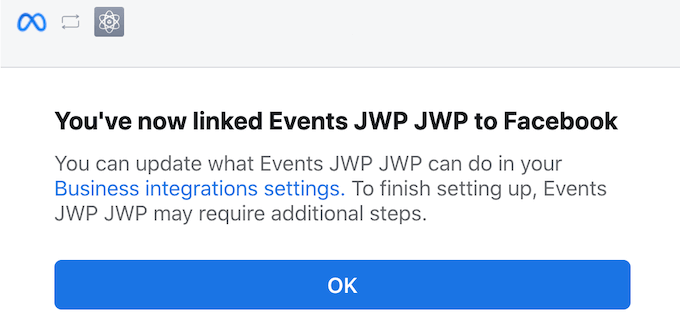
After a few moments, you should see a message confirming that you have connected your WordPress website to Facebook. With that done, you are ready to click on ‘OK.’
Back in the Graph API Explorer dashboard, you will see a temporary access token, which is valid for around 1 hour.
To turn this into a permanent access token, switch back to the Smash Balloon documentation and scroll to step 13. You can now paste the temporary token into this field and click on ‘Extend my token.’

Smash Balloon will now create a permanent page access token.
Copy this value and switch back to your WordPress dashboard. You can now paste the token into the ‘Event Access Token’ field.
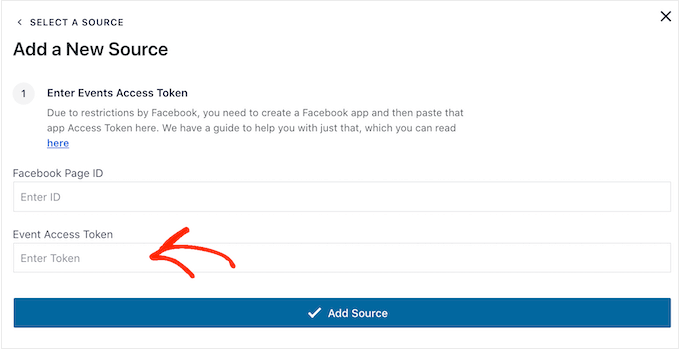
Finally, we need the ID of your Facebook page.
You can simply visit your page in a new tab and take a look at the address bar. The page ID is the value after id=. For example, in the following image, the page ID is 10006740374000.
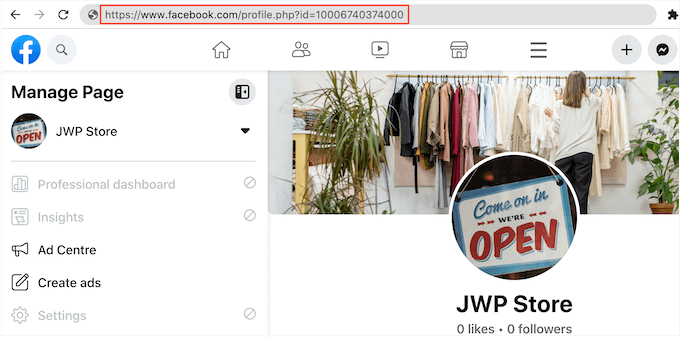
Copy this value and then switch back to the WordPress dashboard.
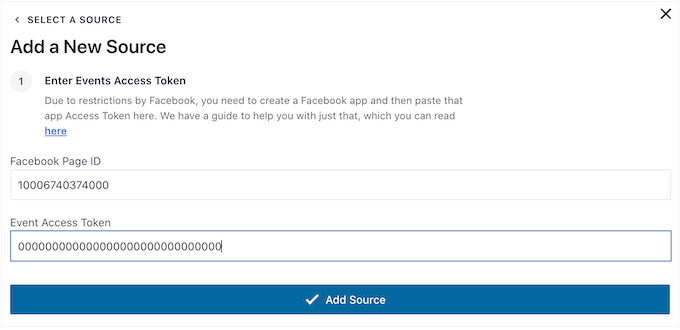
You can now paste the ID into the ‘Facebook Page ID’ field and then click on ‘Add Source.’
On the next screen, choose the template that you want to use for the event calendar.
All of Smash Balloon’s templates are fully customizable, so you can fine-tune the design depending on how you want to display your custom Facebook feed in WordPress.
We are using the ‘Default’ template, but you can use any template you want. After making your selection, click on ‘Next.’
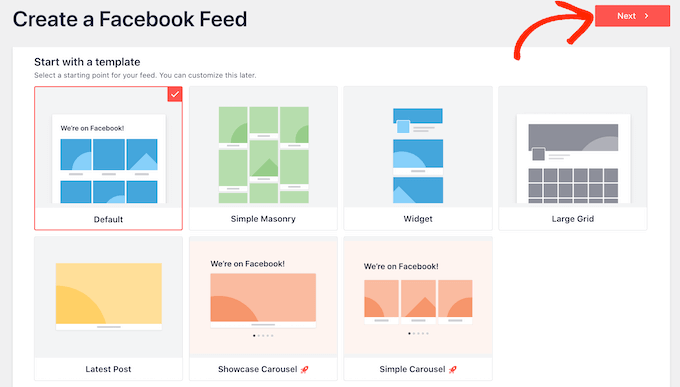
Smash Balloon will now create a feed based on your Facebook page and template. This is a good start, but you may want to fine-tune how the events appear on your site.
Step 3: Customize Your Embedded Facebook Events Calendar
After creating your feed, you will be taken to the Smash Balloon editor automatically.
On the right-hand side, you will see a preview of your Facebook events calendar. On the left-hand side, you will see all the different settings you can use to customize how the events appear on your site.
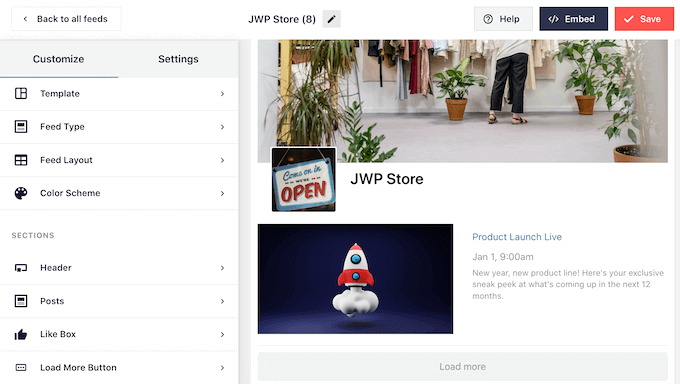
Most of these settings are self-explanatory, but we will quickly cover some key areas.
If you want to change the template you are using, just click on ‘Template.’ Then, press the ‘Change’ button to choose a new template.
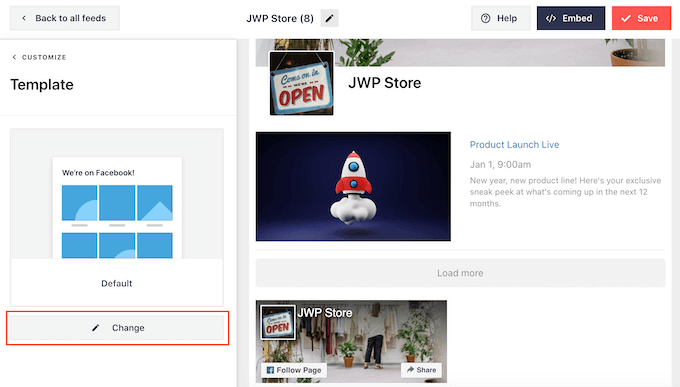
When you are finished with these settings, you can click on the ‘Customize’ link to return to the main Smash Balloon editor.
Next, we want to look at the ‘Feed Layout’ settings.
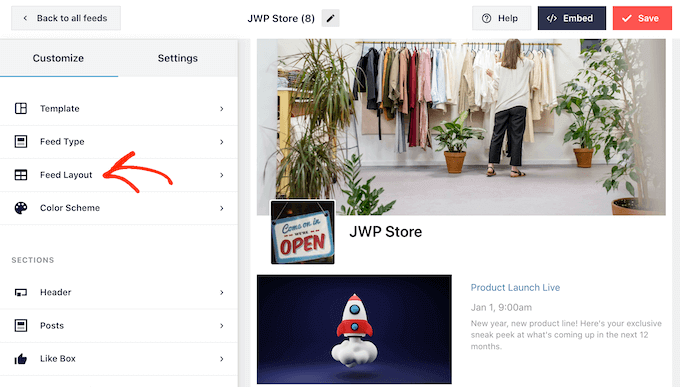
On this screen, you can switch between masonry and list layouts and change the feed height.
As you make changes, the preview will update automatically, so you can try different settings until you are happy with how the Facebook event calendar looks.
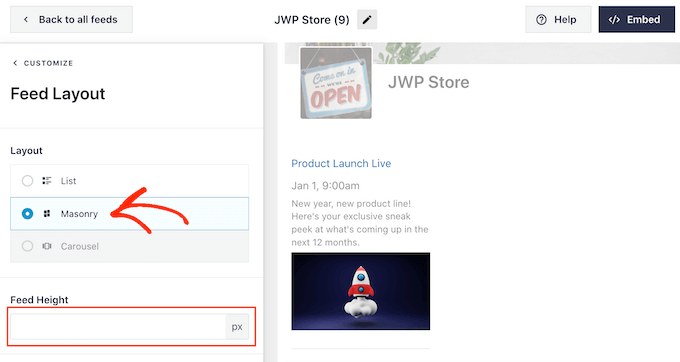
By default, Smash Balloon will show a different number of Facebook events on desktop computers and mobile devices.
You can preview how your event calendar will look on desktop computers, tablets, and smartphones using the row of buttons in the upper-right corner.
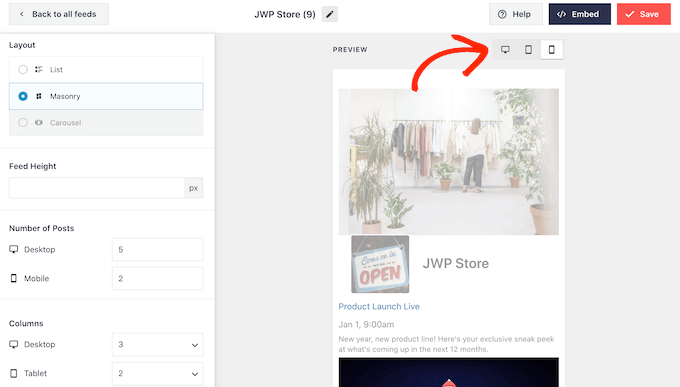
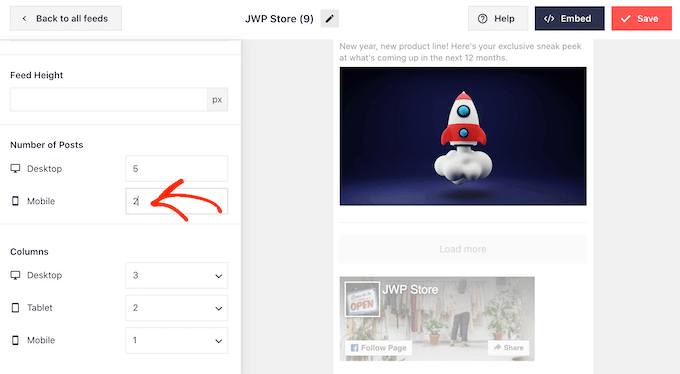
After testing the mobile version of your website, you may want to change how many events you show on smartphones and tablets so that all the content fits comfortably on the screen.
To make this change, simply find the ‘Number of Posts’ section and type a different number into the ‘Mobile’ field.
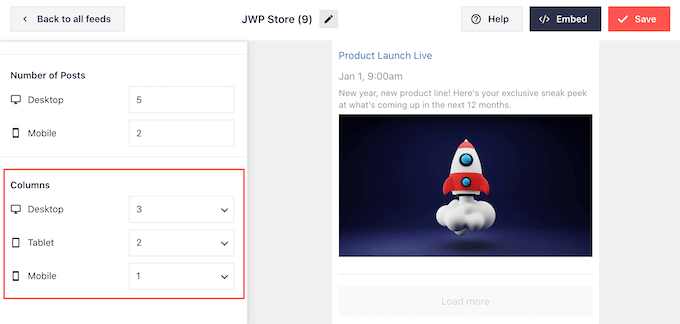
Another option is showing fewer columns on smartphones and tablets by changing the ‘Columns’ settings.
For example, we are showing 3 columns on desktop, 2 columns on tablets, and 1 column on mobile devices.
When you are happy with how the calendar looks on all devices, click on ‘Customize’ to return to the main editor screen.
Here, click on the next settings option, which is ‘Color Scheme.’
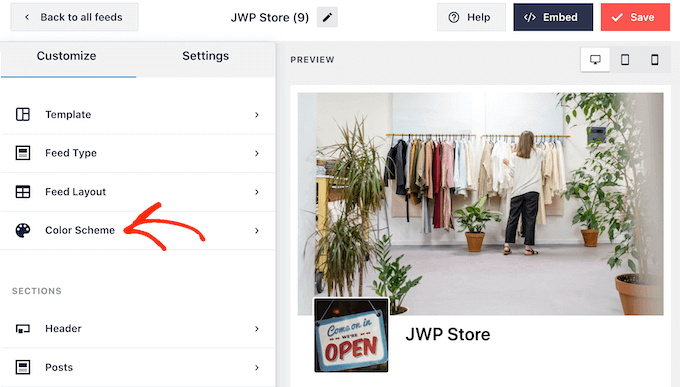
By default, Smash Balloon uses the same color scheme as your WordPress theme for the event calendar.
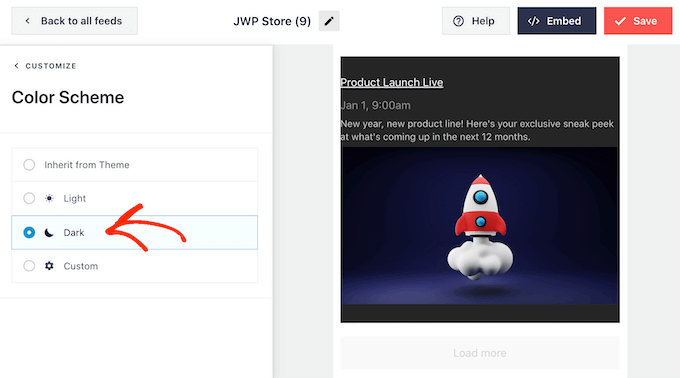
If you don’t like how this looks, then you can switch to a ‘Light’ or ‘Dark’ color scheme.
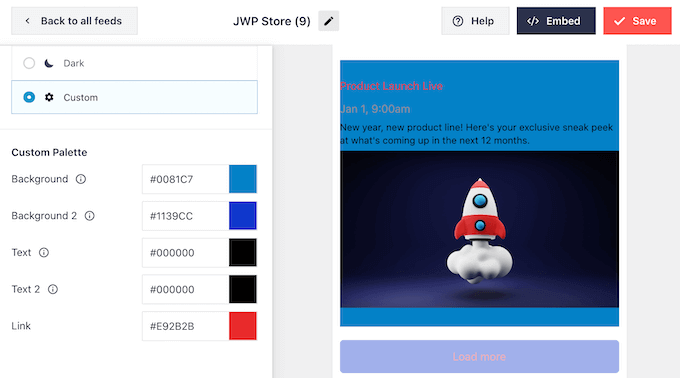
Another option is to design your own color scheme by selecting ‘Custom.’
You can use the controls to change the link color, background color, and change the text color in WordPress, and more.
By default, Smash Balloon adds a header above your event calendar. This lets visitors know that the events are related to your Facebook page or business and also encourages them to visit your Facebook page.
To customize the header section, click on ‘Header’ in the left-hand menu. To start, you can switch between the visual and text header styles.
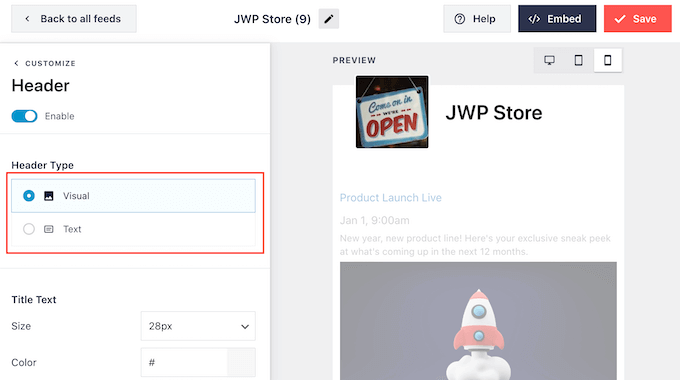
If you are using the ‘Visual’ style, then you can also use the controls to change the header size, hide the cover photo, change the background color, and more.
If you are using a ‘Text’ style, then you can customize the text that’s shown in the header.
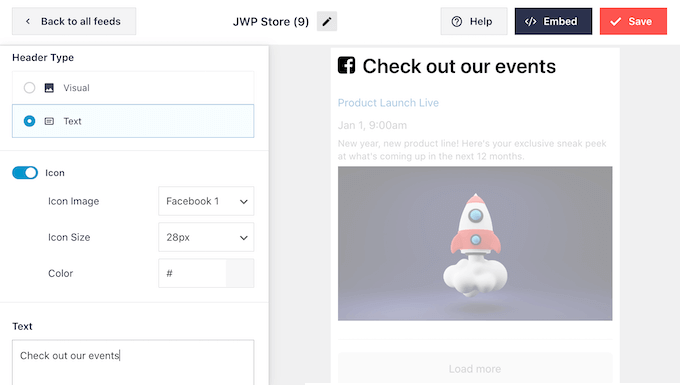
You can also change the font size, color, and more.
If you want to create a more simple event calendar, then you can always remove the header by clicking to turn off the ‘Enable’ toggle.
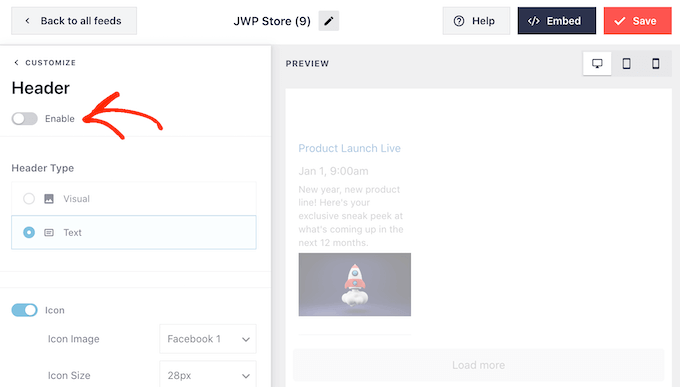
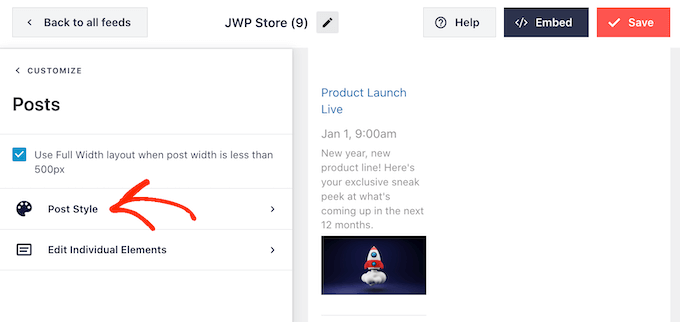
Once you have done that, you can change how the individual events look inside your calendar by selecting ‘Post Style’ from the left-hand menu.
Next, click on ‘Post Style’ again.
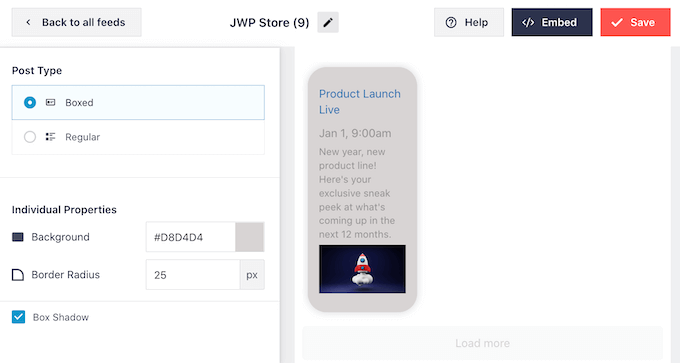
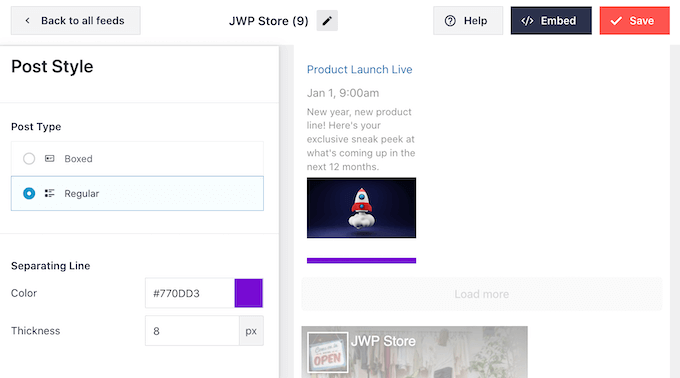
On this screen, you can choose between a regular and a boxed layout for your calendar.
If you select ‘Boxed,’ then you can create a colored background for each event. You can also make the border-radius larger to create curved corners and add a box shadow.
If you choose ‘Regular,’ then you can change the thickness and color of the line that separates your different events.
In the following image, we have added a thicker line to the calendar and changed its color.
You can also customize the individual parts within each event by going back to the main settings screen.
Once again, select ‘Post Style,’ but this time, choose ‘Edit Individual Elements’ instead.
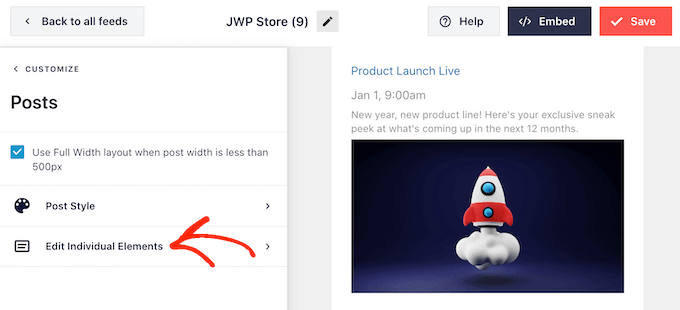
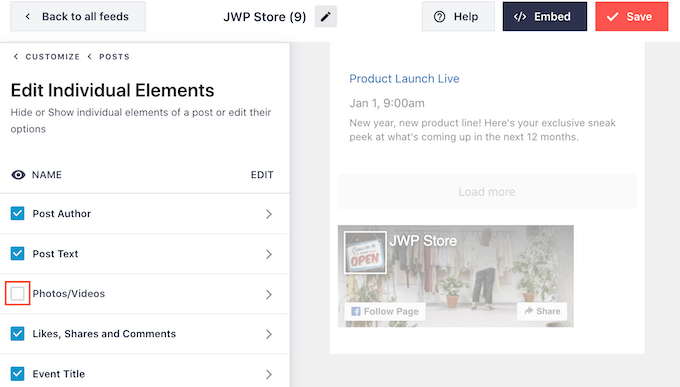
You will now see all the different content that Smash Balloon shows for each event, such as its title, date, and event details.
To hide a piece of content, simply click to uncheck its box.
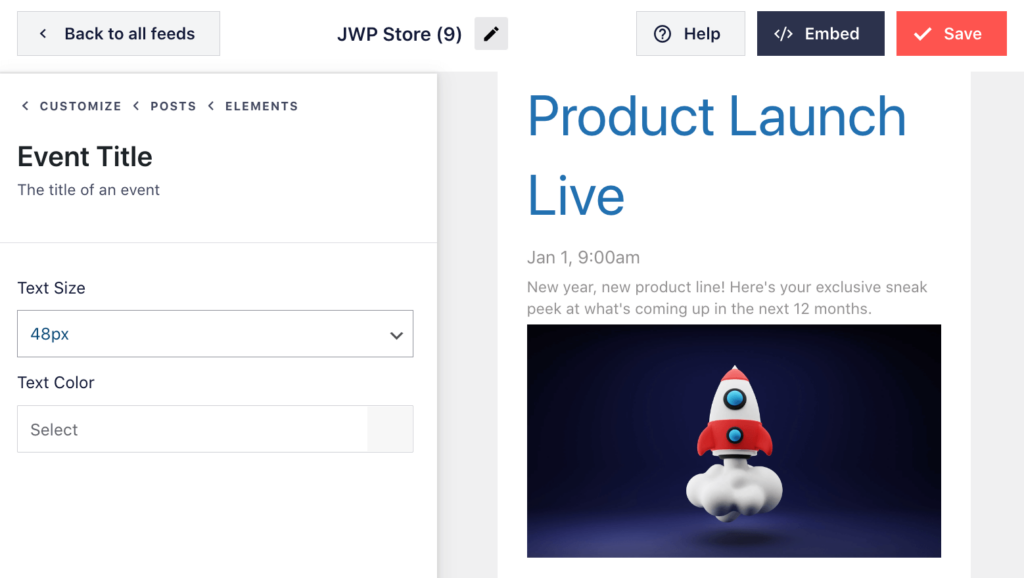
You can also change how an element looks by clicking on its name.
The options you can see on the next screen will vary. However, you can typically change the size of the text and the text color.
By default, Smash Balloon adds a Facebook like button underneath your event calendar, which allows visitors to follow your Facebook page or share it with other people.
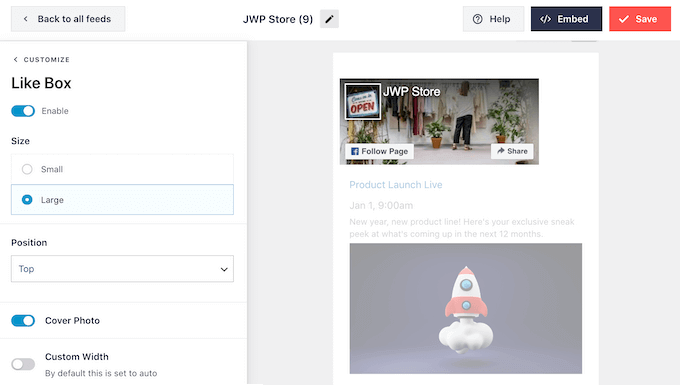
This feature can get you more followers and social shares, so it’s worth clicking on ‘Like Box’ to see what changes you can make.
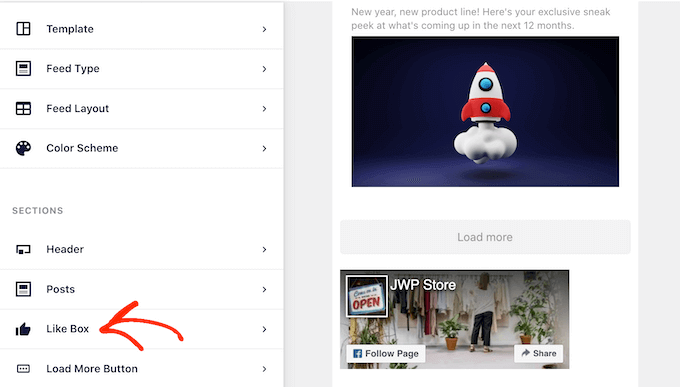
To start, you can change whether the box appears above or below your events calendar using the ‘Position’ dropdown.
You can also change the box’s size or width, or add your page’s cover photo.
A big follower count is great social proof that will encourage more people to follow you on social media and attend your events. With that in mind, you may want to click to enable the ‘Show fans’ switch.
If you prefer to remove the ‘like’ box, then simply click on the ‘Enable’ switch to turn it from blue to grey.
When you are happy with how the ‘Like’ button is set up, you can move on to the ‘Load More Button’ settings.
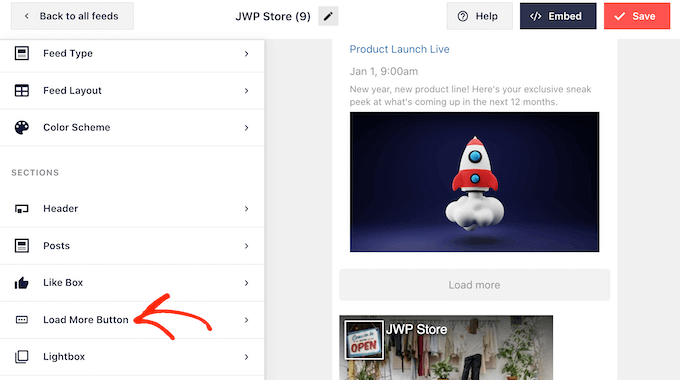
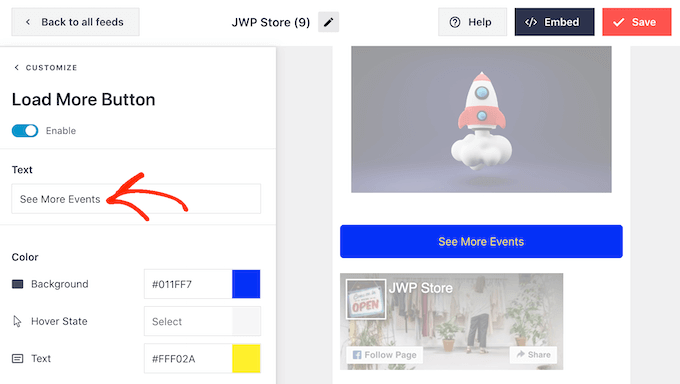
The ‘Load More’ button gives visitors an easy way to scroll through all your events. With that in mind, you may want to make this button stand out from the rest of your site by changing its background color, hover state, and text color.
The button shows ‘Load More’ by default, but you can replace this with your own messaging by typing into the ‘Text’ field.
For example, you may want to use something like ‘See More Events’ or ‘Explore our calendar.’
Smash Balloon has a lightbox feature that allows visitors to see your events in a popup.
Visitors can simply click an event’s image to open the lightbox popup.
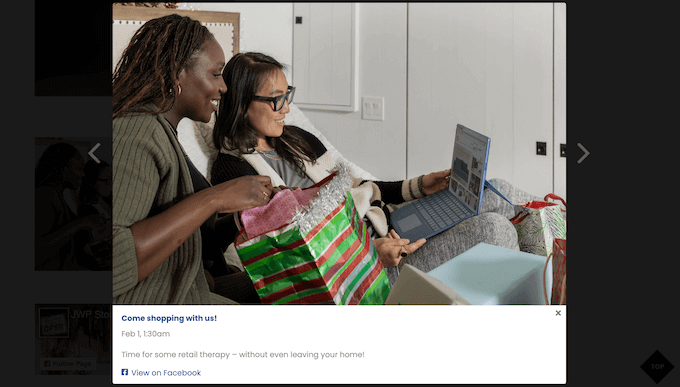
Visitors can then scroll through all your events using the arrows, similar to embedding a Facebook album in WordPress.
To customize the default lightbox, simply select ‘Lightbox’ from the left-hand menu.
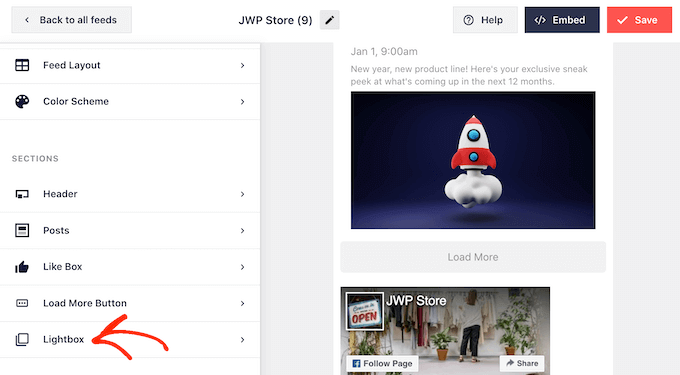
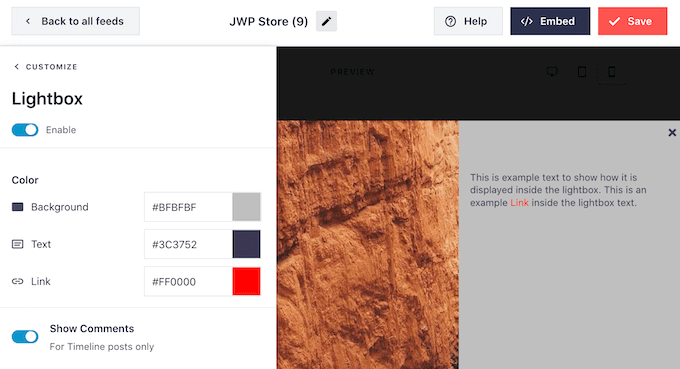
Here, you can change the color of the lightbox’s text, links, and background colors.
The lightbox popup makes it easy for visitors to explore your calendar, but it also allows people to scroll through all your events without visiting your Facebook group.
If you want to encourage people to visit your Facebook page, then you may want to disable the lightbox feature by clicking the ‘Enable’ toggle so that it turns from blue to grey.
If you do disable the lightbox feature, then clicking on an event will open your Facebook page in a new tab.
When you are happy with how the Facebook event calendar looks, don’t forget to click on ‘Save’ to store your changes. You are now ready to add this feed to your WordPress website.
Step 4: Embed Your Facebook Event Calendar in WordPress
To add the Facebook event calendar, you can click the ‘Embed’ button at the top of the screen.
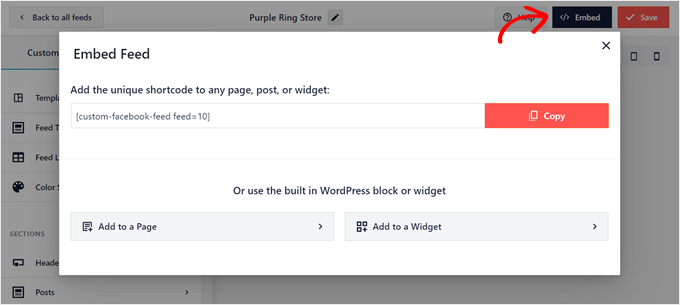
You can add the Facebook event calendar in WordPress using a shortcode, block, or widget.
In our experience, it’s easier to embed the Facebook feed using a block or widget, so we will show you those methods first.
Adding the Facebook Event Calendar to a Page
First, you can click ‘Add to a Page.’ After that, select a page that you want to add the event calendar to and click ‘Add.’
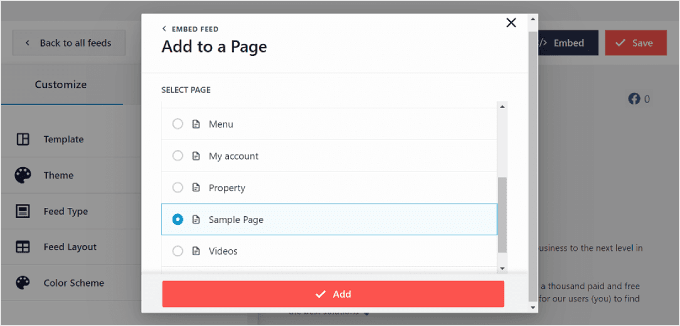
You will then be directed to the block editor.
Here, go ahead and click the ‘+ Add Block’ button and find the ‘Facebook Feed’ block.
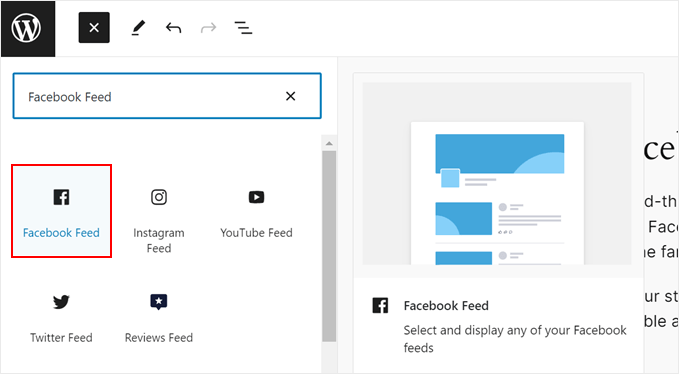
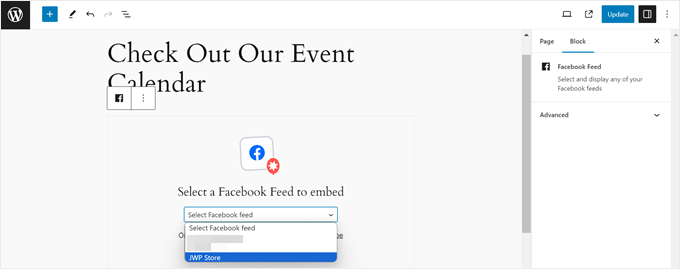
Once you do that, you can select the Facebook Feed with the event calendar that you created earlier.
The Gutenberg block will then automatically be changed to the event calendar.
If you use a block theme and want to add this block to a template part or pattern, you can also do it using the same steps but in the Full Site Editor.
For more information on how to do this, read our guide on WordPress Full Site Editing.
Adding the Facebook Event Calendar to a Widget-Ready Area
Another place you can display the event calendar is on a widget-ready area like a sidebar. This way, you can still show your upcoming Facebook events without distracting users from the main content.
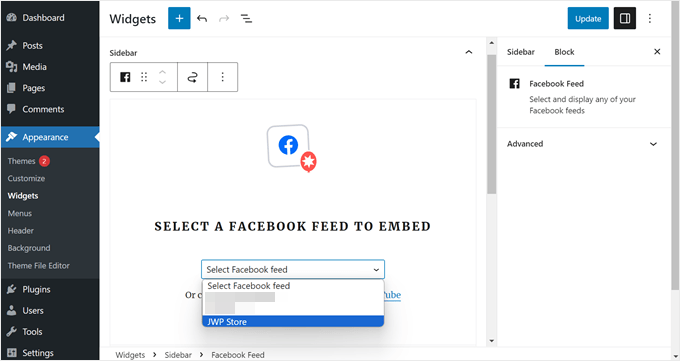
What you need to do is click ‘Add to a Widget‘ in the Embed Feed popup. You will then be directed to the WordPress widget editor page.
Now, click the ‘+ Add Block’ button on your desired widget-ready area and select the ‘Facebook Feed’ block.
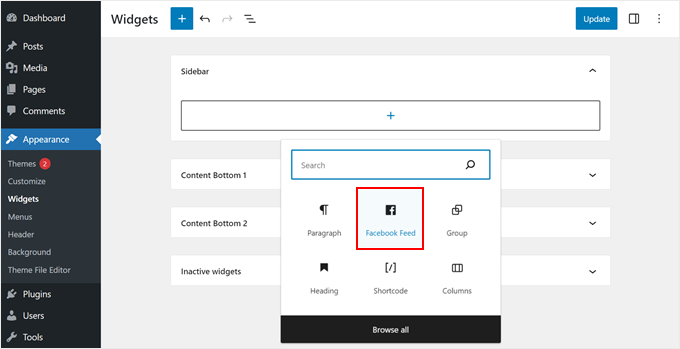
Like before, just select the event calendar feed you created earlier.
Once done, simply click the ‘Update’ button at the top right corner.
Adding the Facebook Event Calendar Using WordPress Shortcode
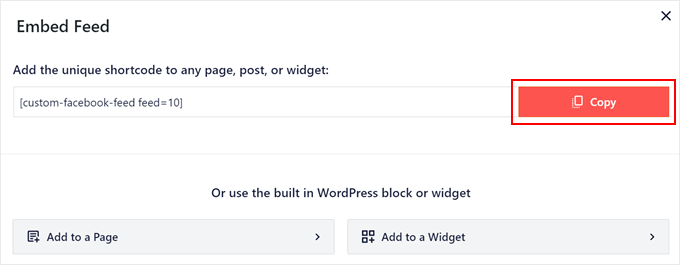
If the block or widget methods don’t work, then you can try adding the Facebook event calendar using a shortcode.
Simply copy the code that’s available in the Embed Feed popup, and paste it to a shortcode block in the block or widget editor.
For more information about shortcodes, you can read our article on how to add shortcodes in WordPress.
Bonus: Enhance Your WordPress-Facebook Integration
Want to take your WordPress and Facebook integration to the next level? Check out these additional guides:
- How to Add a Facebook Giveaway in WordPress to Boost Engagement – Learn to run engaging giveaways that increase your Facebook following.
- How to Automatically Post to Facebook From WordPress – Streamline your social media strategy by automating your Facebook posts.
- How to Fix Facebook Incorrect Thumbnail Issue in WordPress – Ensure your shared content always looks great on Facebook.
- How to Fix the Facebook and Instagram oEmbed Issue in WordPress – Solve common embedding problems for a seamless social media display.
- How to Display Your Facebook Timeline in WordPress – Showcase your Facebook activity directly on your WordPress site.
- Quick Ways to Get More Facebook Likes Using WordPress – Grow your Facebook audience with these effective strategies.
- How to Add Facebook Like Reactions to Your WordPress Posts – Increase engagement by adding Facebook’s popular reaction feature to your content.
- How to Add a Facebook Like Box / Fan Box in WordPress – Encourage more likes and follows with an embedded like box.
We hope this article helped you learn how to add a Facebook event calendar in WordPress. You may also want to see our expert picks for the best Facebook plugins for your blog or learn how to schedule WordPress posts for social media.
If you liked this article, then please subscribe to our YouTube Channel for WordPress video tutorials. You can also find us on Twitter and Facebook.


Moinuddin Waheed
Facebook has large resources base and it is one of the best platform to get quality traffic.
integrating Facebook event calendar with that of the website will definitely help in the acquisition of that large traffic into customers.
Thanks for detailed post on how to make Facebook calendar event.
Ahmed Omar
facebook is one of the important social media that can not be ignored, and this way it will be easy to import the events from facebook
great post with important details
Thank you
WPBeginner Support
You’re welcome
Admin
Lilja Níelsdóttir
I’m trying method 1: Add Facebook Events to Your Site Without a Plugin but it does not work. I can get the preview correct but when I publish or view the page it’s not transferred there, don’t get any information about events or anything on the page. It’s blank. Is this method still correct?
WPBeginner Support
Unless we hear otherwise, this method should still be working. Don’t forget to clear any caching on your site as a possible reason.
Admin
Lacey
“Something went wrong. Your change may not have been saved. Please try again. ”
Each time I try to edit the header.php file per the instructions, I get an error. Is this method still valid with all of the updates Facebook has made?
Pau
I tried the method 1 and a weird gray square under the footer appeared on my website, the facebook events are not there.
jon
Is there a way to just show the Facebook Event Interested button on a Wordpress site?
Michelle Platt
I found this very easy to follow. I’ve added many text widgets before. Do you have any idea why I can see it while I’m in WordPress (view my site) but not on my phone or any other computer? There’s not even a space for it in the sidebar. It’s simply not there. Again, I see it on my end and definitely saved it.
Ashiq hussain
Thanks for wordpress information helpful for me learn wordprss.
Awontis
Everything can be solved with plugins!