Imagine losing your entire website due to a server crash, a hacking attempt, or a simple accidental deletion. It’s a nightmare scenario for any website owner.
That is why we make sure we have reliable backups of all of our sites. They give us peace of mind and improve our website security.
Jetpack’s Backup feature (formerly known as VaultPress) offers a powerful and user-friendly way to create automatic, real-time backups of your WordPress website, storing them safely in the cloud. Should disaster strike, you can restore your site with just a few clicks.
This article provides a step-by-step guide to setting up real-time WordPress backups using Jetpack Backup, ensuring that your website is always protected and recoverable.
Why Choose the Jetpack Backup Plugin?
All websites on the internet are vulnerable to security threats. A good automated backup solution is a good first step to keeping your WordPress website secure.
VaultPress is one of the best WordPress backup plugins. It was rebranded to merge with Jetpack, a powerful WordPress plugin suite, and is now called Jetpack Backup.
Jetpack offers backups as a paid subscription service. The plan includes:
- Real-time backups as you edit
- 10GB of cloud storage space (1TB of storage costs extra)
- 30-day backup archive
- Easy 1-click restore
- Priority expert support
We used VaultPress on WPBeginner for backups and found it to be an extremely reliable solution. The seamless real-time backup feature is very important for a large site like ours.
Related: For more information, see our detailed Jetpack review.
That being said, let’s take a look at how to create WordPress backups using Jetpack (formerly VaultPress).
Creating WordPress Backups Using Jetpack Backup
First, you need the correct Jetpack plugin. If you only want to use Jetpack for backups, then you should install and activate the free Jetpack VaultPress Backup plugin. If you wish to use the complete suite of tools, then you should install and activate the Jetpack plugin.
For more details, see our step-by-step guide on how to install a WordPress plugin.
Upon activation, you will be asked to log in to use your Jetpack subscription or purchase a new one.
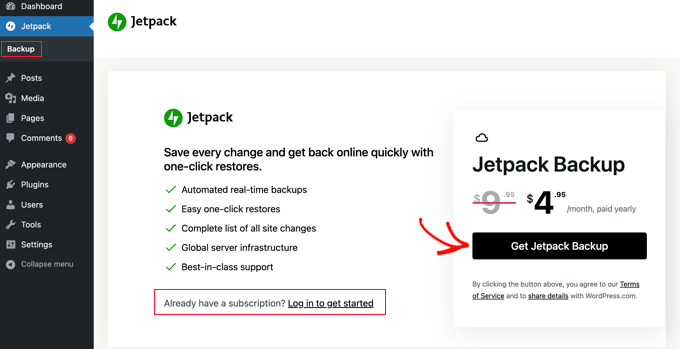
For example, if you installed the Jetpack Backup plugin and wish to purchase a subscription, you should click the ‘Get Jetpack Backup’ button.
You will be directed to the Jetpack website, where you can purchase a subscription for a discounted rate.
You will need to enter your billing information and payment method. Jetpack subscriptions come with a 14-day money-back guarantee.
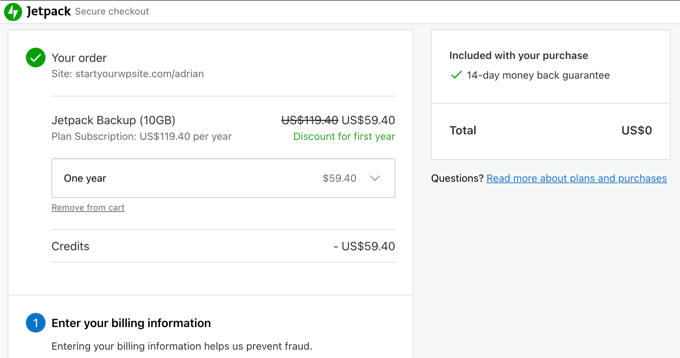
After making the payment, your website will be connected to your Jetpack account, and your website will be automatically backed up.
Depending on the contents of your website, this may take a few minutes or a few hours.
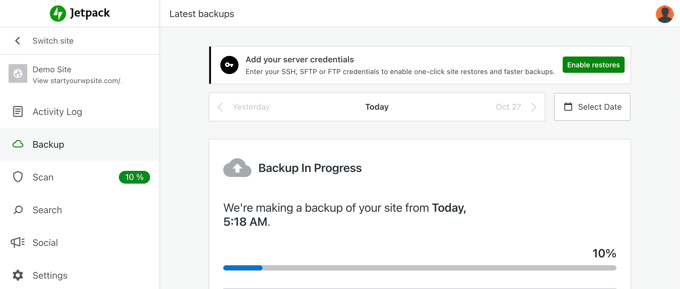
When the first backup has finished, it will be displayed on the Jetpack website along with the time that it finished.
If you have multiple website backups, then you can browse between them using the date buttons near the top of the page.
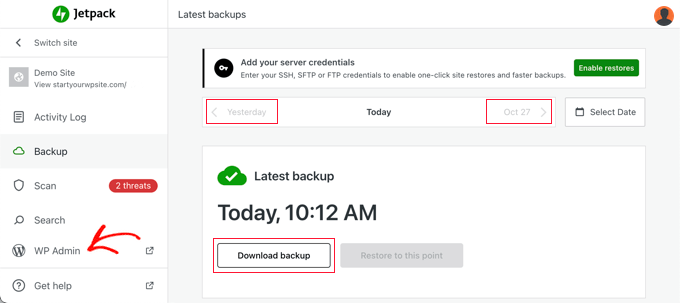
You can also download any backup to your computer for safekeeping, or to restore the site, or transfer it to another website.
Now, you can return to your website’s admin area by clicking the ‘WP Admin’ tab in the Jetpack sidebar. You will see the details of your last backup.

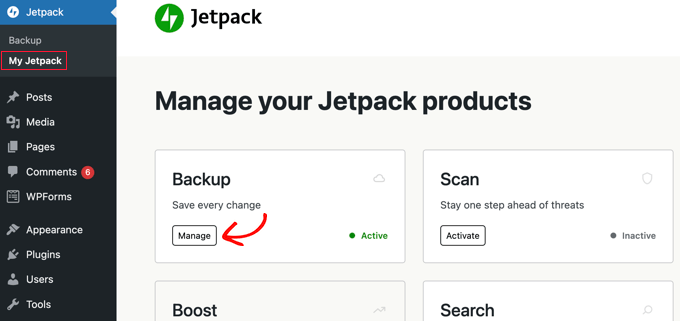
If you need to return to the Jetpack website in the future to view and manage your site backups, then simply visit Jetpack » Backup and click the button labeled ‘See backups in the cloud’.
Alternatively, head to Jetpack » My Jetpack and click the ‘Manage’ button under Backup.
Giving Jetpack Backup Access to Your Server
Jetpack Backup needs access to your server to restore backups and be more efficient. To do that, you need to return to the Jetpack website using one of the methods we just covered:
- Visit Jetpack » Backup and click the ‘See backups in the cloud’ button
- Visit Jetpack » My Jetpack and click the ‘Manage’ button under Backup
This will take you back to the Jetpack website. You need to click the ‘Enable restores’ button at the top of the screen.
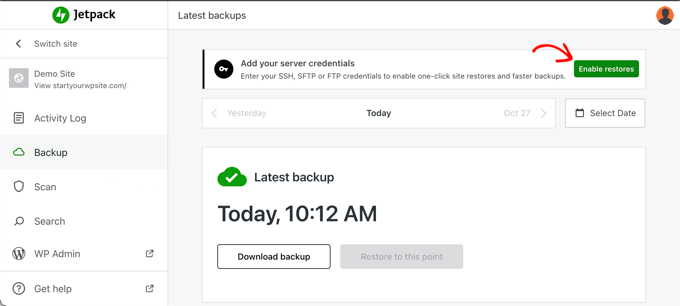
This will take you to a page that lists popular WordPress hosting providers.
If you see your web hosting provider, then you should click it. Otherwise, you will need to select the ‘I don’t know’ option at the bottom.
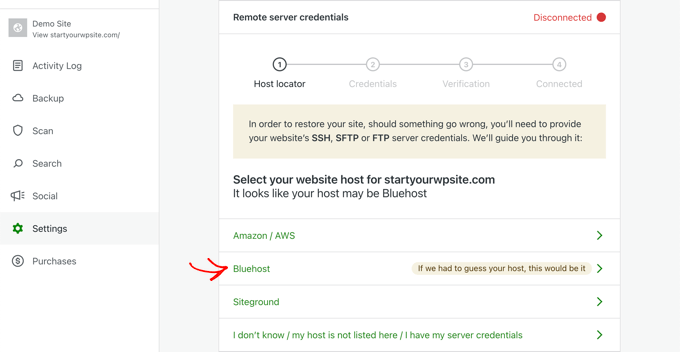
You can now fill in your SSH, SFTP, or FTP server credentials. These were sent to you via email when you signed up for your WordPress hosting account.
Your FTP account information is also available in your hosting account’s cPanel dashboard.
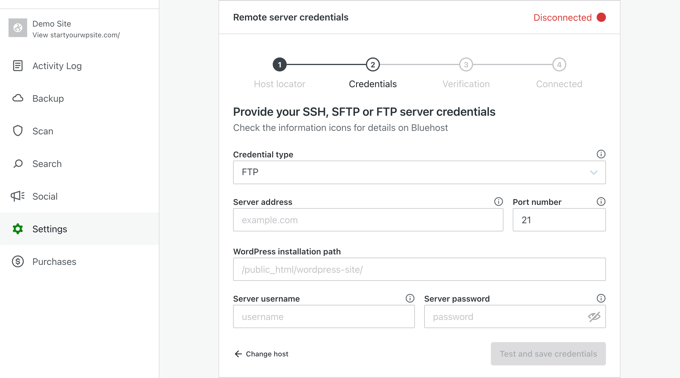
If you select SSH from the ‘Credential type’ drop-down menu, then Jetpack will also ask you to add SSH keys to your server. This adds an additional layer of security.
However, if you are on a shared hosting provider, then chances are that you don’t have access to create that file. You will need to connect to your server using SFTP or FTP instead.
Make sure you click the ‘Test and save credentials’ button when you are finished.
Restoring Your WordPress Site Using Jetpack Backup
Jetpack Backup allows you to easily restore your WordPress site from a backup.
First, you need to view your cloud backups using one of these methods:
- Visit Jetpack » Backup and click the ‘See backups in the cloud’ button.
- Visit Jetpack » My Jetpack and click the ‘Manage’ button under Backup.
Next, you need to navigate to the backup you wish to restore by using the buttons near the top of the page.
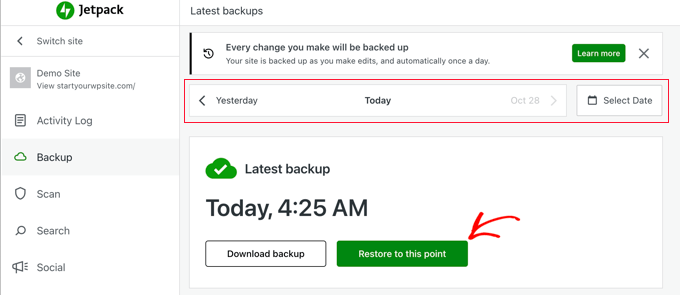
Once you find the backup you wish to restore, simply click the ‘Restore to this point’ button.
On the next screen, you will see all of the items you can restore. To restore the entire website, leave all the boxes checked. Or you can restore only certain items by unchecking the other boxes.
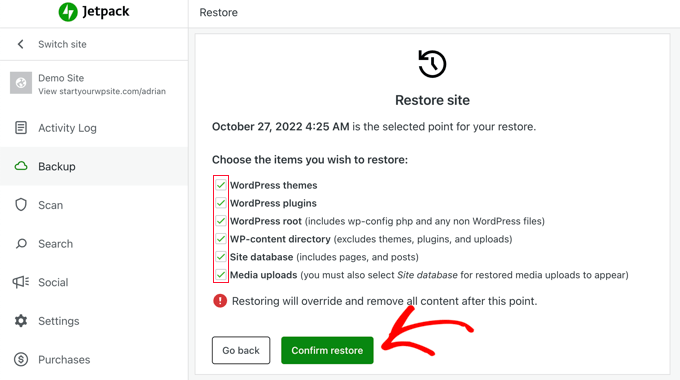
When you click the ‘Confirm restore’ button, Jetpack will begin to restore your website.
You can see the progress on the screen.
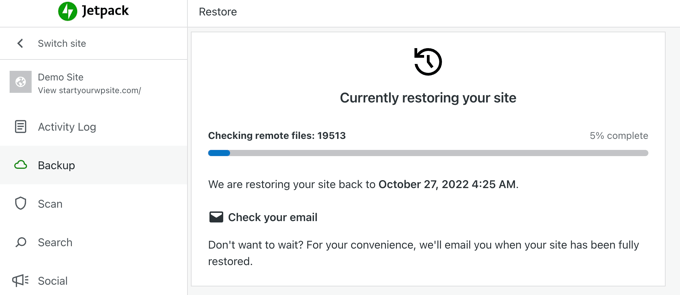
Depending on the size of your site, this may take several minutes or even hours. You don’t need to wait and can close your web browser or shut down your computer if necessary. Jetpack will email you when the restore has finished.
Once finished, you will see a success message.
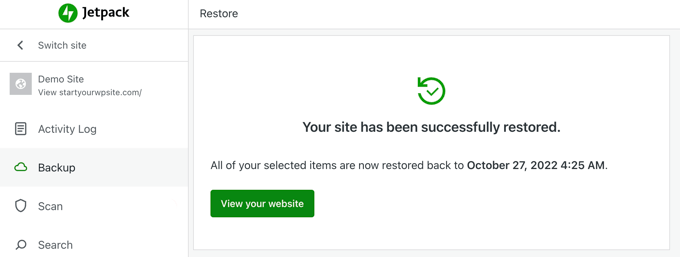
You can click the ‘View your site’ button to make sure your website is working as expected.
Expert Guides on WordPress Security
We hope this article helped you learn how to back up and restore your WordPress website using Jetpack Backup. You may also want to see our guides on other ways to back up your site:
- Which WordPress Files Should You Backup? (+ How to Do It)
- How to Backup Your WordPress Site
- How to Backup & Restore Your WordPress Site with UpdraftPlus
- How to Keep Your WordPress Content Safe with BackupBuddy
- How to Create a Complete WordPress Backup for Free With BackWPup
- How to Setup Automatic WordPress Backup with CodeGuard
- How to Make a WordPress Database Backup Manually (Step by Step)
- Best WordPress Backup Plugins Compared (Pros and Cons)
- Beginner’s Guide: How to Restore WordPress from Backup
If you liked this article, then please subscribe to our YouTube Channel for WordPress video tutorials. You can also find us on Twitter and Facebook.


Jiří Vaněk
If I understand this article correctly, does Jetpack only back up to its own cloud? Is it possible to use another cloud where I have a subscription? So, for example, One Drive or Google Drive?
WPBeginner Support
Unless we hear otherwise, the only current option would be to have your backups on Jetpack’s servers.
Admin
Jiří Vaněk
I understand. This bothers me because I have a subscription to Google Drive, where I have a large capacity and could have backed up more websites there. For Jetpack, I would have to pay extra instead, which means additional costs. Anyway, thanks for the reply.
Felipe
Hi there!
Will VaultPress backup my database too? (All posts, comments and etc…)
WPBeginner Support
Yes, it will back up your database
Admin
SWAPNIL
thank you it was really very helpful
WPBeginner Support
Hi Swapnil,
We are glad you found it helpful. Don’t forget to join us on Twitter for more WordPress tips and tutorials.
Admin