If you are looking for a way to boost conversions on your eCommerce store, then offering smart coupons is a great solution. By extending WooCommerce’s built-in coupons, you can create various promotions, including ‘buy one, get one,’ free gifts, and even URL coupons.
To help you pick the right plugin to add coupons, we tested multiple WooCommerce plugins. And based on our testing, we found that Advanced Coupons offers the most features and is easy to use for adding all types of coupons in WooCommerce.
In this article, we will cover how to create smart coupons in WooCommerce.

Why Create Smart Coupons in WooCommerce?
Smart coupons are a great way to increase sales, keep customers happy, and encourage brand loyalty.
Instead of simply giving your customers a discount on everything in their WooCommerce cart, you can use smart coupons to create all kinds of different campaigns and promotions.
For example, you might create ‘buy one get one’ (BOGO) coupons to boost the sales of a specific product, such as older items that they no longer want to stock.
Free gift coupons are another popular choice. Many eCommerce stores grow their email list by offering shoppers a free gift if they share their contact information. You can even encourage customers to spend more by setting a minimum spend for the free gift coupon.
With all that being said, let’s see how you can create smart coupons in WooCommerce.
Create Smart Coupons with Advanced Coupons Plugin
The best way to create smart coupons in WooCommerce is by using the Advanced Coupons plugin. It’s the best WordPress coupon code plugin on the market and lets you create all kinds of coupons, rewards, and discounts to get more sales and grow your business.
First, you’ll need to install and activate the Advanced Coupons plugin. For more details, see our step-by-step guide on how to install a WordPress plugin.
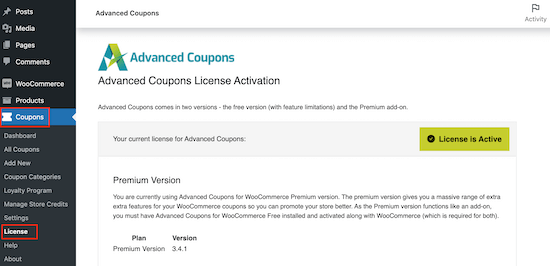
Upon activation, head over to Coupons » License.
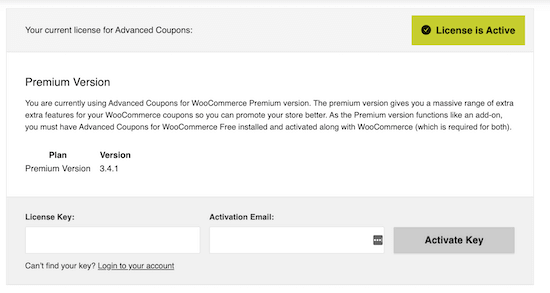
Then, you just need to enter the license key into the ‘License Key’ field.
To find this information, log into your account on the Advanced Coupons website. You’ll also need to enter your ‘Activation Email,’ which is the email address you used when you purchased Advanced Coupons.
Once you’ve done that, click on ‘Activate Key.’
Now, you’re ready to create a smart coupon.
Simply go to Marketing » Coupons and then click on ‘Add New.’
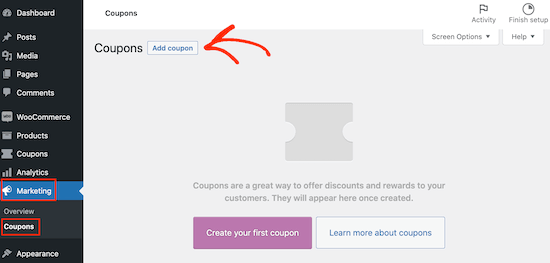
Here, you can create all kinds of coupons, including shipping discounts, one-time personalized coupon codes, and more.
On the next screen, you need to type in a title for the coupon.
This will become the actual coupon that customers will use to claim the discount, free gift, or other perk. With that in mind, it’s a good idea to use something that’s easy for shoppers to remember and type.
You may also want to use something that describes the reward. For example, you might create a ‘FREESHIPPING’ coupon or a ‘BOGOFREE code.’
In this guide, we’re going to take you through some of the most popular coupons you can create for your online store. Simply use the quick links below to jump straight to the coupon you want to create:
Creating a Buy One Get One Free Coupon in WooCommerce
Advanced Coupons let you create all sorts of BOGO offers.
Often, BOGO means ‘buy one product, get a second one free,’ but you can also offer a second item for a discounted price. For example, you might create a ‘buy one, get one 50% off’ offer.
A BOGO coupon can encourage new customers to make their first purchase on your online marketplace. It can also encourage existing customers to make repeat purchases or convince shoppers to add more items to their cart in order to qualify for the BOGO deal.
In this way, a BOGO coupon can increase the average order value, similar to techniques like cross-selling and upselling products in WooCommerce.
To create a BOGO coupon using Advanced Coupons, scroll to the ‘Coupon Data’ section and make sure the ‘General’ tab is selected.
Then, open the ‘Discount type’ dropdown and select ‘Buy X Get X Deal (BOGO).’
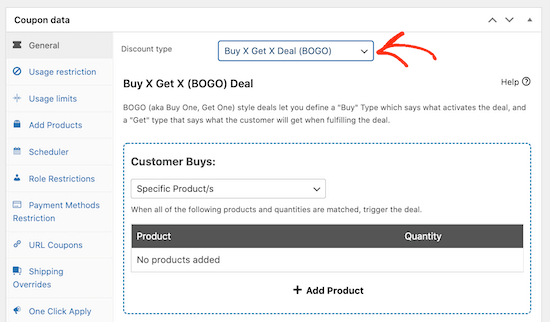
You can create all kinds of BOGO coupons, such as ‘buy one T-shirt, get a second T-shirt free’ or ‘buy any accessory and get 50% off a second accessory.’
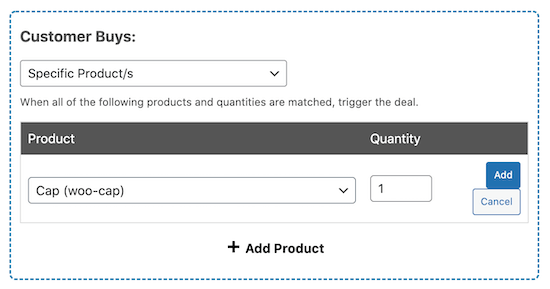
In the ‘Customer Buys’ section, you can choose the product, combination or products, or product category that will trigger the deal. For example, in the following image, we’re creating a BOGO offer that’s triggered every time a shopper adds the Cap product to their cart.
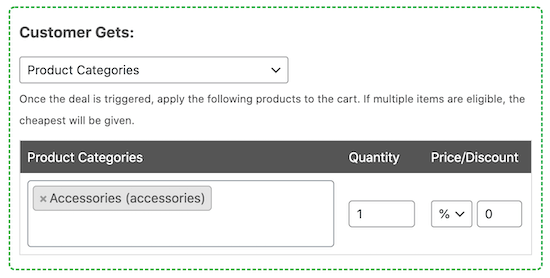
In the ‘Customer Gets’ section, you’ll need to pick the product that customers will get for free or at a discounted price.
In the following image, the customer will get any item from the ‘accessories’ product category for a 50% discount.
Tip: BOGO coupons tend to most effective when you offer an item that’s related to the product being purchased. For example, if you sell winter clothes then you might offer a free pair of gloves with every hat purchased.
If you want more help creating BOGO coupons, then check out our complete guide on how to create buy one get one coupons in WooCommerce.
Creating a URL Coupon (Auto-Apply) in WooCommerce
When you send out an email newsletter or social media post containing a coupon code, your customers may not know how to apply that code.
As a result, shoppers may get frustrated and give up on their purchase, which will affect your cart abandoned cart sales.
Even if a shopper knows how to use the coupon, typing out a long and complicated code isn’t the best customer experience, particularly if they’re using a smaller device like a smartphone. This may cause you to lose out on sales.
Wouldn’t it be nice if shoppers could auto-apply the coupon code just by clicking on a link?
That’s where auto-apply coupon URLs come in.
Instead of typing in the code, customers can simply click on a special URL. Advanced Coupons will then apply the coupon to their cart automatically.
This is really useful on social media, where you’re limited to how many characters you can post. You can simply share the URL, and followers will instantly have access to the coupon code without needing to type anything in.
To start, simply open the ‘Discount type’ dropdown and choose the kind of discount you want to create, such as a percentage discount.
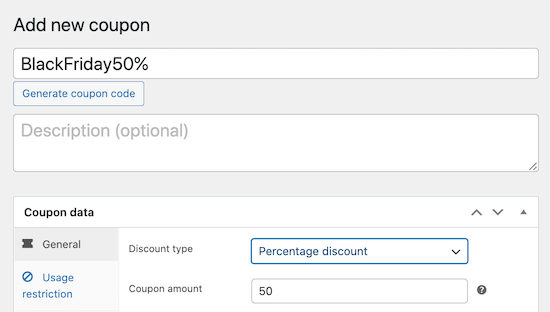
You’ll need to make the coupon live in order to get the URL, so click on the ‘Publish’ button.
After that, simply click on the ‘URL Coupons’ tab, and you’ll see the URL.
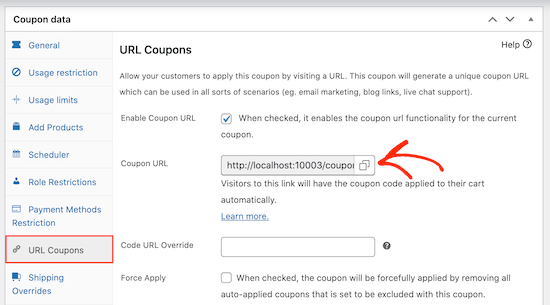
If you want, then you can customize the link using the ‘Code URL Override’ box. For example, if you’re planning to share the link on social media then you may want to create a customized short URL.
For more information, please see our guide on how to create URL coupons in WooCommerce.
Creating a Pre-Scheduled Coupon in WooCommerce
If you run a lot of sales during the year, then you may want to schedule in advance. For example, at the beginning of the year you could schedule coupons for your spring sale, summer sale, and your Black Friday deals.
Advanced Coupons will then automatically make the coupon live on your website at the right time and disable it when the sale is over. This automated workflow can save you a ton of time.
Scheduling coupons often makes it easier to work with affiliate marketing partners, as you can share codes with them in advance. This gives them lots of time to plan their own marketing efforts and promote the code to their own audience.
To schedule a coupon, simply create the code as normal in the Marketing » Coupons » Add New screen.
Here, click on the ‘Scheduler’ tab and then check the ‘Date Range Schedules’ box.
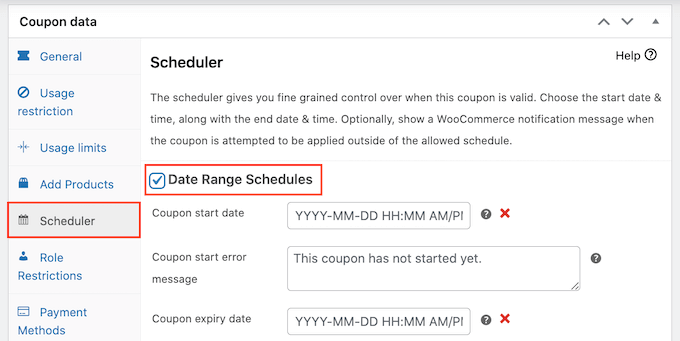
In ‘Coupon start date,’ go ahead and type in the date and time when the coupon will go live.
Then, use the ‘Coupon expiry date’ to specify the date and time when customers will no longer be able to use the coupon.
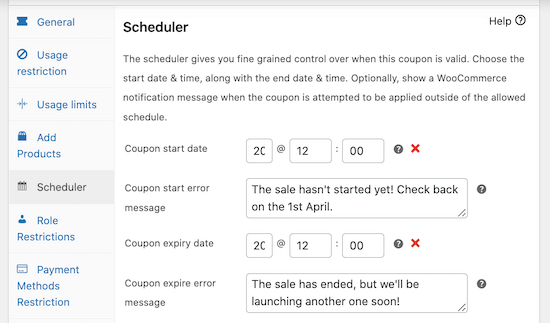
Tip: By default, the coupon will go live at 12:00:00 on the start date and expire at 23:59:59 on the day before the scheduled end date. Advanced Coupons uses the timezone that you’ve set in WordPress. For more details, please see our guide on how to change the date and time format in WordPress.
By default, Advanced Coupons will show an error if the coupon has expired or the promotion hasn’t started yet.
You can change these two error messages by typing some new text into the ‘Coupon start error message’ or ‘Coupon expire error message’ boxes.

If you want more help creating your scheduled coupon, then check out our tutorial on how to schedule a coupon in WooCommerce.
Creating a Free Gift Coupon in WooCommerce
Do you want to offer your customers a free gift?
Free gift coupons let shoppers add a product to their cart for free, which can make shoppers feel more valued and build customer loyalty.
Many online stores offer a free gift when you spend a minimum amount, which can often increase the average order value. Other stores give customers a free gift when they buy a particular product.
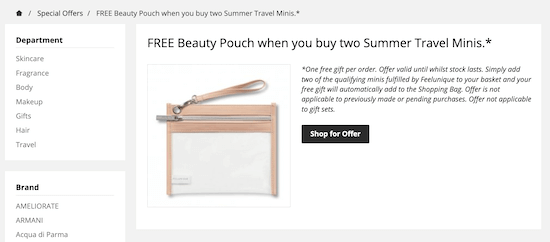
In this way, a free gift can help you sell old or discontinued stock or encourage customers to try a new product.
To create a free gift coupon, select the ‘Add Products’ tab and then click on the ‘+ Add Product’ button.
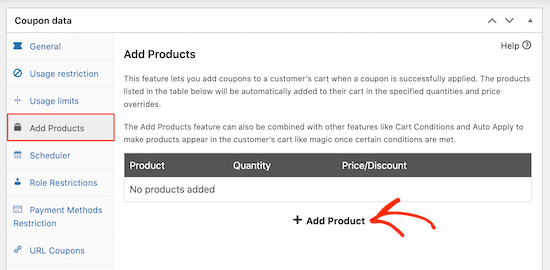
In the ‘Type to search’ field, type the product that you want to use as the free gift. When the right product appears, click on it.
Next, open the dropdown below the ‘Price/Discount’ heading and click on ‘$: Override price.’

In the box next to it, either type in ‘0’ or leave the box blank.
For more details, please see our guide on how to create a free gift coupon in WooCommerce.
In addition to creating a free gift coupon, you may want to create a loyalty program in WooCommerce. Similar to free gifts, this program can keep customers coming back to your online store and keep them away from your competitors. It can also be a great way to reward your best customers and make them feel valued.
How to Promote Your Coupons in WooCommerce
No matter what type of coupon you create, you’ll want to let customers know about it.
Unless you’ve created the offer specifically for your email list or newsletter, then it’s a good idea to promote the coupon across your website.
The easiest way to do this is with OptinMonster.
OptinMonster is the best lead-generation plugin for WordPress that helps you turn casual website visitors into paying customers. You can use OptinMonster’s easy drag-and-drop editor to create an engaging coupon popup.
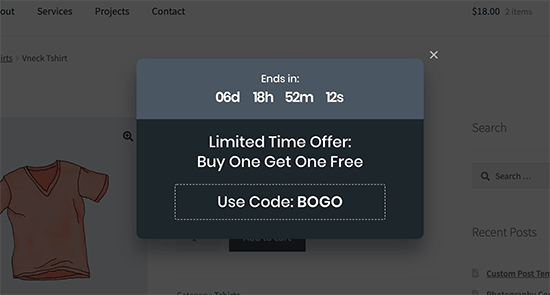
OptinMonster also comes with countdown timers, so you can use FOMO to increase conversions, create exit intent popups, and much more.
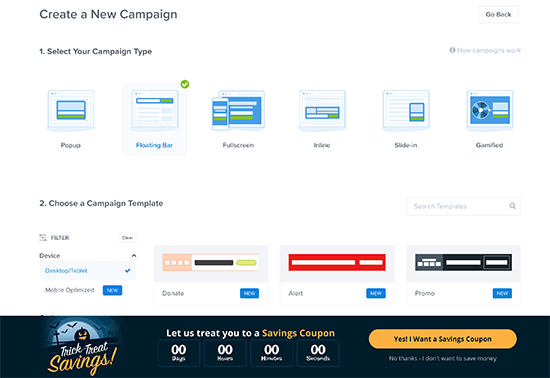
You can also use OptinMonster to display your coupons in lots of other ways including floating notification bars, slide-in boxes, and slide-in scroll boxes.
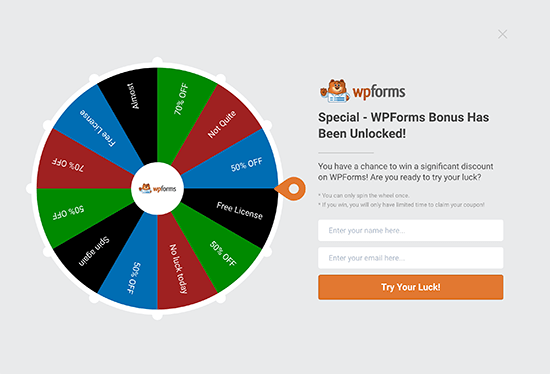
If you’ve created multiple smart coupons, then you can even challenge customers to win the best deal by using a spin the wheel optin.
This is a great way to make your WooCommerce coupons more interesting and fun for the people who visit your website.
It’s also a good idea to monitor how visitors are using your different coupon codes so you can see what’s working and what isn’t. You can then use this insight to fine-tune your future sales and promotions to get even better results.
For more information, see our guide on how to set up WooCommerce conversion tracking.
We hope this article helped you learn how to create smart coupons in WooCommerce. You might also like our ultimate guide to WooCommerce SEO and our step-by-step guide on how to create a WooCommerce popup to increase sales.
If you liked this article, then please subscribe to our YouTube Channel for WordPress video tutorials. You can also find us on Twitter and Facebook.


Mrteesurez
I am really impressed with this plugin and how it works. It is featured rich and offers exciting options. That “buy on and get one for free” is a great feature. Also the auto applied coupon will make it faster for users to buy products as user doesn’t not need to remember any coupon code at the checkout page.