If your business operates in multiple locations, such as storefronts, offices, or service areas, then you need a powerful way to tell Google and potential customers where you are and what you offer. Doing this effectively can significantly boost your visibility in local search results.
This is where Local Business Schema Markup comes into play. Based on our expertise, adding this structured data to your WordPress website helps search engines accurately display your business information across all locations.
This makes sure that customers can easily find and engage with your business services or products, regardless of where they are located.
In this article, we’ll show you how to properly add local business schema markup for multiple locations in WordPress to improve your SEO and attract more customers to every location.
Why Create Local Business Schema Markup for Multiple Locations?
Schema markup or structured data is HTML code that provides more details about your content to search engines.
By adding schema markup to the source code of your WordPress website, search engines can easily find the extra information and display it in the search results as featured snippets. For instance, you can show FAQs in search results, add Google Maps in WordPress, display recipes, and more.
If you have multiple business locations like retail outlets, restaurants, or regional offices, then you can display them on Google and Bing search results through schema markup.
For example, if you search for McDonald’s locations in Florida, Google will show you a featured snippet with the different destinations and a map with pinned locations.

Creating multiple local business locations with schema markup helps improve your website SEO rankings.
Since the featured snippets are placed right at the top of the search results, it helps you to increase your click rate in search. That means more organic traffic and more conversions.
That being said, let’s take a look at how you can create local business schema for multiple business locations in WordPress.
Video Tutorial
If you’d prefer written instructions, just keep reading.
Creating Multiple Locations Using Schema Markup
The easiest way of setting up local business schema markup in WordPress is by using the All in One SEO (AIOSEO) plugin. It’s the best SEO tool for WordPress that’s used by over 3 million website owners and professionals.
AIOSEO removes the need for any technical knowledge or hiring an expert to boost your search engine visibility.
For this tutorial, we’ll be using the AIOSEO Pro license because it includes the Local SEO addon which is what you need to dominate local business SEO. It also has other powerful features like the redirection manager, advanced sitemap, link assistant, and more. If you’re on a budget, then you can use the free version of AIOSEO to get started with SEO optimization.
The first thing you’ll need to do is install and activate the AIOSEO plugin. For more details, please see our guide on how to install a WordPress plugin.
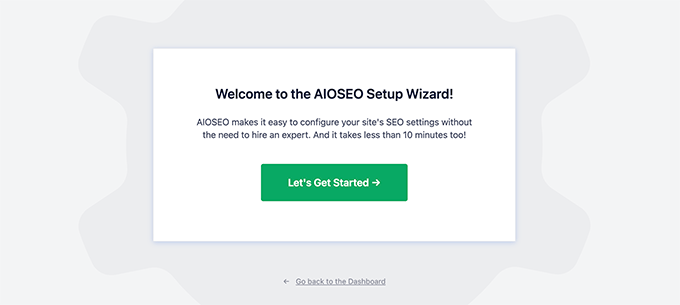
Upon activation, you’ll see the setup wizard. Go ahead and click the ‘Let’s Get Started’ button.
After that, follow the onscreen instructions in the setup wizard to configure the plugin. If you need help, then please see our guide on how to properly set up AIOSEO in WordPress.
Next, you’ll need to head over to All in One SEO » Local SEO from your WordPress dashboard and click the ‘Activate Local SEO’ button.
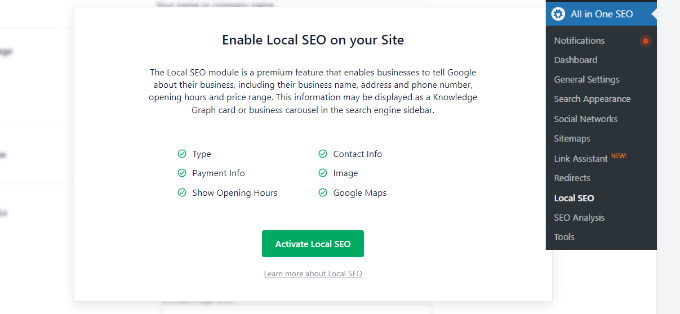
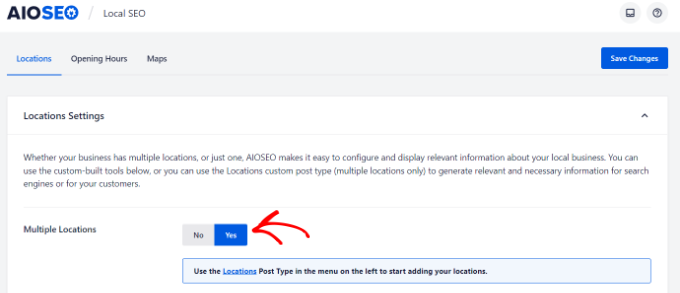
Once the Local SEO addon is active, you’ll see different Location Settings.
Go ahead and click the ‘Multiple Locations’ toggle to enable the option. This will add a new menu in your WordPress admin panel called Locations.
After that, you can scroll down to the ‘Advanced Settings’ section.
Here you can see the permalink AIOSEO will use to show your multiple business locations and location categories. If you wish to use a custom link, then simply check the ‘Use custom slug’ box and enter your permalink URL structure.
Next, you can also switch on the ‘Enhanced Search’ option, which will include your business locations in your WordPress site search results.
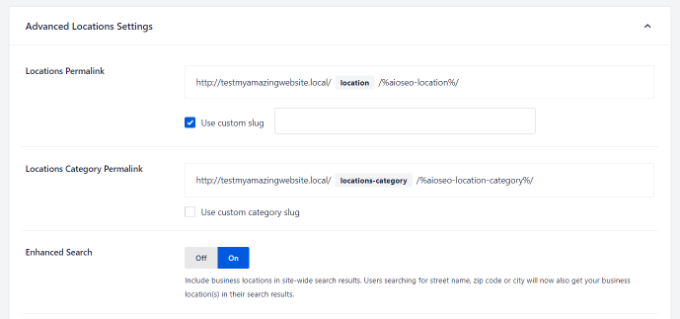
When you’re done, don’t forget to click the ‘Save Changes’ button.
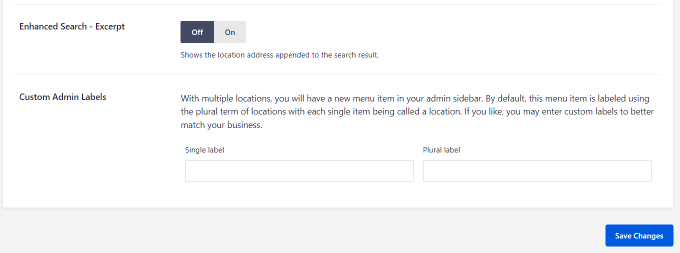
Next, you can go to the ‘Opening Hours’ tab and configure the times for your local businesses.
By default, the ‘Show Opening Hours’ option will be set to Yes. If you don’t want to show opening hours, then simply click the toggle to No.
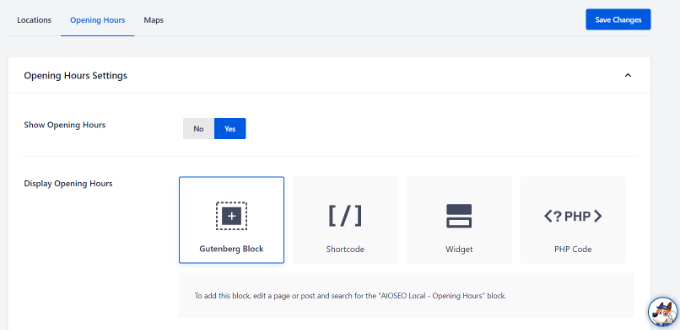
After that, you can scroll down and change the labels for when your business is open or closed.
There are also options to change the opening and closing timings for specific days or set it to open 24/7.
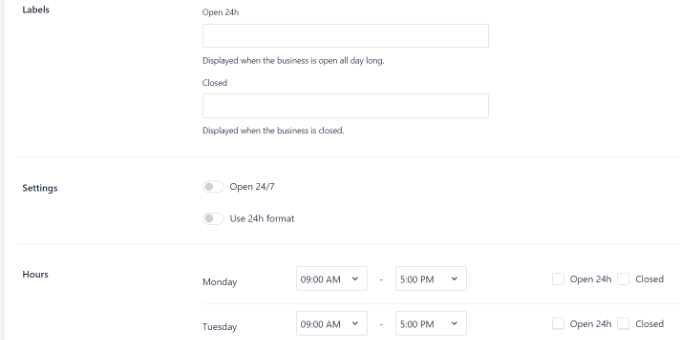
Note: The opening hours will be used across all the locations you add in WordPress. However, you can disable them for specific locations in the content editor.
AIOSEO also lets you integrate Google Maps with your WordPress website which helps show your local business on Google Maps. For more details, you can see our guide on how to add Google Maps in WordPress.
Next, you’ll need to add your multiple business locations in WordPress.
Adding Multiple Business Locations in WordPress
When you enable the Multiple Locations option in AIOSEO, a new ‘Locations’ option will appear in your WordPress admin panel.
To add your local business locations, simply go to Locations » Add New from your WordPress dashboard.
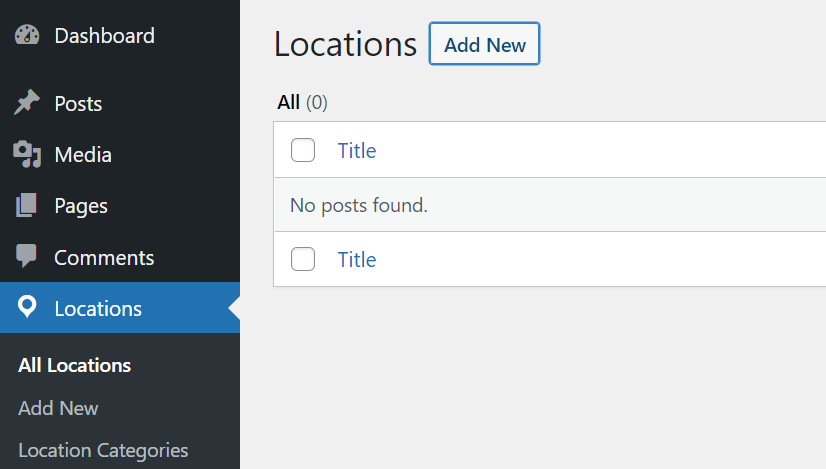
Next, you’ll need to add your location details in the WordPress content editor. Here you can add a title for your business location, which can be the location name.
Under the title, you can add more details or descriptions about your location. You can also create location categories from the settings panel on your right.
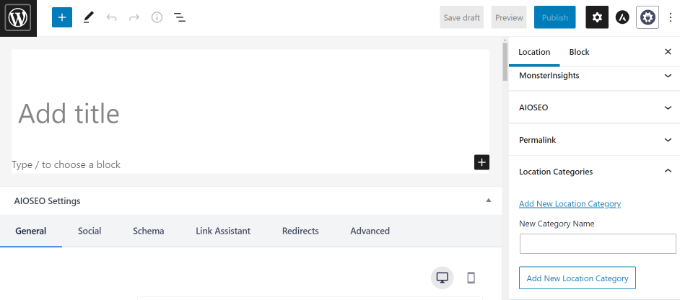
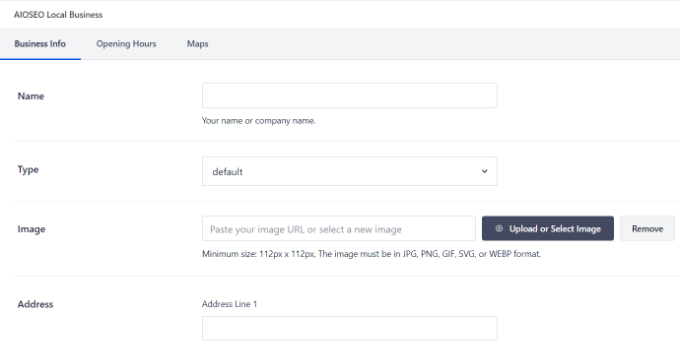
After that, simply scroll down to the AIOSEO Local Business metabox.
In the ‘Business Info’ section, you can add your business name, select a business type (industry), add an image, enter the address for your location, business phone, payment info, the area served, and more.
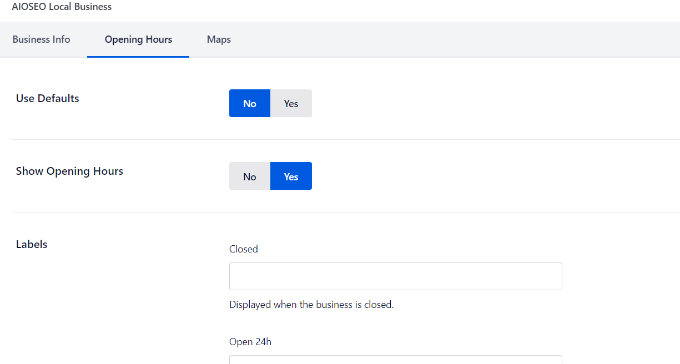
Next, you can switch to the ‘Opening Hours’ tab under the AIOSEO Local Business metabox.
AIOSEO will use the default settings automatically. However, you can disable the ‘Use Defaults’ option and then configure the opening and closing hours for your local business.
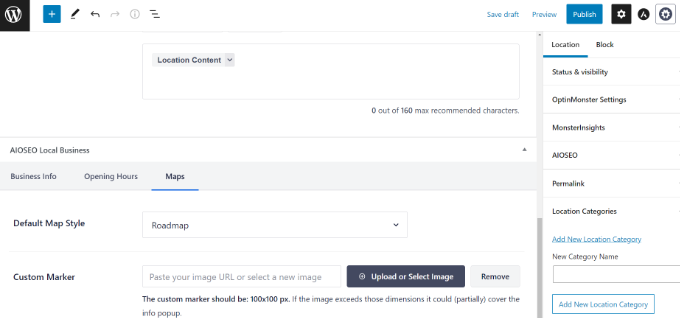
Next, you can go to the ‘Maps’ tab and configure how your local business will appear on Google Maps.
For instance, you can change the map style and upload a custom marker to pin your location on the map.
When you’re done, go ahead and publish your location page.
Now you can simply repeat this process for other locations you want to add to your WordPress website.
After you’ve set up local business schema for your multiple locations, you can also use geotargeting to display personalized content on your website based on your visitors’ geographical locations. To learn more, check out this guide to geotargeting.
We hope this article helped you learn how to create multiple locations in WordPress with schema markup. You may also want to see our guide on how to add event schema in WordPress and our expert picks of the best schema markup plugins for WordPress.
If you liked this article, then please subscribe to our YouTube Channel for WordPress video tutorials. You can also find us on Twitter and Facebook.


Have a question or suggestion? Please leave a comment to start the discussion.