Adding a chat room to your WordPress website is a great way to increase engagement and build a community around your brand.
Unfortunately, a lot of chat software is sold as a monthly service, so you need to budget for this expense indefinitely or risk losing everything you’ve built.
Some chat services even ask you to register with a third-party website, so you’re never fully in control of your chat rooms. Even worse, some tutorials simply tell you to forward your users to an external chat client like Slack or Discord.
In this article, we will show you how to add a self-hosted chat room to your WordPress website. This means you don’t need to pay expensive monthly subscriptions, rely on third-party services, or drive visitors away from your site.
Why Add a Chat Room in WordPress?
If you run a membership website or an online forum, then you may want to create an instant messaging chat room for your users.
Some website owners choose to use a third-party service like Slack, WhatsApp, Facebook groups, or Discord. However, these methods drive people away from your site, so they’re bad news for your pageviews and bounce rate. Plus, you don’t have full control over the chat experience.
By embedding a chat room in your website, you can keep people on your site for longer and build a stronger sense of community. Even better, by creating a self-hosted chat room, you can often avoid costly ongoing subscription fees.
Note: Chat rooms tend to work best for small communities of users. If want to offer live customer support, then check out our list of the best live chat support software.
That said, let’s take a look at how to add a chat room to your WordPress blog or website. Simply use the quick links below to jump straight to the method you want to use:
Method 1. Using Simple Ajax Chat (Free WordPress Plugin)
Do you want to add a simple chat room to your site without having to budget for a premium WordPress plugin or ongoing subscription? Simple Ajax Chat lets you add a simple, self-hosted chat room to any page, post, or widget-ready area without having to pay a cent.
It also lets you restrict access to logged-in users or even create a chat room that’s completely open to the public. For more details, see our Simple Ajax Chat review.
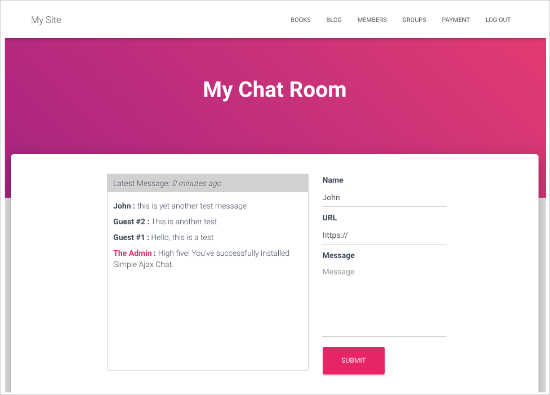
Note: In this guide, we are using the free Simple Ajax Chat plugin, as it has everything you need to create a single chat room. However, if you want to create multiple different chatrooms, then you’ll need to upgrade to Plugin Planet Simple Ajax Chat.
Step 1. Set up Simple Ajax Chat
First, you’ll need to install and activate the plugin. If you need help, then please see our guide on how to install a WordPress plugin.
Upon activation, go to Settings » Simple Ajax Chat to set up your chat room.
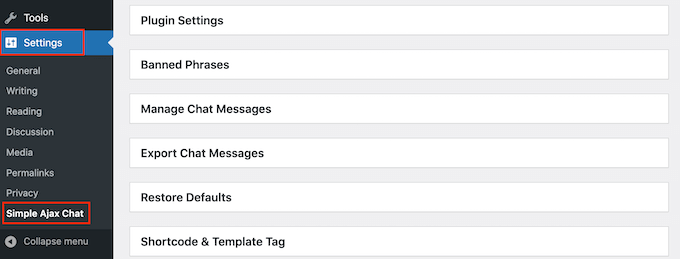
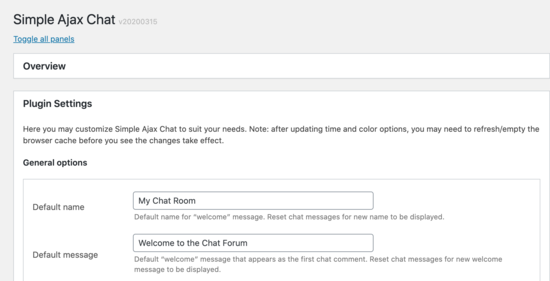
To start, click to expand the ‘Plugin Settings’ section and then change the ‘Default name’ to anything you want.
You can also type in a ‘Default message’, which will appear the first time someone visits your chat room.
Next, you can decide whether users need to be logged in to use the chat room. Requiring user registration can help you combat spam and trolls, but a public chat room may get more users.
To make this decision, either check or uncheck the box next to ‘Require users to be logged in to view and use the chat box.’
You may also want to check the box next to ‘Logged-in username’ so that WordPress shows the person’s username in the chat.
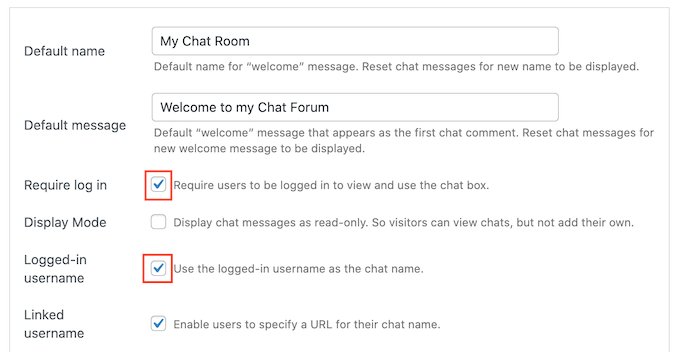
Another option is to allow non-registered visitors to read the chat but not interact. People who like what they see might create an account in order to join the conversation, so you may want to check the box next to ‘Display chat messages as read-only.’
Step 2. Customize Your Chat Room
With that done, you can customize the chat room. For example, you might add your own logo, custom colors, and branding. This is a big benefit to choosing a self-hosted solution like Simple Ajax Chat, compared to a separate platform like Discord.
To make these changes, simply use the settings in the’ Times and Colors’ and ‘Appearance’ boxes.
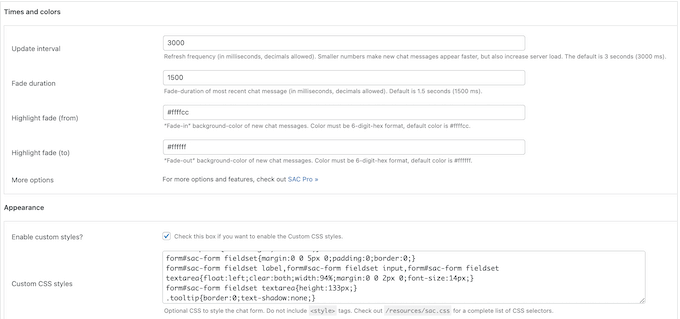
You can also replace the default notification icon with your own image. For example, you might use your logo, icon, or any other image you’ve created using web design software such as Canva.
To add your own graphic, find the ‘Default notification icon’ field and click on ‘Upload.’

You can now either choose an image from the WordPress media library or upload a file from your computer.
If you make any changes in this section, then don’t forget to click on ‘Save Settings.’
Step 3. Add Moderation Features
After that, you can click to expand the ‘Banned phrases’ section and then type in any words that should never appear in your chat. This might be the name of a competitor, offensive words, or anything else that could damage the visitor experience and your reputation.
Since it’s a self-hosted solution, you have complete control over the words you want to see and words that have no place within your community.
Simply separate each word with a comma.
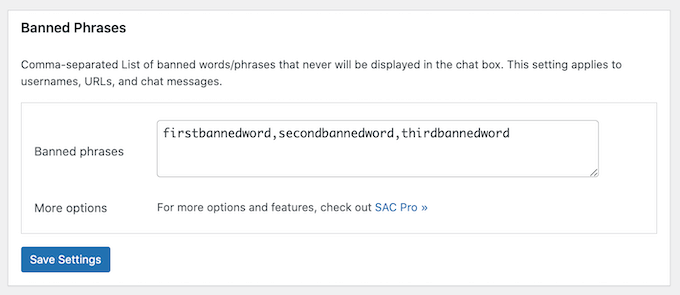
Again, don’t forget to click on ‘Save Settings’ to store your changes.
There are lots more settings to explore, so it’s worth looking through them and seeing what changes you can make. However, this is all you need to create a simple chat room, so let’s see how you can add it to your WordPress website.
Step 4. Display Your Chat Room in WordPress
Simple Ajax Chat lets you control exactly where you display your chat rooms so you can add them to any page, post, or widget-ready area.
When you are happy with how the chat room is set up, scroll down to the Shortcode & Template Tag area and click to open it. Here, you’ll see the shortcode that you can use.
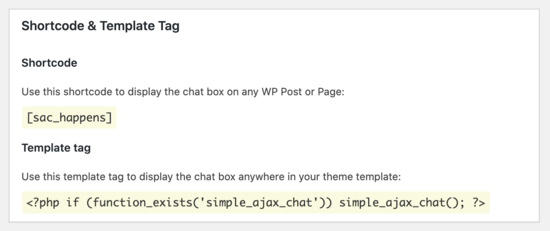
To add the chat room to a page, simply go to Pages » Add New in the WordPress dashboard.
You can now type in a title, upload a featured image, add categories and tags, plus any other content that you want to show on the page.
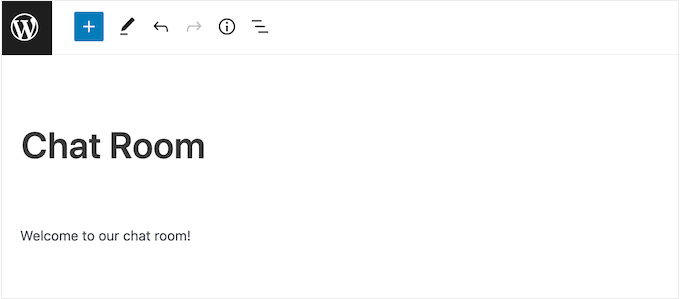
You might even go one step further and add a user experience feedback survey to get valuable suggestions and ideas on how to improve your chat room. This flexibility is another reason why we always recommend using a plugin such as Simple Ajax Chat, compared to rigid third-party software.
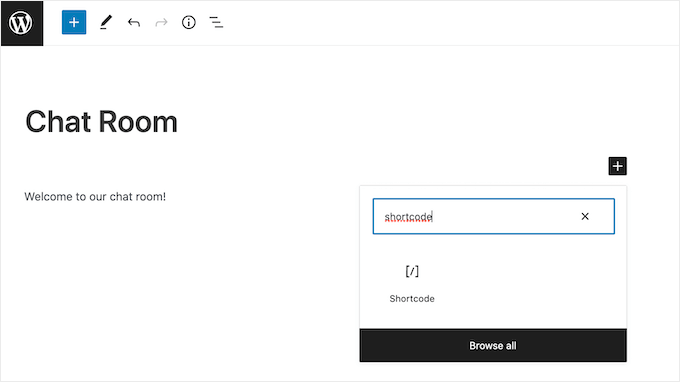
To embed your chat room, click on the ‘+’ sign and then type in ‘Shortcode.’ You can now select the right block when it appears.
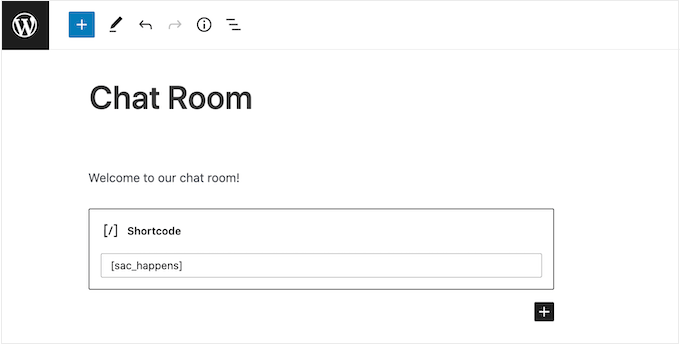
After that, just add the [sac_happens] shortcode to the Shortcode block.
You can now click on ‘Publish’ or ‘Update’ to make the chat room live.
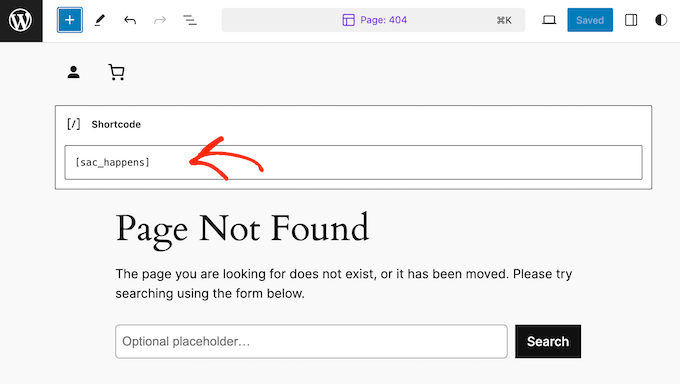
Another option is adding the chat room to a widget-ready area. This is an easy way to show the chat window across multiple pages.
If you are using one of the newer block-based themes, then you can even add the chat room to areas of your site you can’t edit using the standard WordPress content editor.
For step-by-step instructions, please see our guide on how to add and use widgets.
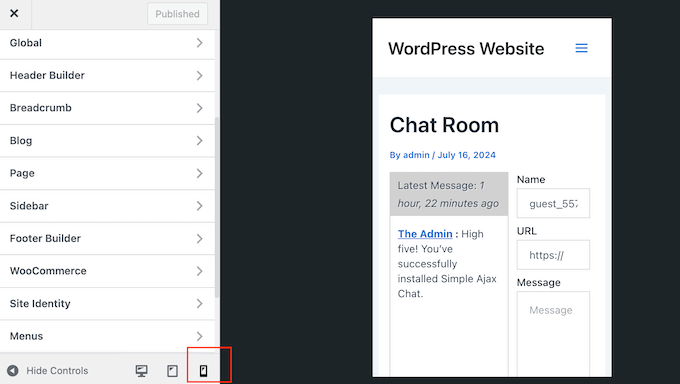
No matter how you add the chat room to WordPress, it’s important to check that it looks good and works correctly across all devices by testing the mobile version of your website.
For more on this topic, please see our expert tips on creating a mobile-friendly website.
Method 2. Using BuddyBoss (Best For Building Online Communities)
Want to create a thriving online community that keeps people coming back for more? Chat rooms are a great start, but they’re just one part of building a successful digital community.
That’s where powerful features like member profiles, searchable directories, forums, social groups, and activity feeds come in.
The good news? You don’t have to cobble together a bunch of different plugins to provide this kind of experience. BuddyBoss has all these features – and more.
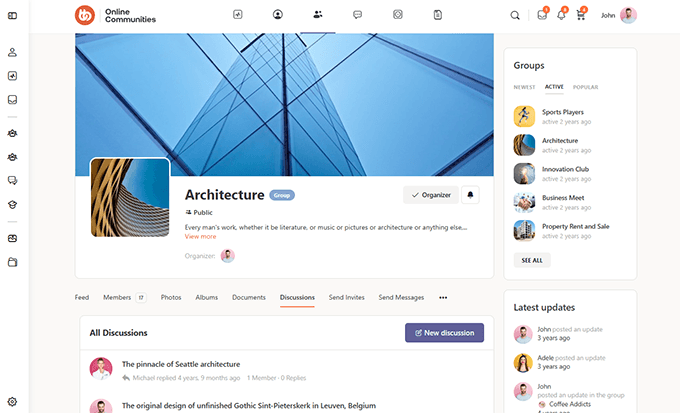
BuddyBoss is the best WordPress community-building platform on the market. In fact, we even have a complete BuddyBoss review that outlines all the reasons why it’s our favorite community plugin.
In this guide, we’ll show how to add live messaging to your site using BuddyBoss. For more information on how to use its other social features, please see our guide on how to create your own private community with WordPress.
Step 1. Create a Pusher Account
BuddyBoss can add live messaging to your site using Pusher Channels, which is a service that lets users communicate in real time.
Before we get started with BuddyBoss, you’ll need to create a Pusher account. Thankfully, Pusher has a free plan that lets you send up to 200k messages per day, which should be enough for most WordPress blogs and websites. However, if you need to upgrade, then you can send up to 1 million messages per day for $49 per month.
To get started, head over to the Pusher website and click the ‘Sign up’ button.
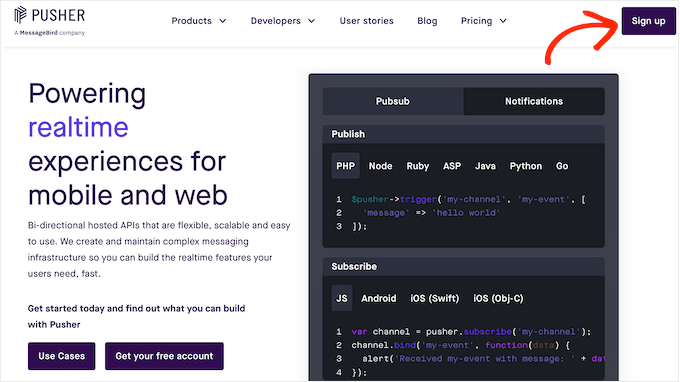
You can then follow the onscreen instructions to create your free account.
With that done, you’ll get redirected to the Pusher dashboard automatically. On this screen, go ahead and click the ‘Get started’ button under ‘Channels.’
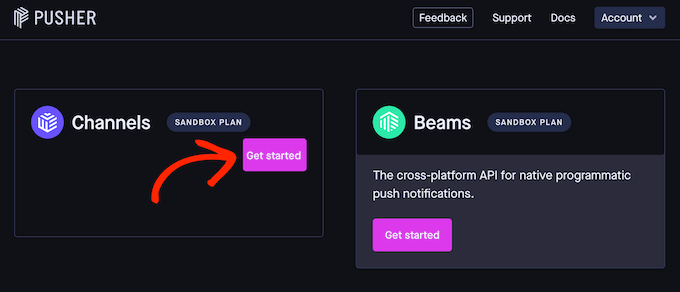
You can now type in a name for your Pusher app. This will represent the app in your Pusher dashboard, so it’s a good idea to use something descriptive.
You can also select a Cluster, which is the physical location of the servers that’ll handle requests from your Pusher app. When choosing a location, keep in mind that European data protection regulations specify that personal user data cannot leave the EU borders.
It also makes sense to choose a location that’s geographically close to either your users or your own servers. This will reduce the delay that can occur when sending and receiving messages.
To choose a location, open the ‘Select a cluster’ dropdown and choose an option from the list.
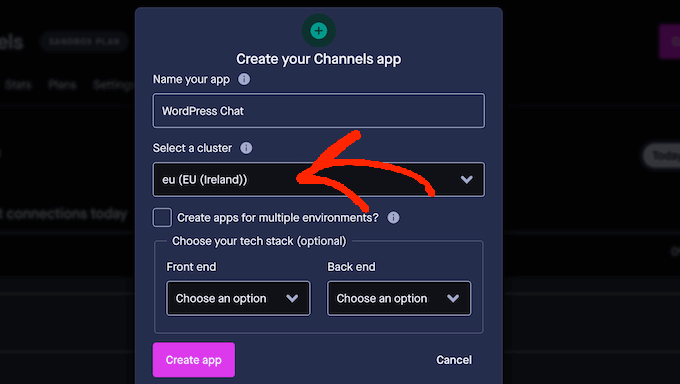
With that done, click on ‘Create app.’
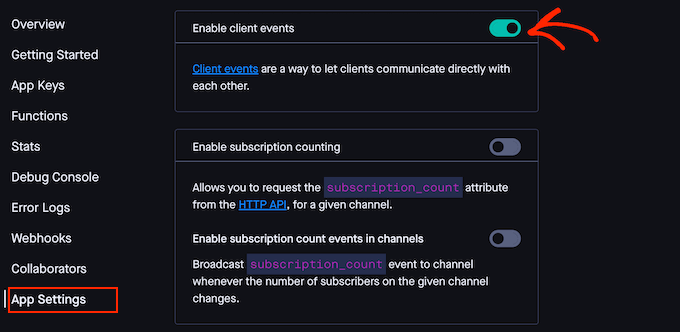
To finish configuring the app, select ‘App Settings’ from the left-hand menu. Then, scroll to the ‘Enable client events’ section and click to enable its switch.
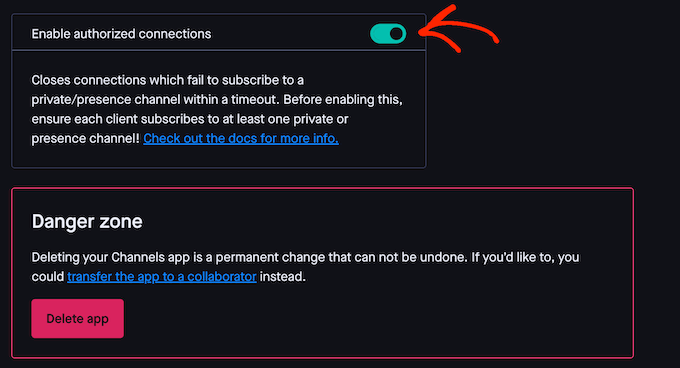
Next, scroll to the ‘Enable authorized connections’ section.
Once again, click to enable this switch.
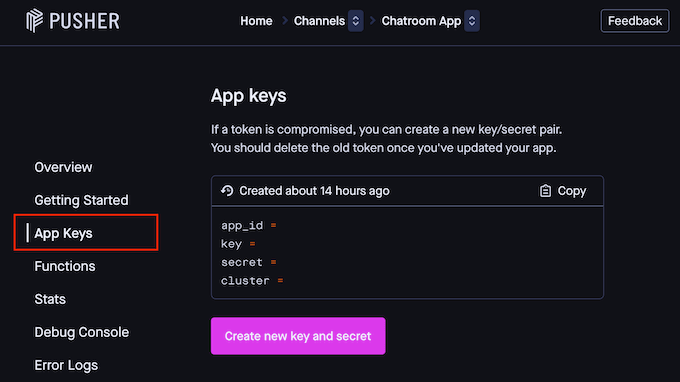
Your app is now up and running, so click on ‘App Keys’ in the left-hand menu. This contains all the information that you’ll need to add to your BuddyBoss plugin.
With that in mind, leave this screen open in a separate tab throughout the next few steps.
Step 2. Install the BuddyBoss Plugins and Theme
To set up live messaging, you’ll need the core BuddyBoss plugin, BuddyBoss Platform Pro, and the BuddyBoss theme. That said, head over to the BuddyBoss website and either sign up for the Web package or a Bundle.

After completing your purchase, you’ll need to install the BuddyBoss and BuddyBoss Platform Pro plugins on your site. For more details, see our tutorial on how to install a WordPress plugin.
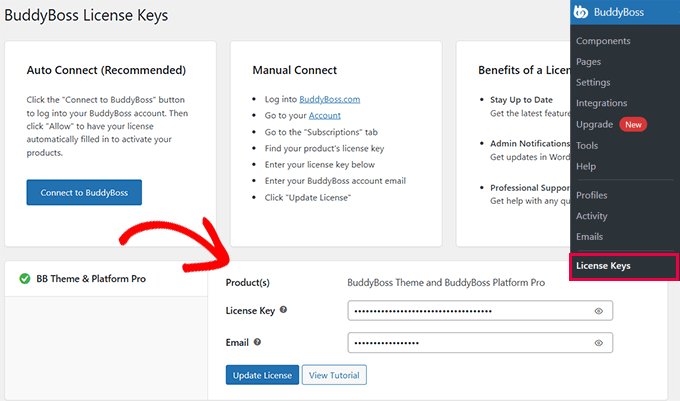
When prompted, enter your product license key. You can find this information in your account on the BuddyBoss website.
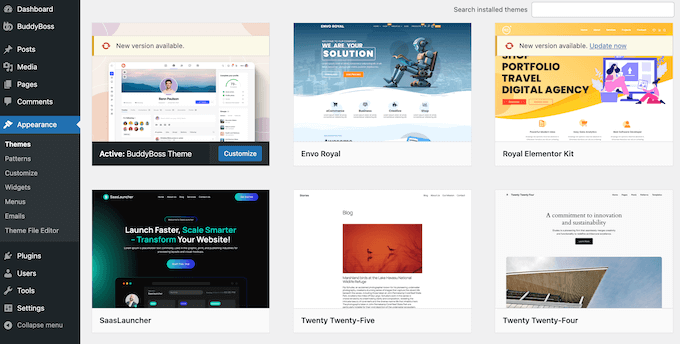
Next, you’ll need to install the BuddyBoss theme that comes included in all the Web and Bundle packages.
For detailed step-by-step instructions, please see our guide on how to install a WordPress theme.
Step 3. Enable Private Messaging
BuddyBoss has a ton of features, so to make things easier, the plugin separates these features into different Components. You can enable or disable these Components, depending on the features you need.
To do this, head over to the BuddyBoss » Components page.
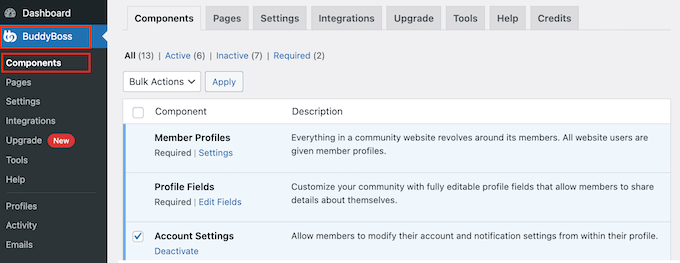
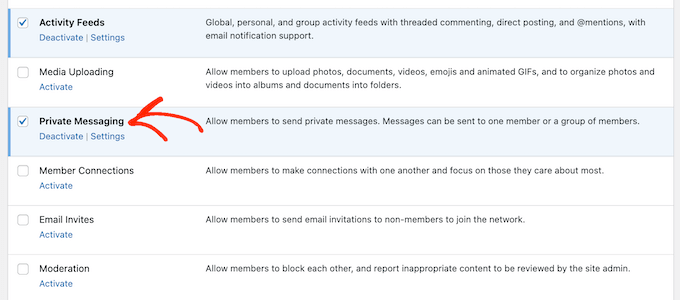
Here, you’ll see all the different Components you can use.
Since we want to add live messaging to WordPress, find the Private Messaging component and click its ‘Activate’ link.
Step 4. Integrate with Pusher Channel
Now, you’re ready to link your WordPress website and Pusher account by going to BuddyBoss » Integrations. Here, click the ‘Pusher’ link.
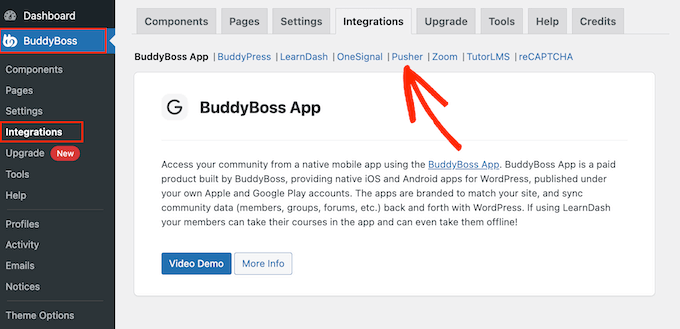
You’ll now see an area where you can add your Pusher ID and keys.
Simply copy each piece of information from your Pusher tab and paste it into the corresponding field in your WordPress dashboard.
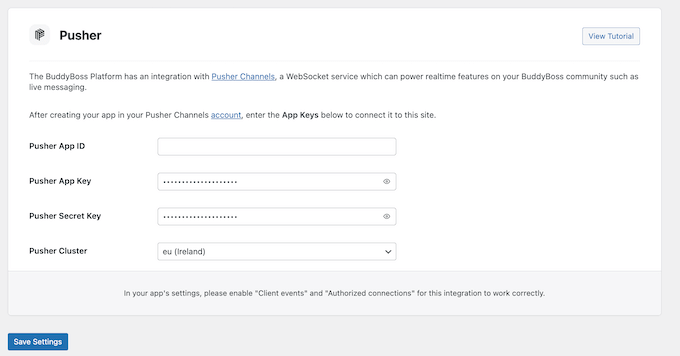
You may also need to change the ‘Pusher Cluster’ field so that it matches the cluster selected in your Pusher account.
Once that’s done, click ‘Save Settings’ in your WordPress dashboard. If everything is working fine, then you’ll see a green ‘Connected’ message towards the top of the screen.
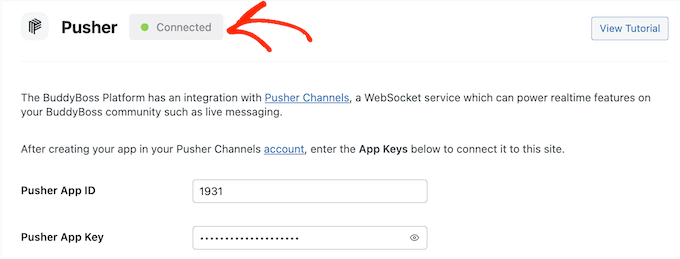
You’ll also see a new ‘Live Messaging’ field.
Go ahead and check the box next to this option.
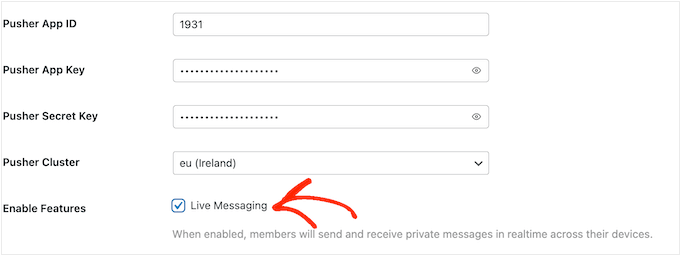
Finally, click ‘Save Settings’ to store your changes.
Step 5. Test Your Live Chat
It’s a good idea to test the new chat feature just to confirm that everything is working fine. To do this, you need to log into two different member accounts using incognito mode in your browser.
Then, head over to the ‘Members’ page that BuddyBoss creates automatically. If you’re unsure where to find this page, then BuddyBoss typically creates it at your-website-url/members.
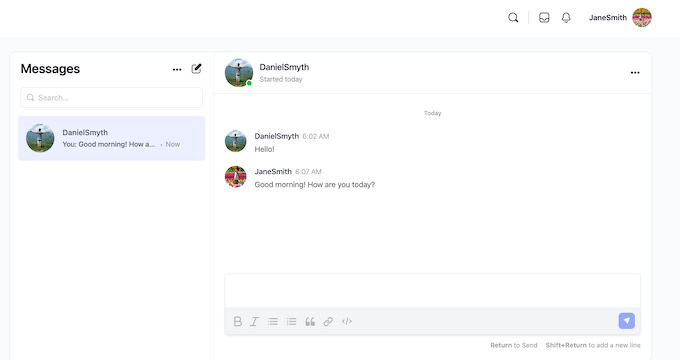
On this page, find the other member account you’re using in your test and click the ‘Send Message’ button.
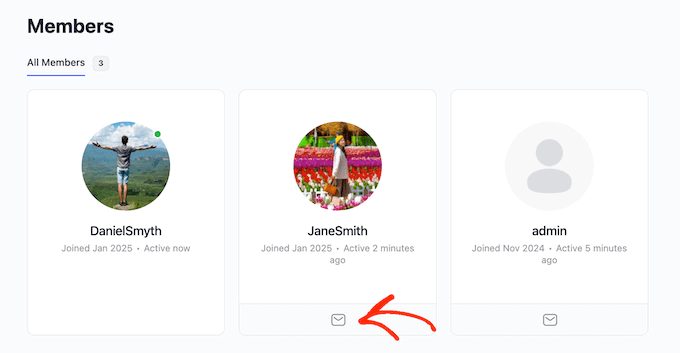
You should see a green icon indicating that this person is online.
Go ahead and type in a message, then click ‘Send.’
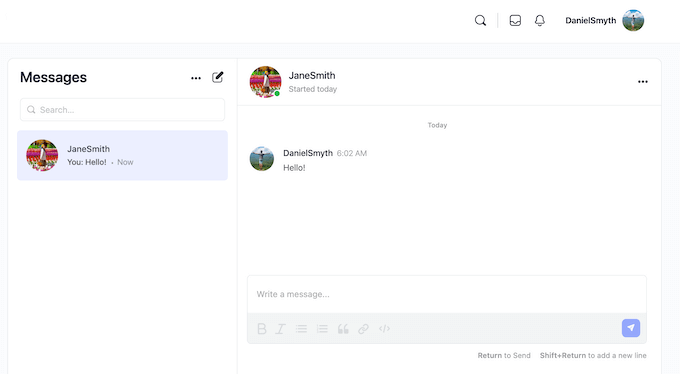
Now, if you switch to your other browser window, you should receive this message immediately without having to refresh the tab.
Bonus Guides
Now that you’ve learned how to create chat rooms on your website, you may wish to learn more tips for improving your online community and the user experience:
- How to Offer Cohort-Based Online Courses — WordPress Group Learning
- How to Create Your Own Private Community with WordPress
- How to Track User Engagement in WordPress with Google Analytics
- What Is Google Lighthouse? How Can It Improve Your Site’s UX?
We hope this article helped you learn how to create chat rooms for your WordPress users. You can also see our guides on how to add reaction buttons to boost engagement and how to do a UX audit of your WordPress website.
If you liked this article, then please subscribe to our YouTube Channel for WordPress video tutorials. You can also find us on Twitter and Facebook.


Moinuddin Waheed
This is very useful feature for increasing engagements with the users themselves on the website.
membership websites and forums can utilise this feature to boost the traffic and reduce the bounce rate.
It would be extra helpful if we can make separate chats with individuals.
I don’t know if this can be achieved or not but it seems promising to implement for the forum.
Dennis Muthomi
Very interesting article.
This will definitely increase user engagement on my site when I implement it.
Actually ijust got an idea when reading this. I love your articles WPBeginner.
THANK YOU!!
Mrteesurez
This is incredible, so WordPress is powerful to the extent of creating chatroom, WordPress is promising.
I like the idea of showing it on widget for reader who might have interest joining the chat. It is also good to allow non-registered visitors to read the chat but not interact untill they are registered as this will reduce abuse.
But I want to ask, is it a good practice to disable comments and rely only on this chats room ?
WPBeginner Comments
This really just depends on the purpose and needs of each website.
Mrteesurez
Well, that’s true. The way one runs their website will determine its application, but I found the chat interesting, and I might give it a try on my personal blog to experience it. Thanks for the answer.
Aks
Hey, does everyone who wants to partake in the chat require a wordpress account?
WPBeginner Support
The users do not need a WordPress account but you can require an account on your site if you wanted.
Admin
Alexi
Wow, great article!
WPBeginner Support
Thank you
Admin
Maja
It’s a pity that you can not embed room on any page, e.g. shordcode, widget etc.
WPBeginner Support
We will be sure to look into alternatives with that option for future updates
Admin
Ahshan
a how can i delete chatbox pragraph
Tijjani Isah
Really Appreciate It
Ahmed Barwari
I installed and activated the plugin but its not working.
403 Forbidden
The website’s configuration prevents you from accessing this page.
Saminu Eedris
This is great.
I just got a job for an online bar, not really and online bar but there would be a platform where the visitors can interact with some of the brand ambassadors.
I think I will try out this plugin to see how it works.
Thanks,
Saminu!
asad ali
Hi
i have chat room site and i want to use wordpress chat room their is any plugin that i can use on my blog right now i am using someone else chat room scrpit but i want to add mine chat room please suggest if their is any good chat room thanks
anand kjha
how many users can use the facility of chat room at a time?
Giorgios
I used that plugin on my website – it works fine but is too simple. Mainly no file sharing feature so I switched to Chatwee. It suits me better.
HappyMoon
Hello. How do I create something like the top of your site, such as HOME »BLOG» WORDPRESS PLUGINS »HOW TO CREATE CHAT ROOMS …
Editorial Staff
Its a plugin called Breadcrumb NavXT. You can see more about it on our Blueprint page.
https://www.wpbeginner.com/blueprint/
Admin
HappyMoon
Thank you so much
Khürt L. Williams
I’m always looking for way to increase the use of our organization’s WordPress install. We have a bulletin board running on another system but I want to centralize systems. Perhaps bbpress with this plugin is the way forward.
ivica
Did you see this WP chat plugin? One of the best, if not THE best:
http://wordpress.org/extend/plugins/quick-chat/
Made in Croatia
Ivica
Editorial Staff
Didn’t know about that one. Will have to take a look at it.
Admin
Thomas
Have to agree with this. Looked into both and the one you posted is way better! I’ve been looking for something JUST like this for my site at NE1UP.com so I really appreciate it!
No worries, @WPBeginner, still love your site and it’s so beautiful. Wouldn’t have figured this out if you hadn’t posted about WordPress chat in the first place!
Thanks guys!